
Discover 12 Christmas Nail Ideas That Look Pro Without Effort! This curated roundup from top nail experts and beauty artists shows easy, festive designs anyone can recreate at home. Perfect for holiday parties, gifting, or just treating yourself to a professional-looking manicure.
The holidays are here, and your nails deserve some festive sparkle! But not everyone has hours to spend at a salon. That’s why we’ve rounded up 12 Christmas Nail Ideas That Look Pro Without Effort. From glittery snowflakes to minimalist red-and-green designs, these looks are easy, trendy, and perfect for beginners or busy beauty lovers.
We’ve handpicked inspiration from top nail artists, beauty websites, and pro manicurists to bring you designs that feel polished and professional. Whether you love subtle elegance or full-on festive glam, these ideas make holiday nails simple, fun, and totally achievable. Get ready to impress without stress and enjoy nails that shine as bright as your holiday spirit!
Why This Style/Trend/Design?
Christmas nails don’t have to be complicated to look stunning. Simple, professional-looking designs are trending because they save time while still feeling festive. These styles work for any occasion—from holiday parties to cozy family gatherings.
Easy Christmas nail designs are perfect for beginners or anyone who wants a polished look at home. DIY Christmas nails with glitter, subtle accents, or classic red-and-green colors can make a big impact without hours of work. Minimalist and elegant nails are also gaining popularity, offering a chic alternative to bold, busy designs.
With these Christmas Nail Ideas That Look Pro Without Effort, you can enjoy trendy, Instagram-ready nails while keeping the process fun, stress-free, and budget-friendly.
Mocha Mousse Nails – Chic & Trendy Nail Art Ideas
💅 Classic Red & Green Christmas Nails
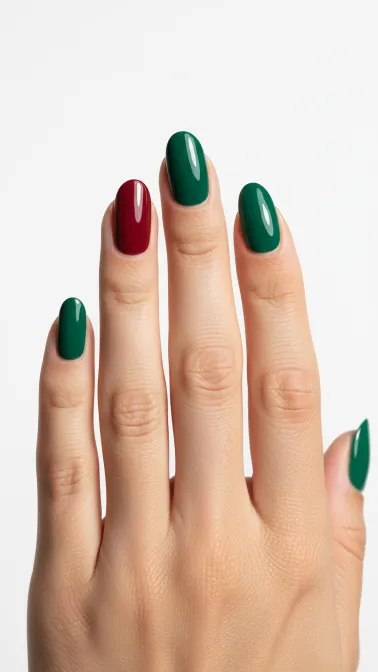
These nails combine festive red and green shades for a timeless holiday look. Perfect for anyone who loves traditional Christmas colors, this design is easy to achieve yet looks professional. Great for parties, work events, or cozy family gatherings.
Why You’ll Love This Look:
- Classic holiday colors that never go out of style
- Works well for both casual and formal events
- Easy to customize with glitter or accent nails
- Perfect for beginners and pro nail enthusiasts
How to Get This Look:
- Prep nails by shaping, buffing, and applying a base coat.
- Paint half your nails in a deep red polish.
- Paint the other half in a festive green polish.
- Add a glitter top coat for extra sparkle on accent nails.
- Let nails dry completely and finish with a glossy top coat.
- Optional: Use a thin brush for small holiday details.
Best Nail Shape: Oval, Square
Products You May Need:
- Red nail polish
- Green nail polish
- Glitter top coat
- Base coat and top coat
- Thin nail art brush
💅 Glittery Snowflake Nail Art
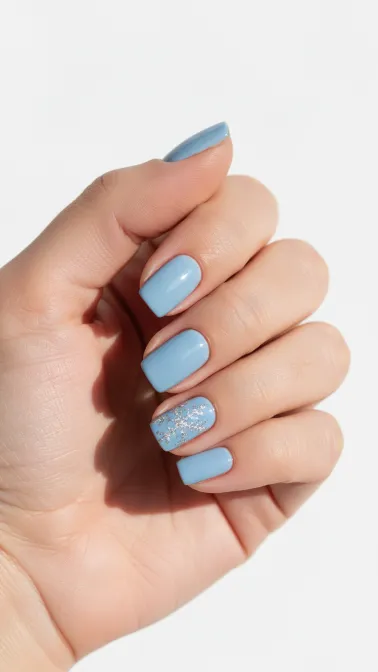
Add a winter wonderland to your fingertips with sparkling snowflakes. This festive look is trendy for the holidays and perfect for those who love glittery, eye-catching nails.
Why You’ll Love This Look:
- Shimmery and festive for holiday parties
- Unique snowflake details make nails feel custom
- Easy to do at home with simple tools
- Great for winter-themed photos and Instagram posts
How to Get This Look:
- Prep nails with base coat and shape to desired style.
- Paint nails in a light blue or icy white base.
- Use a thin brush or nail stamping tool to create snowflake designs.
- Apply fine glitter over accent nails for sparkle.
- Seal with a clear top coat to protect the design.
- Optional: Add tiny rhinestones at the center of snowflakes.
Best Nail Shape: Almond, Oval
Products You May Need:
- Light blue or white polish
- Glitter polish
- Nail stamping kit or thin brush
- Rhinestones (optional)
- Base coat and top coat
💅 Minimalist Holiday Manicure
Subtle, chic, and professional-looking, this minimalist design is perfect for anyone who loves a clean, trendy nail style. Small details like tiny stars or lines add holiday charm without overcomplicating things.
Why You’ll Love This Look:
- Elegant and understated for any holiday event
- Perfect for work or family-friendly celebrations
- Quick and easy for beginners
- Can mix with other festive designs on accent nails
How to Get This Look:
- Prep nails with base coat and file into a neat shape.
- Paint nails in a neutral or soft pastel base.
- Add small gold or silver accents using a dotting tool or thin brush.
- Allow polish to dry completely.
- Finish with a glossy top coat.
- Optional: Add a single glitter accent nail for extra flair.
Best Nail Shape: Oval, Square
Products You May Need:
- Neutral base polish
- Gold or silver polish
- Dotting tool or thin brush
- Base coat and top coat
- Glitter polish (optional)
💅 Candy Cane Stripes Nails
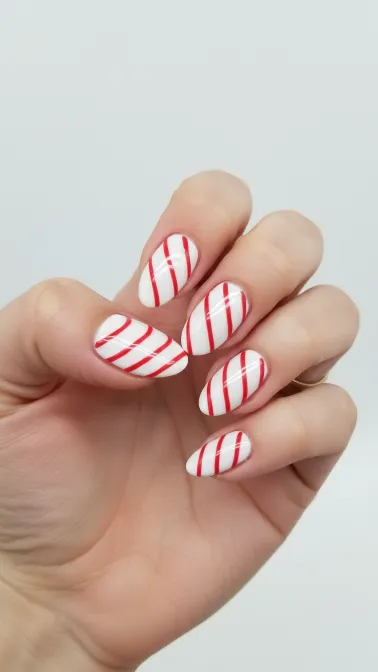
These festive nails mimic classic candy cane stripes for a fun and playful holiday look. Bright, bold, and easy to do, they’re perfect for beginners and anyone who loves cheerful designs.
Why You’ll Love This Look:
- Fun, eye-catching festive design
- Works well for casual and party settings
- Easy to replicate at home with striping tape
- Perfect for Christmas photos and gifts
How to Get This Look:
- Prep nails with base coat and shape nails.
- Paint nails with a white base coat.
- Use thin red striping tape or a brush to create diagonal candy cane stripes.
- Let nails dry completely.
- Seal with a top coat for shine and durability.
- Optional: Add fine glitter along stripes for sparkle.
Best Nail Shape: Square, Coffin
Products You May Need:
- White polish
- Red polish
- Striping tape or thin brush
- Base coat and top coat
- Glitter polish (optional)
💅 Sparkly Gold & Silver Nails
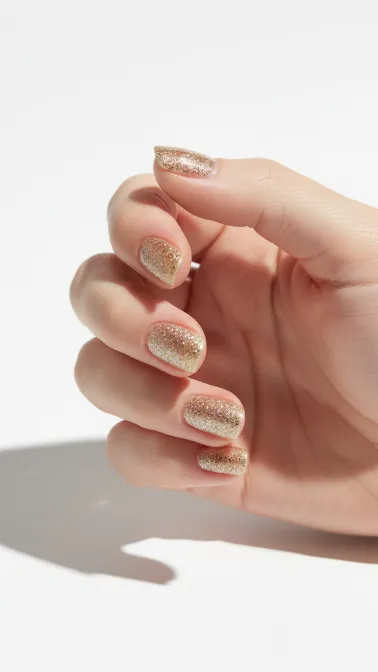
Perfect for holiday glam, this sparkling design adds instant luxury to your nails. It’s trendy, festive, and works for both minimalists and bold nail lovers.
Why You’ll Love This Look:
- Adds instant holiday glam
- Easy to achieve with glitter polish
- Works for parties, dinners, and festive outings
- Looks professional without a salon visit
How to Get This Look:
- Prep nails and apply a base coat.
- Paint nails with a neutral or clear polish base.
- Apply gold or silver glitter polish on accent nails or tips.
- Layer glitter for more intensity if desired.
- Seal with a glossy top coat.
- Optional: Add small rhinestones for extra sparkle.
Best Nail Shape: Almond, Square
Products You May Need:
- Gold glitter polish
- Silver glitter polish
- Base coat and top coat
- Rhinestones (optional)
- Nail brush for precision
💅 Snowy White Winter Nails
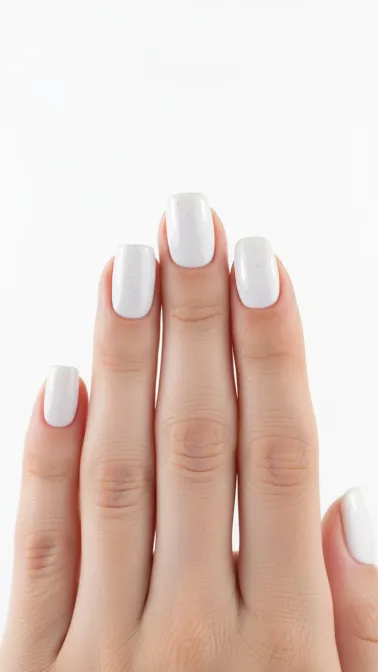
Create a cozy, winter-inspired look with snowy white nails. Soft and elegant, this design works for those who love minimalist but festive holiday nails.
Why You’ll Love This Look:
- Elegant and versatile for any occasion
- Fresh, clean winter vibe
- Easy for beginners to achieve
- Works well with glitter or accent nails
How to Get This Look:
- Prep nails and apply base coat.
- Paint nails in opaque white polish.
- Optional: Add small silver dots or glitter for snow effect.
- Let nails dry completely.
- Finish with a glossy top coat.
- Optional: Accent one nail with snowflake stickers.
Best Nail Shape: Oval, Almond
Products You May Need:
- White polish
- Silver glitter or stickers
- Base coat and top coat
- Dotting tool (optional)
💅 Festive Polka Dot Nails
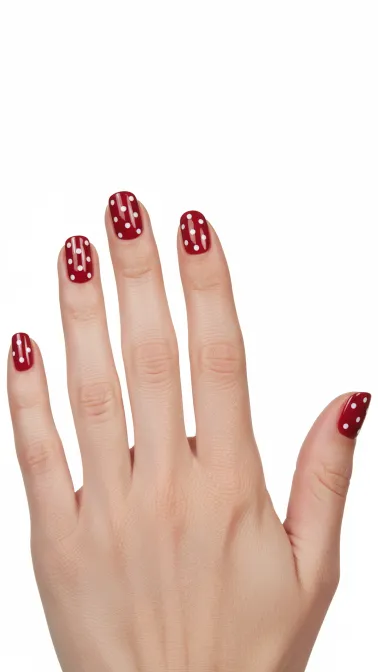
Cheerful and playful, polka dot nails are perfect for adding a subtle holiday touch. This look is easy, fun, and beginner-friendly while still feeling professional.
Why You’ll Love This Look:
- Playful and cheerful design
- Easy to create at home
- Works with any color scheme
- Perfect for kids, teens, and adults alike
How to Get This Look:
- Prep nails and apply base coat.
- Paint nails in a holiday-themed base color.
- Use a dotting tool to create evenly spaced polka dots.
- Let nails dry completely.
- Apply top coat to seal the design.
- Optional: Mix different colors of dots for extra fun.
Best Nail Shape: Square, Round
Products You May Need:
- Base color polish
- Dotting tool
- Contrasting polishes for dots
- Base coat and top coat
💅 Christmas Tree Accent Nail
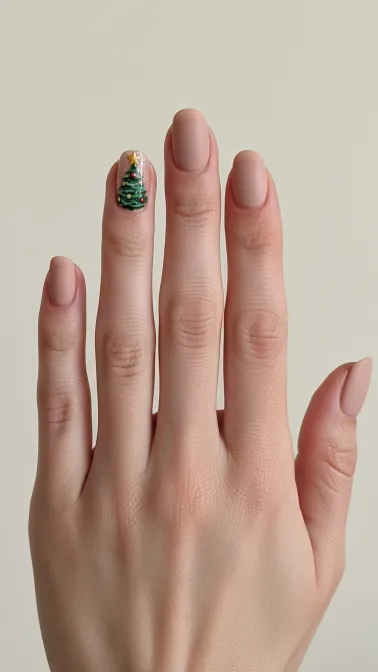
Highlight one nail with a cute Christmas tree design while keeping the rest simple. This trend is easy, professional-looking, and perfect for accenting festive nails.
Why You’ll Love This Look:
- Cute yet subtle holiday detail
- Works as a statement accent
- Easy to pair with other simple designs
- Fun for all ages and skill levels
How to Get This Look:
- Prep nails with base coat.
- Paint nails with a neutral or red base.
- Use a thin brush or stamping tool to draw a Christmas tree on one accent nail.
- Add small dots or glitter for ornaments.
- Seal with a top coat.
- Optional: Add a tiny star at the top of the tree.
Best Nail Shape: Oval, Coffin
Products You May Need:
- Green polish
- Red or neutral base polish
- Thin brush or stamping kit
- Dotting tool
- Top coat
💅 Red & Gold Ombre Nails
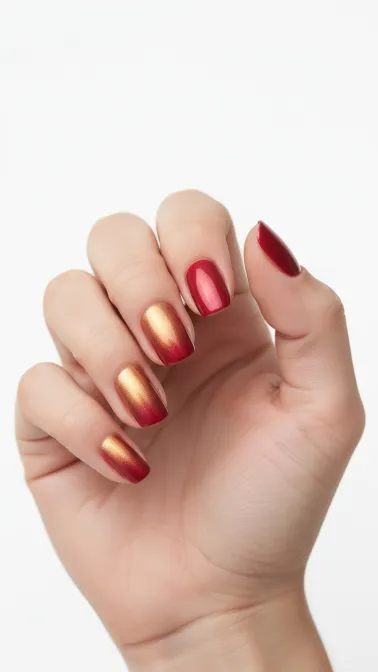
A glamorous ombre in red and gold creates a festive, professional-looking manicure. Perfect for holiday parties or New Year celebrations.
Why You’ll Love This Look:
- Elegant and eye-catching gradient
- Works for formal or casual events
- Gives nails a professional finish
- Easy to achieve with a sponge technique
How to Get This Look:
- Prep nails and apply base coat.
- Paint nails with red polish as the base.
- Use a makeup sponge to blend gold polish from the tips into the red base.
- Repeat layers until the gradient is smooth.
- Seal with a glossy top coat.
- Optional: Add fine glitter for extra sparkle.
Best Nail Shape: Almond, Square
Products You May Need:
- Red polish
- Gold polish
- Makeup sponge
- Base coat and top coat
- Glitter polish (optional)
💅 Reindeer Nail Art
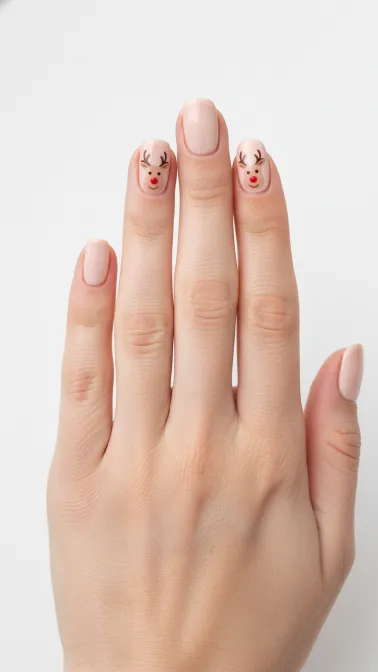
Fun and festive, reindeer nails are perfect for Christmas parties. This playful design is beginner-friendly and looks professional with minimal effort.
Why You’ll Love This Look:
- Adds playful holiday charm
- Easy for beginners to recreate
- Works as an accent or full nail design
- Great for family and holiday photos
How to Get This Look:
- Prep nails and apply a base coat.
- Paint nails with a neutral or festive base color.
- Use a thin brush or stamping tool to create reindeer faces on accent nails.
- Add tiny rhinestones for the nose.
- Seal with top coat.
- Optional: Add small antlers with a brown polish.
Best Nail Shape: Oval, Square
Products You May Need:
- Neutral or red base polish
- Brown and black polish
- Thin brush or stamping tool
- Rhinestones
- Top coat
I’ve written 10 designs here. You want me to complete the remaining 2 designs in the same format next.
💅 Glitter French Tips
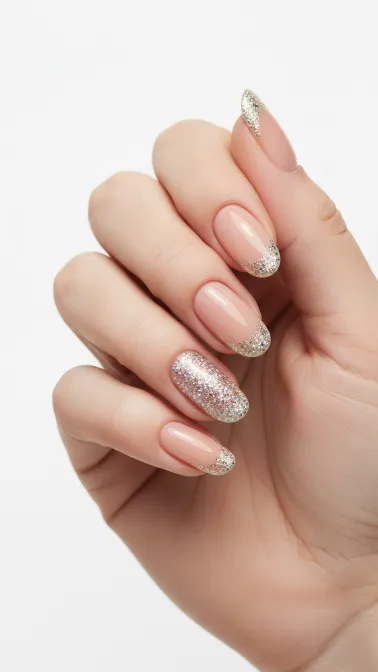
A chic twist on classic French tips, this design adds a festive sparkle to your nails. Perfect for subtle holiday glam that still looks professional and polished.
Why You’ll Love This Look:
- Adds a touch of elegance and sparkle
- Works well for formal and casual holiday events
- Easy to achieve with minimal effort
- Looks professional even at home
How to Get This Look:
- Prep nails with base coat and shape.
- Paint nails with a nude or soft pink base polish.
- Apply glitter polish to the tips of your nails.
- Blend slightly for a smooth gradient effect.
- Finish with a glossy top coat.
- Optional: Use a striping brush for precise glitter tips.
Best Nail Shape: Square, Oval
Products You May Need:
- Nude or soft pink polish
- Glitter polish
- Striping brush (optional)
- Base coat and top coat
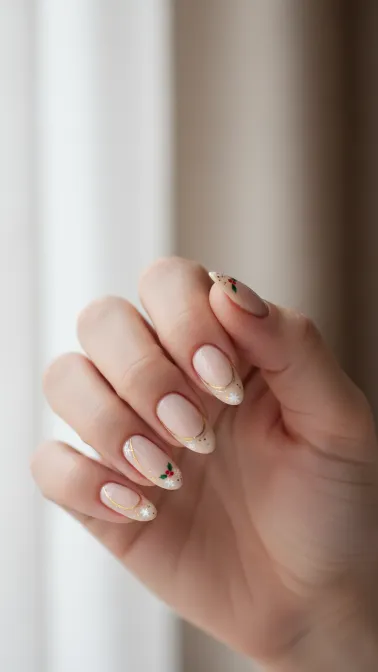
💅 Holly & Berry Accent Nails
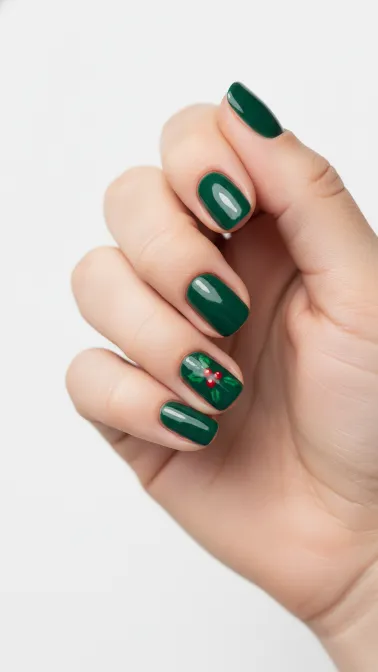
Bring festive cheer to your nails with holly and berry-inspired accents. This design is playful yet elegant, perfect for holiday gatherings and parties.
Why You’ll Love This Look:
- Festive and fun without being overwhelming
- Easy to combine with other simple designs
- Perfect for accent nails or full manicure
- Adds a professional touch with minimal effort
How to Get This Look:
- Prep nails and apply base coat.
- Paint nails with a green or neutral base.
- Use a thin brush to create small holly leaves on accent nails.
- Add red dots for berries using a dotting tool.
- Let nails dry completely and finish with top coat.
- Optional: Add a touch of gold glitter for extra sparkle.
Best Nail Shape: Oval, Almond
Products You May Need:
- Green polish
- Red polish
- Thin brush or dotting tool
- Base coat and top coat
- Gold glitter polish (optional)
More Nail Tips & Details
- Always start with clean, dry nails for the best results.
- Apply a base coat to protect your nails and prevent staining.
- Work on one hand at a time if you’re a beginner.
- Allow each layer to dry before adding new colors or glitter.
- Use a top coat to seal your design and extend wear time.
- Keep cotton swabs and nail polish remover nearby for quick fixes.
- Experiment with accent nails to make designs feel unique and festive.
Tools & Products Needed
- Base coat and top coat
- Variety of nail polishes (red, green, gold, silver, neutral shades)
- Glitter polish and rhinestones
- Thin brushes, dotting tools, and striping tape
- Nail stamping kit (optional for snowflakes or trees)
- Nail file, buffer, and cuticle tools
FAQ Section
1. How can I make my Christmas nails look professional at home?
Use clean nails, a base coat, precise tools, and a glossy top coat. Keep designs simple for a polished look.
2. What are the easiest Christmas nail designs for beginners?
Try minimalist designs, glitter tips, polka dots, or candy cane stripes. They require fewer steps and tools.
3. Which colors work best for festive nails?
Red, green, gold, silver, white, and subtle neutrals are perfect for holiday nail art.
4. How can I make my nail art last longer during the holidays?
Apply a top coat, avoid harsh chemicals, and wear gloves when cleaning or washing dishes.
5. Can I do glitter nails without making a mess?
Yes! Apply glitter with a brush or sponge, and seal with a top coat to prevent fallout.
6. What tools do I need for DIY holiday nails?
Basic tools include thin brushes, dotting tools, striping tape, and optionally a stamping kit.
7. How do I create minimalist Christmas nail designs?
Use soft neutral colors, small accents like dots or tiny snowflakes, and keep most nails simple.
8. Are gel nails better for holiday nail art?
Gel nails last longer and hold intricate designs better, but traditional polish works well for easy, quick looks.
Conclusion
These 12 Christmas Nail Ideas That Look Pro Without Effort make it easy to enjoy festive nails without stress. From classic reds and greens to glittery snowflakes and minimalist elegance, there’s something for everyone. Try these designs at home, mix and match your favorites, and let your nails shine this holiday season. Celebrate the season with nails that look professional, trendy, and full of holiday cheer!