
How to Prep Nails With Dehydrator: Step-by-Step Guide

Quick Answer
To prep nails with dehydrator, start with clean, dry nails, shape them, gently clear dead cuticle tissue from the nail plate, lightly remove surface shine, and wipe away dust. Apply a thin coat of dehydrator to the natural nail, let it air-dry, then continue with primer or base coat if your nail system requires it; OPI’s at-home gel prep guidance also stresses dry prep, gentle buffing, and removing surface oil before gel application.
Quick nail-prep steps
- Step 1 — Remove product: Take off old polish or enhancement residue without peeling the natural nail.
- Step 2 — Shape: File the free edge into your preferred shape before applying liquids.
- Step 3 — Prep gently: Clear loose tissue from the nail plate and lightly reduce surface shine if your system calls for it.
- Step 4 — Clean: Brush away dust and wipe the nail plate with a lint-free wipe and suitable cleanser or alcohol.
- Step 5 — Dehydrate: Apply one thin coat to the natural nail only and allow it to evaporate fully.
- Step 6 — Continue: Apply primer, bonder, base coat, or enhancement according to your product system.
When a gel manicure starts lifting early, it is tempting to blame the polish or lamp. I usually look at the prep routine first because a clean, dry nail surface gives the next product a much better starting point.
A nail dehydrator is only one part of that routine. This guide explains exactly where it goes, how much to use, what comes before and after it, and which common prep habits can work against you.
In This Guide
- What does a nail dehydrator do?
- What do you need before using nail dehydrator?
- How do you prep nails with dehydrator step by step?
- Dehydrator vs cleanser vs primer: what is the difference?
- Does nail prep change for gel, acrylic, and press-ons?
- What nail dehydrator mistakes cause lifting?
- How can you use nail dehydrator safely?
- Frequently asked questions
- Final takeaway
What Does a Nail Dehydrator Do?
A nail dehydrator is a prep liquid designed to temporarily reduce surface oil and moisture on the natural nail plate. It evaporates quickly and leaves a cleaner surface for the next adhesion step.
Think of it as surface preparation rather than a permanent change to your nail. The effect is temporary, which is one reason you should avoid touching the nail after dehydration.
Why oil and moisture matter
Gel, acrylic, builder gel, and many adhesives work best when they contact the prepared nail rather than a layer of oil, dust, lotion, or moisture. Contamination between those surfaces can contribute to premature lifting.
That does not mean you should aggressively dry or file the nail. Good prep removes what interferes with adhesion while preserving the natural nail plate.
What dehydrator does not do
- It does not replace cleaning: Visible dust and residue should be removed first.
- It does not replace primer: A primer or bonder may perform a different adhesion function.
- It does not need lamp curing: Standard liquid dehydrators normally evaporate in the air unless the manufacturer states otherwise.
- It does not justify over-filing: More abrasion is not automatically better adhesion.
The exact formula varies between brands. Some products are marketed as dehydrators, pH bonders, nail prep, or prep liquids, so the label should always control how you use yours.
What Do You Need Before Using Nail Dehydrator?
You do not need a crowded manicure table. A few clean tools make the process easier and reduce the chance of putting dust or oil back onto the nail.
- Nail file: For shaping the free edge.
- Fine buffer or suitable natural-nail file: Only if your system requires surface shine to be reduced.
- Cuticle pusher: For gentle nail-plate cleanup without digging into living skin.
- Soft dust brush: To remove filing debris.
- Lint-free wipes: These leave fewer fibers than ordinary cotton.
- Nail cleanser or isopropyl alcohol: Use the concentration recommended by your nail system.
- Nail dehydrator: Apply only as directed on its label.
- Primer or bonder: Only when your gel, acrylic, or extension system calls for one.
Start with dry hands
For gel or enhancement prep, avoid soaking the hands immediately before application unless your product system specifically tells you to do so. Water exposure can temporarily change the condition of the natural nail.
I also leave hand cream and cuticle oil until after the manicure is complete. Those products are useful for aftercare, but they can put oil back onto a surface you just cleaned.
How Do You Prep Nails With Dehydrator Step by Step?
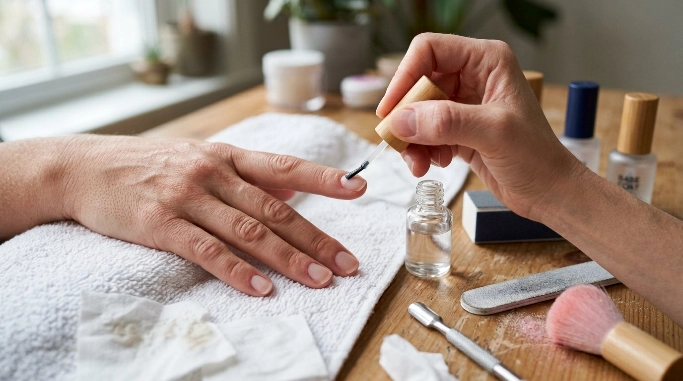
The simplest sequence is shape, clean the nail plate, lightly prepare the surface if required, remove dust, cleanse, dehydrate, then prime or apply base product. Keeping that order consistent makes troubleshooting much easier.
Step 1: Remove old nail product
Start with a clean natural nail. Remove old polish or soak-off product using the removal method recommended for that system.
Do not peel gel or enhancements from the nail plate. Peeling can take surface layers of natural nail with the product.
Step 2: Shape the free edge
File the nail into your preferred shape before applying prep liquids. This keeps fresh dust from landing on the nail after dehydration.
Use controlled strokes and stop once the shape is even. There is no benefit to thinning the free edge excessively.
Step 3: Clear the nail plate gently
Move loose skin away from the nail plate so your coating is not applied over tissue. Avoid cutting or aggressively scraping living cuticle and surrounding skin.
If the area is sore, broken, swollen, or inflamed, postpone cosmetic application. Product should not be used to hide a nail or skin problem.
Step 4: Lightly remove shine if required
Some gel and enhancement systems call for a light surface buff, while others need little or no abrasion. Follow the instructions for the product you plan to apply next.
The goal is a uniformly prepared surface, not a thin nail. If you feel heat, tenderness, or see deep scratches, the filing is too aggressive.
Step 5: Remove every trace of dust
Use a clean nail brush first. Then wipe each nail with a lint-free wipe and the cleanser or alcohol recommended by your system.
Pay attention to the sidewalls and the area near the cuticle. Dust hidden at the edges can end up trapped beneath your next product.
Step 6: Apply the nail dehydrator
Wipe excess liquid from the applicator so the brush is damp rather than dripping. Apply a thin, controlled layer across the natural nail plate.
Avoid flooding the surrounding skin. Let the dehydrator evaporate completely instead of wiping it away or putting it under a curing lamp.
Step 7: Do not touch the prepared nail
Once the surface is clean and dehydrated, handle the finger from the sides whenever possible. Touching the nail with a fingertip can transfer skin oil back onto it.
If you accidentally touch a nail, clean and prep that nail again. It takes less time than wondering later why one finger lifted first.
Step 8: Apply primer or base product
If your system uses primer or bonder, apply it after dehydrator and follow its label for drying instructions. Some primers dry completely, while some bonding products intentionally remain tacky.
Then move into your gel base, acrylic, builder product, adhesive, or other application step. Avoid long delays after prep.
Section Takeaway: Nail dehydrator works best near the end of nail prep, after dust and surface contamination are removed. Apply it thinly, let it evaporate, and avoid touching the nail afterward.
Dehydrator vs Cleanser vs Primer: What Is the Difference?
These products are often grouped together, but they do not necessarily perform the same job. Using them in the correct order is more useful than simply applying more layers.
| Product | Main purpose | Typical order | Dry or cure? |
|---|---|---|---|
| Cleanser/alcohol | Removes dust, residue, and surface oil | Before dehydrator | Allow to evaporate |
| Nail dehydrator | Temporarily reduces remaining surface oil and moisture | After cleansing | Usually air-dries |
| Primer/bonder | Supports adhesion between the natural nail and enhancement system | After dehydrator when required | Varies by formula |
| Gel base coat | Creates the first cured gel layer | After prep and required bonding products | Cure as directed |
Is alcohol the same as nail dehydrator?
Not necessarily. Alcohol can clean oil and residue from the surface, but a dedicated dehydrator is formulated specifically as a nail-prep product.
Some nail systems rely on a prep wipe alone, while others specify a separate dehydrator. Use the routine designed for your products instead of assuming every manicure needs both.
Does dehydrator go before primer?
In systems that use both, dehydrator generally comes first. Primer or bonder is then applied to the clean, dehydrated nail.
The FDA’s nail-care product guidance notes that nail primers can contain ingredients with specific safety considerations, including methacrylic acid, so reading the product label matters.
Does Nail Prep Change for Gel, Acrylic, and Press-Ons?
The basic goal stays the same: create a clean surface without damaging the natural nail. The products used after dehydration can change significantly.
Gel polish
Gel systems commonly focus on dry prep, controlled surface preparation, cleansing, and keeping gel off the surrounding skin. Dehydrator may be included when the brand recommends it.
Once prep is complete, apply the designated base coat and cure it with the compatible lamp for the time stated by the manufacturer.
Acrylic nails
Acrylic systems often use dehydrator followed by a compatible primer or bonding product. Primer selection matters because acid and acid-free formulas are not interchangeable in every system.
Use only the primer recommended for your acrylic line. More primer does not automatically create a stronger bond.
Builder gel or structured gel
Builder products vary widely. Some require a base coat, some use a bonder, and others have their own preparation system.
Do not combine prep products from multiple brands simply because each one promises better adhesion. Too many incompatible layers can make troubleshooting harder.
Press-on nails
Clean, dry nails are also important for press-ons, especially when using nail glue. Dehydrator can be useful when the adhesive or press-on brand includes it in its prep routine.
Adhesive tabs may have different instructions. Follow the tab manufacturer’s directions rather than automatically applying primer underneath them.
What Nail Dehydrator Mistakes Cause Lifting?
Early lifting is rarely fixed by simply adding more dehydrator. The better approach is to check the entire prep sequence from start to finish.
- Applying it over dust: Dehydrator is not a substitute for physically removing filing debris.
- Touching the nail afterward: Fingertips can transfer oil back onto the prepared surface.
- Using too much: A thin application is normally enough; flooding the nail does not improve adhesion.
- Getting prep liquids on skin: Keep products controlled and inside the natural nail plate.
- Using lotion too early: Save cuticle oil and hand cream for after application.
- Over-filing: Thinning the natural nail can leave it weak, tender, and flexible.
- Ignoring the product system: Not every gel, acrylic, or adhesive needs identical prep.
- Waiting too long after prep: Finish the application efficiently once the surface is ready.
Why does only one nail keep lifting?
Look closely at how that finger is used and how it was prepared. Thumbs, index fingers, and dominant-hand nails often experience different daily stress.
Also check the sidewalls and cuticle area. A tiny patch of oil, dust, skin contact, or product touching the skin can create a local trouble spot.
Section Takeaway: If lifting continues, troubleshoot cleanliness, application, product compatibility, curing, and daily wear instead of repeatedly adding stronger prep products.
How Can You Use Nail Dehydrator Safely?
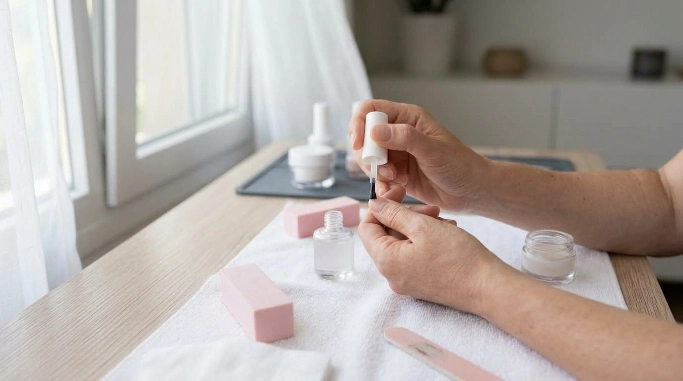
Use nail dehydrator as a cosmetic prep product, not as a treatment for damaged or unhealthy nails. Follow the bottle’s directions and warning statements because formulas differ.
The American Academy of Dermatology’s gel manicure guidance recommends protecting the natural nail and paying attention to persistent nail changes.
Keep prep products off broken skin
Do not intentionally brush dehydrator, primer, gel, or acrylic products onto cuts or irritated skin. Stop the service if the area is painful, bleeding, swollen, or unusually red.
Skin contact also matters with artificial nail products because some ingredients can trigger irritation or allergic reactions in susceptible people.
Do not over-buff the nail
Aggressive filing can thin the natural nail before dehydrator is even applied. The AAD’s artificial-nail guidance specifically notes that filing needed for artificial nail adhesion can make natural nails thinner.
Use the least aggressive preparation that your system requires. A healthy nail plate should not feel sore after routine prep.
Health note: Stop using the product and seek advice from a qualified healthcare professional or dermatologist if you develop persistent burning, itching, swelling, rash, pain, nail separation, or unusual discoloration.
Frequently Asked Questions
Do you apply nail dehydrator before or after primer?
Apply dehydrator before primer when your nail system uses both. The dehydrator prepares the natural nail surface first, while primer or bonder is applied afterward to support adhesion.
How long should nail dehydrator dry?
Let it air-dry completely according to the product label. Many formulas evaporate quickly, but there is no single drying time that applies to every brand.
Do you cure nail dehydrator under a UV or LED lamp?
Standard liquid nail dehydrators normally air-dry and do not require lamp curing. If you have a hybrid prep product with different instructions, follow its label rather than a general rule.
Can you use nail dehydrator without primer?
Yes, if the gel, polish, adhesive, or enhancement system does not require primer. Primer is not automatically necessary just because you used dehydrator.
Can I use rubbing alcohol instead of nail dehydrator?
Alcohol can remove surface oil and debris, and some nail systems use it as their main cleansing step. However, it is not automatically identical to a dedicated dehydrator, so check the instructions for the products you are applying.
Should I dehydrate nails twice?
One controlled coat is usually the better starting point unless the manufacturer instructs you differently. Repeated applications can make the surrounding skin unnecessarily dry without fixing other causes of lifting.
Why are my nails still lifting after using dehydrator?
Check for remaining cuticle tissue, dust, skin contact, heavy product layers, incompatible primer, poor curing, or product touching the sidewalls. Dehydrator helps with surface preparation, but it cannot correct every application problem.
Final Takeaway: Prep Clean, Thin, and in the Right Order
Learning how to prep nails with dehydrator is mostly about getting the sequence right. Clean and shape first, gently prepare the nail plate, remove every trace of dust, cleanse, apply a thin dehydrator layer, and let it evaporate completely.
After that, use primer, bonder, base coat, or adhesive only when your chosen system calls for it. Keep the prepared nail free from fingerprints, lotions, oils, and unnecessary handling.
As of 2026, nail systems still vary enough that the manufacturer’s instructions should outrank any universal prep routine. Once you understand what each step does, it becomes much easier to adjust your technique without over-prepping the natural nail.
For your next manicure, keep one goal in mind: prepare the surface thoroughly, but treat the natural nail gently.

