
Does Nail Dehydrator Need a Lamp? No—Here’s Why

Quick Answer
No, a standard nail dehydrator does not need a UV or LED lamp. It is a nail-prep liquid that removes temporary surface moisture and oil, then air-dries through evaporation. The lamp is used later for light-cured products such as gel base coat, gel color, builder gel, and gel top coat. For product-safety basics, the FDA nail care guidance recommends following each product’s labeled directions.
What to remember
- No lamp needed: Standard nail dehydrator dries naturally within seconds.
- Use it first: Dehydrator belongs in the prep stage before primer, base coat, gel, or acrylic.
- Don’t overapply: One thin, controlled coat is normally enough unless your product says otherwise.
- Check the label: Combination products can have different directions, so follow the manufacturer’s instructions.
- Cure the gel: If the next product is a UV/LED gel, that product may require a compatible lamp.
If you’re wondering, does nail dehydrator need a lamp?, the confusion makes sense because dehydrator is often used immediately before gel products that do need curing. The dehydrator itself, however, usually works by evaporating from the natural nail rather than hardening under light.
When I’m organizing a manicure routine, I separate “prep products” from “curing products.” That one distinction makes the entire process easier to understand.
In This Guide
- Does nail dehydrator need a UV or LED lamp?
- How does nail dehydrator work without a lamp?
- When do you actually need a nail lamp?
- How do you use nail dehydrator correctly?
- Nail dehydrator vs primer vs base coat
- Do different nail systems change the process?
- What mistakes should you avoid?
- Frequently asked questions
Does Nail Dehydrator Need a UV or LED Lamp?
No. Most standard nail dehydrators do not need either a UV lamp or an LED lamp. Apply a thin layer to the natural nail and give it a few moments to evaporate before moving to the next prep step.
A nail dehydrator is different from gel polish because it is not designed to polymerize or become a hardened coating. Its main job is surface preparation.
Definition: A nail dehydrator is a prep liquid used to temporarily remove surface oil and moisture from the natural nail plate so the next nail product can bond to a cleaner, drier surface.
How long should nail dehydrator dry?
Many dehydrators appear dry within seconds because their volatile ingredients evaporate quickly. You usually don’t need to sit and wait several minutes.
Watch the nail surface instead. It often changes from slightly shiny to a dry, matte appearance after application.
- Apply lightly: Avoid flooding the nail or surrounding skin.
- Let it evaporate: Don’t immediately cover a visibly wet nail with another product.
- Continue prep: Apply primer next if your nail system calls for one.
- Cure later products: Use your lamp only when the gel manufacturer’s directions require it.
As of 2026, the safest rule remains simple: follow the directions for the exact bottle you’re using. A specialized combination product may not follow the same routine as a basic dehydrator.
How Does Nail Dehydrator Work Without a Lamp?
Nail dehydrator works mainly through evaporation rather than light curing. It temporarily reduces moisture and oil on the nail surface, creating better conditions for adhesion.
Think of the process more like wiping a surface before applying an adhesive. You’re preparing what is underneath, not creating the finished coating.
Dehydrating is not the same as curing
Dehydrating removes temporary surface moisture and oils. Curing uses a compatible light source to trigger a reaction inside certain gel products.
That difference explains why putting ordinary dehydrator under a nail lamp usually adds nothing to the prep process. The liquid should already be evaporating on its own.
Why does nail prep affect lifting?
Gel, acrylic, press-on adhesive, and other nail systems need good contact with the prepared nail surface. Surface oil, dust, leftover cuticle tissue, or moisture can interfere with that contact.
Dehydrator handles only part of the job. Proper shaping, gentle surface preparation where required, dust removal, and careful product placement still matter.
Prep tip: More dehydrator does not automatically mean stronger adhesion. A thin, even application is usually more useful than repeatedly soaking the nail.
When Do You Actually Need a Nail Lamp?
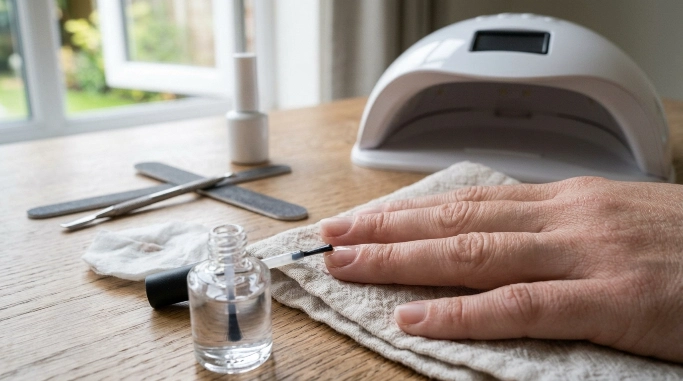
You need a lamp when the product you’re applying is formulated to cure under UV or LED light. The label should tell you whether curing is required and which type of lamp is compatible.
Gel base coats, gel colors, gel top coats, and many builder gels are common examples. Traditional air-dry nail polish does not use the same curing process.
Typical manicure order
- Prepare the natural nail: Shape as needed and remove surface debris.
- Apply nail dehydrator: Use a thin coat and let it air-dry.
- Apply primer if required: Follow the primer manufacturer’s instructions.
- Apply gel base: Cure it if the gel system requires curing.
- Add gel color: Apply thin coats and cure each layer as directed.
- Finish with gel top coat: Cure according to the product instructions.
The American Academy of Dermatology’s gel manicure guidance also distinguishes gel manicures by their use of UV-emitting curing lamps. That curing step belongs to the gel system, not the dehydrator.
Should you cure primer under a lamp?
Not automatically. Many nail primers are also air-dried, while some gel-based bonding products may require curing.
Never assume that every bottle used before gel goes under the lamp. Read the label because “primer,” “bonder,” and “base” can describe products with different chemistry.
How Do You Use Nail Dehydrator Correctly?
Use nail dehydrator after basic nail preparation and before the bonding products in your chosen system. The goal is controlled coverage without putting excess liquid on the skin.
Here’s the simple method I prefer when keeping an at-home manicure organized.
- Wash and dry your hands: Make sure your nails are fully dry before starting detailed prep.
- Shape the nails: File the free edge and perform only the surface preparation required by your system.
- Remove nail dust: Don’t leave filing debris trapped beneath your products.
- Apply dehydrator: Brush a thin layer over the natural nail plate while avoiding surrounding skin.
- Let it air-dry: Wait until the visible liquid has evaporated.
- Apply primer if needed: Use the primer according to its own instructions.
- Continue with your nail system: Cure only the products specifically labeled for lamp curing.
Can you touch your nails after dehydrating them?
Try not to. Touching the prepared nail can transfer natural skin oils back onto the surface you just cleaned.
If you accidentally touch several nails, cleaning and re-prepping them according to your product directions is safer than pretending it didn’t happen.
Should you dehydrate the surrounding skin?
No. Keep prep chemicals on the nail plate whenever possible.
The FDA advises consumers to read nail-product directions and warning labels carefully. Good ventilation and avoiding unnecessary skin exposure are also sensible habits when working with nail cosmetics.
Nail Dehydrator vs Primer vs Base Coat
Nail dehydrator, primer, and base coat can all appear early in a manicure, but they are not interchangeable. Each product has a different role.
| Product | Main job | Usually air-dries? | Usually needs lamp? |
|---|---|---|---|
| Nail dehydrator | Removes temporary surface oil and moisture | Yes | No |
| Nail primer | Helps improve bonding between the nail and enhancement system | Often | Depends on formula |
| Gel base coat | Creates the first cured layer of a gel manicure | No | Usually yes |
| Regular base coat | Provides a foundation for traditional polish | Yes | No |
Can nail dehydrator replace primer?
Not necessarily. Dehydrator prepares the surface, while primer is designed to improve the bond in systems that call for one.
Some people get good retention without primer, while specific acrylic, gel, or extension systems recommend it. Treat the manufacturer’s system directions as the deciding factor.
Can nail dehydrator replace base coat?
No. A dehydrator doesn’t create the protective or bonding layer that a base coat provides.
If your gel system requires a base coat, apply it after the prep stage and cure it according to the brand’s instructions.
Do Different Nail Systems Change the Process?
The dehydrator itself normally still air-dries, but what comes after it changes depending on the manicure. That is where the lamp question becomes important.
- Gel polish: Dehydrator air-dries first, while compatible gel layers are cured afterward.
- Builder gel: Prep products generally come first, then the builder product is cured according to its system.
- Acrylic nails: Dehydrator and primer may be used before acrylic application, but traditional acrylic polymerizes without a UV/LED nail lamp.
- Dip powder: A lamp is often unnecessary in traditional dip systems, although individual systems vary.
- Press-on nails: Dehydrator may help prepare oily natural nails before adhesive, but standard nail glue doesn’t normally require a gel lamp.
- Regular polish: Dehydrator can be used during prep, while traditional polish air-dries.
What if your product says “3-in-1”?
Combination bottles deserve extra attention. A product marketed as dehydrator, primer, bonder, or another multi-step formula may have instructions that differ from a plain dehydrator.
Use the product name as a clue, not as your complete instruction manual. The directions on the bottle or packaging should settle whether air drying or curing is required.
What Nail Dehydrator Mistakes Should You Avoid?
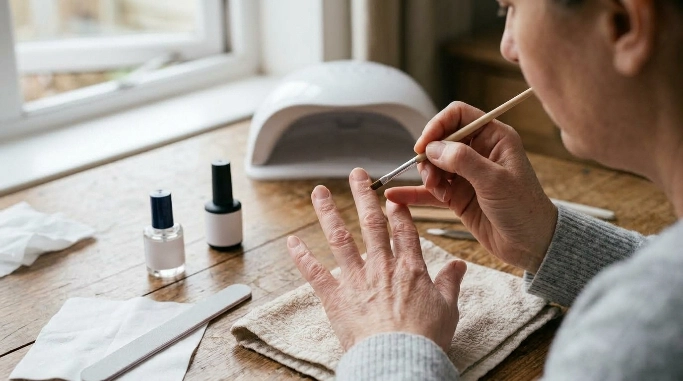
The biggest mistake is treating every nail-prep bottle as if it works the same way. Ingredients and intended uses vary, so the label matters more than a universal manicure rule.
The OSHA nail salon safety guidance emphasizes reading labels, understanding product hazards, keeping products off skin, and maintaining good ventilation when working with salon chemicals.
Common mistakes
- Curing ordinary dehydrator: A lamp generally doesn’t improve a standard evaporating prep liquid.
- Using too much: Flooding the nail wastes product and increases skin exposure.
- Touching prepared nails: Finger oils can contaminate the surface again.
- Skipping drying time: Give the dehydrator time to visibly evaporate before applying the next product.
- Confusing primer with dehydrator: They perform different jobs and may have different instructions.
- Ignoring irritation: Stop using a product that causes significant burning, swelling, itching, or persistent redness.
Basic hygiene matters too. The CDC’s nail hygiene guidance recommends keeping nail tools clean and avoiding damage to the cuticle, which helps protect the surrounding area.
Safety note: If you develop persistent pain, swelling, blistering, unusual nail separation, or another significant reaction after using a nail product, stop using it and seek advice from a qualified healthcare professional or dermatologist.
Section Takeaway: Standard nail dehydrator should air-dry, not cure under a lamp. Good technique means thin application, limited skin contact, proper ventilation, and following the exact product directions.
Frequently Asked Questions
Do you put nail dehydrator under a UV lamp?
No. A standard nail dehydrator normally evaporates on its own and does not need UV exposure. Let it air-dry, then continue with primer or your nail system. Only use a lamp when the specific product directions tell you to cure it.
Do you cure nail dehydrator with an LED lamp?
Usually no. LED lamps cure compatible light-reactive gel products, while ordinary nail dehydrator is a surface-prep liquid. Applying dehydrator and putting your hand under an LED lamp generally isn’t part of the normal preparation process.
How long do you wait after applying nail dehydrator?
Wait until the liquid has visibly evaporated and the nail looks dry, which is often only a short time. Exact drying time can vary by formula and application amount, so use your product’s directions rather than a fixed universal timer.
Does nail primer need a UV lamp?
It depends on the primer. Many traditional acid and acid-free nail primers air-dry, but some gel bonders or light-cured bonding products require a lamp. Check the label instead of assuming that all primers behave the same way.
What comes first, nail dehydrator or primer?
Dehydrator generally comes first. It prepares the nail by reducing temporary surface oil and moisture, then primer is applied if the nail system calls for it. Your base, gel, acrylic, dip, or extension product follows afterward.
Can you use nail dehydrator without primer?
Sometimes, but it depends on the nail system and your adhesion needs. Dehydrator and primer are separate products, so skipping primer should be based on the manufacturer’s instructions rather than assuming dehydrator performs both jobs.
Can you skip nail dehydrator before gel polish?
Some gel systems may not specifically require a separate dehydrator, while others recommend one for improved prep. If lifting is a problem, careful oil and moisture removal can help, but follow the gel manufacturer’s instructions before adding extra products.
Final takeaway: Nail dehydrator does not normally need a lamp. Apply it during prep, let it air-dry, then save your UV or LED lamp for products specifically formulated for light curing. When two bottles seem similar, the product label should always be your final guide.

