
Does Nail Dehydrator Need to Be Cured? Complete Guide

Quick Answer
No. A standard nail dehydrator normally does not need to be cured under a UV or LED lamp. Apply a thin layer, let it air-dry completely, then continue with primer, base coat, acrylic, gel, or another nail system according to its instructions. The FDA’s nail care guidance also stresses following each product’s labeled directions.
What to do after applying dehydrator
- Apply it thinly: You only need enough product to cover the natural nail plate.
- Let it air-dry: Most dehydrators evaporate within a few seconds.
- Skip the lamp: Don’t cure a conventional dehydrator unless its label specifically says to.
- Continue promptly: Apply the next prep or enhancement product once the nail looks dry.
- Check the label: Hybrid prep, bonder, or primer products may have different directions.
Easy rule to remember
- Dehydrator usually air-dries. Gel base coats, gel color, and gel top coats are the products that commonly require lamp curing.
If you’re wondering, does nail dehydrator need to be cured, you’re probably trying to get your prep steps in the right order. I understand the confusion because dehydrator, primer, bonder, and base coat bottles can look surprisingly similar.
The important difference is simple. Nail dehydrator is usually a fast-evaporating prep liquid, not a light-cured gel product.
In This Guide
- Does nail dehydrator need to be cured under a lamp?
- What does nail dehydrator actually do?
- How long should nail dehydrator dry?
- What is the correct order for dehydrator, primer, and base coat?
- Nail dehydrator vs primer: which one needs curing?
- Do gel, acrylic, dip, and press-on nails use dehydrator differently?
- Common nail dehydrator mistakes to avoid
- Is nail dehydrator safe to use?
- Frequently asked questions
- Final takeaway
Does Nail Dehydrator Need to Be Cured Under a Lamp?
No, most nail dehydrators do not need UV or LED curing. They are designed to evaporate naturally after being brushed over the nail plate.
A conventional dehydrator contains fast-drying solvents that temporarily remove surface oil and moisture. Once those solvents evaporate, you can move to the next prep step.
Why doesn’t dehydrator need UV or LED light?
UV and LED lamps cure products containing ingredients designed to polymerize when exposed to certain wavelengths of light. Gel base coats, gel colors, and many gel top coats fall into this category.
A normal dehydrator works differently. It prepares the surface through evaporation rather than lamp-activated curing.
- Dehydrator: Usually air-dries.
- Nail primer: Often air-dries, depending on the formula.
- Gel base coat: Usually requires UV or LED curing.
- Gel polish: Requires curing when it is a light-cured gel formula.
- Gel top coat: Usually requires curing.
For example, Modelones’ published instructions for one of its dehydrator-and-primer systems tell users to air-dry the dehydrator before moving to the next product. The gel base coat is then cured separately.
That distinction is useful because it shows why similar-looking bottles can require completely different application steps.
Section Takeaway: Standard nail dehydrator is an air-dry preparation product. Don’t place it under a lamp unless your specific product instructions tell you to.
What Does Nail Dehydrator Actually Do?
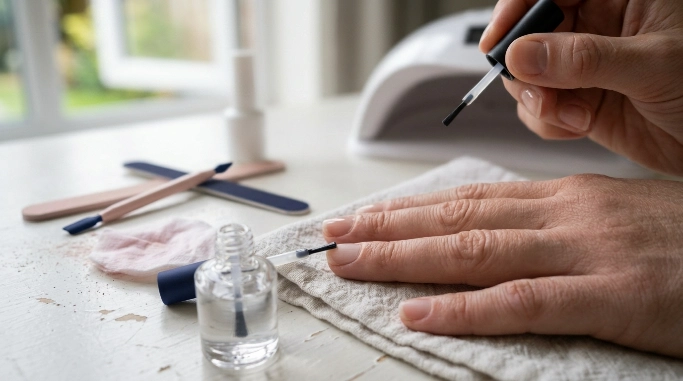
A nail dehydrator is a prep liquid that temporarily removes surface oils and moisture from the natural nail plate. It creates a cleaner, drier surface for the products applied afterward.
Your natural nails don’t need to look oily for oil to affect adhesion. Small amounts of residue can remain even when the nail looks clean.
Why dehydration can help adhesion
Gel, acrylic, nail glue, and other enhancement products generally perform best on properly prepared nails. Oil, dust, or moisture can interfere with that contact.
Dehydrator helps create a short window in which the nail plate is cleaner and less oily.
- Removes temporary surface oil.
- Helps clear light residue after prep.
- Leaves the nail surface dry before the next product.
- May help reduce adhesion problems caused by oily nail plates.
- Works as one part of a complete prep routine.
I like to think of dehydrator as surface preparation rather than a coating. You’re not trying to build a visible layer on the nail.
That’s also why applying more isn’t automatically better. A thin, controlled application is usually enough.
How Long Should Nail Dehydrator Dry?
Most nail dehydrators dry within seconds because their ingredients are highly volatile. The exact time varies by formula, application amount, room conditions, and manufacturer instructions.
You usually don’t need a stopwatch. Watch the nail surface instead.
Signs your dehydrator has air-dried
- The wet shine disappears: The liquid no longer looks freshly brushed on.
- The surface looks matte: Many nails appear temporarily chalky or less shiny.
- No liquid is pooling: Product shouldn’t remain around the cuticle or sidewalls.
- The nail feels dry: Don’t touch it repeatedly, because that can transfer skin oils back onto the plate.
Some manufacturer instructions specify only a few seconds of air drying. Follow that product’s directions when a drying time is provided.
Don’t speed the process by touching the nails, blowing directly onto them, or wiping them after application. Each can introduce contamination before your next step.
What Is the Correct Order for Dehydrator, Primer, and Base Coat?
For many gel and acrylic routines, dehydrator comes after physical nail preparation and before primer or base products. Exact systems differ, so the brand’s instructions remain the final authority.
A common prep sequence looks like this:
- Wash and dry your hands. Make sure the nail area is fully dry before starting.
- Push back excess cuticle tissue. Keep the nail plate clear without cutting or scraping aggressively.
- Shape and prep the nail. Follow the enhancement system’s filing or buffing instructions.
- Remove nail dust. Use a clean, lint-free method recommended for your system.
- Apply dehydrator. Brush on a thin layer and allow it to air-dry.
- Apply primer or bonder if required. Follow that product’s drying or curing directions.
- Apply the base or enhancement product. Cure only if that specific product requires lamp curing.
What happens if you cure dehydrator anyway?
Putting a conventional dehydrator under a lamp usually isn’t a necessary step. The product is intended to evaporate on its own.
The bigger problem is confusing the dehydrator with another bottle. Always check the product label before placing any prep product under UV or LED light.
Should you touch the nail after dehydrating?
It’s best not to touch the nail plate after dehydration. Your fingertips contain natural oils that can transfer straight back onto the prepared surface.
Once I reach the dehydration step, I treat the nail surface as hands-off territory. That habit also makes the remaining prep routine much more consistent.
Section Takeaway: Prep the nail first, apply dehydrator, let it air-dry, then continue with the primer, bonder, base coat, or enhancement required by your system.
Nail Dehydrator vs Primer: Which One Needs Curing?
Nail dehydrator and nail primer are not the same product. They can work together, but they perform different jobs.
Most dehydrators air-dry. Many traditional nail primers also air-dry, while some specialized bonders or gel-based adhesion products may have different directions.
| Product | Main Purpose | Typical Drying Method | Lamp Usually Needed? |
|---|---|---|---|
| Nail dehydrator | Removes temporary oil and moisture | Air-dry | No |
| Traditional nail primer | Promotes adhesion | Often air-dry | Usually no |
| Gel bonder | Creates an adhesion layer | Formula-dependent | Sometimes |
| Gel base coat | Base layer for gel application | UV/LED cure | Yes |
The label matters more than the product name alone. Terms such as primer, bond, bonder, prep, and base are not always used identically between brands.
As of 2026, the safest practical approach remains simple: read the instructions for every bottle in your chosen system rather than assuming all prep products behave alike.
Do Gel, Acrylic, Dip, and Press-On Nails Use Dehydrator Differently?
The dehydrator itself normally still air-dries, but what comes after it changes. Your nail system determines the next step.
Gel polish
For gel manicures, dehydrator usually goes on before primer or gel base coat. The dehydrator air-dries, while the gel base and color layers are cured according to the gel system.
Acrylic nails
Acrylic systems may use dehydrator followed by an acid or acid-free primer. Traditional acrylic hardens through its own chemical reaction rather than a standard gel lamp.
Dip powder
Dip systems vary more because they use adhesive liquids, powder, and activators. Don’t assume a gel curing routine applies to dip powder.
Press-on nails
Dehydrator can be used before some press-on adhesives to reduce surface oil. Apply it to the natural nail, allow it to air-dry, then follow the glue or adhesive-tab instructions.
- Gel: Dehydrator air-dries; gel layers are cured.
- Acrylic: Dehydrator air-dries; acrylic sets chemically.
- Dip: Dehydrator air-dries; follow the specific dip liquid system.
- Press-ons: Dehydrator air-dries before compatible adhesive.
Don’t mix systems casually just because two products are both labeled for nail prep. Compatibility can differ between brands.
Common Nail Dehydrator Mistakes to Avoid
Using dehydrator is simple, but a few small mistakes can undermine the rest of your manicure. Most are easy to prevent.
- Curing it unnecessarily: Standard dehydrator should normally air-dry instead.
- Applying too much: A heavy coat can pool around the nail and wastes product.
- Touching the nail afterward: Finger oils can contaminate your freshly prepared surface.
- Getting it on surrounding skin: Keep nail prep products on the nail plate unless the label says otherwise.
- Skipping dust removal: Dehydrator isn’t a substitute for a clean nail surface.
- Using it over damaged skin: Avoid applying cosmetic prep products onto cuts, irritation, or broken skin.
- Ignoring the label: Hybrid bonders and specialty prep products may have different instructions.
Can you use too much nail dehydrator?
Yes, more product isn’t necessary for better prep. A thin application is generally enough to wet the nail surface before evaporation.
Repeated heavy use of solvent-based products may also leave nails or surrounding skin feeling dry. Use only what your product directions recommend.
Can you skip dehydrator?
That depends on your nail system and your natural nails. Some people get acceptable retention without a separate dehydrator, while oily nail plates may benefit more from it.
Don’t add extra prep products automatically. Use the steps recommended by the system you’re applying.
Is Nail Dehydrator Safe to Use?
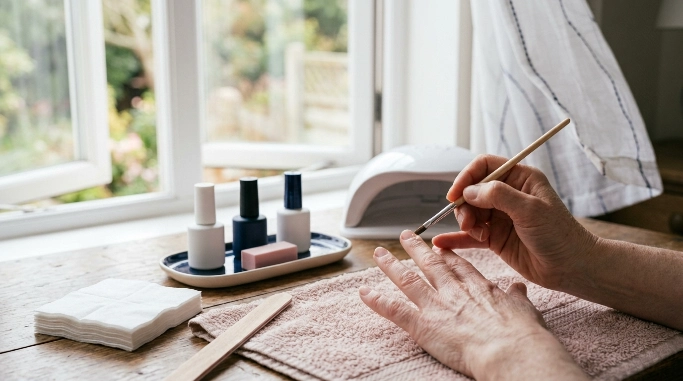
Nail dehydrators are cosmetic prep products, so they should be used according to their labels and kept away from eyes, mouth, flames, and broken skin. Good ventilation is also sensible when working with volatile nail liquids.
The FDA advises consumers to follow nail-product directions and warnings. It also notes that some nail products contain ingredients capable of causing irritation or allergic reactions.
Watch for irritation around the nails
DermNet’s nail cosmetics allergy guidance explains that nail products can cause irritant or allergic contact dermatitis in some people. Symptoms may include redness, swelling, itching, burning, or blistering.
The American Academy of Dermatology’s contact dermatitis guidance also notes that nail products can trigger reactions in sensitive individuals.
- Stop using a product that causes burning or persistent irritation.
- Avoid applying prep liquids to cracked or injured skin.
- Keep products out of reach of children.
- Follow flammability warnings on solvent-based formulas.
- Seek medical advice for significant swelling, blistering, pain, or a persistent rash.
Health note: Persistent nail or skin reactions aren’t normal manicure problems to simply cover with another product. A dermatologist or healthcare professional can assess ongoing redness, swelling, pain, or suspected allergy.
Frequently Asked Questions
Do you cure nail dehydrator before primer?
No. Standard nail dehydrator is normally allowed to air-dry before primer is applied. Wait until the visible wetness has evaporated, then follow the primer manufacturer’s directions.
Do you cure nail dehydrator before base coat?
Usually not. Let the dehydrator air-dry first, then apply the base coat. If you’re using a gel base coat, cure the base coat for the time specified by that gel system.
Can nail dehydrator dry without a UV lamp?
Yes. Conventional nail dehydrators are made to evaporate in air and don’t depend on UV or LED light. Some formulas dry within only a few seconds.
Is nail dehydrator supposed to stay sticky?
Usually no. A typical dehydrator evaporates and leaves the nail looking dry rather than tacky. A sticky layer is more commonly associated with certain primers, bonders, or gel products.
What happens if nail dehydrator doesn’t dry?
Give it more time and check whether you applied too much. If the product remains unusually wet or oily, review its instructions and make sure you’re using a dehydrator rather than a different prep or bonding product.
Do I need both nail dehydrator and primer?
Not every manicure system requires both. Dehydrator removes temporary surface oil and moisture, while primer promotes adhesion in systems designed to use it. Follow the product system rather than adding unnecessary steps.
Can I put dehydrator in a UV lamp to make it dry faster?
There is normally no reason to do this. A standard dehydrator is designed to air-dry quickly, so adding a lamp step doesn’t replace following the manufacturer’s directions.
Final Takeaway: Should You Cure Nail Dehydrator?
Nail dehydrator normally does not need to be cured. Apply a thin coat to the prepared natural nail and let it air-dry completely.
After that, continue with the primer, bonder, base coat, acrylic, gel, dip, or adhesive specified by your nail system. Cure only the products whose instructions specifically require UV or LED light.
The easiest rule is simple: dehydrator air-dries; light-cured gel products go under the lamp. When a bottle combines several functions, check its directions before assuming which rule applies.

