
How to Use Nail Dehydrator for Extensions: Step-by-Step Guide

Quick Answer
To use nail dehydrator for extensions, prepare the natural nail first, remove dust, then apply a thin layer of dehydrator only to the nail plate. Let it air-dry completely, avoid touching the prepared surface, and continue with the primer, bonder, adhesive, or extension product required by your system while following the product’s label and safety directions.
Quick Steps
- Prep the nail: Push back excess cuticle, shape the nail, and gently remove surface shine if your extension system requires it.
- Remove dust: Brush or wipe away all filing dust before using the dehydrator.
- Apply lightly: Brush one thin, controlled layer over the natural nail plate without flooding the skin.
- Air-dry fully: Wait until the liquid has visibly evaporated; most dehydrators do not need a nail lamp.
- Don’t touch: Keep fingers, hair, water, and oils away from the prepared nail.
- Continue promptly: Apply the primer, bonder, glue, or gel specified by your extension system.
If you’re wondering how to use nail dehydrator for extensions without causing lifting or making the prep process confusing, the key is placement and timing. A dehydrator has a small job, but it sits at an important point between basic nail preparation and the products that create adhesion.
I like to think of it as a temporary reset for the natural nail surface. In this guide, I’ll explain exactly where it goes, how much to apply, and how the process changes for Gel-X, acrylic, builder gel, tips, and forms.
In This Guide
- What does nail dehydrator do for extensions?
- How do you use nail dehydrator step by step?
- When should nail dehydrator be applied?
- How much nail dehydrator should you use?
- Nail dehydrator vs primer vs cleanser
- How does application change by extension type?
- What dehydrator mistakes cause lifting?
- How can you use nail prep products safely?
- Frequently asked questions
- Final takeaway
What Does Nail Dehydrator Do for Extensions?
A nail dehydrator temporarily removes surface moisture and helps clear oils or contaminants from the natural nail plate. That creates a cleaner surface for the next adhesion step in an extension service.
Definition: A nail dehydrator is a nail-preparation liquid used before gel, acrylic, tips, and other enhancements to temporarily reduce surface moisture so the following products can bond to a cleaner nail plate.
This effect does not permanently dry out the entire nail. Nail education guidance explains that dehydration happens mainly at the upper surface and gradually reverses as moisture returns.
That temporary effect explains why timing matters. Once the dehydrator dries, you don’t want to handle the nail or leave the prepared surface exposed for a long period.
Why does moisture matter for extension adhesion?
Gel, acrylic, adhesive, and bonding products need direct contact with a properly prepared nail surface. Oil, moisture, dust, and skin debris can interfere with that contact and contribute to lifting.
A dehydrator helps with one part of the equation. It cannot compensate for cuticle left on the nail plate, poor tip sizing, uncured gel, or incorrect product placement.
Does dehydrator make extensions last longer?
It can support better retention when excess moisture or surface contamination is contributing to poor adhesion. However, it is only one part of the complete preparation process.
As of 2026, professional nail education still emphasizes complete prep rather than relying on one “miracle” liquid. Correct product compatibility and manufacturer instructions remain just as important.
How Do You Use Nail Dehydrator for Extensions Step by Step?
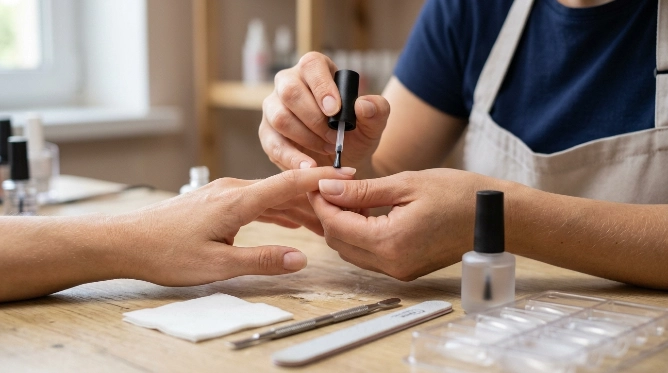
Apply nail dehydrator after the natural nail has been prepared and dust has been removed. Use only enough product to wet the nail plate lightly, then let it evaporate before moving to the next required product.
1. Start with clean hands and nails
Wash and dry the hands thoroughly before starting. Remove existing polish, gel residue, oils, and debris according to the extension system you’re using.
Make sure the nail is completely dry before continuing. Introducing water immediately before adhesion can work against the purpose of dehydrating the surface.
2. Push back cuticle and remove non-living tissue
Gently expose the nail plate around the cuticle area. Any invisible tissue left attached to the plate can become a weak point under the enhancement.
Avoid aggressive scraping or cutting into healthy skin. The goal is a clean nail surface, not an injured one.
3. Shape and lightly prepare the surface
Shape the free edge and remove surface shine only to the degree recommended by your nail system. Over-filing can thin the natural nail without improving adhesion.
The American Academy of Dermatology notes that repeated or aggressive filing used with artificial nails can weaken natural nails, so restraint matters.
4. Remove every trace of dust
Use a clean nail brush or lint-free wipe to clear filing dust. Pay attention to sidewalls and the area near the cuticle.
Don’t apply dehydrator over a visibly dusty surface. The liquid is not a substitute for proper mechanical cleaning.
5. Brush on a thin coat of dehydrator
Wipe excess liquid from the applicator against the bottle neck. Brush a light layer over the natural nail without flooding the cuticle or sidewalls.
- Cover the nail plate: Reach the areas where the extension product will bond.
- Avoid skin: Keep preparation chemicals off surrounding tissue.
- Don’t soak the nail: More liquid does not automatically produce stronger adhesion.
6. Let it air-dry
Most standard nail dehydrators evaporate without a lamp. Wait until the surface looks dry and the visible liquid is gone.
Never blow on the nail to make it dry faster. Breath can reintroduce moisture and contamination to the prepared surface.
7. Apply the next product promptly
Once dry, continue with the primer, bonder, adhesive, base, or extension product required by your system. Avoid touching the natural nail with your fingers after dehydration.
This final detail is easy to miss. A quick fingertip check can place skin oils straight back onto the surface you just prepared.
When Should Nail Dehydrator Be Applied?
In a typical extension routine, dehydrator goes after physical nail preparation and dust removal but before the main bonding products. The exact order after dehydration can differ between brands and extension systems.
A useful general sequence is:
- Clean and dry the hands.
- Remove old nail product if needed.
- Push back cuticle and clean the nail plate.
- Shape the natural nail.
- Gently remove shine if your system requires it.
- Remove filing dust.
- Apply nail dehydrator.
- Let the dehydrator evaporate.
- Follow the brand-specific primer, bonder, tip, adhesive, base gel, or acrylic steps.
Don’t assume every professional system uses the final steps in the same order. Some systems dehydrate first, place a tip or form, then apply a bonding product to the exposed natural nail.
Other soft-gel extension systems use dehydrator, primer, adhesive gel, and then the full-cover tip. The manufacturer’s directions should override a generic online routine.
How Much Nail Dehydrator Should You Use?
Use a thin, controlled application rather than a heavy coat. The nail should look evenly wetted for a moment, not flooded with liquid.
For a brush-on dehydrator, one light pass across each part of the natural nail is usually enough unless the manufacturer specifically instructs otherwise. Wipe excess product from the brush first.
Do you need two coats of nail dehydrator?
Usually, a second coat should not be automatic. Follow the product directions, because formulas and systems differ.
Some technicians use additional dehydration for clients with unusually oily nail surfaces, but applying more product is not a universal fix for lifting. First check the rest of the prep process.
What should a properly dehydrated nail look like?
The surface usually appears dry, clean, and free of visible wetness after the solvent evaporates. Some products may leave the nail looking slightly matte or temporarily chalkier.
Appearance varies by formula. Don’t keep adding coats simply because the nail doesn’t turn white.
Nail Dehydrator vs Primer vs Cleanser: What’s the Difference?
A dehydrator, primer, and cleanser are not automatically interchangeable. They may appear together in nail-prep routines, but each product can serve a different purpose.
| Product | Main Job | Typical Position | Lamp Needed? |
|---|---|---|---|
| Cleanser | Removes dust, residue, or surface contamination depending on formula | During prep or finishing, depending on product | Normally no |
| Dehydrator | Temporarily reduces surface moisture and may remove light oils | After nail prep and dust removal | Normally no |
| Primer/Bonder | Promotes adhesion between the natural nail and enhancement system | Usually after dehydration, according to system directions | Depends on formula |
Can nail dehydrator replace primer?
Not necessarily. Dehydrators mainly prepare the surface, while primers or bonders are designed to promote adhesion in ways specific to the enhancement chemistry.
If your system specifies both, use them in the recommended order. If it specifies only one prep product, don’t automatically add another brand’s primer without checking compatibility.
Can rubbing alcohol replace nail dehydrator?
High-percentage alcohol can remove some oils and moisture, but that does not make it identical to every commercial nail dehydrator. Formulations and manufacturer recommendations vary.
For predictable results, use the prep products designed for your extension system whenever possible. Mixing unrelated products makes troubleshooting lifting harder.
How Does Dehydrator Application Change for Different Extensions?
The basic dehydrator technique stays similar, but the steps that follow it change with the extension system. Always identify where the natural nail needs adhesion before applying prep products.
Gel-X and full-cover soft gel tips
For many soft-gel extension systems, dehydrator is used on the natural nail before primer or bonding gel. The full-cover tip is then attached with the system’s designated adhesive gel and cured according to its instructions.
Don’t assume the inside of a soft-gel tip needs nail dehydrator. Etching or chemically preparing the tip is a separate step and should follow that brand’s directions.
Acrylic extensions
For acrylics, dehydrator is commonly applied after natural-nail prep and before the system’s primer or acrylic application. Keep the liquid off surrounding skin and allow it to evaporate first.
If your acrylic brand specifies an acid or acid-free primer, use only the amount directed. More primer is not the same as stronger retention.
Builder gel extensions
Builder gel systems often use dehydrator before a compatible primer, bonder, or base gel. The builder product is then applied over the prepared natural nail and any properly fitted form or tip.
Pay close attention to the brand’s curing requirements. Dehydrator itself generally air-dries, while the gel products that follow usually require the specified lamp.
Traditional nail tips with glue
With glued tips, the order can vary more than many beginners expect. Some systems prep and dehydrate the natural nail, attach the tip, and then apply bond products to the remaining natural nail.
Others use different sequences. Check the glue and enhancement system directions instead of forcing a Gel-X routine onto traditional tips.
Sculpted extensions on forms
A form itself does not need nail dehydrator because it is not natural nail tissue. Apply dehydrator only where your enhancement will bond to the natural nail.
Fit the form carefully and continue with the bonding and sculpting products specified by your gel or acrylic system.
What Nail Dehydrator Mistakes Can Cause Lifting?
The most common mistake is expecting dehydrator to fix every retention problem. Lifting usually requires checking the complete preparation, application, curing, and product-compatibility process.
- Touching the nail afterward: Fingers can transfer oil and moisture back onto the prepared plate.
- Applying over dust: Filing debris left around sidewalls can interfere with adhesion.
- Flooding the cuticle: Excess prep liquid on skin is unnecessary and may increase irritation risk.
- Using too much product: A soaked nail does not create a stronger bond than a properly applied thin layer.
- Skipping cuticle removal: Dehydrator cannot make enhancement products adhere properly to non-living tissue stuck to the nail plate.
- Blowing on the nail: Breath introduces moisture to a surface you’re trying to keep clean and dry.
- Waiting too long: Surface dehydration is temporary, so complete the next adhesion step promptly.
- Mixing incompatible systems: A dehydrator, primer, base, and adhesive from unrelated brands may not be designed to work together.
- Over-filing: Aggressive filing can weaken the natural nail without solving the underlying retention issue.
What if extensions still lift after using dehydrator?
Check where the lifting begins. Cuticle-area lifting may point toward incomplete prep, skin contact, flooding, or product placement rather than a lack of dehydrator.
Tip lifting can also come from poor sizing, air pockets, incorrect pressure, insufficient adhesive, or curing problems. Troubleshoot the entire system instead of repeatedly dehydrating the nail.
How Can You Use Nail Dehydrator and Extension Products Safely?
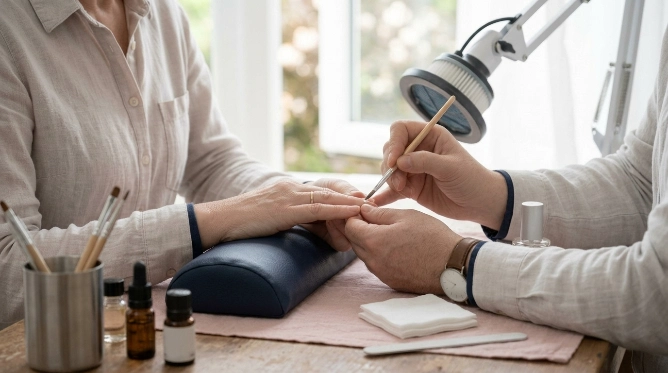
Use nail-prep chemicals exactly as labeled and keep them away from eyes, mouth, and unnecessary skin contact. The FDA recommends following nail-product warnings and using nail products with good ventilation.
The American Academy of Dermatology’s artificial nail guidance also warns that repeated filing and artificial-nail procedures can leave natural nails thinner, brittle, or dry.
Ventilation matters
Prep liquids, adhesives, acrylic systems, and removers can release vapors. Work in a well-ventilated area and close product bottles when they’re not being used.
OSHA’s nail-salon chemical guidance emphasizes ventilation and good work practices for reducing chemical exposure. The CDC/NIOSH guidance for nail technicians gives similar advice for professional workspaces.
Don’t use dehydrator on damaged skin
Avoid getting dehydrator into cuts, torn cuticles, or irritated tissue. Stop using a product if you develop burning, swelling, persistent redness, or another concerning reaction.
Health note: If your nails or surrounding skin are painful, inflamed, infected-looking, or repeatedly reacting to nail products, stop the service and speak with a dermatologist or other qualified healthcare professional.
Use compatible products
Follow the same manufacturer’s system where practical, especially for primer, bonder, adhesive gel, and curing requirements. This makes both application and troubleshooting more predictable.
For a deeper technical explanation of why surface moisture affects enhancement adhesion, NailKnowledge’s dehydrator overview explains why the effect is temporary and why prepared nails should not be touched afterward.
Frequently Asked Questions
Do you put nail dehydrator on before or after nail tips?
It depends on the extension system. Many full-cover soft-gel systems dehydrate the natural nail before primer and tip application, while some traditional tip-and-overlay systems dehydrate first, attach the tip, and then use a bonding product on the exposed natural nail.
Do you cure nail dehydrator under a UV or LED lamp?
Most standard nail dehydrators are solvent-based prep liquids that air-dry and do not need curing. Always check your bottle, because specialty products may use different instructions.
How long should you wait after nail dehydrator?
Wait until the visible liquid has completely evaporated, then proceed promptly with the next step. You normally do not need a long waiting period unless the manufacturer specifically gives one.
Can you use nail dehydrator without primer?
Yes, but only when the extension system does not require a separate primer or bonder. A dehydrator and primer perform different functions, so don’t omit a required primer simply because the nail looks dry.
Can you use too much nail dehydrator?
Yes. Soaking the nail is unnecessary and can increase product exposure without improving the bond. A thin, controlled application that covers the natural nail plate is generally the better approach.
Should you apply nail dehydrator twice?
Not automatically. One thin application is often sufficient, but you should follow the directions for your specific product and nail system rather than treating two coats as a universal rule.
Why are my extensions lifting even after dehydrating?
Possible causes include cuticle left on the nail plate, dust, touching the prepared surface, poor tip fit, skin contact, incompatible products, insufficient adhesive, or curing errors. Dehydrator cannot correct those problems by itself.
Final Takeaway: Where Nail Dehydrator Fits in Your Extension Routine
The simplest rule is prep, clean, dehydrate, let dry, then continue with your system’s bonding steps. Keep the layer thin and avoid touching the natural nail once it has been dehydrated.
For Gel-X, acrylic, builder gel, glued tips, or sculpted extensions, don’t copy one universal order without checking the manufacturer. Different systems place primers, bonders, tips, forms, and adhesives at different points.
Good retention comes from the complete process, not just the dehydrator bottle. Clean prep, compatible products, careful application, correct curing, and gentle nail handling all work together to create a stronger extension set.

