
Should Nail Dehydrator Be Applied to the Whole Nail?

Quick Answer
Yes. Nail dehydrator should usually be applied in a thin, even layer across the entire natural nail plate that will receive gel, acrylic, dip, glue, or another enhancement. Keep it off the surrounding skin and follow your product’s directions, as professional systems such as Gelish nail prep instruct users to apply prep products directly to the nail plate.
How to cover the nail correctly
- Cover the nail plate: Brush a light coat from near the cuticle area toward the free edge.
- Reach the side areas: Cover the parts of the natural nail where product will bond.
- Avoid the skin: Do not intentionally flood the cuticle, sidewalls, or surrounding skin.
- Use very little: The nail should be covered, not soaked or dripping.
- Let it air-dry: Most dehydrators evaporate quickly and do not require a lamp.
One important exception
- If your product label tells you to apply dehydrator only to certain areas, follow that manufacturer’s instructions instead.
If you’re wondering whether nail dehydrator belongs on one problem area or the whole nail, the answer is usually simple. The natural nail plate needs consistent prep wherever your enhancement or coating will attach.
The trick is complete coverage without overapplying it. This guide explains exactly where dehydrator goes, how much to use, and what changes with gel, acrylic, dip, and press-on nails.
In This Guide
- Where should nail dehydrator be applied?
- How do you apply nail dehydrator correctly?
- Why should you dehydrate the whole nail plate?
- Does application change for gel, acrylic, dip, or press-ons?
- Is nail dehydrator the same as nail primer?
- What mistakes should you avoid?
- Can nail dehydrator damage nails or skin?
- Frequently asked questions
- Final takeaway
Where Should Nail Dehydrator Be Applied?
Apply nail dehydrator across the entire natural nail plate that will be covered by your manicure product. Keep the liquid on the hard nail surface rather than brushing it onto the skin.
A nail dehydrator is a nail-prep liquid designed to temporarily remove surface moisture and oils. That creates a cleaner, drier surface before an adhesive or enhancement is applied.
What does “the whole nail” mean?
It means the visible natural nail plate from near the cuticle area to the free edge. You should also reach the sides of the nail plate without flooding the skin beside them.
- Cuticle area: Work close to it, but don’t intentionally coat the surrounding skin.
- Center of the nail: Cover it with one thin, controlled layer.
- Side edges: Prep these areas because lifting can begin where product loses contact.
- Free edge: Cover the natural nail through the tip if your product will bond there.
Gelish, for example, instructs users to apply a thin coat of its PH Bond nail prep directly to the nail plate. That supports full nail-plate coverage rather than treating only one small area.
Should dehydrator touch the cuticle?
No. The cuticle and surrounding living skin are not the target.
You can work close to the edge of the nail plate, but leave the skin itself clean. Precise application also makes the next prep and coating steps easier to control.
How Do You Apply Nail Dehydrator Correctly?
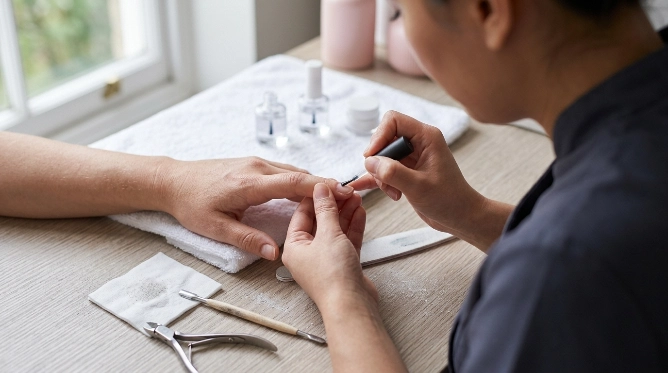
Apply dehydrator after basic nail preparation and cleansing, then allow it to air-dry before moving to the next step. One thin application is normally enough unless your product specifically says otherwise.
Step-by-step application
- Wash and dry your hands. Begin with clean nails and fully dry fingers.
- Push back excess cuticle tissue carefully. Remove only loose material sitting on the nail plate.
- Shape the nails. File the free edge to your desired shape.
- Prepare the surface as your nail system requires. Some systems call for gentle shine removal, while others require less abrasion.
- Remove all nail dust. Use a clean, lint-free wipe and the cleanser recommended for your system.
- Brush on dehydrator. Cover the natural nail plate with a thin coat.
- Let it evaporate. Do not touch the prepared nail afterward.
- Continue with primer, bonder, base coat, glue, or enhancement. Follow the order recommended by the brand you’re using.
A professional nail-prep routine does not mean aggressively filing the natural nail. Gentle, controlled preparation is enough for many systems.
The American Academy of Dermatology notes that excessive filing used with artificial nails can thin and weaken natural nails. You can read its guidance on reducing artificial nail damage.
How much nail dehydrator should you use?
Think thin coverage, not saturation. The brush should hold enough liquid to lightly wet the nail surface without creating puddles.
If dehydrator runs toward your skin, you probably have too much on the brush. Wipe excess product against the bottle neck before application.
Why Should You Dehydrate the Whole Nail Plate?
The purpose of dehydrating is to prepare the bonding surface evenly. If part of the nail remains oily or contaminated, that untreated area may become a weak point in the manicure.
Natural nails carry moisture and surface oils
Even freshly washed nails can develop surface oil from the skin and normal daily contact. Touching your hair or face after nail prep can also transfer oils back onto the nail.
That is why I treat the dehydrating step as the last “hands off” point in prep. Once the nails are dehydrated, avoid touching them with your fingertips.
Partial application creates inconsistent prep
Applying dehydrator only around the cuticle may leave the middle or free edge untreated. Applying it only to the center can miss areas near the sidewalls.
- Near the cuticle: Poor prep can contribute to early separation as the product grows out.
- Along the sides: Missed oil or residue can interfere with clean adhesion.
- At the free edge: Inconsistent prep may matter where nails receive frequent mechanical stress.
The goal isn’t to make the natural nail extremely dry. You simply want a clean and consistently prepared nail plate for the system you’re applying next.
Does Application Change for Gel, Acrylic, Dip, or Press-Ons?
The basic coverage rule stays similar: dehydrate the natural nail surface that needs to bond. What comes after the dehydrator changes according to the manicure system.
| Nail System | Where Dehydrator Goes | Typical Next Step | Key Tip |
|---|---|---|---|
| Gel polish | Whole natural nail plate | Bonder or base gel | Don’t touch the nail after prep |
| Acrylic | Exposed natural nail | Primer if required | Use primer according to its own instructions |
| Dip powder | Whole natural nail plate | Bond or base product | Keep prep products away from skin |
| Press-on nails | Natural nail contact area | Nail glue or adhesive system | Wait until prep liquid has evaporated |
| Soft-gel tips | Natural nail plate | Brand-specific bonder and adhesive | Follow the complete system order |
What about acrylic fills?
With a fill, prep products usually belong on the exposed natural nail growth rather than over existing enhancement unless the manufacturer directs otherwise. This is an important difference from a fresh full set.
Some professional Gelish PolyGEL fill instructions, for example, specify applying PH Bond sparingly to the natural nail plate. That helps illustrate why product placement should follow the service you’re performing.
What about press-on nails?
For press-ons, dehydrating the contact area helps create a clean surface before glue or another adhesive system is applied. Allow the dehydrator to evaporate before attaching the tip.
Do not keep adding dehydrator simply because you want stronger adhesion. More liquid does not automatically create a better bond.
Is Nail Dehydrator the Same as Nail Primer?
No. A dehydrator and a primer can both support adhesion, but they perform different jobs.
Nail dehydrator removes or reduces surface oil and moisture. Nail primer prepares the surface chemically for stronger interaction with a particular enhancement system.
Which one comes first?
Dehydrator normally comes first when both products are part of the same routine. Primer follows after the dehydrator has evaporated.
- Prepare and cleanse the natural nail.
- Apply nail dehydrator.
- Allow it to air-dry.
- Apply primer or bonder if required.
- Continue with the nail system.
Do not assume every manicure requires both products. Some systems combine steps or use their own proprietary nail-prep liquid.
Should primer also cover the whole nail?
That depends on the specific primer. Some acid-free bonders are used broadly on the nail plate, while stronger primers may have more restrictive directions.
The FDA specifically discusses methacrylic acid in certain nail primers and emphasizes safe use of nail products according to labeling. Its nail care product guidance is worth reviewing when you’re unsure about chemical nail products.
What Nail Dehydrator Mistakes Should You Avoid?
The most common problems are not usually caused by missing the exact center of a nail. They’re caused by too much product, skin contact, contaminated nails, or using prep products in the wrong order.
- Applying only near the cuticle: Cover the full natural nail contact surface instead.
- Flooding the nail: A dehydrator should be applied sparingly.
- Painting the skin: Keep the product on the nail plate.
- Touching nails afterward: Fingertips can transfer oils back onto the prepared surface.
- Applying cuticle oil before dehydrator: Save moisturizing products for after the manicure.
- Skipping dust removal: Dehydrator isn’t a substitute for removing filing debris.
- Using several prep liquids randomly: Mixing systems can produce unpredictable results.
- Over-filing first: More abrasion doesn’t automatically mean better retention.
Can you apply dehydrator twice?
Some technicians repeat a light application on oily nails, but that should not become an automatic rule. Start with the amount recommended by the product manufacturer.
If retention is poor, look at the entire prep routine before assuming you need more dehydrator. Cuticle residue, product touching skin, poor curing, tip fit, or incompatible products can also cause problems.
Do you need to cure nail dehydrator?
Most traditional nail dehydrators are designed to evaporate in the air rather than cure under a nail lamp. The surface may temporarily look chalky or extra dry after evaporation.
Check the bottle if you’re uncertain. A specialized prep product can have different instructions.
Can Nail Dehydrator Damage Nails or Skin?
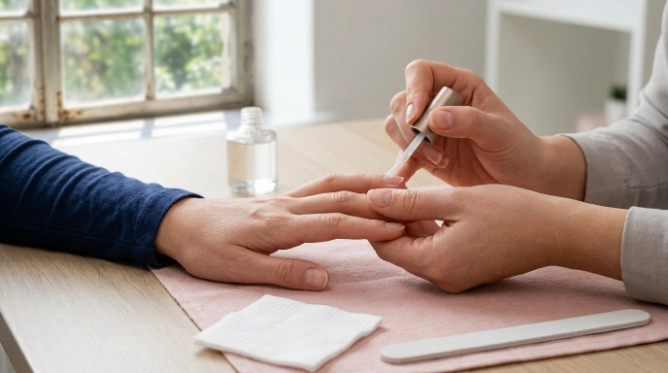
Used as directed, nail dehydrator is meant for nail preparation, but frequent or excessive solvent exposure can leave nails and surrounding skin feeling dry. Avoid intentionally applying it to skin, cuts, or irritated areas.
Vet note adapted for nail care: For persistent pain, swelling, redness, nail separation, or a suspected allergic reaction, stop using the product and consult a dermatologist or healthcare professional.
Keep chemical nail products off damaged skin
The FDA advises consumers to follow nail-product labels and warning statements. It also notes that some nail products can cause irritation or allergic reactions.
That makes precision important. A product intended for the nail plate should stay there whenever possible.
Use ventilation
Many prep products contain fast-evaporating solvents. Use them in a ventilated room and keep flammable products away from flames or heat.
Young Nails, for example, instructs users of its Nail Cleanse to wipe each nail and let it air-dry while warning that the liquid is flammable. See the manufacturer’s nail cleansing directions for an example of solvent-based prep precautions.
Don’t use dehydrator on an unhealthy-looking nail
Do not try to hide unexplained pain, swelling, discoloration, or obvious nail separation under an enhancement. Nail prep products are cosmetic products, not treatments for nail disease.
If a nail problem continues, get it checked before repeatedly covering it with artificial products.
Frequently Asked Questions
Should nail dehydrator cover the entire natural nail?
Yes, in most manicure systems you should apply a light, even coat across the entire natural nail plate that will contact the product. Work close to the edges without deliberately coating the cuticle or surrounding skin, and follow the instructions printed on your specific dehydrator.
Should nail dehydrator go under the free edge?
Usually, you only need to prepare the nail surfaces involved in bonding. You don’t normally need to flood liquid underneath the free edge unless your product or nail system specifically tells you to prep that area.
How long should nail dehydrator dry before primer?
Allow it to evaporate completely before applying the next prep product. Many solvent-based dehydrators dry within seconds, but there is no universal drying time for every formula. Use the visual result and the manufacturer’s directions rather than relying on one fixed number.
Can I touch my nails after applying dehydrator?
It’s better not to. Touching a freshly prepared nail can transfer natural skin oils and residue back to the surface. Once you’ve cleansed and dehydrated the nail plate, move directly into the remaining prep and application steps.
Do I need nail dehydrator for gel polish?
It depends on the gel system. Some systems include a dedicated pH prep or dehydrating product, while others rely on cleansing and their own base product. For best compatibility, follow the preparation sequence recommended by the gel brand you’re using.
Can I use alcohol instead of nail dehydrator?
Alcohol can remove some surface oil and residue, but it is not automatically identical to every commercial dehydrator. Formulas vary by brand and system, so substituting products can change performance. Use the preparation product recommended by your gel, acrylic, dip, or extension system when possible.
Should dehydrator go before or after primer?
Dehydrator generally comes before primer. It prepares and dries the natural nail surface first, while primer or bonder handles the next adhesion step. If your kit provides different instructions, follow the kit because some modern nail systems combine or rename traditional prep stages.
Final Takeaway: Cover the Nail Plate, Not the Skin
So, should nail dehydrator be applied to the whole nail? In most cases, yes. Apply a thin layer across the full natural nail plate where your gel, acrylic, dip, press-on, or soft-gel system needs to bond.
The important distinction is between the whole nail plate and the surrounding skin. Complete coverage is useful; flooding the cuticle area is not.
- Clean and prepare the natural nail first.
- Remove dust and surface contamination.
- Apply one thin layer of dehydrator across the nail plate.
- Keep it off the skin and damaged areas.
- Allow it to air-dry completely.
- Follow with the primer, bonder, adhesive, or base required by your system.
As of 2026, the safest general rule remains simple: use nail-prep products according to their labels and keep each product where it belongs. Good retention comes from controlled preparation, not from applying more chemical product than necessary.

