
How to Use Dehydrator Before Builder Gel: Step-by-Step Guide

Quick Answer
To use dehydrator before builder gel, prep the natural nail first, remove dust, then brush on one thin layer of nail dehydrator. Let it air-dry completely before applying the primer, base gel, or builder gel required by your system. For example, Gelish builder gel instructions place pH Bond during nail prep before the foundation and builder steps.
Quick Builder Gel Prep Order
- Prep the nail: Push back excess cuticle, shape the nail, and gently remove surface shine if your system requires it.
- Remove dust: Make sure the nail plate is clean before applying liquid prep products.
- Apply dehydrator: Use one thin coat across the natural nail without flooding the surrounding skin.
- Let it dry: Nail dehydrator normally air-dries quickly and does not go under the lamp unless its manufacturer says otherwise.
- Continue your system: Apply primer, bonder, base gel, or builder gel in the order specified by that brand.
Builder gel can be strong, but its retention starts before the gel ever reaches your nail. Correct dehydration helps create a clean, oil-free surface for the bonding products that follow.
The important part is using dehydrator as a thin preparation step, not soaking the nail with it. This guide explains the complete order, how much to use, drying time, primer differences, and common causes of lifting.
In This Guide
- What Does Nail Dehydrator Do Before Builder Gel?
- Should You Use Dehydrator Before Builder Gel?
- How Do You Use Dehydrator Before Builder Gel?
- Dehydrator vs Primer vs Base Coat: Which Comes First?
- How Much Dehydrator Should You Use?
- What Prep Mistakes Can Cause Builder Gel Lifting?
- Should Prep Change for Oily, Thin, or Damaged Nails?
- Frequently Asked Questions
- Final Takeaway
What Does Nail Dehydrator Do Before Builder Gel?
A nail dehydrator is a prep liquid designed to temporarily remove surface oils and moisture from the natural nail plate. That leaves a cleaner surface for the adhesion products applied afterward.
This matters because builder gel depends on controlled adhesion. Oil, lotion, water, filing dust, and other residue can interfere with that bond.
Dehydrator is not the same as primer
Dehydrator cleans and dries the nail surface. Primer or bonder is designed to improve the connection between the prepared natural nail and the enhancement system.
They may appear next to each other in a manicure routine, but they perform different jobs. One shouldn’t automatically replace the other.
Why dehydration can help with retention
Natural nails contain moisture and oils, and some people produce more surface oil than others. A dehydrator temporarily reduces that surface contamination before gel application.
Professional prep products may combine cleansing and dehydration functions. Young Nails, for example, describes its Swipe nail cleanser and dehydrator as a pre-prep product that removes dust, contaminants, and oils before nail enhancements.
- Less surface oil: Gives subsequent bonding products a cleaner nail plate.
- Less residue: Helps remove contaminants left after shaping and prep.
- Better preparation: Creates a more consistent surface before primer, base gel, or builder gel.
- Useful for lifting: Proper dehydration can help when surface oils are contributing to poor retention.
Dehydrator still can’t correct every adhesion problem. Poor cuticle prep, incompatible products, incorrect curing, or builder gel touching the skin can also contribute to lifting.
Should You Use Dehydrator Before Builder Gel?
Use dehydrator before builder gel when the builder-gel manufacturer includes dehydration or pH balancing in its recommended prep system. Many professional systems do.
However, builder gels aren’t chemically identical. The safest rule is to follow the prep sequence supplied with the exact builder gel you’re using.
When dehydrator is especially useful
- If your natural nails become oily quickly.
- If builder gel tends to lift around the cuticle or sidewalls.
- If the manufacturer’s system specifically calls for a dehydrator or pH bonder.
- If you’re applying builder gel over a freshly prepared natural nail.
- If your prep system uses separate dehydrator and primer products.
Don’t keep adding dehydration products because more sounds better. Overcomplicated prep can create its own problems and makes troubleshooting difficult.
I recommend treating the manufacturer’s instructions as one complete system. Changing several prep products at once makes it harder to identify why retention improved or failed.
How Do You Use Dehydrator Before Builder Gel Step by Step?
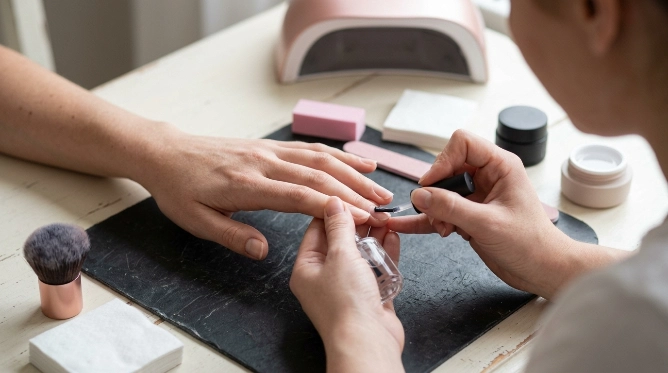
Apply nail dehydrator after physical nail preparation and dust removal but before your primer, bonder, base gel, or builder gel. Keep the application thin and let it dry before moving on.
Here is a practical sequence for most builder-gel manicures.
1. Start with clean, dry hands
Avoid applying hand cream or cuticle oil immediately before your manicure. Oils transferred back onto the nail plate can work against the prep you’ve just completed.
If your brand recommends avoiding water before application, follow that direction too. Water can temporarily change the moisture level of the natural nail.
2. Shape the natural nail
File the free edge into your preferred shape. Keep the edge smooth so cracks or rough areas don’t interfere with the finished overlay.
3. Prepare the cuticle area
Gently push back the cuticle and remove non-living tissue attached to the nail plate. Product applied over that tissue can lift as the manicure grows or experiences pressure.
Avoid aggressive cutting or filing around living skin. The American Academy of Dermatology’s gel manicure guidance also advises against cutting the cuticle because the cuticle helps protect the surrounding area from infection.
4. Remove surface shine if required
Some builder-gel systems call for gently removing the nail’s natural shine with a fine buffer. Others require minimal mechanical preparation.
Use only enough pressure to prepare the surface. Aggressive filing can thin the natural nail unnecessarily.
5. Remove all filing dust
Brush dust away carefully, including near the sidewalls and cuticle area. Don’t touch the prepared nail with your fingertips afterward.
6. Apply one thin layer of dehydrator
Wipe excess liquid from the brush before touching the nail. Brush a light coat across the natural nail plate while avoiding surrounding skin.
The entire nail doesn’t need to look flooded or wet. A thin, controlled application is enough for most systems.
7. Allow the dehydrator to air-dry
Most standard nail dehydrators evaporate on their own within seconds. The nail may briefly appear chalkier or less shiny as surface moisture and oils are removed.
Don’t cure a conventional dehydrator under a lamp unless its label specifically tells you to. Product directions always override general technique.
8. Apply the next adhesion product
Your next step may be acid-free primer, bonder, base gel, or another system-specific product. Apply exactly what your builder-gel manufacturer recommends.
For example, Aprés describes its pH Bonder as a dehydration step used after natural-nail preparation and before later Gel-X or gel-service products.
9. Apply and cure the builder gel
Apply your builder gel according to its required thickness, structure, and curing instructions. Don’t assume every builder gel uses the same lamp time.
Keep uncured gel away from the skin. If gel floods the sidewalls or cuticle, clean it thoroughly before curing.
Section Takeaway: Dehydrator belongs between physical nail preparation and your system’s bonding products. Use a thin coat, let it dry, and then follow the exact primer, base, builder, and curing sequence provided by your brand.
Dehydrator vs Primer vs Base Coat: Which Comes First?
For many systems, the general order is dehydrator → primer or bonder → base gel → builder gel. Some builder gels omit or combine one of those stages.
The table below shows the typical role of each product rather than a universal recipe.
| Product | Main Purpose | Typical Position | Usually Cured? |
|---|---|---|---|
| Dehydrator | Temporarily removes surface oil and moisture | After physical prep | Usually air-dried |
| Primer/Bonder | Supports adhesion between the natural nail and enhancement | Usually after dehydrator | Depends on formula |
| Base Gel | Creates a gel foundation or bonding layer | Before builder when required | Yes |
| Builder Gel | Adds structure, strength, or extension length | After required prep layers | Yes |
Don’t mix these categories based only on their names. A product called a “bonder” from one brand may have different curing requirements from another brand’s bonder.
Keep related products within the same system when practical. That gives you a clearer application order and more predictable compatibility.
How Much Dehydrator Should You Use and How Long Should It Dry?
One thin coat is generally enough to cover the natural nail without flooding it. You don’t need a visible pool of dehydrator for it to do its job.
Brush away excess product on the bottle neck first. Then coat the nail plate with a few light strokes.
How do you know when it is dry?
A conventional dehydrator evaporates quickly and leaves no thick coating behind. Depending on the formula, the nail may look matte or temporarily chalky.
Wait until visible wetness has disappeared before applying the next prep product. Don’t wipe the dehydrated nail with your fingers.
Should you apply dehydrator twice?
A second application isn’t automatically better. Start with the manufacturer’s recommended amount and troubleshoot other prep factors before repeatedly layering dehydrator.
If your nails are unusually oily and the manufacturer permits another coat, keep both applications thin. More liquid shouldn’t mean more reliable adhesion.
What Prep Mistakes Can Cause Builder Gel Lifting?
Dehydrator can improve surface preparation, but lifting can still occur when another step breaks the adhesion chain. The cuticle and sidewall areas are common places to inspect first.
- Leaving invisible cuticle: Gel bonds poorly when it sits over non-living tissue instead of the nail plate.
- Touching the prepared nail: Fingertips can transfer natural oils back onto the surface.
- Using too much dehydrator: Flooding isn’t necessary and may put prep liquid onto surrounding skin.
- Skipping required primer: Some builder systems depend on a separate primer or bonder.
- Using incompatible products: Mixing prep, base, and builder products from unrelated systems can make problems harder to diagnose.
- Incorrect lamp curing: Builder gel needs the lamp type and curing time specified by its manufacturer.
- Gel touching skin: Flooding the cuticle or sidewalls can contribute to lifting and unnecessary skin exposure.
- Over-filing the natural nail: Excessive abrasion can weaken the nail instead of improving retention.
Nail products should be used according to their labeled directions. The FDA’s nail-care product guidance also emphasizes following product warnings and avoiding unnecessary skin contact with reactive nail ingredients.
If you develop persistent itching, redness, swelling, blistering, or another reaction around the nails, stop using the suspected products. Seek advice from a qualified medical professional or dermatologist.
Health note: Nail dehydration products and builder gels are cosmetic products, not treatments for damaged or diseased nails. Persistent nail changes, pain, or inflammation should be evaluated by an appropriate healthcare professional.
Should Prep Change for Oily, Thin, or Damaged Nails?
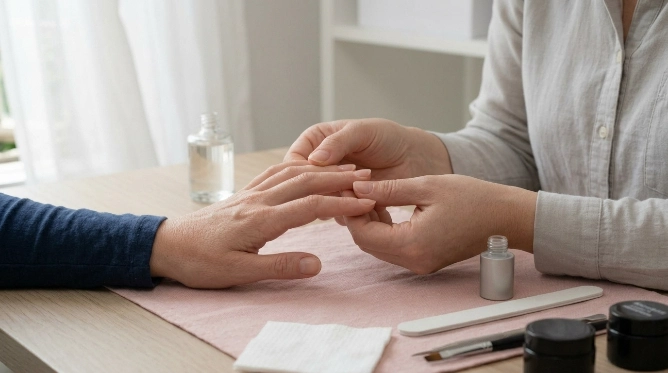
Your basic sequence can stay similar, but the amount of mechanical prep and the choice of bonding products may change. Avoid assuming every retention problem needs more filing.
Oily nail plates
Focus on keeping the nail clean after preparation. Don’t touch it, apply lotion, or introduce oil before the gel system is complete.
Use the dehydrator exactly as directed. If lifting continues, check cuticle removal, primer compatibility, lamp performance, and gel application before blaming oil alone.
Thin or flexible nails
Be conservative when buffing. Removing more natural nail doesn’t necessarily create stronger adhesion.
A flexible nail may also need a builder or base system designed for its movement. Product choice can matter as much as dehydration.
Damaged or irritated nails
Don’t use builder gel to hide a painful, inflamed, infected, or unexplained nail problem. Covering a problem can make it harder to monitor.
Dermatology guidance also warns that repeated artificial-nail services can contribute to brittleness, peeling, and nail damage in some people. Give compromised nails time to recover when needed.
Health note: If the natural nail is separating, discolored without an obvious cosmetic cause, painful, swollen, or persistently irritated, consider medical evaluation before applying another enhancement.
Frequently Asked Questions
Do you put nail dehydrator on before or after builder gel?
Put nail dehydrator on before builder gel. It normally goes onto the prepared natural nail before primer, bonder, base gel, or builder gel, depending on the application sequence required by your specific system.
Do you cure nail dehydrator under a UV or LED lamp?
Most standard nail dehydrators are designed to air-dry and don’t require lamp curing. Allow the visible liquid to evaporate, then continue with the next step unless the product manufacturer provides different instructions.
Do you need both dehydrator and primer for builder gel?
Some builder-gel systems use both, while others use only a pH bonder, a base gel, or another adhesion product. Dehydrator and primer have different jobs, so follow the exact prep requirements of the builder-gel brand you’re using.
Can you use builder gel immediately after dehydrator?
You can only apply builder gel directly after dehydrator when your product system specifically allows it. Many systems require a primer, bonder, or base layer between those stages, so check the manufacturer’s application instructions first.
Why is my builder gel still lifting after using dehydrator?
Lifting can come from leftover cuticle, touching the prepared nail, incompatible products, under-curing, gel touching the skin, poor application structure, or skipped bonding steps. Dehydrator solves only the surface oil and moisture part of the prep process.
Can I use acetone instead of nail dehydrator?
Acetone can remove oils, but that doesn’t automatically make it an exact substitute for a dedicated dehydrator or pH-bond product. If your builder-gel system specifies a particular prep product, using that recommended product gives you a more predictable routine.
What happens if you use too much nail dehydrator?
More dehydrator doesn’t guarantee stronger adhesion. Apply a thin, controlled coat to the natural nail and keep it away from surrounding skin rather than repeatedly flooding the nail plate.
Final Takeaway: Keep Your Builder Gel Prep Simple
For most builder-gel routines, the correct approach is simple: prepare the natural nail, remove dust, apply a thin layer of dehydrator, let it air-dry, and continue with the bonding products required by your gel system.
The biggest mistake is treating dehydrator as a cure for every retention issue. Long-lasting builder gel depends on the complete prep, application, and curing process working together.
As of 2026, professional gel systems still vary in whether they require separate primer, bonder, or base-gel steps. Check your product instructions whenever you change brands instead of assuming the same sequence applies to every builder gel.
Keep the dehydrator thin, keep uncured gel off your skin, and keep the entire prep system compatible. Those three habits make builder-gel troubleshooting much easier.

