
Animal Nail Designs for Kids: Cute, Easy Ideas Parents Can Actually Recreate

Animal nail art can be playful without being complicated. For kids, the best designs are usually the ones that look charming from a distance, fit comfortably on short nails, and don’t require a steady hand for tiny details. That means simple faces, soft colors, stickers, and accent nails often work better than intricate patterns.
As a nail technician, I always steer families toward designs that match the child’s age, patience, and daily routine. A toddler may do best with one or two animal accents on a short manicure. An older child can usually handle a slightly more detailed look, especially if the design uses decals or press-ons instead of freehand painting.
The goal is not perfection. It’s a manicure that feels fun, looks neat enough to enjoy, and removes easily when the child is ready for a new color.
Quick Picks: The Cutest Animal Nail Designs for Kids
If you want the shortest path to a cute result, these are the easiest options to consider first:
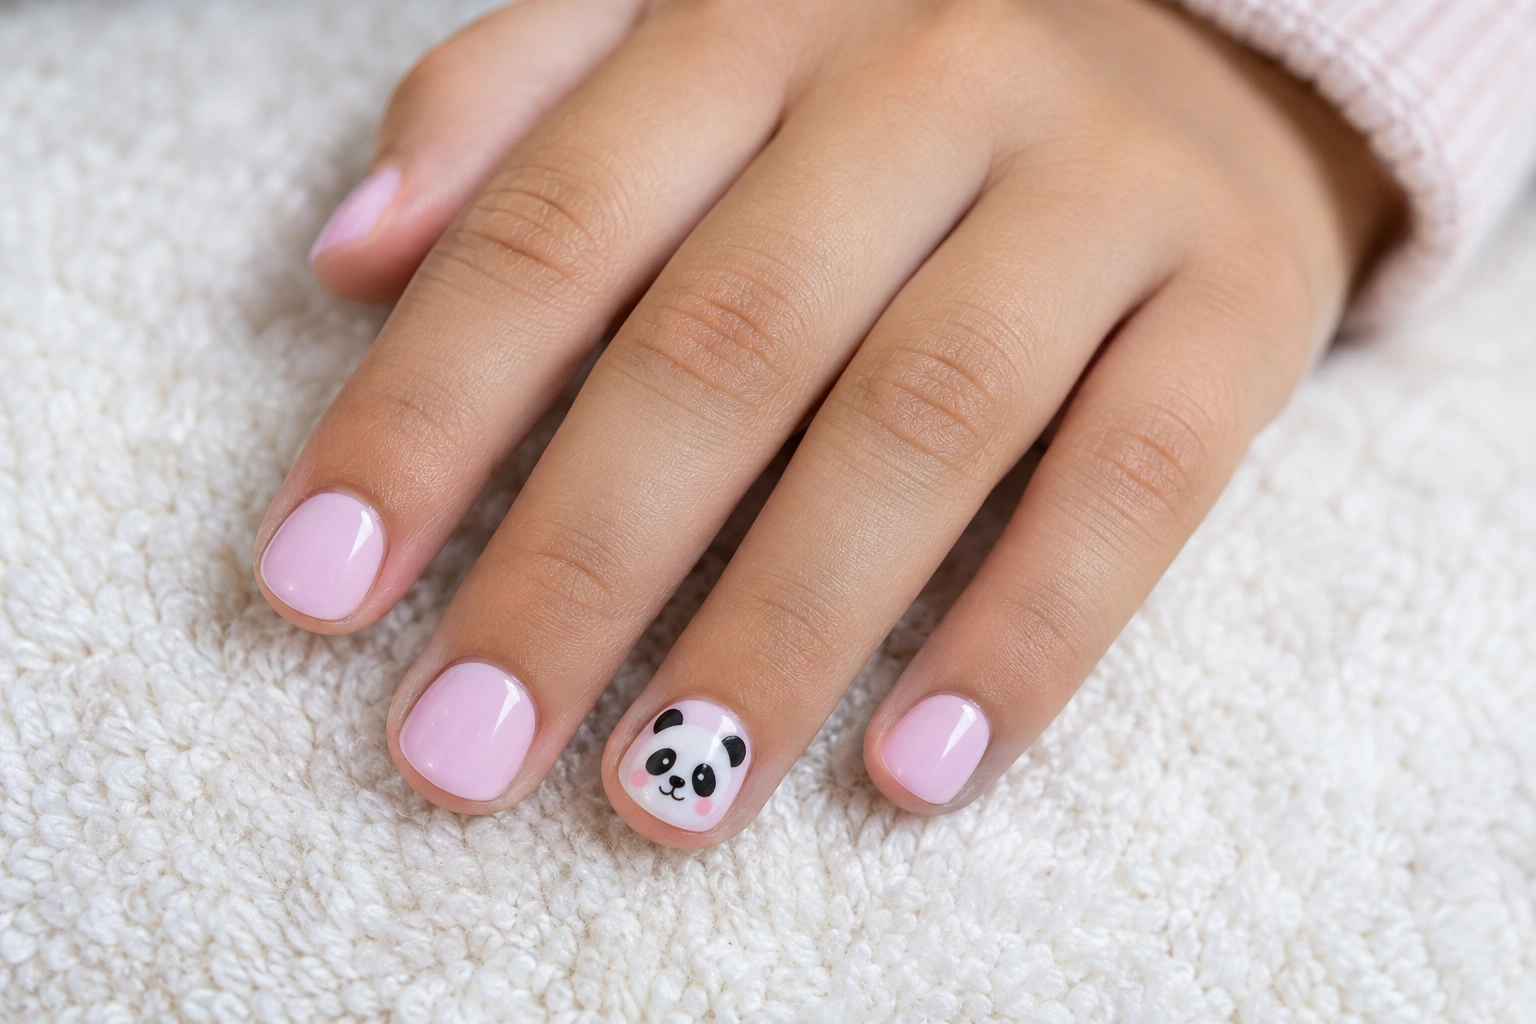
- Panda accent nails: White base, black ears, and two dot eyes. Clean, recognizable, and forgiving on small nails.
- Puppy faces: A beige or cream base with floppy ears and a tiny nose. Great for kids who love dogs.
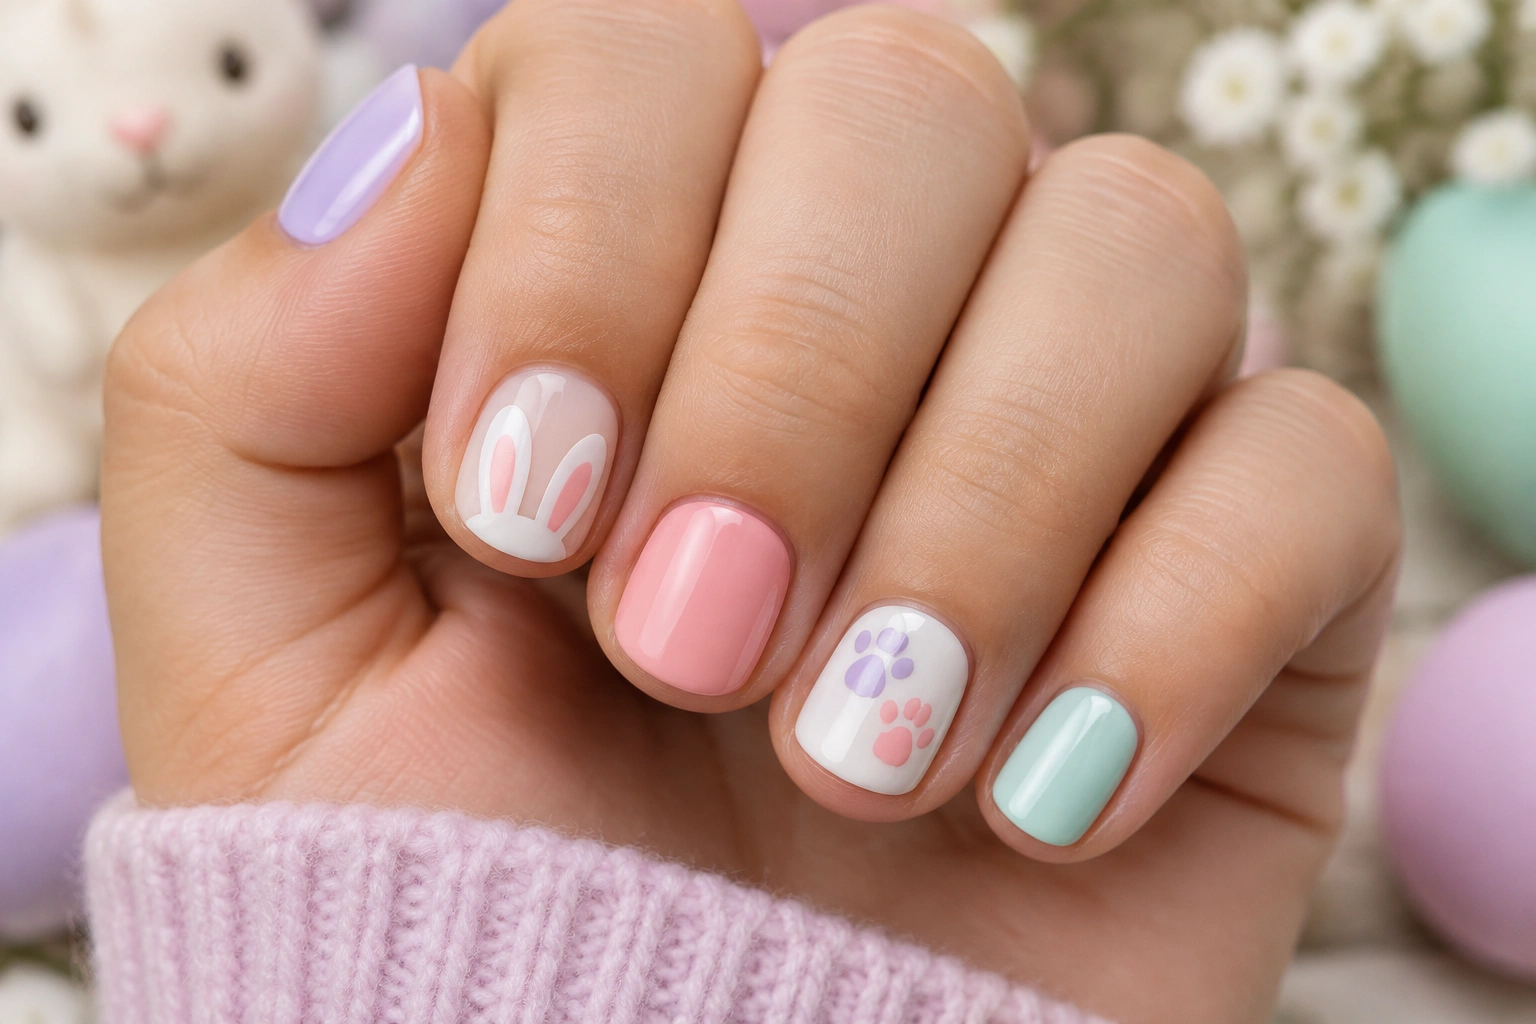
- Bunny ears: Soft pink or pastel nails with simple ear shapes on one or two accent nails.
- Bear paws: A neutral base with tiny paw prints. Easy to paint and less fussy than full bear faces.
- Cat whiskers: A solid pastel manicure with one cat face or whiskered accent nail.
- Animal stickers: Fastest option when you want cute results without brushwork.
For younger children, I’d choose a design that uses one animal face per hand and plain color on the rest. That keeps the manicure readable and reduces the chance of smudging.
How to Choose the Right Animal Design by Age and Skill Level
The easiest way to narrow your choice is to match the design to the child’s age and how much sitting still they can manage.
Toddlers and preschoolers
Choose:
– Large shapes
– Two-color designs
– Stickers instead of hand painting
– Short wear time, like a party or weekend manicure
A toddler manicure might be a pastel pink polish with one panda face on each ring finger. That gives the animal theme without turning the session into a long art project.
Young kids
Choose:
– Simple faces
– Paw prints
– Accent nails
– Water-based polish or stickers if cleanup needs to stay easy
This age group usually enjoys seeing a recognizable animal, but the design still needs to be quick. A set of bunny ears on two nails and a solid lavender polish on the others is a good example.
Older kids
Choose:
– Slightly more detail
– Mixed designs across the hand
– Press-ons if they want a polished look for a party
Older children often enjoy a more themed manicure, such as cat faces on two nails, paw prints on one, and solid color on the rest. That gives variety without making every nail a mini painting.
Easiest Animal Nail Designs to Do at Home
These are the designs I’d recommend first if you’re new to kids’ nail art.
Panda nails
Pandas are one of the easiest animal looks because the design relies on a white base and a few black details. Paint a white oval or full nail, then add two ears and two dot eyes. If the nail is tiny, even just the ears and eyes are enough.
Paw prints
Paw prints are ideal when you want something cute but very simple. A dotting tool or even the tip of a bobby pin can make the pads. Use one accent nail per hand and keep the rest a matching solid color.
Bunny faces
Bunnies work well in soft spring colors. A pale pink or cream base with long ears and a tiny nose creates the look without much detail. This design suits short nails because the ears can be small and still read clearly.
Cat whiskers
A cat manicure can be as simple as a pastel base, two tiny triangular ears, and whiskers. If the child likes minimalist designs, this is a strong choice because it looks cute without needing lots of color changes.
Bear nails
Bear faces and paw prints are dependable kid favorites because the shapes are round and forgiving. Brown, caramel, or soft taupe polish gives the design a cozy look.
Ladybugs and tiny animals
If you want something that feels extra playful, ladybugs and simple cartoon insects can work too. They’re especially nice for younger children because the shapes are bold and easy to recognize.
Most Popular Animal Themes Kids Usually Love
Certain animal ideas tend to work especially well because they are familiar, cheerful, and easy to simplify.
Cats
Cats are popular because you can make the design as minimalist or as expressive as you want. A pair of ears and whiskers can be enough.
Dogs
Dog designs feel friendly and easygoing. Puppy faces, spots, and little noses are all simple enough for home manicures.
Pandas
Pandas are one of the best choices for beginners. The black-and-white palette is easy to manage, and the face can be reduced to a few shapes.
Bunnies
Bunnies are a natural fit for pastel nails. They work especially well for spring birthdays, Easter, or a soft everyday look.
Bears
Bear designs suit neutral or warm colors and tend to look neat even when the artwork is simple.
Farm and safari animals
Cows, giraffes, zebras, and lions can be fun for older kids, but they usually work better as stickers or decals than hand-painted details on very small nails.
Best Tools and Supplies for Kid-Friendly Animal Nail Art
You do not need a full nail art kit to make a child’s manicure look cute. A few basic tools go a long way.
Helpful basics
- Non-toxic nail polish
- Water-based nail polish for easier cleanup
- Clear top coat, if the formula is appropriate for children
- Nail stickers or decals
- Dotting tool
- Fine nail art brush
- Cotton swabs
- Gentle remover
- Small nail file
- Base color polish in soft shades
A dotting tool is especially useful because it helps you make paws, eyes, and noses with less mess than a brush. If you only buy one extra tool, that’s the one I’d pick.
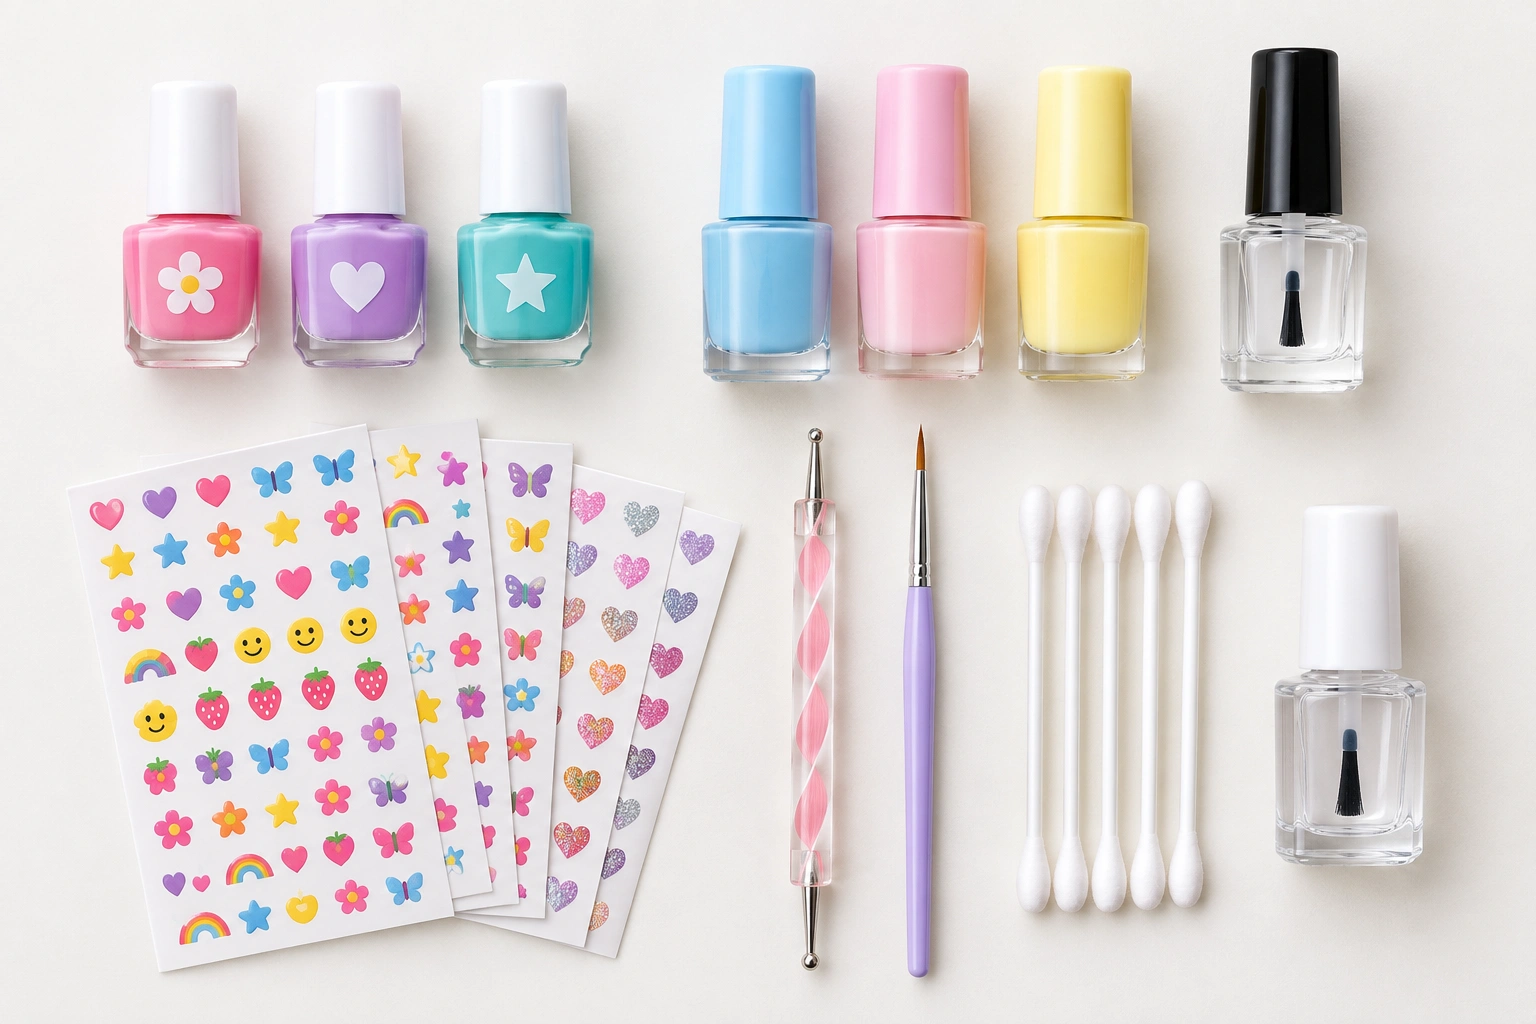
If you’re planning a home manicure for a child who moves around a lot, stickers are often the most practical supply. They cut the application time and reduce the chance of the design getting smeared before it dries.
Simplest possible setup
For a beginner home manicure, the minimum tools are:
– one child-friendly polish
– a small file
– cotton swabs
– a gentle remover
– stickers or a dotting tool if you want one small accent
That’s enough to do a neat, low-stress manicure without building a full kit.
Safe Polish and Product Choices for Children
When you’re doing nails for a child, product choice matters as much as the design. Families often prefer non-toxic nail polish or water-based nail polish because they are generally easier to remove and may be a better fit for a short, supervised manicure.
Water-based polish is usually the most child-friendly option for quick wear. It tends to be easier to remove, but it may not last as long as regular polish. That makes it a good fit for toddlers, preschoolers, and short-term looks like birthdays or weekends.
Regular polish usually lasts longer and can handle more wear, but it generally takes more effort to remove and may be better suited to older kids who can sit still longer and want a manicure that lasts beyond a single day.
A simple way to think about it:
- Water-based polish: easiest removal, shorter wear, best for toddlers and preschoolers
- Regular polish: longer wear, harder removal, better for older kids or special occasions
- Stickers/decals: fastest to apply, easy to refresh, good for very small nails
- Press-ons: most polished look, but best for older kids rather than toddlers
That said, always check the label and follow the manufacturer’s instructions for age guidance and removal. If a product is meant for children, the packaging should make that clear.
A few practical safety points:
– Keep the session short and supervised.
– Use products in a well-ventilated space.
– Avoid tiny decorative pieces for younger children, since small embellishments can be a choking risk.
– Choose formulas that are easy to remove without harsh scraping or strong solvents.
For general nail safety and hygiene guidance, the American Academy of Dermatology’s nail care advice is a useful reference: AAD nail care basics.
DIY vs. Stickers vs. Press-Ons: Which Option Works Best?
Each approach has a different balance of speed, control, and durability.
| Option | Best age fit | Ease of removal | Durability |
|---|---|---|---|
| Water-based polish | Toddlers, preschoolers | Easiest | Shortest wear |
| Regular polish | Older kids | Moderate | Longer wear |
| Stickers/decals | Toddlers through older kids | Usually easy, but residue can vary by product | Short to moderate |
| Press-ons | Older kids only, usually for special occasions | Moderate | Can last well for short-term wear, but not ideal for very young children |
DIY hand-painted designs
Best for:
– Custom looks
– Simple faces and paw prints
– Kids who enjoy the process
Trade-off: You get the most personalized result, but it takes the most patience and steady hands.
Stickers and decals
Best for:
– Busy parents
– Younger kids
– Fast birthday or holiday manicures
Trade-off: They’re much easier than painting, but they may lift sooner if the child uses their hands a lot.
Press-ons
Best for:
– Older kids
– Special events
– Children who want a more finished look
Trade-off: Press-ons can look polished, but they are usually less practical for toddlers and can feel too bulky for very small nails. In practice, they make the most sense for older kids who can keep them on carefully for a party or short outing.
If the manicure needs to last only for a party, stickers are often the sweet spot. If the child wants to help create the design, simple hand-painted animals are more fun.
Simple Tips for Painting Neat Designs on Small Nails
Small nails are easier to manage when you keep the design simple and the polish load light.
Use short nails
Short nails are less likely to chip and easier to paint cleanly. They also give animal faces a better scale, since tiny details can get lost on longer shapes.
Keep the base design minimal
One animal accent nail per hand is usually enough. The rest can be a solid color that matches the theme.
Load the brush lightly
Too much polish causes pooling near the cuticle and makes tiny designs blur. A thin coat is easier to control and dries more evenly.
Let each layer dry fully
This matters more on kids’ nails than many people expect. If the base is still soft, even a small dot eye can drag the color underneath.
Use simple shapes first
Ears, circles, dots, and tiny triangles are more reliable than trying to draw fur texture or detailed faces.
For very tiny nails, nail guides or sticker-based designs can help keep the art neat. If you want the cleanest result with the least fuss, choose one small sticker per nail or limit the artwork to a single accent nail.
For a school-friendly manicure, try soft blue nails with one bunny face on each ring finger. It looks cute without being too busy.
How to Make Kids’ Animal Nail Designs Last Longer
Kids are active, so durability comes down to smart choices rather than trying to make the manicure indestructible.
Pick designs that chip less easily
Solid color with one accent nail usually lasts better than a full set of detailed art. Large shapes also hold up better than tiny linework.
Seal the edges
If the product is child-safe and the formula allows it, a clear top coat can help protect the design. Focus on the free edge of the nail, where chips often begin.
Keep hands dry right after application
Water and friction are the fastest ways to ruin fresh nail art. Plan a short quiet window after painting so the child can avoid rough play.
Favor stickers for short wear
If the manicure is only meant to last a day or two, stickers can be a smart choice because they’re quick and easy to refresh.
Match the design to the occasion
A birthday manicure can be more decorative. An everyday manicure should be simpler and easier to remove.
For a concrete long-wear choice, I’d use this rule of thumb:
– Party-only: stickers or press-ons for older kids
– Weekend wear: simple regular polish with one or two accents
– Everyday wear: water-based polish or a very simple sticker design
If you want a longer-lasting weekend design, try bear faces on accent nails with a matching neutral polish on the rest. It looks intentional even as it wears.
Easy Removal and Cleanup Without Harsh Chemicals
Removal should be gentle, especially for children. You want the manicure to come off cleanly without turning into a battle.
For water-based or child-friendly formulas, follow the product’s instructions first. Some can be peeled or washed off more easily than regular polish. For other formulas, use a child-appropriate remover and avoid aggressive scrubbing.
A few cleanup habits help:
– Use cotton swabs to clean the edges while the polish is still fresh.
– Keep remover off the skin as much as possible.
– Work slowly instead of trying to erase everything at once.
– Stop if the child’s skin becomes irritated.
If you’re using stickers, peel them gently and remove any leftover adhesive with the recommended product rather than picking at the nail surface.
When to See a Nail Technician or Dermatologist
A nail technician can help if you want a neater result for a special occasion, especially when the child wants a more detailed animal theme and you’d rather not handle it at home. For toddlers and preschoolers, a home manicure is usually the more practical choice because it’s quicker, simpler, and easier to stop if the child gets restless. For older kids, a salon visit can make sense if they want a more polished look or a design that’s harder to recreate at home.
A dermatologist is the right choice if you notice persistent nail pain, swelling, significant discoloration, or signs of infection. Decorative nail art should never be used to cover a concern that needs medical attention.
FAQ: Animal Nail Designs for Kids
What are the easiest animal nail designs for kids?
Pandas, paw prints, bunnies, and simple cat faces are usually the easiest because they rely on dots, ears, and basic shapes.
Are stickers better than hand-painted designs for children?
For many kids, yes. Stickers are faster, less messy, and often easier to remove, though removal can vary by product and some decals may leave residue.
Can toddlers wear animal nail art?
Yes, if the design is age-appropriate and done safely. For toddlers, I’d keep it very simple: short nails, soft colors, and one or two animal accents.
What colors work best for kids’ animal nails?
Soft pink, cream, beige, lavender, pale blue, and mint are easy to pair with animal themes. Neutral colors also make the design look cleaner on small nails.
How long do kids’ animal nail designs usually last?
That depends on the product and how active the child is. Short-term designs for parties may only need to last a day or two, while a simple polished manicure can hold up longer if it’s protected and kept dry.
What’s the safest option for a child’s manicure?
Look for non-toxic or water-based formulas, follow age guidance on the label, and keep the manicure supervised. For very young children, stickers or washable polish are often the simplest choices.
Should I do animal nail designs at home or at a salon?
At home works well for simple looks and quick cleanup. A salon or nail technician makes more sense if you want a polished finish for a special event or need help with a more detailed design.
Can boys wear animal nail designs too?
Absolutely. Animal nail art is for anyone who enjoys it. The best design is the one the child likes, whether that’s a dog face, panda accent, or a simple paw print.

