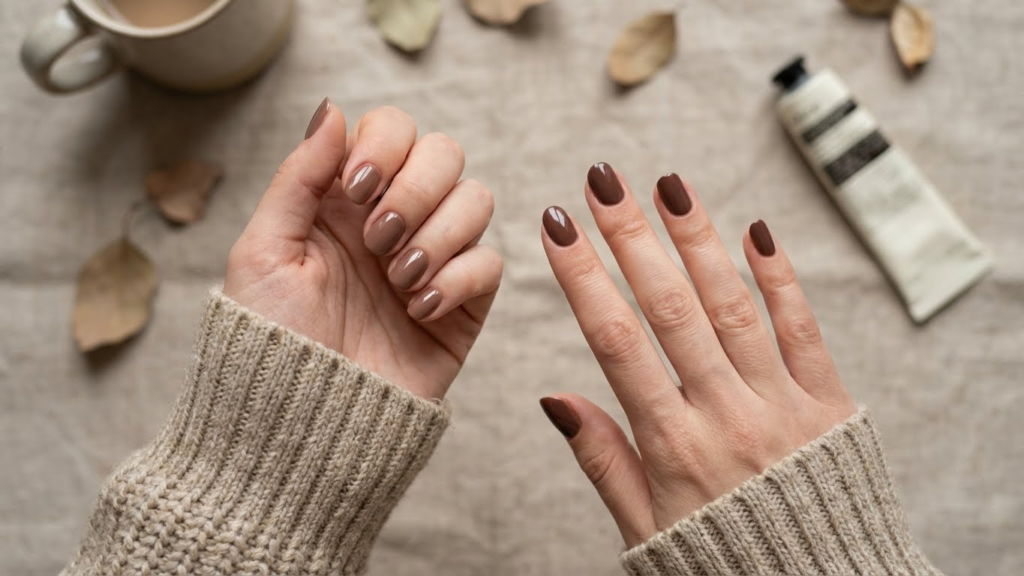
You’ve probably seen both mocha and cocoa nail shades and wondered which one suits you best. We—Ella Hart and the team—break it down simply: mocha leans warmer and coffee‑like with creamy, caramel undertones, while cocoa sits deeper and richer like dark chocolate. Mocha feels soft and warm on your hands; cocoa reads darker and more chocolatey.
Knowing this helps you pick a shade that matches your skin tone, outfit, and the vibe you want—soft and cozy or bold and luxe. Keep reading to learn how application, nail shape, and finish make each shade pop and which one will work best for your style.
Key Takeaways
- Mocha has warm, coffee-inspired undertones that give a soft, creamy look.
- Cocoa is a deeper, richer brown that reads more chocolatey and bold.
- Shade choice and finish affect how the color suits your skin and style.
Mocha Nails Overview
Mocha nails use warm, coffee-inspired browns with creamy or slightly reddish undertones. You’ll find colors that read cozy but still polish up for work or nights out.
Definition of Mocha Nails
Mocha nails refer to manicures colored or styled to mimic the look of a mocha beverage. Think of a mix between espresso brown and warm cream. The shade leans warmer than neutral brown and often has slight red or caramel hints.
You’ll see both solid polish and nail art labeled “mocha.” That includes creams, glossy gels, and matte finishes. The term also covers variations like mocha mousse or mocha ombré that blend multiple warm tones.
Typical Color Tones in Mocha Nails
Mocha tones range from medium warm brown to deep coffee brown. Common undertones include caramel, warm red, and muted orange rather than cool or grayish browns.
You might spot colors described as:
- Light mocha: creamy tan with warm beige.
- Classic mocha: medium brown with caramel hints.
- Deep mocha: rich espresso brown with a warm red base.
Pick a shade based on your skin tone and outfit needs. Warmer undertones usually flatter medium to dark skin, while lighter mocha shades suit lighter skin tones.
Popular Mocha Nail Designs
Mocha nails appear in simple and detailed styles. Solid glossy or matte mocha is a go-to for a clean, professional look.
Trendy options include:
- Ombré: light to dark mocha gradient on each nail.
- French twist: mocha tips with nude bases.
- Accent nail: one mocha nail with gold foil or thin lines.
- Textured mousse: velvety matte finish for depth.
You can pair mocha with cream, white, or muted metallics for contrast. Use almond or coffin shapes to enhance the warm, elegant vibe.
Cocoa Nails Overview
Cocoa nails use deep, warm brown tones with softer, earthy undertones. You’ll learn what cocoa nails mean, how the color looks on different skin tones, and the popular styles you can try.
Definition of Cocoa Nails
Cocoa nails refer to manicures colored in shades that mimic natural cocoa powder and dark chocolate. The color sits between true brown and muted coffee tones, often with low shine and a slightly matte look.
Cocoa shades can lean warmer or cooler depending on the polish formula. Pigments may include red-brown, neutral brown, or a faint gray to tone down brightness. Professional nail techs and polish brands label these shades as “cocoa,” “chocolate,” or “deep brown,” so check swatches before you buy.
For product safety and care, consult the FDA’s cosmetic guidelines and choose reputable nail brands to avoid irritants. A trusted source for shade trends and swatches is the Pantone Color Institute, which influences many seasonal palettes.
Common Color Characteristics of Cocoa Nails
Cocoa nails usually show medium-dark brown with muted warmth rather than bright amber. Expect pigments that read as rich but not glossy; many formulas aim for a velvety finish.
On warm skin tones, cocoa often appears more reddish-brown. On cool skin tones, it can read as a neutral brown with subtle gray. Nail length and finish change perception: short nails make the color look denser, while a glossy topcoat can bring out red undertones.
When choosing a cocoa polish, compare swatches under natural light. Look for codes or photos from brand pages to match your undertone. Brands that publish shade names and high-quality swatches help you predict the final look.
Trending Cocoa Nail Styles
Cocoa nails work well as a base for minimalist and decorative designs. Popular options include simple solid cocoa with a satin finish, cocoa French tips paired with nude bases, and geometric accents in cream or gold.
Texture trends include matte cocoa with glossy tips, subtle marbling with beige veins, and thin metallic lines using copper or bronze. Seasonal twists add warm glitter for winter or muted florals for fall. Many nail artists use cocoa as a neutral canvas for small motifs like dots, negative space, or tiny gold foils.
If you want inspo and step-by-step looks, check nail trend galleries on InStyle or Vogue for styling photos and ideas.
Key Differences Between Mocha and Cocoa Nails
Mocha and cocoa nails differ mainly in hue, depth, and how they read under different lights. You’ll notice mocha leans warmer and creamier, while cocoa sits richer and more chocolate-like. These traits shape finish choices, seasonal use, and who prefers each shade.
Color Palette Comparison
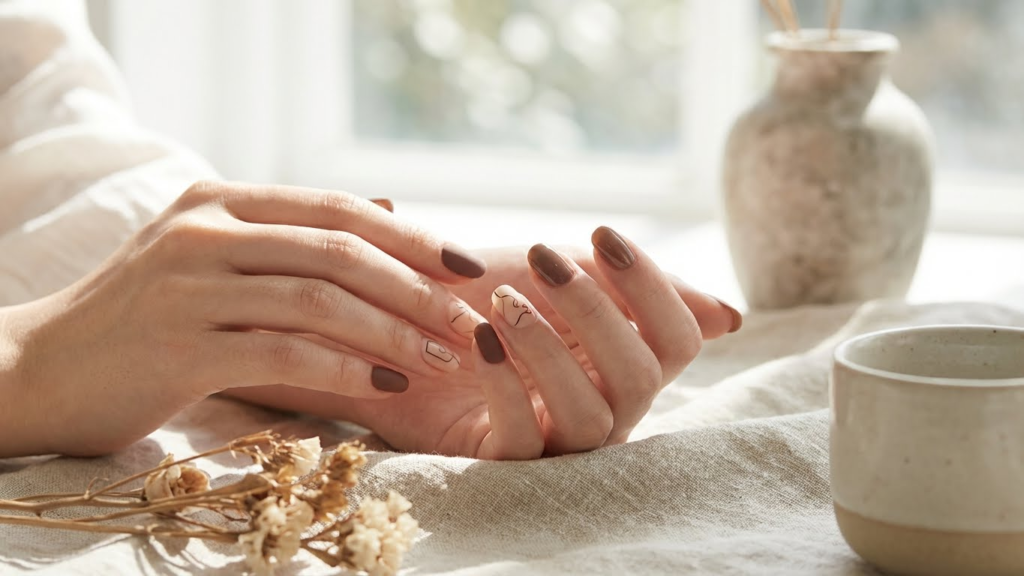
Mocha nails show warm, coffee-and-cream tones. Expect light to medium brown with subtle beige or latte undertones. On your nails, mocha often reads as a soft, muted brown that brightens skin with warm undertones.
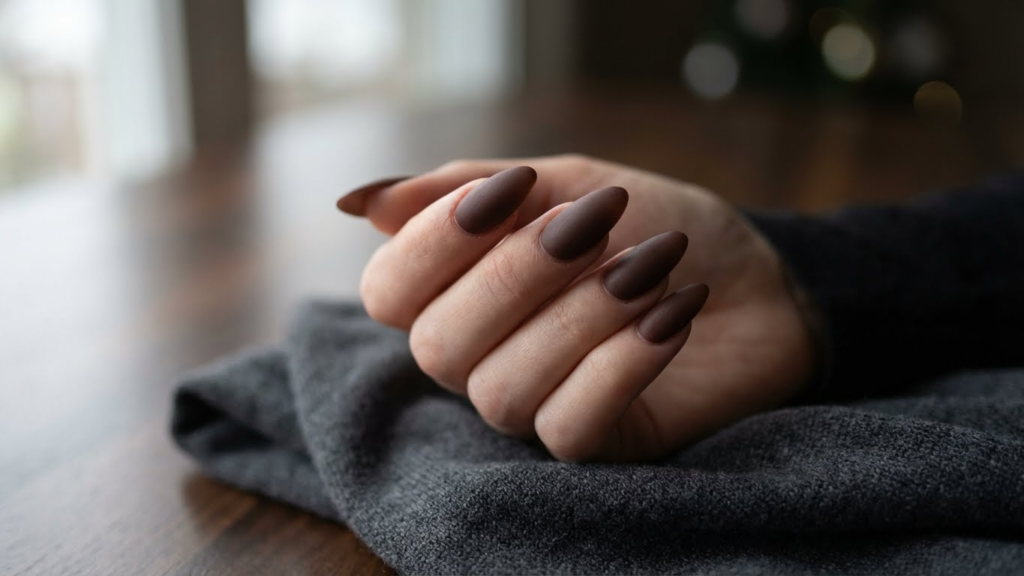
Cocoa nails present deeper, true chocolate browns. They range from medium-deep to almost-dark brown with red or milk-chocolate warmth. On darker skin tones cocoa can look near-black, so test a swatch before committing.
If you want contrast, choose cocoa for bold, rich color. Pick mocha when you want a softer, neutral look that pairs well with nude and beige outfits.
Finish and Texture Differences
Mocha works well in glossy or satin finishes. Gloss highlights its creaminess and keeps the shade lively. Matte mocha brings a modern, understated look without losing warmth.
Cocoa benefits from high-gloss and shimmer finishes. Gloss makes cocoa appear richer and more lustrous. Shimmer or metallics add depth and reflect light, which prevents cocoa from looking flat on longer nails.
For texture, mocha supports simple designs like negative space or soft French tips. Cocoa supports bolder textures—glitter accents, marbling, or chrome tips—to emphasize its depth.
Seasonal Versatility
Mocha fits spring through fall. Its warm, lighter tone pairs with warmer weather wardrobes and neutral spring palettes. You can wear mocha year-round if you prefer a soft, everyday brown.
Cocoa suits fall and winter best. Its deeper, richer tone matches heavy fabrics and darker seasonal colors. Cocoa reads as cozy and elegant in colder months and at evening events.
If you travel between climates, pack both. Choose mocha for daytime and warmer settings; bring cocoa for nights or cooler seasons.
Target Audience Preferences
If you like subtle, office-friendly colors, you’ll probably prefer mocha. It flatters a range of skin tones and reads as professional and polished. People new to brown nails often start with mocha because it’s forgiving and low-contrast.
If you prefer statement nails and richer hues, cocoa will appeal to you. It’s popular with people who want high contrast, dramatic looks, or deep tones that pair with bold makeup and evening wear.
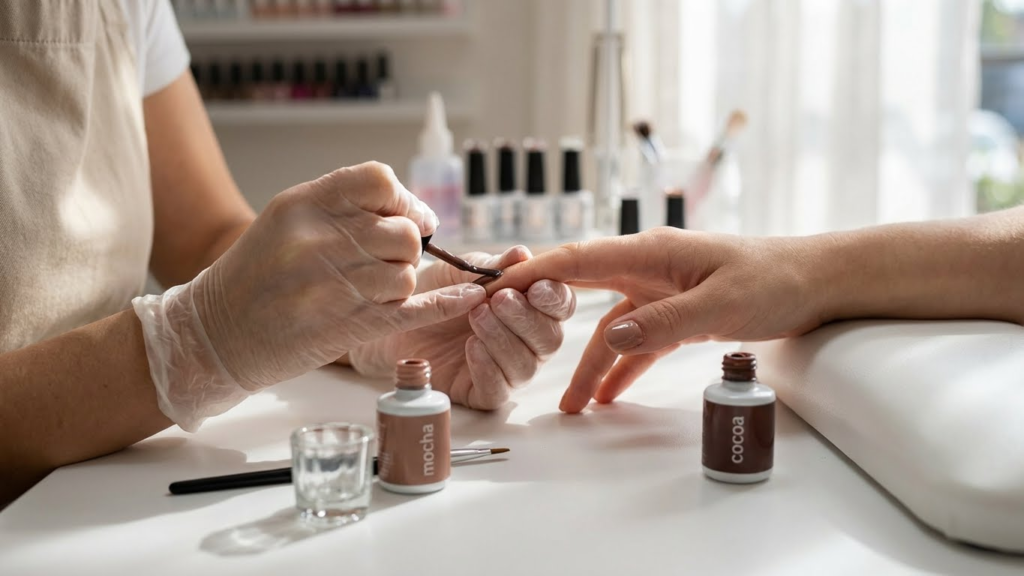
For salon requests, ask for “mocha” when you want coffee-beige warmth and “cocoa” when you want true chocolate depth. Always swatch on your nail or request a test strip to see the final look on your skin.
Mocha vs. Cocoa: Application Techniques
Mocha nails lean toward warm coffee-brown tones with creamy highlights, while cocoa nails sit deeper and more chocolatey. You will focus on base choice, how you layer colors, and blending to get smooth ombrés or marbled effects.
Recommended Base Colors
For mocha nails, pick a warm tan or light caramel base. Use shades like beige #D6B19A or latte beige; these make espresso or caramel accents pop. Apply two thin coats and cure if using gel to keep the base even.
For cocoa nails, choose rich mid-to-dark browns such as milk chocolate #7B4F35 or deep cocoa #4B2E20. A neutral base like taupe can work if you want less contrast. Use an opaque first coat, then a second thin coat for full coverage.
If you mix finishes, start with a satin base and add glossy accents. Use high-quality pigments to avoid streaks; brands and shade guidance are available at the American Academy of Dermatology for safe nail products and pigment notes (https://www.aad.org).
Layering and Blending Methods
For smooth ombré, apply the lightest shade at the nail base and a darker shade at the tip. Use a small makeup sponge to dab where the colors meet, then gently buff the seam with a clean brush. Cure between thin layers if you use gel to avoid lifting.
For marbling, drop two contrasting colors onto the nail, swirl with a dotting tool, and drag once toward the center. Work quickly on each nail to keep lines defined. Clean the brush in acetone between nails to prevent muddying.
To add dimension, finish with a thin translucent shimmer or topcoat on select nails. Seal with a high-gloss or matte topcoat depending on the look you want. For technique videos and step-by-step visuals, check professional tutorials like those on the Nailpro learning center (https://www.nailpro.com).
Choosing the Right Nail Style for You
Pick a shade and shape that fits your skin tone, daily activities, and wardrobe. Small changes—like a warmer brown or a squoval tip—can make your hands look longer or more even.
Skin Tone Suitability
Choose mocha if your skin has warm or neutral undertones; its creamy, coffee-brown hues lift warm complexions without looking harsh. Cooler or very fair skin tones can wear mocha too, but pick a lighter, milk-coffee tint so the color doesn’t overwhelm your skin.
Cocoa leans deeper and richer, so it works well on medium to deep skin tones. On lighter skin, go for cocoa with a slight red or taupe base to avoid a washed-out look. If you want contrast, use cocoa as an accent nail or in glossy finishes to prevent the shade from appearing flat.
Try the shade next to your wrist in natural light. If it brightens your skin, keep it. If it makes your skin look dull, pick a warmer or lighter variant.
Occasion-Based Recommendations
For work or interviews, choose neutral mocha shades with a satin or cream finish. They look professional and hide small chips. Keep nails short to medium and opt for squoval or oval shapes for conservative settings.
For nights out or formal events, select a deep cocoa with glossy or metallic accents. Add one glitter or chrome accent nail on the ring finger for a subtle statement. Almond or stiletto shapes add drama, while still fitting with evening wear.
For weekends and casual looks, mix mocha and cocoa in an ombré or block design. Matte mocha is low-key and practical for everyday wear. Keep length practical if you type or handle small items often.
Style Pairing Ideas
Pair mocha with warm neutrals like camel, cream, and terracotta for a coordinated look. Use thin gold striping tape or a gold dot accent to add warmth without overpowering the brown base. Textures like suede or matte topcoat make mocha feel cozy and modern.
Cocoa pairs well with black, deep greens, and burgundy for a moody palette. Try a glossy cocoa base with a single matte black geometric nail for an edgy contrast. You can also add tiny white or nude speckles to break up the darkness.
If you want subtle variety, mix finishes: glossy cocoa on most nails and matte mocha on the thumb and pinky. Or alternate short squoval mocha nails with one long almond cocoa nail for a fashionable, asymmetrical look.
Current Trends in Mocha and Cocoa Nails
You’ll see mocha and cocoa nails everywhere this season, from minimalist salons to high-fashion runways. Mocha leans warm and soft, while cocoa can read richer and deeper, and both fit many styles.
Neutral mani looks rule right now. Think single-color glossy nails, muted matte finishes, and gentle gradients that move from light latte to dark chocolate. These looks pair well with casual outfits and formal wear.
Negative-space designs stay popular. You can wear clean cutouts, thin lines, or minimalist French tips that leave parts of the nail bare. These add a modern edge without overpowering the neutral base.
Texture and accents are trending. Try glossy topcoats, soft matte finishes, or a single metallic or gold foil accent on one nail. Tiny pearls or minimalist gems add polish without looking flashy.
Short to almond shapes dominate. You’ll find rounded squares and almond tips most common, because they flatter the hand and work with layered nail art. Longer, sculpted tips appear more in editorial looks.
Color combos you’ll like include:
- Mocha + cream for a soft contrast.
- Cocoa + deep brown or black for depth.
- Mocha + gold for a warm, luxe touch.
You can copy these trends at home or ask your nail tech to customize shades and finishes to match your skin tone and style.
Care and Maintenance for Brown-Toned Nails
Keep your nails clean and dry before you paint. Apply a base coat to protect the nail plate and improve polish adhesion.
Top coats extend shine and prevent chips. Reapply a thin top coat every 2–3 days if you want a longer-lasting finish.
Moisturize your cuticles daily. Use cuticle oil or a light cream to prevent dryness and keep the skin around your nails healthy.
Avoid harsh chemicals that strip color. Wear gloves for cleaning and use gentle, acetone-free removers when changing polish.
Store brown polishes upright in a cool, dark place. This keeps formulas from thickening and preserves true color.
Quick checklist for lasting manicures:
- Base coat: yes
- Top coat: every few days
- Cuticle care: daily
- Gloves for chores: always
- Gentle remover: preferred
If polish thickens, add a few drops of nail polish thinner. Do not use nail polish remover as a thinner; it can ruin the formula.
For professional-looking results, file in one direction and buff gently. Avoid aggressive filing that can weaken nails and shorten polish life.
Summary of Mocha and Cocoa Nail Differences
You can tell mocha and cocoa apart by their undertones and brightness. Mocha leans warm with coffee-like beige or light brown tones, while cocoa is deeper and richer with chocolate or reddish-brown hints.
Texture and finish affect how each shade reads on your nails. Mocha often looks softer and more muted in matte or creamy finishes. Cocoa stands out more in glossy or shimmer finishes because its depth shows through stronger.
Think about skin tone and occasion when you choose. Mocha suits neutral, minimalist looks and works well for daytime or office settings. Cocoa gives a bolder, more classic impression and fits evening wear or statement manicures.
Simple design choices can change how each color feels. Pair mocha with nude, cream, or soft white for a latte-inspired, subtle palette. Pair cocoa with gold, deep reds, or black for contrast and a richer vibe.
Quick comparison table
- Mocha: warm, light-to-medium brown; soft, muted; casual and elegant.
- Cocoa: dark, medium-to-deep brown; rich, bold; classic and dramatic.
You can also mix them. Ombre or marble blends let you use mocha’s softness and cocoa’s depth together for balanced, stylish nails.
FAQs
What defines mocha vs. cocoa nail colors?
Mocha nails have warm, coffee-like undertones with a mix of brown and slight beige or caramel. Cocoa nails lean richer and darker, closer to pure chocolate brown.
Which shade suits my skin tone best?
If you have warm or olive skin, mocha’s creamy warmth often flatters you. Cocoa works well on deeper skin tones and creates a bold, polished look on lighter skin.
Can I use the shades together in one manicure?
Yes. You can combine mocha and cocoa in ombré, French tips, or accent nails for contrast. Mixing them creates depth without clashing.
Are mocha and cocoa good for every season?
Both colors work year-round. Mocha feels cozy in fall and winter, while cocoa gives a classic, elegant look any time of year.
How do I ask for these colors at the salon?
Show a photo or describe the tone: ask for “mocha” for a warm, coffee-inspired brown or “cocoa/chocolate brown” for a deeper, richer shade. Mention matte or glossy finish if you have a preference.
Do these shades hide chips or grow-out better?
Darker cocoa can hide small chips better. Mocha hides grow-out slightly more because it’s closer to natural nail and skin tones.
Can you match polish to outfits or makeup?
Yes. Use mocha for softer, neutral palettes and cocoa for stronger contrasts with golds, blacks, or jewel tones.
Conclusion
You can choose mocha when you want warm, coffee-toned nails with soft, golden or caramel undertones. Mocha reads cozy and slightly lighter, so it pairs well with neutral outfits and subtle nail art.
Pick cocoa if you prefer deeper, richer brown with more chocolate intensity. Cocoa tends to look more dramatic and polished, and it suits bold accents like gold or glossy finishes.
Consider skin tone and style: mocha flatters fair to medium skin with warm undertones, while cocoa stands out on medium to dark skin and gives a striking contrast. You can mix both shades in ombré or accent nails for a modern, layered look.
Quick comparison:
- Mocha: warm, lighter, coffee-inspired.
- Cocoa: darker, richer, chocolate-inspired.
- Use both: try gradients, marble, or alternating nails.
Your choice depends on mood and occasion. Keep formulas and finishes in mind — matte softens both shades, while glossy or metallic details make them pop.