
DIY Nail Dehydrator: Safe At-Home Options for Better Nail Prep

If your gel polish, press-ons, acrylics, or nail tips keep lifting sooner than expected, the problem may start before the color or glue ever touches your nails. Natural nails hold small amounts of oil and moisture, and that surface residue can make it harder for nail products to stick.
A DIY nail dehydrator can help remove some of that temporary surface oil before a manicure. However, homemade nail prep needs to be simple and cautious. Mixing random household chemicals or repeatedly stripping the nail plate can leave your nails and surrounding skin dry, irritated, or damaged.
This guide explains what nail dehydrator actually does, which at-home alternatives are reasonable, what ingredients to avoid, how to prepare your nails step by step, and when buying a purpose-made dehydrator is the smarter choice.
Quick Answer
A DIY nail dehydrator is a simple nail-prep method used to temporarily remove surface oil and moisture before gel, acrylic, press-ons, or nail glue. For home use, high-percentage isopropyl alcohol on a lint-free wipe is one of the simplest options. Avoid complicated chemical mixtures, skin contact, and excessive use.
What Does a Nail Dehydrator Actually Do?
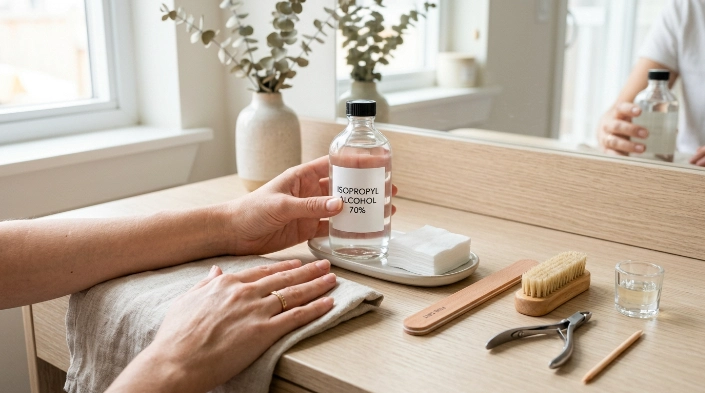
A nail dehydrator prepares the natural nail plate before you apply an enhancement, adhesive, gel system, or sometimes regular polish.
Its main purpose is to temporarily remove:
- Surface oil
- Moisture
- Lotion residue
- Dust left from filing
- Other residue that could interfere with adhesion
After dehydration, the nail often looks slightly matte or chalky rather than shiny.
This step does not permanently dry out the nail, nor should it aggressively etch or thin the nail plate. The effect is temporary because your nails and surrounding skin naturally come into contact with moisture and oils again.
Dehydrator is also different from primer.
Dehydrator cleans and dries the surface. Primer is designed to improve bonding between the natural nail and a particular enhancement system.
Some manicures use both products, while others require only one. Always follow the instructions for the gel, acrylic, press-on adhesive, or nail system you are using.
The Simplest DIY Nail Dehydrator Option
For most beginners, the goal should not be to create a complicated salon chemical formula at home.
A simpler approach is using high-percentage isopropyl alcohol on a lint-free nail wipe.
What You Need
- 90% or higher isopropyl alcohol
- Lint-free nail wipes
- A clean nail file if shaping is needed
- Clean, completely dry hands
Lower-concentration rubbing alcohol contains more water, so a higher concentration generally makes more sense when your goal is removing surface oil and allowing the nail to dry quickly.
How to Use It
- Wash your hands and nails.
- Dry them thoroughly.
- Shape the nails if needed.
- Remove filing dust.
- Put a small amount of isopropyl alcohol on a lint-free wipe.
- Wipe each nail plate from the cuticle area toward the free edge.
- Avoid saturating the surrounding skin.
- Let the nail air-dry completely.
- Continue immediately with the next prep step recommended by your nail system.
Do not touch the nail surface with your fingertips afterward. Your fingers can transfer oil back onto the freshly cleaned nail plate.
Important: Isopropyl alcohol is flammable. Keep it away from flames, cigarettes, heaters, sparks, and other ignition sources, and use it with good ventilation.
Can You Use Acetone as a Nail Dehydrator?
Acetone can remove oil and residue from the nail surface, which is why some DIY manicure routines use a quick acetone wipe during prep.
However, acetone is better known as a nail-product remover, and it can be very drying to the surrounding skin. Repeated or excessive exposure may leave the nail and skin feeling dry.
If you use it during prep, use only a small amount on the nail plate rather than soaking the fingertips.
The American Academy of Dermatology notes that acetone exposure during gel removal can be drying and recommends moisturizing nails and cuticles between manicures. American Academy of Dermatology guidance on gel manicures
For a routine DIY manicure, alcohol alone is often simpler than experimenting with combinations of several solvents.
Should You Mix Alcohol and Acetone?
You may see homemade nail dehydrator recipes online that combine acetone with isopropyl alcohol.
For a beginner, there is usually no reason to start mixing solvents at home.
Both products are volatile and flammable, and stronger is not automatically better for your nails. You also need to consider ventilation, storage, skin sensitivity, and the instructions for the nail products you plan to apply afterward.
A professionally formulated nail dehydrator has the advantage of being packaged, labeled, and designed for a specific cosmetic purpose.
The FDA recommends reading nail-product labels carefully, following warnings and directions, using nail products with adequate ventilation, and avoiding unsafe exposure to the eyes or skin. FDA nail care product safety guidance
For most at-home users, keeping the DIY method simple is the better choice.
DIY Nail Dehydrator Options Compared
| Nail Prep Option | Main Benefit | Limitations | Best For |
|---|---|---|---|
| 90%+ isopropyl alcohol | Removes oil and dries quickly | Can dry or irritate skin | Simple at-home prep |
| Acetone wipe | Strong degreasing action | More drying to skin and nails | Occasional nail-surface cleanup |
| Commercial nail dehydrator | Designed specifically for nail prep | Costs more than household alcohol | Gel, acrylic, dip, and frequent manicures |
| Soap and water only | Removes general dirt | Does not provide the same degreasing effect | Basic cleaning before prep |
| Hand sanitizer | Convenient | Often contains moisturizers or additives | Not recommended as a dehydrator |
A commercial dehydrator is usually inexpensive per manicure because only a very thin application is needed.
That makes DIY options useful when you are in a pinch, but not necessarily better simply because they are homemade.
How to Prep Your Nails Before Using a DIY Dehydrator
Your dehydrator cannot compensate for poor nail preparation.
A few careful prep steps often matter more than applying extra chemicals.
1. Start With Clean Nails
Remove old polish, glue, or enhancement residue completely.
Wash your hands and make sure there is no lotion, cuticle oil, sunscreen, or hand cream on the nail plate.
Then dry your hands thoroughly.
2. Shape the Nails Gently
Use a clean nail file to shape the free edge.
Avoid aggressively sawing the natural nail or removing unnecessary layers from the nail plate. The American Academy of Dermatology recommends keeping nail edges smooth and notes that filing in the same direction can help avoid unnecessary weakening. AAD guidance for trimming and filing nails
3. Be Careful Around the Cuticles
Do not aggressively cut, scrape, or dig into living skin around the nail.
The cuticle area helps protect the space between the nail and skin. Damage can create an opening for irritation or infection.
If there is obvious dead tissue stuck to the nail plate, work gently and stop if you experience pain, bleeding, or tenderness.
4. Remove Dust
Use a clean, dry nail brush or lint-free wipe to remove filing dust.
Dust trapped beneath gel, glue, or enhancements can affect the finish and adhesion.
5. Apply Your Dehydrating Step
Wipe each nail lightly with your chosen nail-prep product.
Use enough to cover the nail without flooding the sidewalls or surrounding skin.
Allow it to evaporate completely.
6. Avoid Touching the Nail
Once your nails have been cleaned and dehydrated, avoid touching your hair, phone, face, clothing, or fingertips to the nail plate.
The goal is to keep the prepared surface clean until you apply your primer, base coat, adhesive, or enhancement.
Expert Tip: Prep one hand completely before reaching for your nail product, and keep a clean lint-free wipe nearby. Accidentally touching a prepped nail is common; simply clean that nail again instead of applying more and more dehydrator.
DIY Nail Dehydrator for Gel Nails
Gel manicures depend heavily on correct product application and curing, so dehydration is only one part of the process.
A basic order may look like:
- Clean and dry nails.
- Shape gently.
- Remove surface debris.
- Apply your dehydrating step.
- Apply primer if your gel system requires it.
- Apply the recommended base coat.
- Cure according to the manufacturer’s directions.
- Continue with color and top coat.
Do not assume that extra filing or repeated dehydration will fix lifting.
Lifting can also happen because of product touching the skin, incorrect curing, incompatible products, thick application, poor edge sealing, or nail flexibility.
DIY Nail Dehydrator for Press-On Nails
Press-ons often benefit from an oil-free nail surface because glue and adhesive tabs need clean contact with the natural nail.
Before applying press-ons:
- Wash and completely dry your hands.
- Size every press-on before applying glue.
- Shape the natural nail if necessary.
- Remove dust.
- Wipe the natural nail with alcohol.
- Let it dry.
- Avoid touching the prepared surface.
- Apply your adhesive according to its directions.
Do not aggressively buff your natural nail every time you change press-ons. Repeatedly removing layers from the nail plate can leave nails thin and sensitive.
DIY Nail Dehydrator for Acrylic or Dip Nails
Acrylic and dip systems may use a combination of dehydrator, primer, base liquids, bonding products, or activators.
This is one situation where buying products intended for your specific system may make more sense than improvising.
Some professional nail primers contain ingredients that require careful handling. The FDA specifically discusses methacrylic acid in certain nail primers and notes the potential for poisoning and injury when these products are misused. FDA information about nail primers and other nail products
Do not attempt to make your own primer from professional nail chemicals.
DIY dehydration and DIY primer are not the same thing.
Ingredients You Should Not Use as a DIY Nail Dehydrator
Not every product that feels drying or cleansing belongs on a nail before an enhancement.
Hand Sanitizer
Many hand sanitizers contain moisturizers, fragrance, thickeners, aloe, or other additives.
These can leave residue behind, which defeats the purpose of nail dehydration.
Vinegar
Vinegar may appear in home beauty recipes, but it is not necessary for standard nail dehydration and may irritate sensitive or damaged skin.
Lemon Juice
Lemon juice is acidic and can sting broken skin. It also adds unnecessary moisture during a step intended to leave the nail clean and dry.
Essential Oils
Oil is exactly what you are trying to remove before many nail applications.
Save cuticle oils for after appropriate manicure steps or for your regular nail-care routine—not immediately before applying products that need an oil-free surface.
Hydrogen Peroxide
Hydrogen peroxide is not a substitute for properly formulated nail dehydrator. Using extra household chemicals does not automatically make nail prep cleaner or safer.
Homemade Professional-Strength Primers
Avoid experimenting with acids, methacrylates, or other professional nail chemicals.
Commercial products should be used only according to their labels.
OSHA notes that nail products may expose users and workers to chemicals through vapors, skin contact, or accidental exposure, and ventilation is an important part of reducing unnecessary exposure. OSHA guidance on chemical hazards in nail products
Safety Considerations for Sensitive Skin and Nails
A dehydrator belongs primarily on the nail plate, not all over your fingertips.
Stop using the product if you notice:
- Burning
- Persistent stinging
- Swelling
- Blistering
- A spreading rash
- Significant redness
- Cracked or bleeding skin
- Pain beneath the nail
Do not apply solvent-based nail prep onto cuts, torn cuticles, or visibly inflamed skin.
If your nails are already extremely thin, peeling, sore, or damaged from previous enhancements, repeatedly dehydrating and covering them with another enhancement may not be the best next step.
Give the nails time to recover and seek professional guidance when needed.
Hygiene Matters as Much as Dehydration
Dehydrating a nail does not disinfect dirty tools.
Clean reusable manicure tools appropriately and avoid sharing porous files or buffers unless they are designed to be properly cleaned and disinfected.
Keep bottles closed when not in use, and do not repeatedly touch applicators to dirty surfaces.
Clean prep reduces contamination while dehydration addresses temporary surface oil. They are related parts of a manicure, but they are not interchangeable.
Common Mistakes to Avoid
- Using too much product. A thin wipe is usually enough.
- Flooding the cuticle area. Keep solvents and primers off the skin as much as possible.
- Touching nails after prep. This transfers oil back onto the surface.
- Applying cuticle oil before gel or glue. Save oil for the appropriate aftercare stage.
- Over-buffing the natural nail. More roughness does not always mean better adhesion.
- Using hand sanitizer as dehydrator. Added moisturizers can leave residue.
- Mixing several chemicals unnecessarily. Simple prep is easier to control.
- Working beside an open flame. Alcohol, acetone, and many nail products are flammable.
- Ignoring product directions. Your gel, acrylic, dip, or adhesive system may require a particular prep method.
- Applying enhancements over irritated nails. Pain and inflammation should be addressed instead of covered.
DIY vs. Store-Bought Nail Dehydrator
A DIY option can be useful when you only need basic surface cleaning and already have suitable isopropyl alcohol at home.
A store-bought dehydrator makes more sense when:
- You frequently wear gel or acrylic.
- Your nail system recommends a specific dehydrator.
- You regularly experience lifting.
- You want a brush-on application.
- You are using primer and dehydrator from one compatible system.
- You want clearer ingredient and usage instructions.
For occasional press-ons or a simple home manicure, alcohol may be enough.
For technically demanding enhancements, choosing a compatible professional product is often more predictable.
When to See a Nail Technician or Dermatologist
A nail technician can help when your main issue is application technique—for example, repeated lifting, incorrectly fitted press-ons, uneven enhancements, or uncertainty about the correct prep products for your system.
A dermatologist or other healthcare professional is more appropriate when the problem looks medical rather than cosmetic.
Seek medical advice if you notice:
- Increasing pain
- Swelling around the nail
- Pus or drainage
- Green, yellow, dark, or unusual discoloration
- Persistent nail lifting
- Bleeding
- A widespread rash
- Blistering after using a nail product
- Nail changes that continue after the enhancement has been removed
Do not use stronger dehydrators, primers, glue, or gel to cover a suspicious nail problem.
FAQs
Can I make a DIY nail dehydrator with rubbing alcohol?
Yes. High-percentage isopropyl alcohol on a lint-free wipe is a simple way to remove temporary surface oil before many at-home manicures. Let it evaporate completely and avoid unnecessary contact with the surrounding skin.
Is nail dehydrator the same as rubbing alcohol?
No. Commercial nail dehydrators are formulated specifically for nail prep and may contain different solvents or combinations of ingredients. Isopropyl alcohol can serve as a simple cleaning and degreasing alternative for some home manicures.
Can I use acetone instead of nail dehydrator?
A quick acetone wipe can remove surface oil, but acetone can also be quite drying. Avoid soaking the skin unnecessarily, and check whether your nail system recommends a particular prep product.
Do I need dehydrator before press-on nails?
Not every press-on system requires a separate dehydrator, but starting with clean, dry, oil-free nails can improve adhesive contact. Follow the instructions included with your nail glue or adhesive tabs.
Do I need both nail dehydrator and primer?
It depends on the manicure system. Dehydrator removes temporary surface oil and moisture, while primer helps some enhancement products bond to the nail. If your system calls for both, use them in the manufacturer’s recommended order.
Why are my nails still lifting after using dehydrator?
Dehydrator cannot correct every adhesion problem. Lifting may result from product touching the skin, poor curing, incompatible products, excessive nail movement, incorrect application, moisture exposure, or inadequate preparation.
How often can I use a DIY nail dehydrator?
Use it when needed as part of manicure preparation rather than repeatedly applying it throughout the day. If your nails or skin become excessively dry, sore, irritated, or cracked, stop and allow them to recover.
Conclusion
A DIY nail dehydrator does not need to involve a complicated homemade chemical recipe. For many at-home manicures, carefully cleaning the nail plate with high-percentage isopropyl alcohol and allowing it to dry completely provides a simple way to remove temporary surface oil before application.
Good results still depend on the full routine: gentle filing, clean tools, dry nails, minimal skin contact, correct product application, and following the directions for your gel, acrylic, dip, or press-on system.
Avoid the temptation to make nail prep stronger by adding random acids, household ingredients, or professional chemicals. If you regularly use enhancements or struggle with lifting, a purpose-made dehydrator that is compatible with your nail system is often the more predictable choice.
Most importantly, pay attention to what your nails are telling you. A longer-lasting manicure is never worth burning, pain, infection, or significant nail damage. Keep your prep simple, work carefully, and get professional help when a problem goes beyond routine cosmetic nail care.
