
Does Nail Dehydrator Dry on Its Own? Yes—Here’s How It Works

Quick Answer
Yes. Nail dehydrator normally dries on its own through air evaporation, often within seconds after a thin application. You usually do not need a UV or LED lamp, but always follow the directions on your specific product and the FDA’s nail product safety guidance.
What to expect after applying it
- Air-dries naturally: Most nail dehydrators use fast-evaporating solvents and need no curing lamp.
- Dries quickly: A thin coat often looks dry within several seconds to about 30 seconds.
- Looks matte: The natural nail usually loses some surface shine as oils and moisture are removed.
- Shouldn’t stay wet: Persistent liquid or pooling can mean too much product was applied.
- Primer comes next: Once the dehydrator has evaporated, continue with primer, bonder, or your nail system’s next prep step.
Simple rule
- Don’t cure a standard nail dehydrator unless its manufacturer specifically tells you to.
When I first learned nail prep, I assumed every liquid used with gel needed a lamp. Nail dehydrator is one of the important exceptions.
It normally evaporates on its own before primer, base coat, gel, acrylic, or extensions are applied. Here’s how to tell when it has dried and what to do if it hasn’t.
In This Guide
- Does nail dehydrator dry on its own?
- How long does nail dehydrator take to dry?
- Do you cure nail dehydrator under a UV or LED lamp?
- What should nail dehydrator look and feel like when dry?
- Nail dehydrator vs primer vs base coat
- Why is my nail dehydrator not drying?
- How do you apply nail dehydrator correctly?
- Can nail dehydrator make nails too dry?
- Frequently asked questions
- Final takeaway
Does Nail Dehydrator Dry on Its Own?
Yes, most nail dehydrators are designed to air-dry without a lamp. Their liquid ingredients evaporate quickly after you brush a thin layer over the natural nail.
A nail dehydrator is a prep liquid that temporarily removes surface moisture, oil, and residue from the nail plate. This creates a cleaner surface for the next product to grip.
Definition: Nail dehydration is a temporary surface-preparation step. It doesn’t mean permanently removing moisture from the entire natural nail.
Why does it evaporate so quickly?
Many dehydrators rely on volatile solvents. A volatile liquid changes into vapor quickly when exposed to air.
That’s why the product can seem to disappear only moments after application. You aren’t waiting for it to harden like gel polish.
- Dehydrator: evaporates from the nail surface.
- Gel polish: usually needs UV or LED energy to cure.
- Regular polish: dries as solvents evaporate and the coating forms.
- Primer: varies by formula and may remain slightly tacky.
I treat the dehydrator step as a short pause in nail prep. Once the nail looks evenly dry, I move directly to the next product without touching the surface.
How Long Does Nail Dehydrator Take to Dry?
Most thin applications dry within several seconds, although some formulas can take closer to 30 seconds. The product label should take priority over any general timing rule.
You usually don’t need to stare at a stopwatch. The visual change in the nail is more useful.
What affects drying time?
- Amount applied: A thin layer evaporates faster than a flooded nail.
- Formula: Different solvent blends evaporate at different rates.
- Room airflow: Normal ventilation can help volatile ingredients disperse.
- Humidity: A humid workspace may affect how dry the nail surface feels.
- Application method: A controlled brush stroke dries more evenly than a saturated applicator.
As of 2026, I still use the same practical check: look for an evenly matte, residue-free nail rather than assuming every brand needs an identical number of seconds.
Avoid blowing directly on the nail with your mouth. That can add moisture or contaminants back onto a surface you just cleaned.
Should you wait several minutes?
Usually, no. A standard dehydrator shouldn’t need several minutes when applied correctly.
If visible liquid remains for an unusually long time, first check how much you used. Then check the bottle’s instructions before adding anything on top.
Section Takeaway: Nail dehydrator normally dries in seconds, not minutes. Use a thin coat and judge readiness by the product instructions and the appearance of the nail.
Do You Cure Nail Dehydrator Under a UV or LED Lamp?
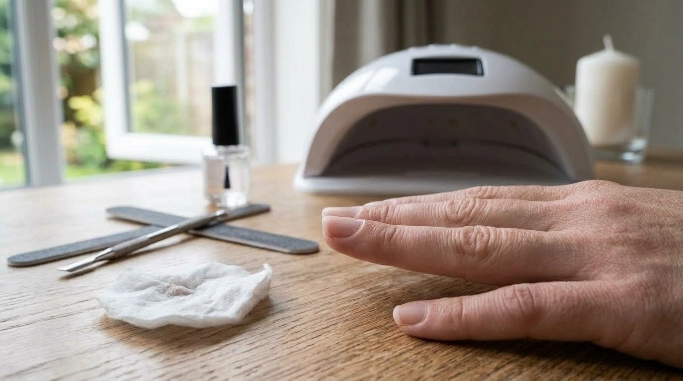
A standard nail dehydrator usually does not go under a UV or LED lamp. It air-dries because its job is surface preparation, not forming a cured gel layer.
This distinction matters because several bottles may appear together in one manicure system. They don’t necessarily dry the same way.
Why a lamp isn’t normally needed
UV and LED nail lamps activate photoinitiators in compatible gel products. Dehydrators generally aren’t designed to form that type of polymerized coating.
Putting a normal dehydrator under a lamp doesn’t replace proper evaporation. It may also conflict with the manufacturer’s directions.
- Apply the dehydrator sparingly.
- Let it evaporate in the air.
- Do not touch the prepared nail.
- Apply the next prep product as directed.
- Cure only products that specifically require curing.
If you bought a multi-step kit, read each bottle separately. “Prep,” “bond,” “primer,” and “base” aren’t interchangeable terms.
For broader manicure-care advice, the American Academy of Dermatology’s manicure and pedicure resources explain why careful nail practices matter beyond the finished appearance.
What Should Nail Dehydrator Look and Feel Like When Dry?
The natural nail usually looks cleaner, duller, and less shiny once the dehydrator has evaporated. There shouldn’t be obvious pools of liquid sitting on the nail.
The change can be subtle. You’re preparing a surface, not creating a visible coating.
Signs the dehydrator has probably evaporated
- No visible wetness: You shouldn’t see a glossy puddle from the prep liquid.
- Less surface shine: Natural oils have been temporarily reduced.
- No heavy residue: The nail shouldn’t look coated with a thick film.
- Ready for the next step: You can continue according to the nail system’s instructions.
Should a dehydrated nail feel sticky?
Usually, the dehydrator itself shouldn’t leave the same tacky feel as some primers or gel products. However, formulas vary, so the label is the final authority.
Don’t repeatedly touch the nail to test it. Your fingertip can transfer natural oils straight back onto the nail plate.
I prefer checking visually under good light. That keeps the freshly prepared surface untouched.
Nail Dehydrator vs Primer vs Base Coat: What Dries and How?
Dehydrator, primer, and base coat perform different jobs even when all three appear in the same manicure routine. Confusing them is one reason beginners aren’t sure whether a product should air-dry or cure.
| Product | Main job | Typical drying method | Typical finished feel |
|---|---|---|---|
| Nail dehydrator | Temporarily removes surface oil and moisture | Air-dries, often within seconds | Dry and relatively matte |
| Nail primer | Promotes adhesion between the natural nail and enhancement | Often air-dries, depending on formula | May feel dry or slightly tacky |
| Regular base coat | Creates a foundation for traditional polish | Air-dries | Forms a thin coating |
| Gel base coat | Creates a cured gel foundation | Usually requires the compatible lamp | May retain an inhibition layer after curing |
Does dehydrator replace primer?
No. Dehydrator prepares the nail surface, while primer or bonder is used to improve adhesion in systems that call for it.
Some manicures use both products. Others may require only one, depending on the manufacturer and service.
Does dehydrator replace a base coat?
No. A base coat becomes part of the manicure coating, while dehydrator is a temporary preparation step.
Think of dehydrator as preparing the workspace. The base coat is part of what you build on that workspace.
Why Is My Nail Dehydrator Not Drying?
If your nail dehydrator stays visibly wet, the most common issue is applying too much product. A prep liquid should normally be spread in a light, controlled layer.
Don’t immediately add primer or gel over a puddle. First identify why the surface isn’t behaving normally.
Common reasons it stays wet
- Too much product: The brush may be overloaded.
- Product pooling: Liquid can collect near the sidewalls or cuticle area.
- Contaminated bottle: Mixing products on the brush can affect performance.
- Old or poorly stored product: Changes in the formula may affect normal behavior.
- Unusual formula: Some products marketed as prep or bond may not behave like a simple dehydrator.
What should you do?
- Stop before applying the next layer.
- Check the manufacturer’s drying directions.
- Make sure the bottle is truly a dehydrator rather than primer or bonder.
- Use less product on the next nail.
- Replace a product that looks, smells, or performs abnormally compared with its normal condition.
Never assume that stronger heat will fix a prep problem. Keep volatile nail products away from flames or inappropriate heat sources.
The FDA advises consumers to read nail-product labels, follow warnings, and use nail products with good ventilation. Those simple habits are especially important when working with solvent-based prep products.
How Do You Apply Nail Dehydrator Correctly?
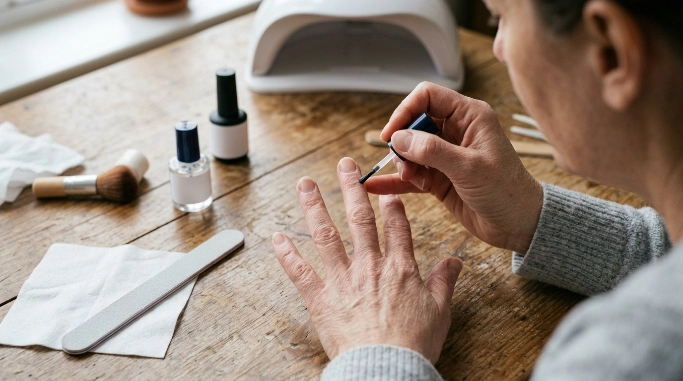
Apply nail dehydrator after basic nail preparation and before primer, bonder, or the next adhesion step required by your system. The key is using enough to cover the nail without flooding it.
My goal is always a clean, controlled surface. More dehydrator doesn’t automatically create better adhesion.
Simple nail dehydrator application steps
- Prepare the natural nail: Shape and complete the appropriate surface prep for your manicure system.
- Remove loose dust: Keep particles away from the nail plate before applying liquids.
- Load the brush lightly: Wipe excess product against the bottle neck if needed.
- Apply a thin layer: Cover the natural nail without flooding the cuticle or surrounding skin.
- Let it air-dry: Wait until visible wetness has evaporated.
- Don’t touch the nail: Finger oils can contaminate the prepared surface.
- Continue your system: Apply primer, bonder, base coat, acrylic, or other products as directed.
Should you apply dehydrator twice?
One controlled application is often enough. Some product systems or nail technicians may use another light pass for clients with oily nail plates.
Don’t make repeated applications your default unless the product directions support it. Overusing prep solvents can make the surrounding skin and nail area feel unnecessarily dry.
Good adhesion depends on the whole prep routine. Dehydrator can’t compensate for product touching skin, poor tip fit, improper curing, or incompatible nail products.
Section Takeaway: Use a light coat, let it evaporate naturally, avoid touching the nail afterward, and follow the next step specified by your nail system.
Can Nail Dehydrator Make Natural Nails Too Dry?
Frequent or excessive exposure to drying nail products can contribute to dryness around the nail and cuticle area. That doesn’t mean normal dehydrator use automatically damages healthy nails.
The safer approach is targeted application. Keep the liquid primarily on the natural nail plate and avoid repeatedly flooding surrounding skin.
Healthy nail habits still matter
- Follow the product label rather than applying extra coats “just in case.”
- Avoid contact with irritated, cut, or damaged skin.
- Work in a well-ventilated area.
- Stop using a product if you develop burning, swelling, itching, or another reaction.
- Moisturize nails and surrounding skin between manicure services when needed.
The American Academy of Dermatology’s healthy nail guidance recommends habits that help protect natural nails, including keeping nails clean and dry and avoiding unnecessary trauma.
Artificial nail services can also expose nails and surrounding skin to adhesives, filing, solvents, and other chemicals. The AAD’s guidance on reducing artificial nail damage explains why gentle technique matters.
If you’re using nail cosmetics at home, the FDA also recommends reading labels and following all directions and warnings in its cosmetics safety guidance.
Health note: If you develop persistent redness, swelling, pain, nail lifting, blistering, or another concerning reaction, stop using the product and contact a qualified healthcare professional or dermatologist.
Frequently Asked Questions
Does nail dehydrator need to be wiped off?
Usually, no. A standard brush-on nail dehydrator is generally allowed to evaporate from the natural nail rather than being wiped away. Wiping after it dries could transfer oils or lint back onto the prepared surface, so follow your product’s instructions.
Can you cure nail dehydrator with an LED lamp?
A standard dehydrator normally doesn’t require LED curing. It is designed to evaporate in air, while compatible gel products use a lamp to cure. Don’t add a curing step unless the manufacturer specifically directs you to do so.
How do I know nail dehydrator is dry?
Look for the visible liquid to disappear and the nail surface to appear clean and relatively matte. Avoid touching the nail with your fingertip because that can transfer oil onto the freshly prepared surface.
What happens if I put primer on before dehydrator dries?
You can interfere with a clean, predictable prep sequence if you layer products while the dehydrator is still pooled or visibly wet. Let the dehydrator evaporate first, then use primer according to your system’s directions.
Does nail primer also dry on its own?
Many nail primers air-dry, but their finished appearance varies. Some acid-free primers or bonding products remain slightly tacky by design, so don’t assume primer should look exactly like a dry dehydrator.
Can I use a hair dryer to dry nail dehydrator faster?
It’s generally unnecessary because dehydrator already evaporates quickly. Avoid adding uncontrolled heat around volatile cosmetic products, and don’t use airflow that can blow dust onto freshly prepared nails.
Can I apply gel immediately after nail dehydrator?
Only after the dehydrator has evaporated and after completing any primer, bonder, or base-coat step required by your gel system. Follow that system’s order rather than skipping products simply because the natural nail feels dry.
Final Takeaway: Let Nail Dehydrator Air-Dry
Yes, nail dehydrator dries on its own in most manicure systems. A thin layer normally evaporates within seconds and does not need a UV or LED lamp.
The simplest routine is to apply it lightly, wait until visible wetness disappears, avoid touching the nail, and continue with your primer or other required prep step.
- Use a thin coat.
- Let it air-dry naturally.
- Don’t cure it unless the label says to.
- Keep it off surrounding skin.
- Follow the complete nail system instructions.
If a dehydrator stays wet, feels unusually sticky, or behaves differently from normal, check the bottle instructions before continuing. Correct prep is more important than rushing to the next layer.

