
Homemade Nail Dehydrator: A Safe DIY Nail Prep Guide for Beginners

If your gel polish, press-ons, acrylic, or builder gel keeps lifting sooner than expected, moisture and natural oil on the nail plate may be part of the problem. That is why nail dehydrator is commonly used during nail prep.
But what if you do not have a professional dehydrator at home?
A homemade nail dehydrator can be a practical temporary option, especially when you are doing a simple DIY manicure. The key is keeping the recipe simple. You do not need a complicated mixture of household chemicals.
In this guide, you will learn what nail dehydrator actually does, the safest DIY substitute to use, how to apply it correctly, what ingredients to avoid, and when buying a professional product makes more sense.
Quick Answer
A simple homemade nail dehydrator can be made by using 91% or 99% isopropyl alcohol by itself to wipe the natural nail plate before applying gel, acrylic, or press-ons. It removes surface oils and moisture. Pure acetone can also degrease nails, but it is more drying and should be used carefully.
What Does a Nail Dehydrator Actually Do?
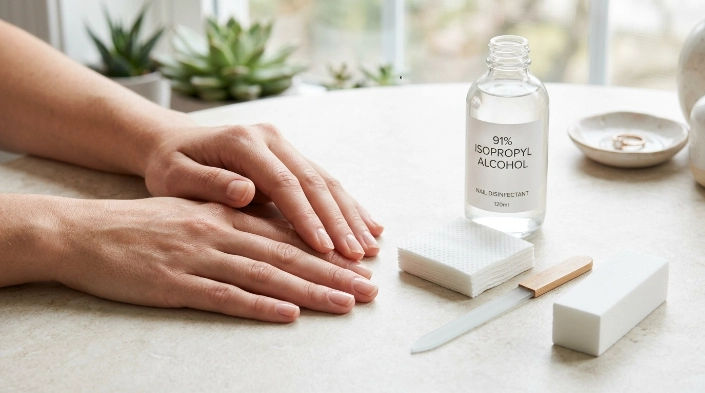
A nail dehydrator prepares the surface of your natural nail before a manicure enhancement is applied.
Your nails naturally collect:
- Skin oils
- Moisture
- Lotion residue
- Soap residue
- Dust from filing or buffing
Even when your nails look perfectly clean, a very thin layer of oil can remain on the surface.
Gel, acrylic, builder gel, dip products, nail glue, and some press-on adhesives generally stick better to a clean, dry nail plate. A dehydrator temporarily removes surface moisture and oil so the next product has a cleaner surface to grip.
A dehydrator does not permanently dry your nail. Natural oils and moisture eventually return.
It is simply a preparation step.
Can You Really Make a Homemade Nail Dehydrator?
Yes, but the word homemade can be misleading.
You do not necessarily need to mix several ingredients together. For most beginners, the simplest homemade nail dehydrator is simply high-percentage isopropyl alcohol used as a nail-prep wipe.
The goal is not to create a salon chemical formula in your kitchen.
The goal is to temporarily clean and degrease the natural nail plate before applying your manicure product.
Best Simple DIY Option: 91% or 99% Isopropyl Alcohol
High-percentage isopropyl alcohol evaporates quickly and removes surface oils effectively.
For basic home nail preparation, use:
- 91% isopropyl alcohol, or
- 99% isopropyl alcohol
Apply a small amount to a lint-free wipe and clean each nail plate.
Avoid soaking your fingers.
You only need enough liquid to wipe the nail surface.
Lower-percentage rubbing alcohol contains more water, so it may not evaporate as quickly or leave the nail as dry as a higher-percentage solution.
Homemade Nail Dehydrator vs. Commercial Nail Dehydrator
A homemade substitute can be useful, but it is not identical to a professional nail-prep product.
| Option | Main Benefit | Best For | Limitations |
|---|---|---|---|
| 91–99% isopropyl alcohol | Removes surface oil and evaporates quickly | Beginner DIY manicures | May not perform exactly like a professional formula |
| Pure acetone | Strong degreasing action | Very oily nail plates or occasional prep | Can dry and irritate skin |
| Commercial nail dehydrator | Designed specifically for nail adhesion | Gel, acrylic, extensions, frequent manicures | Costs more than household alcohol |
| Soap and water only | Removes visible dirt | Basic cleaning before prep | May leave moisture behind |
For an occasional home manicure, alcohol may be enough.
If you regularly wear extensions, acrylic, hard gel, Gel-X, builder gel, or other long-wear systems, a professional dehydrator is usually more predictable.
How to Make a Homemade Nail Dehydrator
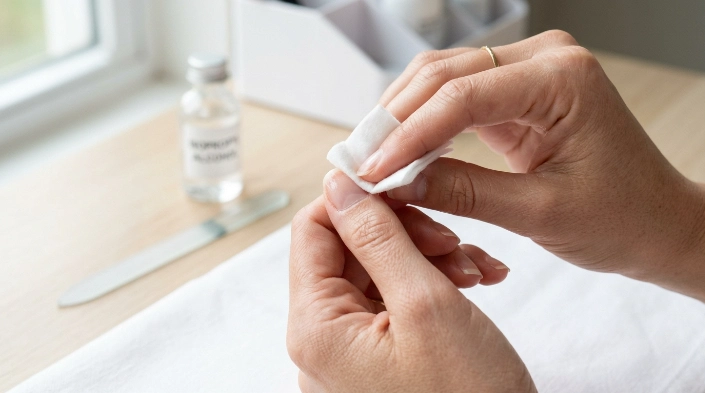
The safest beginner approach is extremely simple.
What You Need
You will need:
- 91% or 99% isopropyl alcohol
- A clean small container if needed
- Lint-free nail wipes
- Your normal manicure supplies
You do not need essential oils, fragrance, lemon juice, vinegar, hydrogen peroxide, or other kitchen ingredients.
Step 1: Wash and Dry Your Hands
Wash your hands gently to remove dirt, lotion, and surface oils.
Dry them thoroughly.
Do not begin nail prep while your nails are still wet. Nails can temporarily absorb water, which is the opposite of what you want immediately before applying an enhancement.
Step 2: Push Back the Cuticle Area Carefully
Gently push back excess cuticle from the nail plate.
Remember that the visible skin around the base of your nail is living tissue. Avoid aggressive cutting or scraping.
The American Academy of Dermatology’s manicure advice recommends avoiding unnecessary cutting or pushing of cuticles because damage around this area can contribute to inflammation or infection.
Step 3: Shape the Nail
File the free edge into your preferred shape.
If your manicure system requires light surface buffing, use a gentle buffer rather than aggressively filing the natural nail.
Never file until your nail feels thin, sore, warm, or sensitive.
Over-filing can weaken the nail plate and may make future manicures uncomfortable.
Step 4: Remove Nail Dust
Brush away visible dust.
Then use a clean lint-free wipe if necessary.
Avoid touching the nail plate with your fingers after this point. Your fingertips can immediately transfer natural oils back onto the prepared nail.
Step 5: Apply the Homemade Nail Dehydrator
Put a small amount of 91% or 99% isopropyl alcohol onto a lint-free wipe.
Wipe each nail thoroughly from the cuticle area toward the free edge.
Keep the alcohol primarily on the nail plate rather than rubbing it repeatedly over the surrounding skin.
Step 6: Let It Air-Dry
Wait several seconds until the alcohol has fully evaporated.
Do not wipe it away with a towel.
Once dry, the nail may look slightly matte or less shiny.
Step 7: Continue With Your Nail System
Apply your primer, base coat, nail glue, gel, acrylic system, or other product according to its manufacturer’s instructions.
Do not touch your nails between dehydration and product application.
Expert Tip: Prep one hand completely before beginning product application, and keep your fingers off the nail plates. Touching a freshly dehydrated nail can transfer enough oil to interfere with adhesion.
Can You Use Acetone as a Homemade Nail Dehydrator?
Pure acetone can remove oils from the nail plate and evaporates quickly, so some people use it as a nail-prep substitute.
However, acetone is more drying than alcohol.
According to Poison Control’s guidance on nail polish removers, acetone can irritate the skin and repeated exposure may contribute to dry or brittle nails.
If you choose to use acetone for prep:
- Use only a small amount.
- Apply it to the nail plate rather than soaking the fingers.
- Keep it away from broken or irritated skin.
- Work in a ventilated area.
- Keep it away from flames and heat.
- Stop if you experience burning or significant irritation.
For routine beginner nail prep, high-percentage isopropyl alcohol is usually the simpler option.
Should You Mix Alcohol and Acetone Together?
You may find DIY nail dehydrator recipes online recommending combinations of acetone and alcohol.
For most home users, mixing them is unnecessary.
Both are powerful, fast-evaporating solvents. Combining them can create a harsher preparation step without giving a beginner a meaningful advantage.
A commercial nail dehydrator is inexpensive compared with the cost of repairing irritated skin or over-dried nails.
If alcohol alone is not giving you enough adhesion, it is generally smarter to evaluate your entire prep routine or buy a professionally formulated dehydrator instead of experimenting with increasingly strong DIY mixtures.
Ingredients You Should Not Add to a Homemade Nail Dehydrator
More ingredients do not make a better dehydrator.
Avoid Oils
Do not add:
- Cuticle oil
- Coconut oil
- Olive oil
- Vitamin E oil
- Essential oils
Oil defeats the purpose of dehydration because you are trying to remove surface oil before adhesion.
Save cuticle oil for after your manicure is completely finished.
Avoid Lotion
Moisturizer belongs at the end of your nail routine, not immediately before applying enhancements.
Even a small amount of lotion can leave residue on the nail plate.
Skip Lemon Juice and Vinegar
These are popular ingredients in DIY beauty recipes, but they are unnecessary for nail dehydration.
They contain water and acids and do not offer the predictable evaporation or degreasing action of high-percentage alcohol.
Do Not Experiment With Strong Household Chemicals
Bleach, household cleaners, industrial solvents, paint thinner, or similar chemicals should never be used as nail dehydrators.
Nail preparation does not require aggressive household chemicals.
The FDA’s nail-product safety guidance advises consumers to follow product instructions, pay attention to warnings, maintain ventilation, and use nail products carefully to reduce irritation and other adverse reactions.
Nail Dehydrator vs. Nail Primer: They Are Not the Same
This is one of the most common beginner misunderstandings.
A dehydrator primarily helps remove surface moisture and oil.
A primer is intended to improve the bond between the natural nail and a particular enhancement system.
Think of the order like this:
- Nail preparation
- Nail dehydrator
- Primer, if required
- Base or enhancement product
Some nail systems do not require a separate primer, while others perform much better with one.
Always follow the instructions for the gel, acrylic, builder gel, or extension system you are using.
Why Your Manicure May Still Lift After Using Dehydrator
Dehydrator cannot compensate for poor preparation.
If your gel or extensions are still lifting, check the following.
Product Is Touching the Skin
Gel, acrylic, builder gel, or nail glue should not flood the cuticle or sidewalls.
Product touching skin can lift more easily and may also increase your exposure to potentially irritating nail ingredients.
Invisible Cuticle Is Still on the Nail Plate
Thin dead tissue can remain attached to the nail plate near the base of the nail.
Product applied over it may lift as the tissue separates.
Use gentle preparation rather than aggressively scraping.
You Touched Your Nails After Prep
This happens constantly.
One quick touch can transfer skin oils back to the nail.
Once you dehydrate the nail plate, avoid touching it.
You Are Over-Filing
More filing does not automatically mean better adhesion.
You usually need controlled preparation, not aggressive sanding.
Your Application Technique Needs Adjustment
Lifting can also come from:
- Incorrect curing
- Applying layers too thickly
- Incompatible products
- Incorrect primer use
- Weak or damaged nails
- Moisture exposure before application
- Product touching surrounding skin
Changing dehydrator alone may not solve these problems.
Safety Considerations for DIY Nail Dehydrator
Alcohol and acetone are common household products, but they still require sensible handling.
Work in a Ventilated Space
Keep fresh air moving through your workspace, especially when using multiple nail products.
Keep Solvents Away From Flames
Alcohol and acetone are flammable.
Do not use them near candles, cigarettes, gas flames, hot tools, or other ignition sources.
Protect Your Skin
A nail dehydrator is intended for the nail plate.
Repeatedly coating the surrounding skin is unnecessary.
If your skin becomes red, itchy, swollen, painful, cracked, or blistered, stop using the product.
Never Use Dehydrator on an Injured Nail
Avoid DIY nail enhancements if you have:
- Cuts around the nail
- Bleeding
- Significant swelling
- Pus
- Severe tenderness
- A nail separating from the nail bed
- Unexplained discoloration
Covering an unhealthy nail with gel or acrylic can make it harder to monitor what is happening underneath.
How Much Does Homemade Nail Dehydrator Cost?
Cost is one of the biggest advantages of the DIY method.
A bottle of isopropyl alcohol can be used for many manicures because each nail requires only a small amount.
You also do not need specialized equipment.
Your basic setup may include:
- High-percentage isopropyl alcohol
- Lint-free wipes
- Nail file
- Gentle buffer
- Cuticle tool
- Your chosen manicure system
A commercial dehydrator is still relatively affordable, however, so the DIY option makes the most sense when you need a temporary substitute or already have suitable alcohol at home.
DIY vs. Professional Nail Dehydrator: Which Should You Choose?
Choose a homemade nail dehydrator when:
- You do occasional home manicures.
- You already own 91–99% isopropyl alcohol.
- You need a temporary substitute.
- Your nail system does not require a specific prep product.
- You want a simple surface-cleaning step.
Consider a commercial dehydrator when:
- You frequently wear extensions.
- Your nails are naturally oily.
- You regularly experience lifting.
- You use builder gel, acrylic, Gel-X, or similar systems.
- Your nail brand recommends a matching dehydrator.
- You want more consistent results.
There is nothing wrong with beginning with alcohol and upgrading later.
Common Mistakes to Avoid
A homemade nail dehydrator is easy to use, but several small mistakes can undo your preparation.
- Using 70% alcohol when a higher percentage is available. The extra water means it may take longer to evaporate.
- Soaking the nails. A light wipe is enough.
- Applying dehydrator repeatedly. More is not necessarily better.
- Putting it on irritated skin. Keep solvents primarily on the nail plate.
- Touching the nail afterward. This transfers oil back to the surface.
- Using lotion before application. Moisturize after your manicure instead.
- Adding oils or fragrance to the mixture. These can leave residue.
- Aggressively buffing the nail. Adhesion should not require thinning your natural nail.
- Ignoring product instructions. Some professional systems require specific preparation products.
- Using nail products beside an open flame. Alcohol, acetone, and many manicure products are flammable.
When to See a Nail Technician or Dermatologist
DIY nail prep should stop when the issue goes beyond ordinary manicure adhesion.
A qualified nail technician can help when you repeatedly experience lifting, uneven application, incorrect product removal, or trouble choosing products that work together.
Consider seeing a dermatologist if you develop:
- Persistent redness
- Swelling around the nail
- Significant pain
- Blisters
- Severe itching
- Nail separation
- Green, brown, or unusual discoloration
- Pus or drainage
- Nail changes that continue after removing the manicure
Do not keep covering a suspicious nail with polish, glue, acrylic, or gel simply because you dislike how it looks.
Persistent nail changes sometimes need medical evaluation rather than another DIY beauty treatment.
FAQs
Can I use rubbing alcohol instead of nail dehydrator?
Yes. High-percentage rubbing alcohol, especially 91% or 99% isopropyl alcohol, can work as a simple at-home nail-prep substitute by removing surface oils before product application.
Is 70% alcohol good enough for nail dehydration?
It can clean the nail, but it contains more water than 91% or 99% alcohol. If a higher percentage is available, it is generally more practical for quick nail preparation because it evaporates faster.
Can acetone replace a nail dehydrator?
Pure acetone can degrease the nail plate, but it can also be drying and irritating. Use only a small amount and avoid prolonged contact with surrounding skin.
Do I need both nail dehydrator and primer?
Not always. Dehydrator removes surface oil and moisture, while primer improves adhesion for certain nail systems. Follow the manufacturer’s instructions for your gel, acrylic, or extension products.
Can vinegar be used as a homemade nail dehydrator?
Vinegar is not an ideal substitute. It contains significant water and does not provide the same fast degreasing and evaporation as high-percentage isopropyl alcohol.
Should nail dehydrator touch the cuticle?
Try to keep dehydrator primarily on the nail plate. Occasional minor contact may happen, but repeatedly coating the surrounding skin can contribute to dryness or irritation.
How long should I wait after applying homemade nail dehydrator?
Usually only until the liquid has completely evaporated, which may take several seconds. Once the nail looks dry, continue with the next step in your manicure system without touching the nail surface.
Conclusion
Making a homemade nail dehydrator does not need to involve a complicated DIY formula.
For most beginner home manicures, wiping the prepared natural nail with 91% or 99% isopropyl alcohol is the simplest approach. It removes surface oils, evaporates quickly, and helps create a cleaner surface for gel, acrylic, nail glue, or other manicure products.
Pure acetone can also degrease the nail, but it is more drying and should be used sparingly.
Most importantly, remember that dehydrator is only one part of successful nail preparation. Gentle filing, removing nail dust, keeping products off the skin, avoiding touching freshly prepped nails, and following your manicure system’s directions all matter.
If lifting continues despite careful prep, consider switching to a commercial nail dehydrator or asking a qualified nail technician for help rather than using stronger DIY chemical mixtures.
Healthy natural nails should always come before making a manicure last a few extra days.
