
Getting fake nails off doesn’t have to wreck your natural nails or cost a salon visit. You can safely remove acrylics, gels, or press-ons at home with the right supplies and a gentle process that avoids ripping or prying.
Soak-off with acetone or use a careful mechanical method for press-ons to remove fake nails without causing major damage. Follow clear steps, take your time, and stop if you see pain or signs of infection so you know when to get professional help.
Key Takeaways
- Use gentle, proven at-home methods and the right tools to protect your natural nails.
- Seek professional removal if nails hurt, lift, or show signs of infection.
- Avoid forceful removal and follow aftercare to reduce long-term damage.
Safe At-Home Methods To Remove Fake Nails
You can remove fake nails at home safely if you use the right tools and take your time. Pick one method that fits the nail type and your tolerance for acetone or filing.
Soaking In Acetone
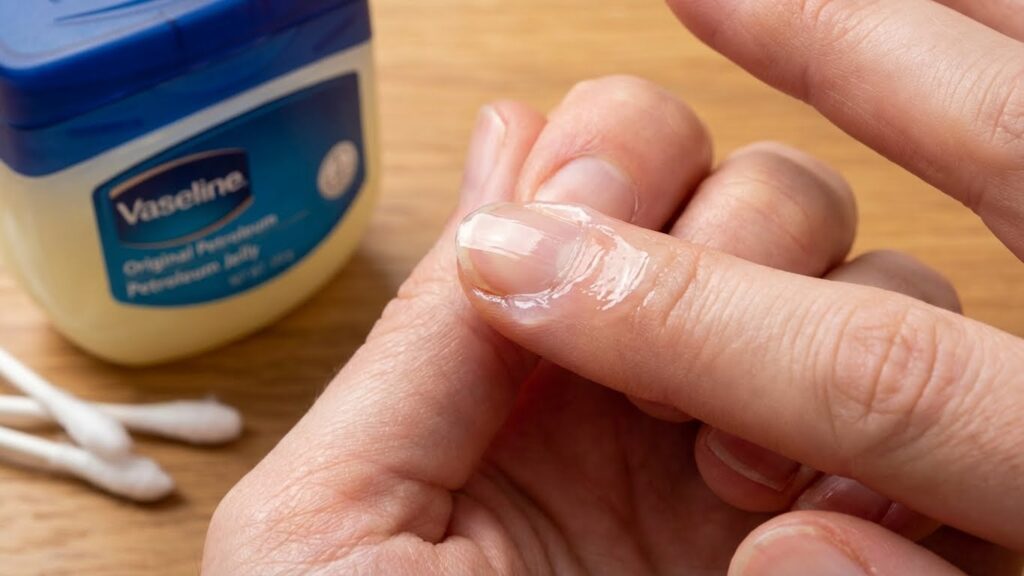
Soak only when the fake nails are acrylic, gel, or heavily glued-on press-ons. Use 100% acetone nail polish remover in a small glass or metal bowl. Protect skin by applying petroleum jelly around each nail first.
Pour enough acetone to cover the tips, then submerge fingers for 10–15 minutes. Check one nail after 10 minutes; if the fake nail lifts or softens, gently push it off with an orange stick. Repeat soaking for 5–10 minute intervals until nails come off.
Avoid prolonged skin contact. If acetone dries or irritates your skin, stop and rinse with warm water and soap. After removal, wash hands, apply cuticle oil, and let nails breathe for a day before applying new products.
Using Foil Wraps
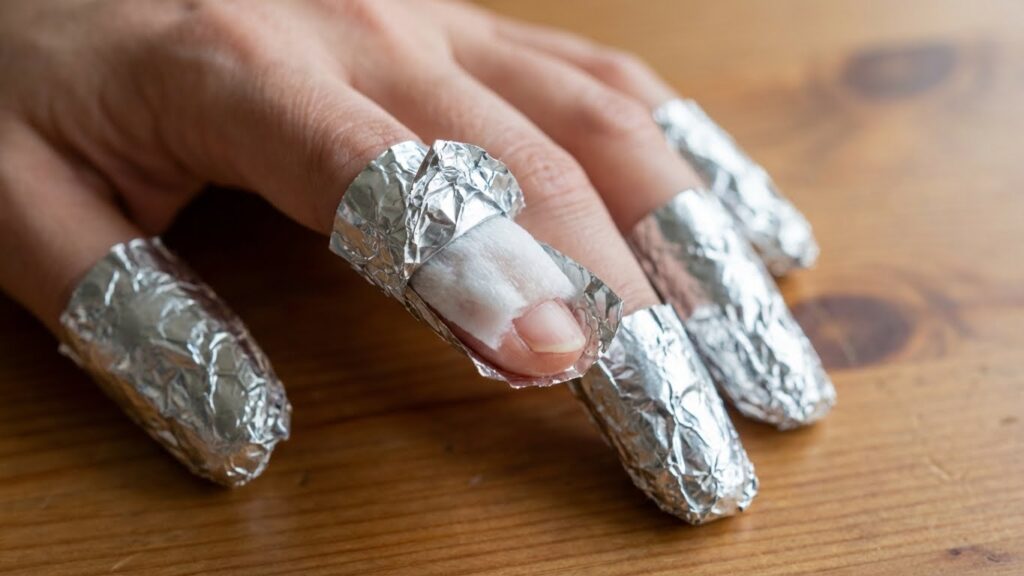
Foil wraps speed up acetone soaking and reduce evaporation. You’ll need cotton balls, 100% acetone, and aluminum foil cut into small squares. Soak a cotton ball in acetone, place it over the fake nail, and wrap the fingertip snugly in foil.
Leave wraps on for 15–20 minutes. Unwrap one nail first to test; the fake nail should slide off with light pressure from an orange stick or cuticle pusher. If it resists, rewrap and wait another 5–10 minutes.
Foil wraps work well for stubborn glue or gel layers and limit acetone exposure to skin. Dispose of used cotton and foil safely and moisturize your nails and surrounding skin afterward.
Gentle Filing Techniques
Use filing when you prefer to avoid acetone or for thin press-on nails. Start with a coarse nail file (100–180 grit) to shorten the fake nail, then switch to a finer file (240 grit) to thin the glue layer. File in one direction to avoid splitting and work slowly.
Once the fake nail is very thin, use a wooden cuticle stick to lift at the edge. If you feel resistance or pain, stop filing and try soaking instead. Never force or pry nails off, which can peel layers from your natural nail.
Sanitize files and tools before and after use. Finish by buffing the nail surface lightly and applying moisturizer or cuticle oil to restore hydration.
Professional Removal Procedures
Professional removal uses tools and trained hands to lower damage risk. You’ll get a safe process, proper products, and advice for aftercare.
What To Expect At The Salon
When you arrive, the technician will inspect your nails to note product type and nail health. They usually file the top layer of the fake nail or gel to break the seal and reduce soak time.
For acrylics or hard gel, expect an acetone soak—your tech will wrap nails in cotton soaked with acetone and cover them with foil for 10–20 minutes. They check progress and repeat soaking if needed.
Technicians use metal or wooden pushers and professional nail drills to gently lift softened product. They stop as soon as the product loosens to avoid scraping live nail.
You may get a light buffing, cuticle care, and an application of oil or cream to rehydrate the nail and surrounding skin.
Comparing Salon And At-Home Methods
At the salon, professionals use controlled filing, regulated heat lamps, and medical-grade acetone. This reduces the chance of over-filing or prolonged acetone exposure that can thin your nails.
You’ll also get trained judgment: they can tell when a nail is too weak for removal and may trim or reshape instead of forcing removal.
At-home methods often rely on DIY soaking, peeling, or improvised tools. These increase risk of nail-bed injury, split nails, and slow healing.
If you choose at-home removal, follow salon steps: file surface, use proper acetone wraps, work slowly, and apply cuticle oil afterward. A salon visit costs more but gives faster, safer results when nails are very bonded or damaged.
Removing Different Types Of Fake Nails
You can remove most fake nails at home without a salon if you use the right solvent, tools, and patience. Work slowly, protect surrounding skin, and stop if you feel sharp pain.
Acrylic Nail Removal
Soak the acrylics in 100% acetone to break down the resin bond. File the top layer of the acrylic lightly to remove the glossy seal; this helps the acetone penetrate. Then soak cotton balls in acetone, place them on each nail, and wrap with foil for 15–30 minutes. Check one nail after 15 minutes; the acrylic should soften and lift. Use a wooden cuticle stick to gently push and scrape off softened acrylic. Do not force or pry if it resists—rewrap and soak longer.
After removal, wash hands and apply cuticle oil and a rich hand cream. Trim and gently buff your natural nails to remove residue. If nails feel thin, give them a week or two of rest and use a strengthening treatment.
Gel Nail Removal
If you have builder gel or hard gel, filing to thin the top layer first is essential because acetone soaks take longer. File until the shiny coat is gone, then soak in acetone with foil wraps for 20–40 minutes. Press lightly on the gel edge with a cuticle pusher; softened gel should lift. For gel polish (regular cured gel), you can usually remove it faster: roughen the surface, soak for 10–20 minutes, then wipe away residue.
Avoid peeling or picking cured gel off, since that strips natural nail layers. After removal, neutralize skin with soap and water, apply cuticle oil, and avoid harsh manicures for a few days to let your nail surface recover.
Dip Powder Nail Removal
Dip powder bonds similarly to acrylics but can be thinner near the free edge. Start by filing the topcoat and some of the powder layer to break the seal. Use acetone-soaked cotton and foil wraps for 15–30 minutes. Check progress by gently pushing at the free edge; the powder should crumble or lift when softened. If a press-on or glue-on dip set was used, warm, soapy water and gentle lifting with dental floss or a wooden stick can help separate the tips first.
After you remove powder residue, clean nails, buff lightly, and apply moisturizer and cuticle oil. If you feel any irritation or see raw nail plate, stop and let the nails breathe before reapplying products.
Tips To Minimize Nail Damage
Protect your natural nails by removing fake nails slowly and caring for the nail bed afterward. Use gentle tools, avoid prying, and restore moisture and strength once the artificial nails are gone.
Avoiding Excessive Force
Never pry, pick, or rip fake nails off with your fingers or metal tools. That action can peel layers from your natural nail and cause pain or bleeding. If a nail lifts, soak it in pure acetone or warm soapy water until the bond softens, then use a wooden cuticle stick to ease the fake nail away.
File only the top surface to thin acrylic or gel before soaking; avoid filing into your natural nail. Work in small sections, checking progress often. If you feel resistance or pain, stop and soak longer. Wear a mask or work in a ventilated area when using acetone to reduce fumes exposure.
Aftercare For Natural Nails
Once the fake nails are off, gently buff rough edges with a fine nail file and wash your hands. Apply a cuticle oil or a moisturizer with vitamin E twice daily to restore oils and prevent brittleness.
Use a strengthening base coat for 2–4 weeks if nails feel thin. Avoid new acrylic or gel applications for at least two weeks to let nails recover. Eat a balanced diet with protein, biotin, and zinc to support growth, and consider a nail repair treatment if you notice deep ridges or persistent peeling.
What To Avoid When Taking Off Fake Nails
You should avoid force, harsh chemicals, and unclean tools. Bad choices can peel layers of your natural nail or cause infections.
Common Mistakes
Do not pull or peel nails off with your fingers. Tugging can strip the nail plate and cause pain or bleeding. If a fake nail lifts, soak with acetone or use the foil method and a cuticle pusher to ease it away gently.
Avoid clipping too close to the skin. Cutting the fake nail down hard can tear the surrounding skin or the natural nail if you catch it. Clip only enough to shorten length before soaking.
Don’t rush the process. Skipping soak time or trying to pry nails off will increase damage. Take the full soak recommended for the nail type (often 10–30 minutes) and repeat if needed rather than forcing removal.
Unsafe Tools And Chemicals
Avoid metal files or heavy drills unless you know how to use them. Electric e-files can remove too much nail and burn the nail bed when used incorrectly. Leave power tools to trained technicians.
Do not use household solvents like rubbing alcohol, bleach, or paint thinner to remove nails. These do not dissolve adhesives or acrylics and can irritate skin. Use pure acetone if needed, and ventilate the area.
Stay away from sharp instruments not meant for nails, such as scissors, knives, or needles. They can slip and cut skin, creating infection risk. Use only clean, purpose-made nail tools and sanitize them before use.
Signs You Should See A Professional
If removal hurts or causes sharp pain, stop and book an appointment. Pain can mean the nail bed or skin is damaged. A pro can remove nails without making the injury worse.
Look for signs of infection like swelling, pus, redness that spreads, or fever. These symptoms need medical or professional attention rather than a DIY fix.
If the fake nail is glued to skin or lodged under the cuticle, don’t force it off. A technician has the right tools and solvents to lift or trim it safely.
Notice severe thinning, deep ridges, white spots, or nails that peel in layers. These indicate damage that needs careful treatment and nail recovery advice from a pro.
If you can’t remove the nails after repeated safe attempts, get help. Pro removal prevents further chipping or accidental tearing of your natural nails.
If you plan to get new enhancements soon, a salon visit helps ensure proper prep. A technician can assess nail health and recommend safer options before reapplication.
Alternative Solutions If Removal Is Difficult
If acetone soaks or gentle filing don’t work, try a warm water and soap soak first. Soak your nails for 15–20 minutes to soften adhesives and lift edges. Pat nails dry and test a corner with a wooden cuticle stick.
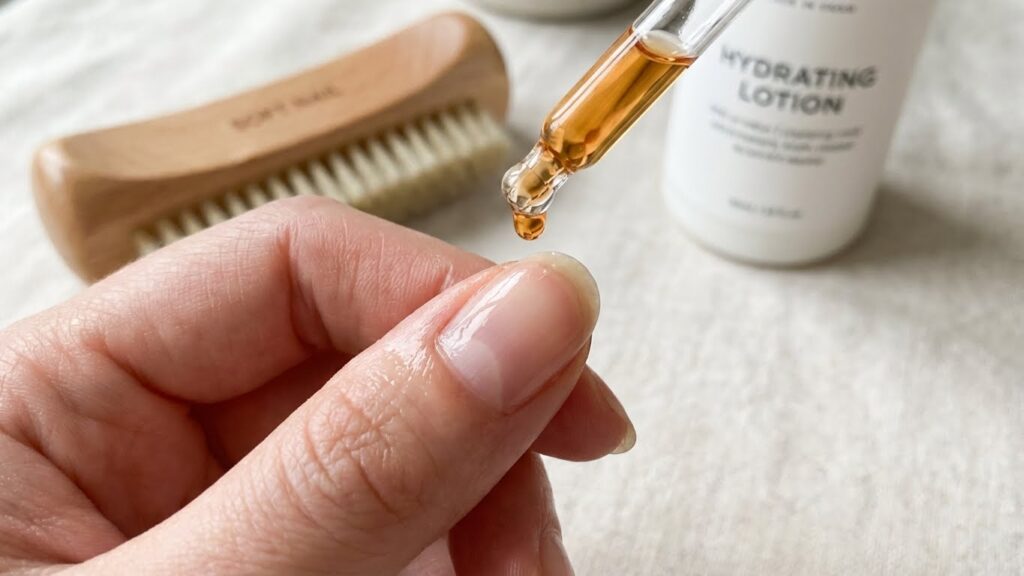
Use cuticle oil, vitamin E oil, or petroleum jelly around the nail edges to help loosen glue. Apply oil, wait 10 minutes, then push gently at the lifted edge. Repeat oiling and waiting rather than forcing the nail off.
If press-ons still resist, trim them down with nail clippers to reduce leverage and weight. Filing the top layer first can speed up soaking. Always file softly to avoid heat or pressure that could hurt your natural nail.
Try a foil-and-acetone wrap for stubborn acrylics or gel: soak a cotton ball in acetone, place it on the nail, then wrap with foil for 10–20 minutes. Check progress often and stop if your skin becomes irritated.
When in doubt, seek professional help. A nail tech has tools and training to remove difficult sets safely and to assess any damage. If you see severe lifting, pain, swelling, or signs of infection, book a salon visit or a medical check.
FAQs
What should you do if a fake nail won’t lift?
Try soaking the nail in acetone for 10–20 minutes to soften the glue or acrylic. If it still won’t budge, gently file the top layer to speed soaking. Stop if you feel pain and seek professional help.
Can you remove press-ons without acetone?
Yes. Warm soapy water, cuticle oil, and gentle lifting with a wooden stick can work for many glue-on nails. These methods take longer but reduce chemical exposure.
Will acetone damage your natural nails?
Acetone can dry your skin and nails if overused. Use a brief soak, moisturize after, and apply cuticle oil. For detailed safety tips, check the American Academy of Dermatology’s guidance.
How long does safe removal take?
Plan for 20–45 minutes for most methods, longer for stubborn acrylics or dip powder. Rushing can cause peeling or thinning of your natural nails.
Can you trim or clip fake nails before removal?
Yes. Trim them short to remove excess length and reduce catching on things. Be cautious near the cuticle to avoid lifting the natural nail.
When should you see a salon or doctor?
Go to a salon if nails are glued tightly, or to a doctor if you see infection, severe pain, or deep nail damage. Professional tools and training can prevent long-term harm.
What aftercare should you follow?
File and buff gently, moisturize daily, and give nails a break from enhancements. A balanced diet and vitamin-rich care help nails recover; the NHS offers general nail health advice.
Conclusion
You can remove fake nails safely with the right method and a little patience. Pick a removal method that fits the nail type—soaking with acetone for acrylics and gel, or gentle lifting and oil for press-ons—and set aside time so you don’t rush.
Work slowly and use simple tools: a file, cuticle pusher, cotton, and acetone if needed. Protect your skin with petroleum jelly and keep a bowl of warm, soapy water nearby to soften edges.
After removal, treat your natural nails with care. Trim and file any rough edges, push back cuticles gently, and apply oil or a strengthening treatment to help nails recover.
If nails feel sore, swollen, or you see signs of infection, seek professional help. A salon or medical provider can safely fix problems that go beyond home care.
Keep healthy nail habits to prevent damage next time. Use quality glue and take breaks between sets. When in doubt, choose the gentlest method or visit a pro.