
How Many Coats of Nail Dehydrator Should You Apply?

Quick Answer
For most manicures, apply one thin coat of nail dehydrator to the natural nail and let it air-dry completely. Professional nail-prep instructions, including OPI’s nail prep guidance, use a single coat of the prep product before moving to the next step.
How to use it correctly
- Start with one coat: Brush on a thin, even layer without flooding the skin or cuticle area.
- Let it air-dry: Wait until the nail looks dry before applying primer, bonder, base coat, glue, or acrylic.
- Don’t overapply: More dehydrator doesn’t automatically create stronger adhesion.
- Follow the label: If your brand specifically recommends another application, follow its directions.
- Avoid the skin: Keep dehydrator on the nail plate whenever possible.
If the nail still looks oily
- Check your prep first rather than automatically piling several coats onto the nail.
One of the easiest nail-prep mistakes is assuming that more dehydrator means better adhesion. In most cases, you only need a light, complete application.
The important part is removing surface oil and moisture without soaking the nail or surrounding skin. This guide explains how many coats to use, when another pass makes sense, and how dehydrator fits into gel, acrylic, dip, and press-on nail prep.
In This Guide
- How many coats of nail dehydrator do you need?
- Why is one thin coat usually enough?
- When should you apply a second coat?
- How do you apply nail dehydrator correctly?
- Do dehydrator and primer do the same job?
- How much dehydrator should you use for gel, acrylic, dip, and press-ons?
- What nail dehydrator mistakes cause lifting?
- Can you use too much nail dehydrator?
- Frequently asked questions
- Final takeaway
How Many Coats of Nail Dehydrator Do You Need?
One thin coat is usually enough. Cover the natural nail plate lightly, then allow the dehydrator to evaporate before continuing your manicure.
A nail dehydrator is a prep product designed to remove temporary surface oils and moisture from the natural nail. This creates a cleaner, drier surface for the products that come afterward.
It isn’t supposed to form a thick protective layer like polish. That distinction matters.
- Normal nail prep: Start with one thin coat.
- Missed part of the nail: Touch up that area instead of flooding the entire nail again.
- Brand requires two applications: Follow the manufacturer’s directions.
- Oil returns after touching the nail: Clean the nail again and repeat your prep.
As of 2026, professional application guidance still supports controlled, thin prep rather than automatically stacking multiple wet coats. OPI, for example, instructs users to apply one coat of its BondAid prep product and allow it to dry.
The exact instructions on your bottle always take priority. Formulas differ between manufacturers.
Does one coat mean one brush stroke?
No. One coat means one complete, thin application across the nail plate.
You might need two or three brush strokes to cover a wide thumbnail. That still counts as one coat because you’re creating one thin application layer.
Why Is One Thin Coat Usually Enough?
Nail dehydrator works through nail preparation, not through building thickness. Its main purpose is to leave the nail surface cleaner and temporarily drier before your bonding products go on.
Young Nails describes its Swipe nail prep product as a pre-prep cleanser that removes dust, contaminants, and oils before enhancements. That explains why thorough coverage matters more than layer thickness.
More product doesn’t necessarily mean more adhesion
A heavy application can make nail prep harder to control. It can also increase the chance of getting solvent-based prep onto the surrounding skin.
I prefer to think of dehydrator like cleaning a surface before applying adhesive. You want the surface clean, not soaked.
- Use enough product to wet the nail lightly.
- Reach the sidewalls without touching the skin.
- Cover the area near the cuticle carefully.
- Include the free edge when appropriate.
- Wait for visible moisture to evaporate.
Don’t touch the prepared nail afterward. Finger contact can put oils back onto the surface you just cleaned.
What should the nail look like afterward?
The natural nail will often look more matte or dry after a dehydrator evaporates. It shouldn’t have a thick, glossy coating sitting on top.
The appearance varies by formula, so don’t judge success by whiteness alone. Follow the product instructions rather than trying to make the nail look increasingly dry.
When Should You Apply a Second Coat?
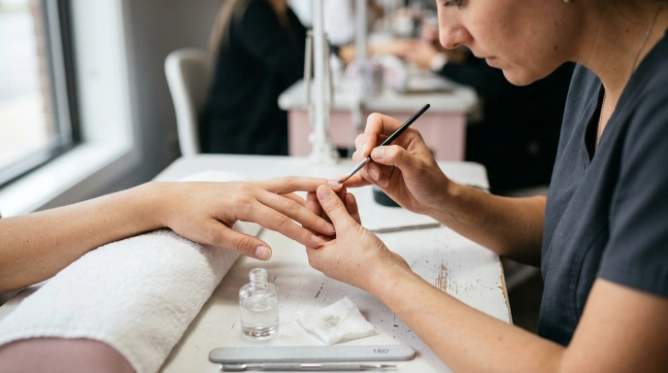
A second coat shouldn’t be an automatic step. Use another application only when the product directions or the condition of your prep gives you a clear reason.
First, make sure the problem isn’t incomplete cleaning. Oil, nail dust, cuticle residue, or touching the nail after prep can all interfere with adhesion.
| Situation | Recommended approach | Why |
|---|---|---|
| Normal clean natural nail | One thin coat | Usually provides complete surface prep without excess product. |
| You missed part of the nail | Touch up the uncovered area | Corrects incomplete coverage without unnecessarily soaking the nail. |
| You touched the prepared nail | Clean and prep again | Skin contact can transfer oils back onto the nail. |
| Manufacturer specifies two applications | Follow the label | Different formulas may have different application instructions. |
| Persistent lifting | Review the full prep routine first | Lifting has several possible causes beyond dehydrator quantity. |
What about naturally oily nails?
People with oily nail plates may need especially careful cleansing and preparation. That doesn’t mean everyone with oily nails needs several coats of dehydrator.
Start with the manufacturer’s normal application. If retention remains poor, review the entire prep and bonding system instead of assuming another dehydrator coat will solve it.
Section Takeaway: One coat is the default. Repeat only when there’s a specific reason, rather than treating two or three coats as automatically better.
How Do You Apply Nail Dehydrator Correctly?
Correct technique matters more than using a large amount. Prepare the nail fully before opening your dehydrator.
- Wash and dry your hands. Start with clean nails and avoid oily lotions immediately before application.
- Shape the nails. Complete filing before the dehydrator step.
- Clean the nail plate. Remove visible dust and any non-living cuticle attached to the nail surface.
- Use your required surface prep. Lightly buff only when your nail system calls for it.
- Remove remaining dust. Don’t trap filing debris under your manicure.
- Apply one thin coat. Wipe excess liquid from the brush and cover the natural nail evenly.
- Avoid surrounding skin. Keep the brush controlled around sidewalls and the cuticle area.
- Let it air-dry. Don’t put the hand into a lamp unless your specific product explicitly requires one.
- Continue with your system. Apply primer, bonder, base coat, glue, or enhancement product as directed.
How long should nail dehydrator dry?
Most conventional nail dehydrators are designed to evaporate quickly. Move to the next step once the application has visibly dried and your manufacturer’s directions say it’s ready.
A dehydrator isn’t normally cured like gel polish. Don’t assume every clear nail-prep liquid belongs under an LED or UV lamp.
Should you wipe dehydrator off?
Usually, you allow a standard brush-on dehydrator to evaporate rather than wiping it away. However, product systems differ.
If your bottle instructs you to wipe, cleanse, or repeat the step, use those directions. The label is more reliable than a universal nail tutorial.
Do Dehydrator and Primer Do the Same Job?
No. Dehydrator prepares the nail surface, while primer or bonding products are designed to improve adhesion in a different way.
That’s why a dehydrator shouldn’t automatically replace primer when your gel, acrylic, or extension system requires both.
Dehydrator usually comes first
The typical order is nail preparation, dehydrator, primer or bonder, then the enhancement system. Your specific brand may change that sequence.
- Dehydrator: Helps remove temporary surface moisture and oil.
- Primer: Prepares the surface chemically for stronger bonding in systems that require it.
- Bonder: Creates an adhesion-promoting layer for compatible products.
- Base coat: Forms part of the actual manicure or gel coating system.
Don’t apply thick layers of every prep product hoping to prevent lifting. Each product has a separate purpose.
The FDA notes that some nail primers can contain methacrylic acid and that nail products should be used according to their directions. This makes correct identification of each prep bottle important.
How Much Dehydrator Should You Use for Gel, Acrylic, Dip, and Press-Ons?
The general rule remains the same across many nail systems: begin with a thin, complete application. What comes after the dehydrator changes depending on the service.
Gel nails
For gel polish or builder gel, apply the dehydrator thinly and let it evaporate. Continue with primer or base products required by your gel system.
Keeping product off the skin becomes especially important before gel application. Clean application also makes the following base layer easier to control.
Acrylic nails
Acrylic systems often use dehydrator followed by a compatible primer. Don’t assume primer is optional simply because you used more dehydrator.
Prepare the natural nail carefully and avoid excessive filing. Good retention comes from the complete system working together.
Dip powder
Dip systems may use their own prep liquids before the base and powder. Follow the order supplied with your dip system rather than mixing instructions from unrelated brands.
If a separate dehydrator is included, one controlled application is a sensible starting point unless the directions specify otherwise.
Press-on nails
Dehydrator can be useful before nail glue or compatible adhesive because oils can interfere with bonding. Apply it only to the natural nail unless the press-on manufacturer directs otherwise.
After the dehydrator dries, avoid touching the natural nail with your fingertips. Then apply your glue or adhesive according to its instructions.
Gel-X or soft-gel tips
Soft-gel extension systems often combine several prep products. Use the dehydrator according to the extension brand’s system before primer, bonder, or gel adhesive when required.
Mixing incompatible preparation systems can make troubleshooting harder. Staying within one manufacturer’s directions is often simpler.
Section Takeaway: The nail system changes what follows dehydrator, but it doesn’t mean you automatically need extra dehydrator coats.
What Nail Dehydrator Mistakes Cause Lifting?
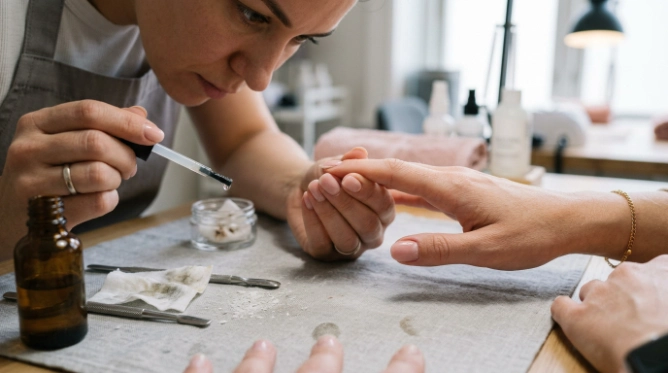
Lifting isn’t always caused by using too little dehydrator. Often, something else happened before or after the dehydrator step.
- Leaving cuticle on the nail: Product can bond to dead tissue instead of the nail plate.
- Touching prepped nails: Fingers can transfer oils back onto the surface.
- Using too much product: Flooding the nail doesn’t guarantee stronger retention.
- Skipping drying time: The next product shouldn’t be applied over visibly wet dehydrator unless instructed.
- Getting prep on skin: Keep application controlled and on the nail plate.
- Using incompatible products: Primer, base, glue, and enhancement systems aren’t universally interchangeable.
- Ignoring the free edge: Poor edge preparation can contribute to premature separation.
- Filing too aggressively: Removing excessive natural nail isn’t a good substitute for correct preparation.
Should you add another coat when nails keep lifting?
Not immediately. First check cuticle removal, dust, nail contact, product compatibility, curing, application thickness, and whether product touched the skin.
A second coat can’t compensate for every prep error. Troubleshooting the full manicure gives you more useful information.
Can You Use Too Much Nail Dehydrator?
Yes, you can use more dehydrator than you need. More frequent or heavier solvent exposure may also leave the nail and surrounding skin feeling dry or irritated.
The FDA’s nail product safety guidance recommends following product directions and warnings carefully. It also advises good ventilation when using nail products.
Keep dehydrator away from irritated skin
Don’t intentionally brush nail dehydrator over cuticles, broken skin, or open cuts. Stop using a product if you develop significant burning, swelling, rash, or another concerning reaction.
The American Academy of Dermatology also provides manicure and pedicure safety guidance for protecting natural nails and surrounding skin.
Health note: If you have persistent nail changes, pain, swelling, suspected infection, or repeated reactions to nail products, speak with a dermatologist or another qualified healthcare professional.
Can dehydrator damage natural nails?
Used as directed, nail dehydrator is meant to be a brief preparation step. Problems are more likely when nail products are overused, repeatedly put on irritated skin, or combined with aggressive filing and removal practices.
Give damaged nails appropriate recovery time. Don’t use extra dehydrator to hide an underlying nail problem.
Frequently Asked Questions
Should I use one or two coats of nail dehydrator?
Start with one thin, complete coat unless your product specifically instructs you to use two. Let the first application dry fully before deciding whether any area needs to be touched up or repeated.
Can I apply three coats of nail dehydrator?
Three coats are usually unnecessary unless the manufacturer specifically tells you to apply the product that way. Extra layers don’t automatically increase adhesion, so review your cleaning, cuticle prep, primer, application, and curing if you’re experiencing lifting.
Do I need two coats for oily nails?
Not automatically. Start with thorough cleansing and one thin coat according to your dehydrator’s directions. If oil or contamination returns because you’ve touched the nail, clean and prep it again rather than routinely stacking several coats.
Do you cure nail dehydrator under a UV or LED lamp?
Standard solvent-based nail dehydrators normally air-dry and aren’t gel products that require lamp curing. Because formulas vary, read your bottle before use and follow any brand-specific directions that differ.
Does nail dehydrator go before or after primer?
Dehydrator generally goes before primer. It prepares the natural nail surface first, while primer or bonder handles the next adhesion step in systems that require one.
Can I use nail dehydrator without primer?
That depends on your manicure system. Some products don’t require a separate primer, while acrylic, gel, or extension systems may call for both dehydrator and primer. Follow the instructions for the products you’re applying rather than assuming dehydrator replaces primer.
How much nail dehydrator should I put on each nail?
Use just enough to create a thin, even application across the natural nail plate. The nail shouldn’t be flooded with liquid, and product shouldn’t pool around the cuticle or sidewalls.
Final Takeaway
For most nail-prep routines, one thin coat of nail dehydrator is enough. Apply it evenly, keep it off the skin, let it air-dry, and avoid touching the nail afterward.
Use a second application only when your product instructions call for it or you genuinely need to redo incomplete or contaminated prep. Don’t use extra coats as a substitute for correct filing, cuticle removal, cleaning, primer, base application, or curing.
When in doubt, check the directions on your specific dehydrator first. A controlled prep routine is more useful than simply adding more product.

