
How to Cut Toenails Without Splitting Them

You line up the clippers, press down, and instead of getting a clean edge, your toenail cracks, flakes, or splits at the corner. It is frustrating, especially when you are trying to keep your feet looking neat for sandals, polish, or a fresh pedicure.
Learning how to cut toenails without splitting them is mostly about preparation, the right tool, and using several controlled cuts instead of forcing the entire nail through the clipper at once. Nail thickness, dryness, clipper sharpness, and your filing technique all make a difference.
Below, you will learn a simple trimming method, which tools work best, how to smooth the edge afterward, what mistakes cause splitting, and when a damaged-looking nail deserves professional attention.
Quick Answer
To cut toenails without splitting them, soften hard nails after a shower or brief warm-water soak, use clean and sharp toenail clippers, and make several small cuts straight across. Do not cut the nail extremely short or dig into the corners. Finish by gently filing rough edges instead of clipping them repeatedly.
Why Toenails Split When You Cut Them
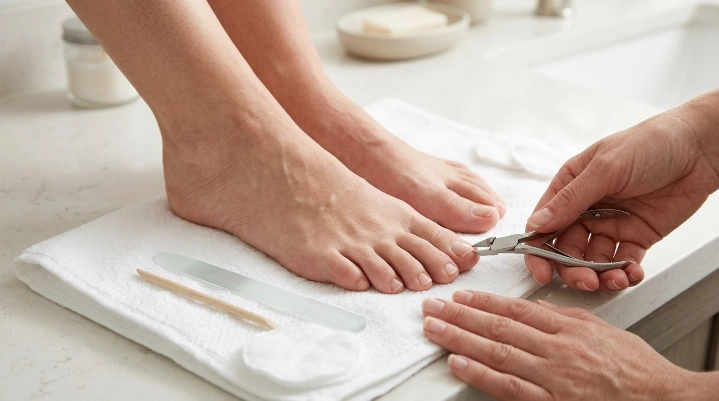
A toenail may look solid, but it is made from layers of keratin. When the cutting force is uneven, those layers can separate instead of producing one smooth edge.
The problem becomes more noticeable when the nail is dry, thick, brittle, damaged, or being squeezed by dull clippers.
Common reasons include:
- Using clippers that are dull or poorly aligned
- Trying to cut a wide toenail in one large clip
- Cutting very hard, dry nails
- Cutting too deeply into the corners
- Trimming the nail extremely short
- Aggressively filing a freshly cut edge
- Using a tool that is too small for the thickness of the nail
- Repeated shoe pressure or previous nail trauma
- Nail changes related to infection or another health problem
A split that occasionally appears at the free edge is different from a toenail that repeatedly cracks through the nail plate, becomes unusually thick, changes color, or hurts.
Persistent changes deserve more attention than a simple grooming mistake.
The Best Tools for Cutting Toenails Cleanly
You do not need a complicated pedicure kit. A few well-chosen tools are usually enough.
The most important item is a sharp toenail clipper rather than a small fingernail clipper. Toenail clippers generally give you more leverage and room for a thicker nail.
The American Academy of Dermatology recommends using a toenail clipper for toenails and smoothing rough edges afterward with a nail file or emery board. American Academy of Dermatology nail-trimming guidance
| Tool | Best Use | What to Look For |
|---|---|---|
| Toenail clipper | Normal everyday toenails | Sharp, aligned blades and a comfortable lever |
| Nail nipper | Very thick or difficult nails | Strong jaws, secure grip, good hand control |
| Fine nail file | Smoothing freshly cut edges | Fine, even abrasive surface |
| Glass file | Gentle finishing | Smooth surface that is easy to control |
| Emery board | Low-cost occasional filing | Fine side for finishing natural nails |
| Small cleaning brush | Tool hygiene | Easy-to-clean bristles used only for grooming tools |
Choosing a Nail File
Because this article is about preventing splitting, the file you use after clipping matters almost as much as the clipper.
A coarse file removes nail quickly, but that is not always what you want on a freshly trimmed natural toenail. For routine finishing, choose a fine, gentle file that lets you smooth one rough spot without aggressively thinning the edge.
Glass files can be a convenient reusable choice. Fine emery boards are inexpensive and easy to replace.
The goal is not to reshape the entire toenail after clipping. You are simply refining rough or sharp areas.
Budget vs. Better-Quality Tools
A basic clipper-and-file routine can be inexpensive. You do not need salon-level equipment for healthy, ordinary toenails.
A budget setup might include:
- A standard toenail clipper
- Fine emery boards
- A small cleaning brush
A more durable setup might include:
- Stainless-steel toenail clippers
- A washable glass file
- A protective case for clean storage
Pay more attention to blade alignment, sharpness, grip, and cleanability than decorative features.
How to Cut Toenails Without Splitting Them Step by Step
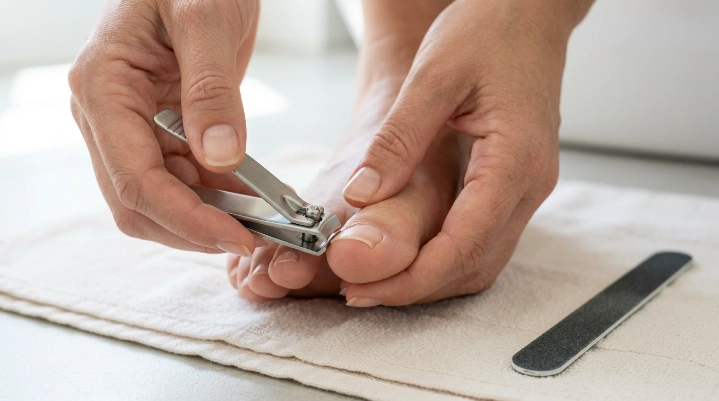
The safest-looking cut usually comes from patience rather than force.
1. Soften Very Hard Toenails First
If your toenails feel extremely hard, trimming immediately after a bath or shower can make the process easier.
If that is not practical, the American Academy of Dermatology recommends soaking nails in lukewarm water for a few minutes before trimming.
For thickened toenails specifically, Mayo Clinic advises a warm-water soak for about 5–10 minutes before drying the feet and trimming. Mayo Clinic guidance for trimming thickened toenails
You want the nail slightly easier to cut—not waterlogged and extremely soft.
2. Dry Your Feet and Get Good Lighting
Dry the toes so your hands and tools are not slipping.
Sit somewhere stable with enough light to clearly see:
- The white free edge of the nail
- Both corners
- The surrounding skin
- Any existing cracks or splits
If you cannot comfortably reach your feet, forcing yourself into an awkward position makes slipping more likely.
3. Check Your Clippers Before Starting
Open and close the clipper a few times.
The blades should meet evenly. If one side closes before the other, or the tool feels blunt enough that you need excessive force, replace it.
Do not keep squeezing harder with a dull clipper. Crushing pressure can produce the exact splitting you are trying to avoid.
4. Start at One Side With a Small Cut
Do not place the entire width of a large toenail inside the clipper and try to remove it in one snap.
Instead, start near one side and remove a small section.
Then reposition the clipper and continue across.
Mayo Clinic recommends small straight cuts when trimming thickened toenails because this approach can help prevent splintering.
For a wide big toenail, you may need several small cuts to reach the other side.
5. Cut Straight Across
Keep the overall shape fairly straight.
This is especially important at the corners.
Both dermatology and medical guidance recommend trimming toenails straight across to reduce the risk of ingrown nails.
That does not mean the finished edge must look unnaturally square. You can gently smooth a sharp point with a fine file afterward.
What you want to avoid is cutting deep semicircles into both sides.
6. Leave Some Nail at the End
Avoid cutting so close that you expose or pinch the skin underneath.
A practical stopping point is around the natural end of the toe rather than cutting deeply below it.
Cutting nails too short can increase the likelihood of an ingrown toenail, particularly when shoes press against the toe afterward. Mayo Clinic ingrown-toenail prevention guidance
7. File Instead of Re-Clipping Tiny Rough Pieces
After trimming, inspect the edge.
If one tiny section looks sharp, resist the temptation to chase it repeatedly with the clipper. That can gradually take off more nail than you intended.
Use your fine file instead.
Work gently until the edge feels smooth against a fingertip.
The American Academy of Dermatology recommends smoothing rough edges and advises filing in the same direction rather than repeatedly sawing back and forth, which can weaken nails.
Expert Tip: If you hear the nail cracking before the clipper has finished closing, stop. Move to a smaller section of nail rather than forcing the cut through.
What to Do If Your Toenails Are Thick
Thicker toenails require more caution because they resist the clipper and may fracture when too much pressure is applied at once.
First, soften the nail.
Then use several small cuts.
For particularly thick nails, a properly designed nail nipper may give you more control than a small conventional clipper. Mayo Clinic identifies nail nippers as an option for thickened toenails and emphasizes careful handling because they are very sharp.
Do not automatically assume every thick toenail is simply a cosmetic issue.
If thickness is increasing, painful, discolored, crumbly, distorted, or difficult to manage safely, professional evaluation is the better next step.
Should You Cut Wet or Dry Toenails?
The answer depends on how hard your nails are.
Slightly Softened Nails
If your nails are hard and difficult to cut, trimming shortly after bathing can reduce the amount of force needed.
That is often useful for thicker toenails.
Very Soft or Waterlogged Nails
You do not need to soak normal, flexible toenails for a long time just to trim them.
The purpose of soaking is to make a hard nail easier to manage, not to leave the nail saturated.
Afterward, dry your feet and work slowly.
How to File Toenails Without Making Splitting Worse
Filing is useful when it is used as a finishing step.
Hold the file so it meets the free edge rather than scraping aggressively across the upper surface of the nail.
Then:
- Use light pressure.
- Work on the rough edge only.
- File primarily in one direction.
- Check the edge after a few passes.
- Stop once it feels smooth.
Avoid grinding deeply into the corners.
Also avoid heavy buffing over the nail plate just because a toenail looks ridged. Excessive thinning can make a vulnerable nail more fragile.
How to Keep Nail Tools Hygienic
Your clippers and files come into contact with skin, nail debris, and sometimes tiny unnoticed cuts.
Keeping tools clean is therefore part of safe nail care.
The American Academy of Dermatology recommends regularly disinfecting nail-trimming tools and allowing them to dry completely before storage. It also advises against sharing grooming tools, particularly because organisms responsible for fungal infections can spread between people. AAD advice for reducing nail-fungus risk
Good habits include:
- Remove visible nail debris after use.
- Clean reusable tools according to their material and manufacturer instructions.
- Dry tools completely before storing them.
- Replace disposable emery boards when worn or contaminated.
- Do not share personal nail clippers or files.
- Keep clean tools separate from dirty pedicure supplies.
If you accidentally cut the surrounding skin, stop trimming that area.
Common Mistakes to Avoid
A few small technique problems cause a large percentage of frustrating trims.
- Cutting the entire nail in one bite. Large cuts require more force and may encourage splitting.
- Using fingernail clippers on thick toenails. A tool that is too small may crush rather than cleanly cut the nail.
- Using dull blades. If you must squeeze excessively, replace the tool.
- Rounding the corners deeply. Cutting down the sides can contribute to ingrown nails.
- Cutting too short. Leave enough nail to protect the end of the toe.
- Pulling off a partially cut piece. Finish the cut with the tool instead of tearing the remaining nail.
- Aggressive back-and-forth filing. Gentle finishing is enough.
- Ignoring recurring cracks or discoloration. Repeated nail changes may need professional evaluation.
- Sharing nail tools. Personal grooming tools should stay personal.
- Trying to perform difficult foot care when you cannot see or feel the toe well. Professional assistance may be safer.
What If the Toenail Has Already Split?
If the split is limited to the loose white edge and there is no pain or bleeding, avoid tearing it farther.
Carefully trim only the loose section that can be removed without pulling on attached nail.
Then use a fine file to smooth the snag.
Keep the area clean and avoid shoes that repeatedly catch or press on the damaged edge.
If the crack extends into attached nail, causes bleeding, reaches sensitive tissue, or becomes painful, do not keep cutting into it to make the nail look even.
Cosmetic symmetry can wait. Protecting the nail and surrounding skin matters more.
DIY Toenail Care vs. Professional Pedicure
Routine trimming is usually manageable at home when your toenails are healthy, easy to reach, and painless.
A salon appointment can be convenient when you mainly want cosmetic shaping, polish, or help reaching otherwise healthy nails.
| Situation | DIY Care | Professional Help |
|---|---|---|
| Normal healthy toenails | Usually appropriate | Optional |
| Mild rough edge | Clip and file gently | Optional |
| Hard-to-reach nails | May be awkward | Nail professional may help if nails are healthy |
| Very thick nails | Use extra caution | Professional assessment may be safer |
| Pain or swelling | Do not treat as cosmetic | Seek medical evaluation |
| Drainage or suspected infection | Not appropriate for salon-only care | See a healthcare professional |
| Poor circulation or reduced sensation | Extra risk | Ask your healthcare team for guidance |
A nail technician can help with grooming healthy nails, but a salon visit is not a substitute for medical diagnosis or treatment when a toe appears infected, injured, unusually discolored, or painful.
When to See a Nail Technician or Dermatologist
Consider a nail technician when the nail is healthy but you want help with ordinary grooming, shaping, or maintaining a neat pedicure.
Consider a dermatologist, podiatrist, or other qualified healthcare professional when you notice:
- Increasing pain
- Redness or swelling around the nail
- Pus or other drainage
- Bleeding
- Persistent yellow, brown, green, or dark discoloration
- Significant thickening
- Crumbling nail
- Nail separation
- Repeated deep splitting
- A nail growing painfully into the skin
- A change in nail shape or texture that does not improve
The American Academy of Dermatology advises seeing a board-certified dermatologist for significant changes in nail color, texture, or shape because some changes can reflect infection or other disease.
People with diabetes, poor circulation, or reduced sensation in the feet should be particularly cautious with difficult toenail trimming. Mayo Clinic recommends speaking with your healthcare team if these conditions make nail care unsafe or uncertain.
FAQs
Is it better to cut toenails after a shower?
It can be, especially if your toenails are hard or thick. Warm water can soften the nail enough to make cutting easier. Dry your feet before using the clippers so your grip stays secure.
Why does my big toenail split when I clip it?
The big toenail is wide and often thicker than the others. Trying to cut the full width at once can place uneven pressure on the nail. Use sharp toenail clippers and several smaller cuts instead.
Should toenails be cut straight or curved?
Toenails are generally best trimmed straight across. Avoid digging deeply into the corners because overly rounded trimming can encourage an ingrown nail.
Can a nail file prevent toenails from splitting?
A nail file cannot fix every cause of splitting, but a fine file can smooth rough edges that might otherwise snag and crack. File gently rather than aggressively thinning the nail.
How short should I cut my toenails?
Do not cut them extremely short. Leave the nail around the natural end of the toe rather than cutting deep into the skin or corners.
Why are my toenails suddenly brittle?
Occasional brittleness can happen after repeated trauma or dryness, but persistent splitting—especially with thickening, discoloration, pain, or crumbling—deserves professional evaluation rather than repeated DIY trimming.
Can I use regular fingernail clippers on my toenails?
You can sometimes use them on thin, small toenails, but a dedicated toenail clipper usually provides better leverage and accommodates thicker nails. If the tool struggles to cut cleanly, switch rather than forcing it.
Conclusion
Knowing how to cut toenails without splitting them comes down to a few simple habits: soften hard nails when needed, use sharp and properly sized tools, make several small cuts, keep the overall shape straight, and finish rough areas with a gentle nail file.
Do not aim for the shortest possible nail or a perfectly rounded corner. A controlled, conservative trim is usually better than repeatedly cutting away tiny imperfections.
Keep your tools clean, pay attention to changes in the nail, and stop treating the problem as a DIY grooming issue if you see persistent pain, swelling, drainage, major discoloration, or unusual thickening.
For your next trim, start with one change: use smaller cuts and let the nail file handle the final smoothing. That simple adjustment can make your at-home pedicure cleaner, easier, and gentler on your toenails.

