
Tired of living with grown-out or lifting fake nails? You can remove acrylics, gels, and press-ons at home without ruining your natural nails if you use the right tools and take your time. Soak-and-gentle-scrape with acetone for acrylics, acetone or filing with gel, and careful lifting for press-ons will get them off safely.
Follow a clear, slow process and avoid peeling or prying; that’s what usually causes damage. You’ll learn what tools to grab, which steps to skip, how to protect your nails while removing product, and simple aftercare to help your nails recover.
Key Takeaways
- Use the right removal method for your nail type to avoid damage.
- Take your time and use gentle tools and products during removal.
- Do basic aftercare to restore strength and prevent problems.
Types of Fake Nails
You’ll find three common types of fake nails: hard acrylics that bond to your natural nail, gel systems cured under UV/LED light, and removable press-ons that stick on with adhesive. Each type needs a different removal method to avoid damage.
Acrylic Nails
Acrylic nails are hard, thick, and glued to your nail with an acrylic mixture. They can last several weeks and often require fills as your natural nail grows out. Acrylics are common in salons and on at-home kits.
When removing acrylics, you must soak them in acetone or clip and file them down first. Work slowly and avoid prying the nail off; lifting can strip layers of your natural nail and cause pain.
After removal, the surface of your natural nail may look thin or dry. Use cuticle oil and a strengthening treatment for a week or two. If you feel sharp pain or see signs of infection, stop and consult a professional.
Gel Nails
Gel nails use a gel polish or builder gel that cures under a UV or LED lamp. Gel polish is thinner than acrylic and often blends more naturally with the nail. Builder gel creates added length and strength like acrylic, but it bonds differently.
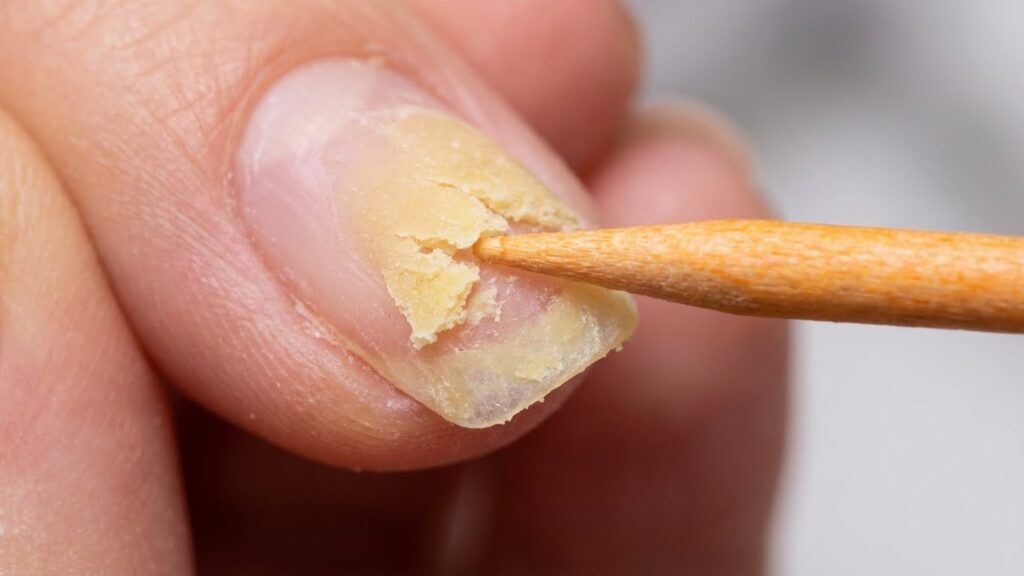
To remove gel, you typically file the shiny topcoat, then soak the nail in acetone until the gel softens. Gently push the softened gel off with an orangewood stick or buffer. Avoid force; scraping can peel layers from your natural nail.
After gel removal, your nails may be slightly flexible or sensitive. Rehydrate them with oil and avoid harsh manicures for a few days. If the gel was applied over damaged nails, consider letting your nails breathe before reapplying.
Press-On Nails
Press-on nails are pre-made tips you stick on with adhesive tabs or glue. They’re the easiest to apply and remove at home. Press-ons vary in size, length, and finish and come off without special tools if you use the right method.
To remove press-ons, soak a cotton ball in acetone or warm soapy water, hold it against the nail for several minutes, and gently lift from the edge. If glue was used, you may need longer acetone soak time or oil to loosen the adhesive.
Press-ons usually cause the least damage when removed properly. Clean adhesive residue with an oil-based remover, then moisturize your nails and cuticles. If a press-on lifts repeatedly, replace it rather than re-gluing to avoid trapping moisture.
Essential Tools and Materials
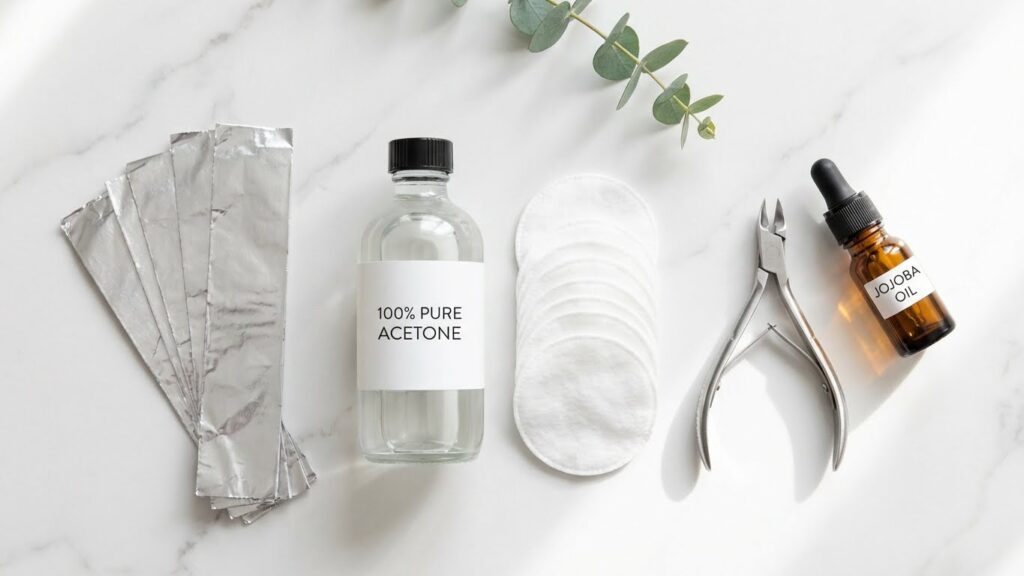
You need a few specific items to remove fake nails safely: a strong nail polish remover or pure acetone, tools to lift and trim the enhancements, and materials to soak and wrap each nail. Choose items that match the nail type (acrylic, gel, or press-on).
Nail Polish Remover
Use 100% acetone for acrylics and most gel products. Acetone breaks down the adhesive and acrylic quickly, so it reduces scraping and pulling. If you have sensitive skin, get a small bottle first to test for irritation.
Non-acetone removers work for some press-ons and polish but take much longer on acrylics. Look for an acetone-based remover labeled for artificial nails or “nail enhancement removal.” Keep a glass or metal bowl for soaking — acetone can damage plastic.
Have a moisturizing hand cream and cuticle oil ready. Acetone dries nails and skin, so apply oil right after removal to restore moisture.
Cuticle Stick and Clippers
Use a wooden or metal cuticle stick to gently lift edges of press-ons or to push softened acrylic residue off the nail. Work slowly and only after the product has softened from soaking. Avoid prying hard; that can lift and damage your natural nail.
Keep a set of nail clippers or clippers for artificial nails to trim long tips before soaking. Shortening long fake nails reduces soak time and makes removal safer. Use small nail scissors or a nail file to remove stubborn bits.
Sanitize tools with rubbing alcohol before and after use. This prevents infection and keeps your natural nails healthy.
Foil and Cotton Balls
Use aluminum foil and cotton balls for the popular wrap-and-soak method. Tear foil into 3×3 inch squares and soak cotton balls in acetone. Place a soaked cotton ball on each nail and wrap tightly with foil to keep acetone in contact with the nail surface.
Foil traps heat and prevents evaporation, which speeds up the breakdown of acrylic or gel. Replace cotton and rewrap any nails that still feel hard after 10–15 minutes. For press-on nails, soaked cotton alone may be enough without foil.
Keep a small bowl of warm water nearby to soothe fingers after unwrapping. Dispose of used cotton and foil safely and ventilate the room while using acetone.
Step-By-Step Removal for Acrylic Nails
You will either dissolve the acrylic with acetone or remove layers by filing. Both methods need patience, steady hands, and basic tools like pure acetone, a coarse file, a buffer, cotton, foil, and cuticle oil.
Soak-Off Method
Gather 100% acetone, cotton balls, aluminum foil, a nail file, and a cuticle pusher. File the top shine off each nail so acetone can penetrate. Trim any long edges carefully if needed.
Soak a cotton ball in acetone, place it on the nail, and wrap the fingertip in foil to hold it. Leave wraps on for 15–25 minutes; check one nail first. If acrylic lifts, gently push it off with a wooden cuticle stick. Do not force stuck areas; rewrap and soak another 10 minutes if needed.
After acrylic comes off, buff the nail surface lightly to remove residue. Wash hands and apply cuticle oil and a moisturizing cream to rehydrate nails and skin.
Filing Method
Use this only if you cannot soak in acetone or need to shorten acrylics quickly. Work over a towel to catch dust and wear a mask to avoid inhaling particles. Use a coarse nail file (100–180 grit) to file the bulk of the acrylic, holding the file at a low angle to avoid digging into the natural nail.
Switch to a medium grit (180–240) as you near the natural nail to slow material removal. Stop frequently and check progress; if you see natural nail layers or feel thin spots, stop filing that nail. Finish with a fine buffer to smooth rough edges and then wash hands.
Apply oil and moisturizer after filing. If nails feel weak, give them a week of rest or visit a pro for safer removal.
Safe Techniques for Removing Gel Nails
You can remove gel nails at home without hurting your natural nails if you use the right supplies and go slow. Two safe ways are soaking in acetone with a wrap, or a careful gentle peeling method for loose edges.
Acetone Wrap Method
Gather 100% acetone, cotton balls, aluminum foil, a nail file, a cuticle stick, and a small bowl of warm water. File the shiny top coat lightly to break the seal. Soak a cotton ball in acetone and place it on the nail. Wrap the fingertip tightly with a small foil square to hold the cotton in place and prevent evaporation.
Leave wraps on for 10–15 minutes. Check one nail first: press the foil and slide the cotton. If the gel softens and lifts, use a wooden cuticle stick to push the gel off gently. Do not force it; rewrap and soak 5–10 more minutes if it resists. When done, wash hands with soap, apply cuticle oil, and moisturize to restore hydration.
Gentle Peeling Process
Only use peeling when the gel is already lifting at the edges or the nail has air gaps. Start by trimming any long tips and lightly lifting an edge with a cuticle stick—never pry under the entire nail. Work slowly from one side, easing the gel up in small sections.
If the gel clings tightly, stop and switch to the acetone method. After peeling, buff the nail surface gently to remove sticky residue. Finish by soaking your nails in warm soapy water for five minutes, then apply cuticle oil and hand cream to help the nail plate recover.
How to Take Off Press-On Nails
You can remove press-ons safely by either soaking them to soften the glue or by gently lifting the edges and working outward. Both ways protect your natural nails when done slowly and with the right tools.
Soaking Off Press-Ons
Fill a bowl with warm water and add a few drops of mild dish soap. Soak your fingertips for 10–15 minutes to loosen the adhesive. Re-soak any nails that still feel stuck.
If you used nail glue, use pure acetone in a bowl or cotton-soaked pads for faster results. Protect skin by applying petroleum jelly around the nail and work one hand at a time. Place a cotton pad soaked in acetone on the nail, wrap with foil, and wait 8–12 minutes.
After soaking, press gently at the base and slide the press-on off. Do not pull hard. If it resists, soak again for a few minutes more. Finish by washing hands and applying cuticle oil to rehydrate.
Carefully Lifting the Edges
Trim the press-ons short with nail clippers to reduce leverage and prevent breakage. File the top lightly to break any shiny seal; this helps adhesive release.
Use an orange stick or cuticle pusher to find the edge under one side of the press-on. Push gently under the edge and work slowly toward the center, moving around the nail until the whole press-on lifts. Stop if you feel sharp resistance.
If the edge won’t lift, apply warm, soapy water or an acetone-soaked pad to that nail and try again after a few minutes. Once removed, buff any glue residue softly and moisturize with cuticle oil.
How to Prevent Nail Damage During Removal
Use gentle techniques, patience, and good aftercare to protect the nail plate and cuticle. Focus on dissolving adhesive, avoiding force, and restoring moisture and strength afterward.
Avoid Forcible Pulling
Never pry or rip the fake nail off. Pulling lifts layers of your natural nail and can cause splits, thinning, and pain. If a press-on or acrylic is loose, soak it in acetone or warm soapy water until adhesive softens. For acrylics or gels, file the topcoat first to let acetone penetrate faster.
Work on one nail at a time. Use a cotton ball soaked in acetone and wrap the nail with foil for 10–20 minutes, or use an acetone bowl with care. After soaking, gently push the remaining product off with an orange stick or a soft buffer. Stop if you feel resistance; re-soak instead of forcing.
If you can’t remove material after repeated soaks, see a pro. Also avoid scissors or metal tools under the nail edge; they can tear the nail bed.
Proper Moisturizing After Removal
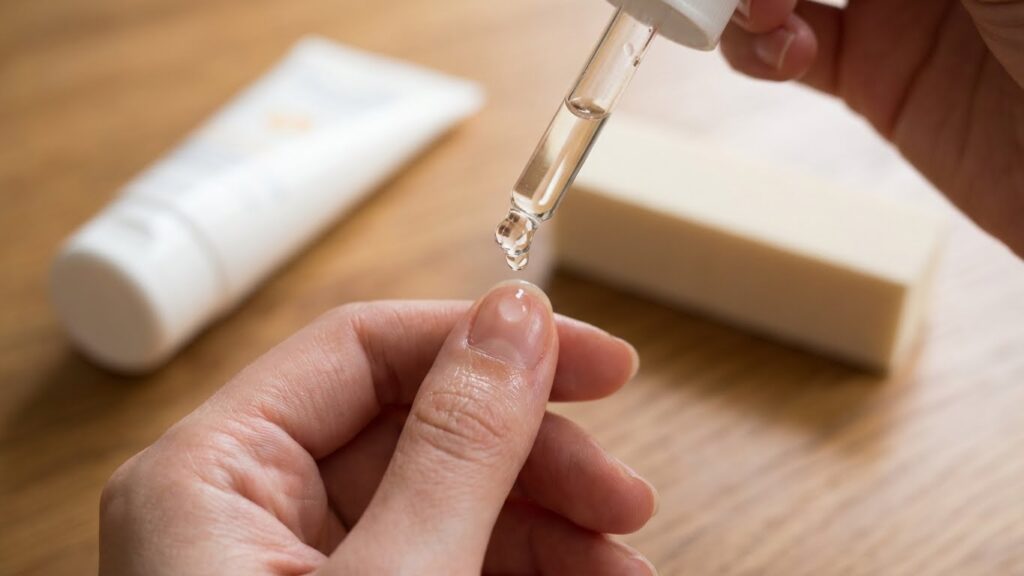
Hydrate the nails and cuticles within an hour of removal. Acetone strips oils and makes nails brittle, so apply a cuticle oil or plain jojoba/olive oil and massage for a minute to boost circulation and absorption.
Use a thick hand cream or a nail-specific balm twice daily for a week. Apply a strengthening base coat with proteins or calcium if your nails feel weak. Keep nails short while they recover to reduce breakage risk.
Consider a weekly warm oil soak (olive or coconut) for 10 minutes to restore flexibility. If you notice persistent splitting, severe thinning, or pain, rest the nails and consult a dermatologist or nail tech for treatment options.
Aftercare for Natural Nails
Give your nails time to recover. Focus on restoring moisture to cuticles and skin, then rebuild nail strength with targeted treatments and gentle habits.
Hydrating Cuticles and Skin
Use a rich cuticle oil with ingredients like jojoba, vitamin E, or sweet almond oil. Apply twice daily—morning and night—and after hand washing. Massage the oil into the base of each nail for 20–30 seconds to increase blood flow and help absorption.
For hands, choose a hand cream containing glycerin, shea butter, or ceramides. Reapply after washing hands and before bed. If skin is cracked, apply a thicker ointment (petroleum jelly or a balm) overnight and wear cotton gloves to lock in moisture.
Avoid aggressive cuticle pushing or cutting while skin heals. If a cuticle is torn, clean it with mild soap and apply an antibiotic ointment until it closes. Stay away from harsh soaps and hot water for several days to prevent further drying.
Reinforcing Nail Strength
Start with a nail hardener or strengthener that contains proteins like keratin or calcium; use it following the product directions, usually 2–3 times a week. If nails are very thin, switch to a rebuild treatment or a biotin supplement after checking with your healthcare provider.
Trim nails straight across and file gently with a fine-grit file in one direction. Keep nails short while they recover to reduce bending and breakage. Don’t use your nails as tools—use the pads of your fingers instead.
Protect nails during chores by wearing gloves for cleaning, washing dishes, or gardening. Avoid acetone-based removers and long exposure to water; opt for non-acetone removers and brief soaks when needed.
Common Mistakes to Avoid
Trying to peel or pry off fake nails can tear your natural nail and skin. You risk thinning the nail plate, lifting the nail from the bed, and causing pain or infection.
Skipping the proper filing step wastes time and increases damage. Thinning the top layer first helps acetone or soaking methods work faster and reduces forceful scraping.
Using non-acetone shortcuts like brute force or household solvents can harm your skin. Stick to safe removal methods: acetone soak, warm soapy water for lighter types, or professional-grade products when needed.
Soaking for too long or not protecting your skin is another error. Prolonged acetone exposure dries and irritates; use a short soak, apply cuticle oil afterward, and moisturize your hands.
Rushing the process often leads to rough buffing or aggressive scraping. Work patiently in small steps, check progress, and stop when the product lifts easily.
Ignoring aftercare leaves nails weak and brittle. Treat your nails with cuticle oil, a gentle cream, and keep them short until they recover to lower breakage risk.
Not seeking help when you need it can make problems worse. If you feel sharp pain, see lifting that won’t stop, or suspect infection, contact a professional instead of forcing removal.
When to Seek Professional Help
If removal causes sharp pain, bleeding, or intense pressure, stop immediately and see a pro. These signs can mean the natural nail or nail bed is damaged or infected. A nail technician or medical provider can remove the product safely.
Watch for ongoing redness, swelling, pus, or increasing pain after you try at-home removal. These are common infection signs. You should get professional care to avoid worse infection or permanent nail damage.
If the fake nail was applied over a fungus or if you already have recurrent nail problems, professional removal is best. Technicians can assess the nail, treat underlying issues, and recommend safe products.
When the fake nails are glued tightly or are very thick, at-home methods may harm your nails. A professional has the right tools and medical-grade acetone solutions to remove stubborn nails without over-filing your natural nail.
If you have health conditions like diabetes, poor circulation, or a weak immune system, consult a professional before you remove fake nails. Your risk of complications is higher, and trained staff can protect your nail health.
Bold signs that need urgent attention:
- Severe pain or sudden bleeding
- Signs of infection: pus, spreading redness, fever
- Loose nails that feel detached from the nail bed
Call your regular nail salon, urgent care, or a dermatologist depending on the severity.
FAQs
What if your fake nails won’t lift after soaking? Try more acetone soaks and gentle filing. Be patient; forcing the nail can tear your natural nail. If you see pain, swelling, or bleeding, stop and seek medical or professional help.
Can you remove press-ons without acetone? Yes. Warm soapy water, oil around the edges, and gentle lifting with a wooden stick often works. Press-ons usually come off easier than acrylics or gels.
Is acetone safe for your nails and skin? Acetone dries skin and cuticles, so use a moisturizer afterward and limit exposure. If you have sensitive skin, test a small area or ask your dermatologist for advice. The American Academy of Dermatology has useful guidance on nail care (https://www.aad.org).
How long does removal take? Expect 20–60 minutes depending on the type: press-ons are fastest, acrylics take longest. Work slowly—rushing makes damage more likely.
Can you file off acrylics instead of soaking? You can, but it takes time and the right files. If you don’t have proper tools, you may thin or heat your natural nail. Consider a salon visit for thick or stubborn acrylics.
How do you care for nails after removal? Gently buff, trim hangnails, and apply cuticle oil and a hydrating hand cream. Give your nails a break from enhancements for a few weeks to rebuild strength.
Conclusion
You can remove fake nails at home safely if you take your time and use the right tools. Be gentle and patient to protect your natural nails and skin.
If you use acetone, work in a well-ventilated area and moisturize afterward. For press-ons or glue, try soaking and careful lifting rather than forceful prying.
Keep a simple aftercare routine: trim, file, and apply cuticle oil and hand cream. This helps your nails recover and reduces peeling or brittleness.
If you notice pain, swelling, or signs of infection, stop and see a professional. Some problems need a salon or medical visit to avoid long-term damage.
Quick checklist:
- Gather supplies before you start (acetone, foil, file, oil).
- Soak or lift slowly; avoid ripping.
- Moisturize and rest your nails after removal.
You can do this safely at home when you follow steps and listen to your nails.