
You can remove fake nails at home with acetone safely and without ruining your natural nails if you follow the right steps and take your time. Soak your nails in pure acetone while protecting your skin and cuticles, then gently lift the tips once the glue or acrylic softens. This method dissolves the adhesive and lets the nails come off with little force.
Gather simple supplies — acetone, foil or bowls, cotton, an orange stick, and moisturizer — and work in a well-ventilated area to avoid irritation. Take breaks if your skin feels too dry or sore, and stop if nails resist so you can try again or see a pro.
Key Takeaways
- Prepare safe supplies and a ventilated workspace before starting.
- Soak nails in acetone until they loosen, then remove gently.
- Rehydrate nails and seek help if removal feels painful or difficult.
Preparing to Remove Fake Nails With Acetone
You will set up a safe, clean workspace, gather the right tools, and reduce the nail length and top layer so acetone can work faster. Small prep steps cut soak time and lower the risk of damage to your natural nails.
Gathering Essential Supplies
Collect 100% acetone (not regular nail polish remover), a small glass or metal bowl, cotton balls or pads, aluminum foil strips, a coarse nail file (180 grit), a cuticle pusher, and a pair of nail clippers. Have cuticle oil, a gentle hand cream, and cotton swabs ready for aftercare. Use a timer or clock to track soak time.
Keep a sponge or nail buffer for light finishing and a small bowl of warm soapy water to rinse later. If you have sensitive skin, add a jar of petroleum jelly to protect the skin around your nails. Make sure tools are clean and within reach before you start.
Protecting Your Work Surface
Work on a hard flat surface like a kitchen table. Lay down an old towel or several layers of paper towels to absorb spills and protect the table finish. Acetone can strip finishes and fabrics, so avoid wood or upholstered surfaces without protection.
Open windows or use a fan for ventilation to reduce strong fumes. Keep a small bowl of water and a trash bag nearby for used cotton and foil. Also keep pets and children out of the area while you work.
Trimming and Filing Fake Nails
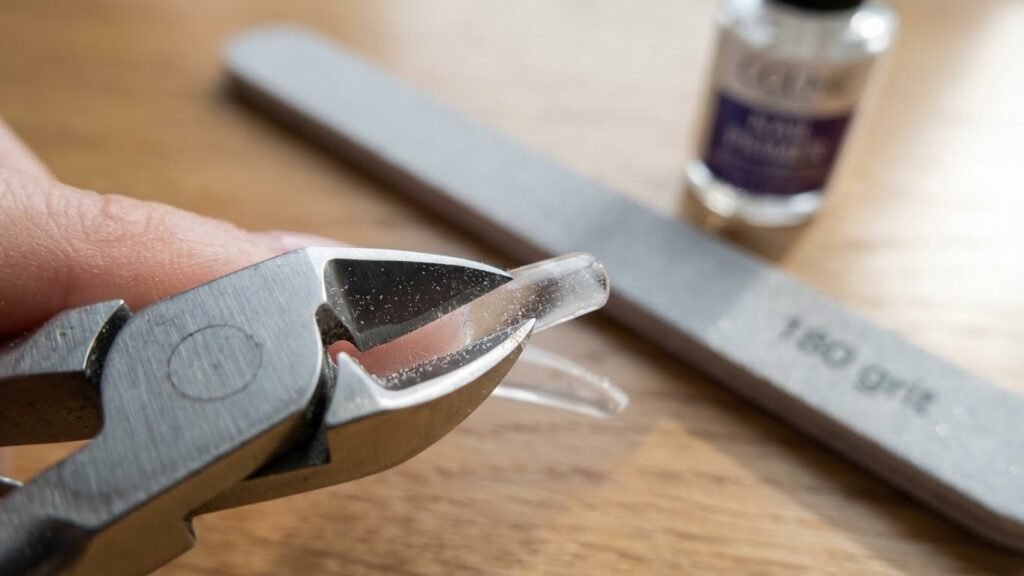
Clip the fake nails down to a short, manageable length with nail clippers. Cut across the free edge; do not force or pry the nails off. Shorter nails reduce the amount of acrylic or gel that needs to dissolve.
Use a coarse 180-grit file to roughen the top layer and remove any glossy polish or topcoat. File gently until you see the fake nail’s surface become matte. This lets the acetone penetrate faster. Finish by pushing back the cuticle gently with a cuticle pusher so acetone reaches the edge between the fake and your natural nail.
Step-By-Step Process to Soak Off Fake Nails
You will prep your nails, apply acetone in a way that protects your skin, and keep the acetone on each nail long enough for the product to soften. Work one hand at a time and have supplies ready: 100% acetone, cotton, foil, nail file, cuticle pusher, and cuticle oil.
Applying Acetone Safely
Work in a well-ventilated room and put a towel under your hand to protect surfaces. Use 100% acetone; it works fastest and dissolves acrylic and many gels. Pour a small amount into a glass or ceramic bowl if you plan to soak, or soak cotton pads if you’ll use the foil method.
Protect your skin by applying petroleum jelly or a thick moisturizer around each nail and to the surrounding skin. Avoid getting acetone on open cuts. Keep acetone away from heat and flames and close the bottle when you are done.
Wrapping Nails With Foil or Cotton
If you use cotton-and-foil: soak small cotton balls in acetone and place one over each nail. Wrap a 2–3-inch square of aluminum foil tightly around the fingertip to hold the cotton in place. The foil traps heat and keeps the acetone working on the fake nail.
If you prefer a bowl soak: submerge fingertips in acetone for 10–20 minutes, covering the bowl to limit fumes. After either method, gently test one nail edge with a cuticle pusher. If the fake nail lifts easily, push it off slowly. If it resists, rewrap and soak longer—force can damage your natural nail.
Monitoring the Soak Time
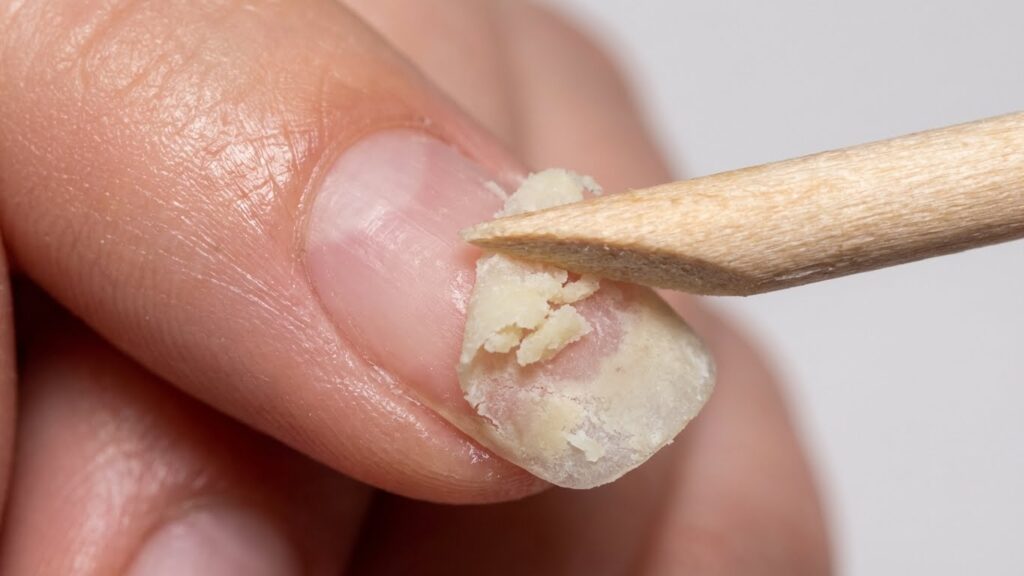
Aim for 10–20 minutes per soak cycle, then check each nail. Acrylics and thick gels can need 20–30 minutes, while thinner overlays may loosen in 8–12 minutes. Check nails every 5 minutes once you hit the lower end of the range.
If the product flakes and peels away, stop soaking and remove remaining bits with a cuticle pusher. If the surface still feels hard after 30 minutes, refinish the top with a coarse file and repeat the soak. Always follow with washing, gentle buffing, and applying cuticle oil or a moisturizer to rehydrate your nails and skin.
Alternative Acetone Removal Techniques
You can use different acetone methods that control soak time, heat, and contact area to speed up removal and protect your skin. Pick the one that fits your supplies and how much filing or soaking you want to do.
Acetone Bowl Soak Method
Fill a small glass or ceramic bowl with pure acetone and place a towel under your hand to catch drips. File or buff the top coat and any thick edges so acetone reaches the adhesive faster. Submerge your fingertips for 10–15 minutes, then test one nail with a wooden cuticle stick; the fake should lift or slide off with light pressure.
Work one hand at a time to keep acetone from evaporating. If nails don’t budge, soak another 5–10 minutes. Moisturize immediately after removal with oil or cream to restore skin and nail moisture.
Warm Acetone Soak
Heat speeds chemical action, but you must control temperature to avoid burns. Pour acetone into a heat-safe bowl and float the bowl in warm water for a few minutes to warm the acetone; never apply direct heat or microwave acetone. Test the bowl temperature with the back of your wrist before use.
Soak nails for 8–12 minutes while gently pushing at the base with a cuticle pusher. Warm acetone often reduces total soak time. Keep a fan or open window for ventilation and wear gloves on the non-soaked hand if needed.
Pre-Cut Soak-Off Pads
Pre-cut soak-off pads are small acetone-soaked cotton pads shaped for each nail. Place a pad on the nail, wrap with foil or use reusable nail clips, and leave in place for 8–15 minutes. These pads give precise contact and limit acetone exposure to the surrounding skin.
Check each nail after removing the wrap; use a wooden stick to push off loosened product. Pads work well if you want less mess and steady pressure during soaking. Dispose of used pads safely and moisturize your nails and cuticles afterward.
Post-Removal Nail Care
You should restore moisture, smooth rough edges, and check for sensitivity right after acetone removal. Follow focused steps to rehydrate the nail plate, smooth any uneven surface, and treat tender or thin nails.
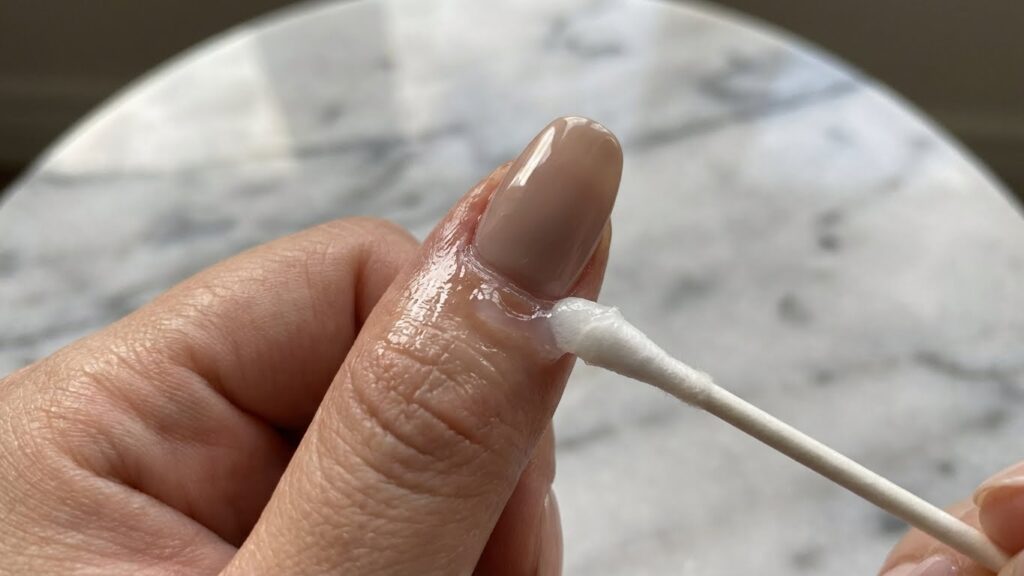
Moisturizing and Rehydrating Nails
Acetone strips natural oils from your nails and skin. Start by washing your hands with warm water and a gentle, oil-based soap to remove residue. Pat dry gently; do not rub.
Apply a cuticle oil (look for jojoba, vitamin E, or almond oil) to each nail and massage for 30–60 seconds. Repeat 2–3 times a day for the first week. For overnight repair, put a thick layer of petroleum jelly or a rich hand cream on your nails and cuticles, then wear cotton gloves.
Use a nail-strengthening treatment with keratin or calcium twice a week. Drink water and eat protein-rich foods to support nail health from the inside.
Buffing and Smoothing Nail Surface
Avoid aggressive filing right after acetone use. Wait until nails feel dry but not brittle, usually 24 hours. Use a fine-grit buffer (240–400 grit) and make only light, one-direction strokes.
Focus on removing ridges and thin glue residue without removing too much of the nail plate. Stop when the surface looks even and matte. If you see thin, translucent areas, skip buffing and protect those nails instead.
Finish by shaping with an emery board using short, light strokes toward the free edge. Wash hands and apply oil or cream immediately after buffing.
Addressing Nail Sensitivity
If nails feel tender, swollen, or show white spots, treat them gently. Soak hands in warm water with a tablespoon of olive oil or a mild salt solution for 5–10 minutes to soothe and rehydrate.
For pain or strong sensitivity, apply a cold compress for 10 minutes and avoid pressure on the nails. Use a hypoallergenic base coat if you plan to reapply polish. If you see deep discoloration, lifting of the nail, or persistent pain, contact a dermatologist or nail technician for an exam.
Safety Considerations When Using Acetone
Use acetone in a well-ventilated space, protect your skin, and dispose of soaked materials safely. Small steps—fans, gloves, sealed containers—reduce risk and keep your home safe.
Ventilation and Inhalation Risks
Work near an open window or run a box fan to push fumes outside. Acetone gives off strong vapors that can cause dizziness, headaches, or nausea if you breathe them in for too long.
Avoid enclosed rooms like cars or tiny bathrooms. If you start to feel lightheaded, step outside for fresh air and sit down until you feel normal. People with asthma, pregnancy, or other lung conditions should consult a doctor before using acetone or have someone else remove the nails.
Keep children and pets away from the area while you work. Use low-flow acetone pads rather than pouring large amounts into a bowl when possible to cut down on vapor.
Skin Irritation Prevention
Wear nitrile or latex-free gloves to protect your hands. If you get acetone on your skin, wash the area with soap and water right away.
Avoid prolonged contact; acetone strips natural oils and can dry or crack skin. Apply a thick hand cream or oil after removal to restore moisture. Do not use acetone on broken or irritated skin, and stop if you notice redness, burning, or a rash.
Protect cuticles and surrounding skin by dabbing petroleum jelly around the nail edges before soaking. Use tools gently—never force a nail off—as manual pressure can tear the nail plate and harm your skin.
Proper Acetone Disposal
Collect used cotton, pads, or foil in a sealable, nonflammable container. Do not pour leftover acetone down the sink or into the trash loose; vapors and flammability create hazards.
Label the container and store it out of reach of children until you can follow your local hazardous-waste rules. Many communities offer household hazardous waste drop-off sites; follow their instructions for solvent disposal.
If you must discard a small sealed bottle, check local rules first. Never burn or mix acetone with bleach, ammonia, or other chemicals—this can create dangerous fumes or fires.
Tips for Minimizing Nail Damage
Take steps that protect the nail plate and cuticle during and after acetone removal. Focus on gentle techniques, hydration, and rebuilding strength with targeted treatments.
Avoiding Forceful Removal
Never pry, peel, or pull off fake nails. Use a cotton ball soaked in 100% acetone and wrap each fingertip in foil for 15–30 minutes. Check one nail first; if the acrylic or gel lifts, gently push it off with an orange stick or a soft cuticle pusher. If it resists, soak longer rather than forcing it.
File only the top layer before soaking to let acetone work faster. Work slowly and stop if you feel pain or see white, ragged nail edges. Trim jagged bits with clippers and smooth edges with a fine-grit file to avoid catches that tear the natural nail.
Choosing Nourishing Nail Treatments
After removal, rinse and dry your hands, then apply a hydrating oil like jojoba or vitamin E to the cuticle and nail plate. Use a cream with glycerin or shea butter several times a day to restore moisture and reduce peeling.
Start a nail-strengthening routine: apply a protein-based nail treatment or a biotin supplement if you have chronic weakness. Limit water exposure and wear gloves for chores for two weeks. Avoid polish for a few days to let nails breathe before applying any new enhancements.
- Immediate care: acetone → rinse → oil
- Ongoing care: daily moisturizer, weekly protein treatment, glove use during wet work
When to Seek Professional Help
If your nails are very sore, bleeding, or show signs of infection (pus, spreading redness), stop the acetone process and see a professional right away. These signs can mean damage that needs medical or salon care to prevent worsening.
Seek a pro if the acrylics or glue won’t budge after a full acetone soak. A nail technician can use a proper drill or tools safely and remove stubborn product without extra harm to your natural nail.
If you have thin, peeling, or very weak nails, a technician can assess damage and recommend rebuilds or protective treatments. You may need a slower, gentler removal method than home acetone offers.
Avoid DIY removal if you have skin conditions, open cuts, or allergic reactions to acetone or adhesives. A professional can use alternative products and protect your skin and nail beds.
If you’re unsure how to finish after removal, a salon can provide post-removal care like gentle buffing, hydrating treatments, and advice to help nails recover. This lowers the chance of long-term damage.
FAQs
What kind of acetone should you use?
Use 100% pure acetone for fastest results. Regular nail polish remover may work but takes longer. Keep acetone away from open flames and use in a well-ventilated area.
How long will the soak take?
Most false nails loosen in 10–30 minutes of soaking. Check every 5–10 minutes and gently test with an orange stick. If nails don’t lift, soak a bit longer.
Will acetone damage your natural nails?
Acetone dries and can weaken nails and skin. You can reduce harm by applying cuticle oil and a moisturizer after removal. If your nails feel thin or peeled, rest them from enhancements for a few weeks.
Can you remove gel or acrylic this way?
Yes, acetone removes both acrylic and many gel overlays, though gels may need more time. For complex salon systems, consider professional removal to avoid damage. The FDA and professional nail associations offer safety tips: https://www.fda.gov and https://www.nailsmag.com.
What tools should you use?
Use a glass bowl, cotton, foil, an orangewood stick, and a nail file. Avoid prying or forcing the false nail off; that can tear your natural nail.
Is it safe to DIY at home?
Yes, if you follow steps: limit soak time, work gently, and care for nails afterward. Stop and see a pro if you notice severe pain, swelling, or signs of infection.
Conclusion
You can remove fake nails with acetone safely if you follow the right steps and take time. Use 100% acetone or a strong remover, protect your skin, and work patiently so you don’t force the nails off.
After soaking, gently push and lift the artificial nails. Stop if you feel resistance; reapply acetone and wait longer to avoid ripping or thinning your natural nails.
Expect some dryness and white spots on your nail plate after acetone. Restore moisture with cuticle oil, hand cream, and a short break before applying new enhancements.
If nails feel painful, are swollen, or the adhesive won’t budge, seek professional help. A salon technician can remove stubborn nails without damaging your natural nail bed.
Follow simple care: file rough edges, avoid picking, and use a strengthening treatment. These small steps help your nails recover and look healthy again.