
You can remove fake nails at home without wrecking your natural nails if you use gentle, steady methods and give your nails time to recover. Soak or file carefully, avoid prying or ripping, and follow with simple nail care to keep your natural nails healthy. That approach stops damage and speeds healing.
This post walks you through safe options for acrylics, gels, press-ons, and dip powder. You’ll learn which tools to use, what to avoid, and when to get pro help so your real nails stay strong and smooth.
Key Takeaways
- Use gentle, methodical removal to protect your natural nails.
- Finish with basic aftercare to restore nail strength and health.
- Get professional help if nails are thin, painful, or show signs of infection.
Understanding Fake Nails
Fake nails come in several forms, each attached differently and carrying different removal needs. You will learn which type you have, what can go wrong if removal is done wrong, and how the products bond to your nail plate.
Types of Fake Nails
There are three common types: acrylics, gel (including hard gel), and press-ons (stick-on). Acrylics are a powder-and-liquid mix that hardens into a rigid overlay. Salons usually sculpt them or apply tips to extend length.
Gels are cured under a UV/LED lamp and can be soft or hard; soft gels require breaking the surface first, while hard gels must be soaked or filed off.
Press-ons use adhesive tabs or glue and pop off more easily but can still damage your nail if pried off.
Dip powder nails are another type: you dip your nail into pigment and seal with resin. They remove more like acrylics and may need soaking.
Potential Risks of Improper Removal
Removing fake nails the wrong way can peel layers off your natural nail, causing thinning and pain. Forcibly prying nails off can tear the nail plate and the surrounding skin.
Chemical overuse, such as excessive acetone or strong solvents, dries and weakens nails and cuticles. You may get infections if water or debris gets trapped under partially removed nails.
Repeated harsh removal cycles increase splitting and slow nail growth. If you feel sharp pain, bleeding, or severe lifting, stop and see a pro to avoid long-term damage.
How Fake Nails Adhere to Natural Nails
Different systems stick in different ways. Acrylics bond mechanically: the acrylic locks onto the roughened natural nail or an applied tip. Technicians often file a bit of the nail surface to improve grip.
Gels form a chemical bond to a tacky layer left after curing, or they stick to a primer applied to the nail. This creates a firm adhesive layer that resists water.
Press-ons rely on double-sided tabs or cyanoacrylate glue. Tabs allow easier removal but lose hold faster; glue bonds strongly and can lift or take layers of your nail if removed incorrectly.
Understanding the bond helps you choose the right removal method—soaking for chemical bonds, careful filing for mechanical bonds, and gentle adhesive softening for press-ons.
Preparing for Fake Nail Removal
Plan ahead with the right tools and protect your skin and nail beds. Small steps now make the removal faster and reduce the chance of damage or pain.
Gathering Necessary Supplies
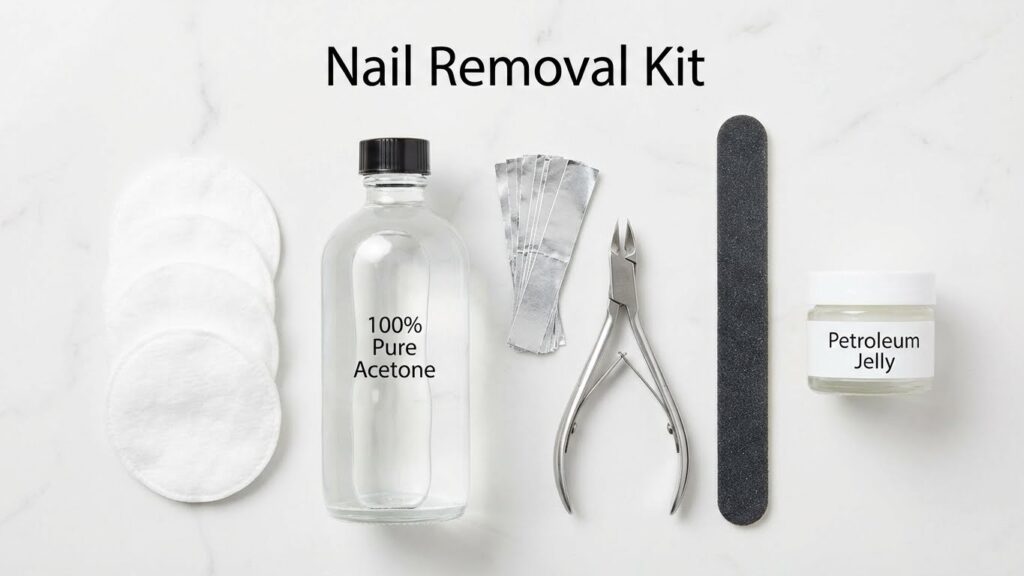
Collect tools so you won’t stop mid‑task. You’ll need pure acetone (or an acetone soak kit), cotton balls or pads, aluminum foil strips to wrap each finger, a nail clipper, a coarse nail file, a cuticle stick or orangewood stick, and a small bowl for warm water if you prefer a soak method. Optional items that help: petroleum jelly to protect skin, a buffer for finishing, and a gentle oil or cuticle cream to rehydrate after removal.
Organize supplies on a towel or tray within reach. Trim long tips with clippers first and file the top surface gently to break the seal; this helps acetone penetrate and speeds removal.
Protecting Your Natural Nails and Skin
Shield your skin from acetone to avoid dryness and irritation. Apply a thin layer of petroleum jelly around each nail and on cuticles before you soak or wrap. Wear small strips of foil correctly so the acetone stays on the nail and not on your skin.
Work slowly and avoid prying or forcing fake nails off, which can lift the nail plate. After removal, rinse your hands, gently push back cuticles with a stick, and rub in a hydrating oil or lotion to restore moisture. If you see redness, swelling, or pain, stop and consider seeing a professional.
Safe Methods to Remove Fake Nails
You can remove fake nails without damaging your natural nails if you use the right tools, take your time, and protect the skin around your nails. Use a gentle approach, avoid peeling, and follow step-by-step removal for each nail type.
Soaking Off Acrylic Nails
Trim acrylic tips short with nail clippers to reduce surface area. File the top coat gently to break the seal; stop when you see the acrylic thin but don’t file down to your natural nail.
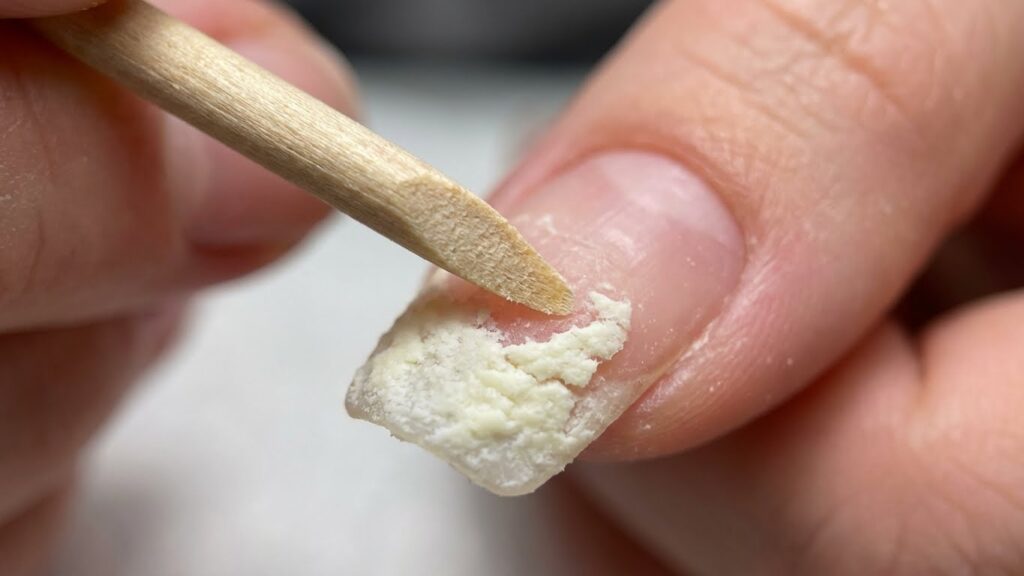
Pour pure acetone into a small glass bowl or use foil wraps with cotton soaked in acetone. Soak each nail for 15–30 minutes. Check one nail first; if acrylic lifts, use a wooden cuticle stick to push it off gently. If it resists, re-soak—never force or pry.
After removal, wash your hands and apply a thick cuticle oil or lotion to rehydrate nails and skin. File any rough spots lightly and give your nails a few days to recover before applying new enhancements.
Removing Gel Nails at Home
Start by buffing the shiny topcoat with a 180–240 grit file so acetone penetrates better. Protect the skin with petroleum jelly around the nail plate to limit drying.
Use the foil method: place a cotton ball soaked in acetone on each nail and wrap with aluminum foil. Leave for 10–20 minutes. Unwrap one nail and gently push off softened gel with an orange stick. If gel stays hard, re-wrap and wait a bit longer.
Finish by soaking hands in warm soapy water for a few minutes, then rinse and moisturize. Avoid scraping hard on the nail surface; stop if you feel pain or see white layers on the nail plate.
Using Nail Removal Kits
Choose a kit labeled for your nail type (acrylic, gel, or press-on). Kits typically include acetone pads, foil wraps, a nail file, and a pusher. Read the instructions—some kits use non-acetone solvents for sensitive skin.
Follow kit steps exactly: trim and file, apply solvent as directed, wrap or soak per timing on the package, then remove softened material with the provided tool. Kits reduce mess and usually include protective items like cuticle oil.
If a kit causes burning, severe dryness, or intense pain, stop and rinse. Seek professional help if nails feel infected, very thin, or painful after removal.
Aftercare for Natural Nails
Act quickly to restore moisture, strengthen weak nails, and protect the nail bed from infection. Use targeted products and gentle habits to rebuild nail health over the next few weeks.
Hydrating and Moisturizing Nails
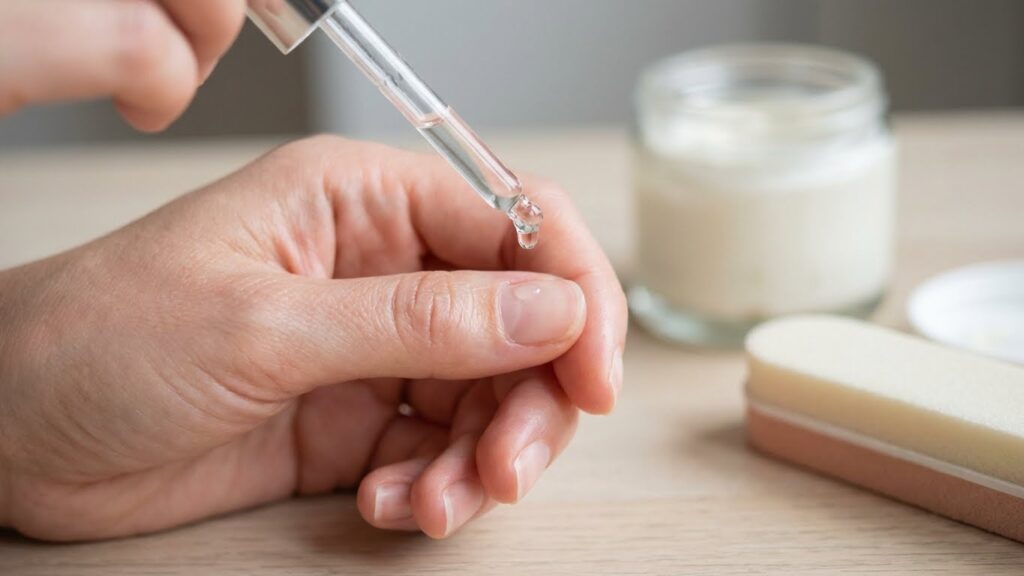
Apply cuticle oil twice daily — jojoba, almond, or vitamin E oils work well — and massage it into the cuticle and nail plate for 30–60 seconds each time. This restores oils lost during removal and helps prevent splitting and peeling.
Use a thick hand cream after washing hands and before bed. Look for creams with glycerin, shea butter, or ceramides. If nails feel very dry, put on cotton gloves after applying cream overnight to boost absorption.
Limit water exposure and harsh soaps while nails recover. Wear gloves for dishes and cleaning. Avoid acetone and alcohol-based sanitizers on nails until they feel normal.
Repairing Damaged Nail Beds
Trim and file nails straight across to reduce stress at the edges. Keep nails short while they rebuild to lower the chance of catching and tearing. Use a fine-grit file and move in one direction.
Use a protein-rich nail strengthener or a thin layer of clear nail hardener 2–3 times a week. Choose products with keratin, calcium, or biotin. Stop if you see increased brittleness or irritation.
Treat any signs of infection immediately: redness, swelling, or pus. Clean the area with mild soap and water, apply an antiseptic, and see a healthcare provider if symptoms worsen or don’t improve in 48 hours.
Mistakes to Avoid During Removal
Avoid actions that strip or stress your natural nails. Use gentle, slow methods and the right tools to prevent pain, thinning, and infection.
Peeling or Forcing off Fake Nails
Peeling, popping, or prying a fake nail off can tear layers of your natural nail. If the fake nail is lifted, stop and soak the nail in acetone or nail remover solution instead of pulling. Use a wooden cuticle stick to gently push softened adhesive away—never use metal tools to force separation.
If nails resist removal after soaking, repeat the soak rather than increasing force. Forcing can cause splits, ridges, and long-term thinning that take months to grow out. If you feel sharp pain or see blood, stop and seek a salon or medical help.
Using Harsh Chemicals
Using undiluted acetone without protecting your skin dries and irritates cuticles and surrounding skin. Limit direct acetone contact to only the nail area. Apply petroleum jelly or cuticle oil around the nail before acetone soaks to protect skin.
Don’t substitute unknown solvents or household chemicals like paint thinner or nail glue removers not made for nails. These can burn skin and damage nail plates. Use products labeled for nail removal, follow package directions, and ventilate the room to avoid fumes.
When to Seek Professional Help
If your nails feel weak, look abnormal, or cause pain, get help from a licensed nail tech or a medical professional. A pro can remove artificial nails safely and check for infection or permanent damage.
Signs of Nail Damage
If your natural nail is thin, split, or has deep grooves after removing fake nails, see a pro. Professionals can assess if the nail plate is peeling, if the nail bed is bruised, or if the nail is separating (onycholysis). These problems can worsen if you file or peel the area yourself.
Look for discoloration — yellow, brown, or dark streaks — which may signal a fungal or severe trauma. Also watch for nails that bend or break easily or for new ridges running lengthwise. A nail technician can suggest treatments like trimming damaged edges, gentle buffing, or protective overlays while your nail grows out.
Persistent Pain or Infection
If you have constant throbbing, swelling, pus, or red streaks around a nail, get medical care immediately. These signs point to an infection that may need prescription antibiotics or professional drainage. Don’t try to lance or squeeze the area yourself.
Pain that lasts beyond a few days after removal is also a red flag. A dermatologist or podiatrist (for toenails) can examine the nail, take cultures if needed, and recommend topical or oral treatment. If you wear artificial nails frequently and infections repeat, a clinician can advise safer application methods or alternatives.
Tips for Maintaining Nail Health Post-Removal
After you remove fake nails, treat your natural nails gently. Avoid filing or buffing them right away; let the surface settle for a few days before any shaping.
Keep nails and cuticles hydrated. Apply a fragrance-free hand cream and cuticle oil daily to restore moisture and reduce peeling.
Protect nails from water and harsh chemicals. Wear gloves for cleaning or dishwashing to prevent softening and breakage.
Trim nails short and file in one direction. Shorter nails are less likely to catch or split as they regain strength.
Use a simple, strengthening base if you want polish. Choose a protein- or calcium-based base coat and avoid long wear of heavy polish while nails recover.
Give nails a break from enhancements. Wait at least a few months before reapplying acrylics or gels so new growth can strengthen naturally.
Support with diet and supplements if needed. Eat protein, iron, biotin-rich foods, and consider a multivitamin after checking with your healthcare provider.
Watch for signs of damage or infection. If you see persistent pain, swelling, discoloration, or thickening, contact a clinician for advice.
Preventing Future Nail Damage
Give your nails a break. Reserve fake nails for special events instead of wearing them nonstop. Time without enhancements lets your natural nails rebuild strength.
Pick a skilled technician when you get salon nails. Proper application and removal cut the risk of thinning, lifting, and infections. Ask about their training and hygiene practices.
Use gentler products at home. Choose non-acetone polish removers sometimes, and keep cuticle oil and hand cream handy to hydrate nails and skin. Moisture reduces peeling and splitting.
Keep a simple weekly care routine. File edges gently, trim hangnails, and apply a strengthening base coat every few weeks. Small habits add up.
Watch for signs of trouble. Redness, swelling, pain, or pus mean you should stop using enhancements and see a professional. Early action prevents bigger problems.
Avoid picking or peeling at nails. Forceful removal causes the most damage. If a nail lifts, soften adhesive with acetone or see a technician rather than ripping it off.
Consider supplements and diet. Biotin and a balanced diet rich in protein and iron support nail health. Check with a healthcare provider before starting supplements.
Tools checklist
- Gentle file (180 grit)
- Cuticle oil
- Non-acetone remover (for regular polish)
- Acetone (only for acrylic/gel removal)
- Nail clipper
Follow these steps and you’ll lower your risk of long-term damage while still enjoying the look of fake nails.
FAQs
How long does removal take?
It depends on the type of fake nails and how they were applied. Acrylics and dip powder usually need an acetone soak and can take 20–40 minutes; gel and press-ons can be faster with the right tools.
Can you remove fake nails without acetone?
Yes. Warm soapy water, cuticle oil, and filing can loosen some press-ons and gels. For strong adhesives or acrylics, acetone is more reliable. If you want more detail on safe at-home methods, the NHS offers good nail-care advice: https://www.nhs.uk.
Will removing fake nails damage my natural nails?
You can avoid damage if you remove them gently. Never pry or force them off. File down length, soak as needed, then buff lightly and use cuticle oil to rehydrate the nail plate.
What should you do after removal?
Give your nails time to recover. Massage cuticle oil and hand cream daily. Avoid polish or enhancements for a week if possible to let nails strengthen.
When should you see a professional?
See a nail tech or dermatologist if you have pain, swelling, or signs of infection. If at-home methods fail or you worry about damage, a salon can remove them safely.
Are there safety tips for at-home removal?
Work in a well-ventilated area when using acetone. Protect your skin and cuticles with petroleum jelly. Use proper tools (foil, cotton, nail file) and be patient—rushing raises the risk of harm.
Conclusion
Removing fake nails safely takes patience and the right steps. If you soak, file gently, and use acetone when needed, you reduce the risk of damage to your natural nails.
Watch for signs that you need professional help, like persistent pain, thin or peeling nails, or any signs of infection. A salon removal can protect your nail health when DIY methods feel risky.
After removal, treat your nails kindly. Apply cuticle oil, trim and file carefully, and give your nails time to recover before applying new enhancements.
Keep tools clean and work in a well-ventilated area if you use chemicals. Small precautions lower the chance of irritation and speed up healing.
If you want a gentler option next time, consider press-on nails or shorter wear cycles. They can give you the look you want with less long-term care.