
You can make easy, stylish fake nails using simple paper, tape, and glue — a quick, low-cost way to try new shapes and colors without salon tools. Paper nails can be waterproof and wearable for a few days when sealed properly, giving you a fast, damage-free manicure option.
This guide shows what to use, how to shape and attach the nails, and how to add designs that last. You’ll learn quick application and safe removal so your real nails stay healthy.
Key Takeaways
- Gather a few basic materials to start crafting paper nails.
- Follow simple, clear steps to shape, decorate, and secure the nails.
- Use proper sealing and gentle removal to protect your natural nails.
Materials Needed
You will need paper that holds shape, basic nail tools, and a safe glue for attaching. Pick papers and adhesives that match the look you want and the time you plan to wear the nails.
Types of Paper for Fake Nails
Choose paper that is thin enough to cut and bend, but stiff enough to keep shape on your nail. Cardstock (160–200 gsm) works well for durable fake tips. It trims cleanly and sands smooth.
Origami or decorative scrapbook paper gives you ready-made patterns. These papers are thinner, so glue several layers or back them with thin cardstock for strength.
Use printer paper only for practice; it tears easily and will not last long. For a glossy finish, select patterned paper with a coated surface or add a clear top layer of nail polish.
Avoid wettable papers like tissue or newsprint; they warp when glue or polish touches them.
Essential Tools and Supplies
Gather tools that let you measure, shape, and finish nails precisely. You need:
- Sharp scissors or a craft knife for cutting shapes to match your nail size.
- Small nail file or buffer to smooth edges and blend paper to your natural nail curve.
- Fine-tip tweezers to place small pieces cleanly.
- Nail clippers to trim paper lengths.
- Base coat and clear top coat (nail polish) to seal paper, add shine, and protect edges. Keep a small dish of acetone or nail polish remover on hand to clean mistakes, and use a cuticle pusher to prep the nail surface. Work on a clean, flat surface with good light.
Choosing Safe Adhesives
Pick an adhesive that bonds paper to your nail without harsh chemicals. Nail glue (cyanoacrylate) gives a strong, fast hold for short-term wear. Use tiny drops to avoid overflow onto skin.
For gentler removal, try double-sided nail tabs; they reduce damage but may not last as long in water. Liquid nail art glue or PVA craft glue can work for layered paper if you allow full drying time and seal with top coat.
Avoid construction adhesives, super glues labeled for industrial use, or glue with solvents that can irritate skin. Test any new adhesive on one nail first and stop if you feel burning or see redness.
Step-by-Step Guide to Making Fake Nails With Paper
You will cut paper pieces to match each nail, shape them to sit flush against your nail bed, and attach them so they stay for a few days. Gather thick paper, scissors, a file, a small brush, and a simple adhesive like flour paste, double-sided tape, or clear nail polish before you start.
Measuring and Cutting the Paper Nails
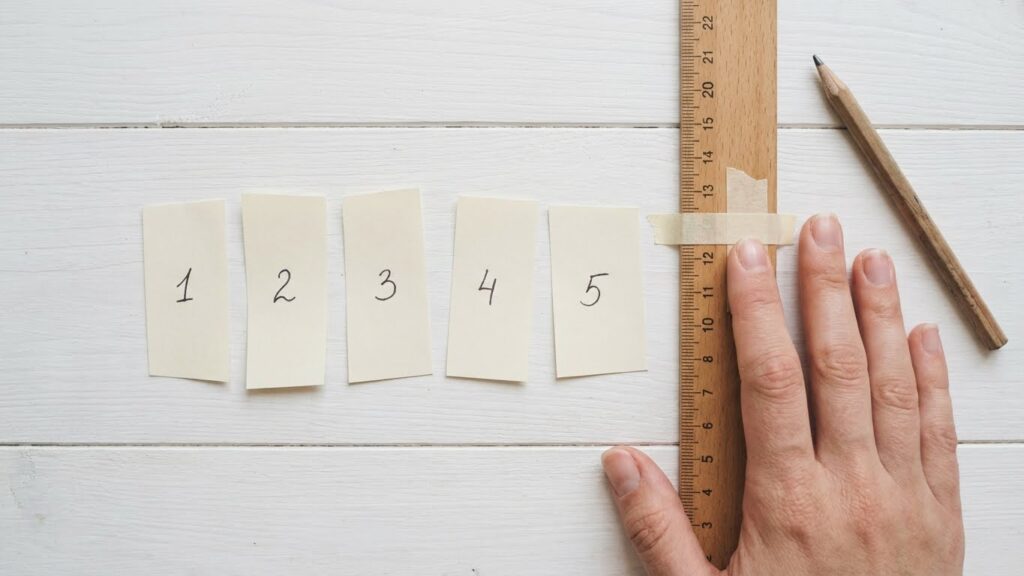
Measure each nail across the widest part with a scrap strip of paper or a ruler. Mark the width and length you need for each finger; write numbers on the backs so you don’t mix them up.
Use thick paper (cardstock or thin cardboard) for strength. Cut rounded or squared tips based on your natural nail shape. Cut each piece slightly larger than your nail—about 1–2 mm extra on all sides—to allow for trimming and shaping after you attach them.
Keep scissors sharp for clean edges. Cut slowly and check fit often by placing the paper over your nail. Trim small amounts rather than large chunks to avoid wasting material or ending up too small.
Shaping the Paper to Fit Natural Nails
Soften edges by gently bending the paper over a dowel or the side of a pen. This helps the paper conform to your natural nail curve and reduces lifting at the free edge.
File the outer edge with a fine emery board to smooth bumps and create the desired tip shape. Use a small nail file to thin the side edges where the paper meets your cuticle so it lays flat.
Hold the paper against your nail for a few seconds while adjusting the curve and angle. If you need more flexibility, score the underside with light cuts (do not cut through) to let the paper bend without cracking.
Securing the Paper Nails in Place
Choose an adhesive: flour-water paste, double-sided tape, or clear nail polish all work. Apply a thin, even layer of adhesive to the top of your natural nail or the underside of the paper piece.
Press the paper onto your nail starting at the cuticle and rolling toward the tip to avoid air bubbles. Hold firmly for 20–30 seconds. Wipe away excess adhesive around the edges with a damp cloth.
Reinforce the bond with two thin coats of clear nail polish over the paper and your natural nail. Allow each coat to dry completely. For extra durability, seal the tip with a small dab of polish or a strip of clear tape underneath the free edge.
Designing and Customizing Paper Fake Nails
You will pick colors, patterns, and reinforcement to match your style and make the nails last. Work in small steps: base color, decoration, then extra layers for strength.
Applying Nail Polish and Decorations
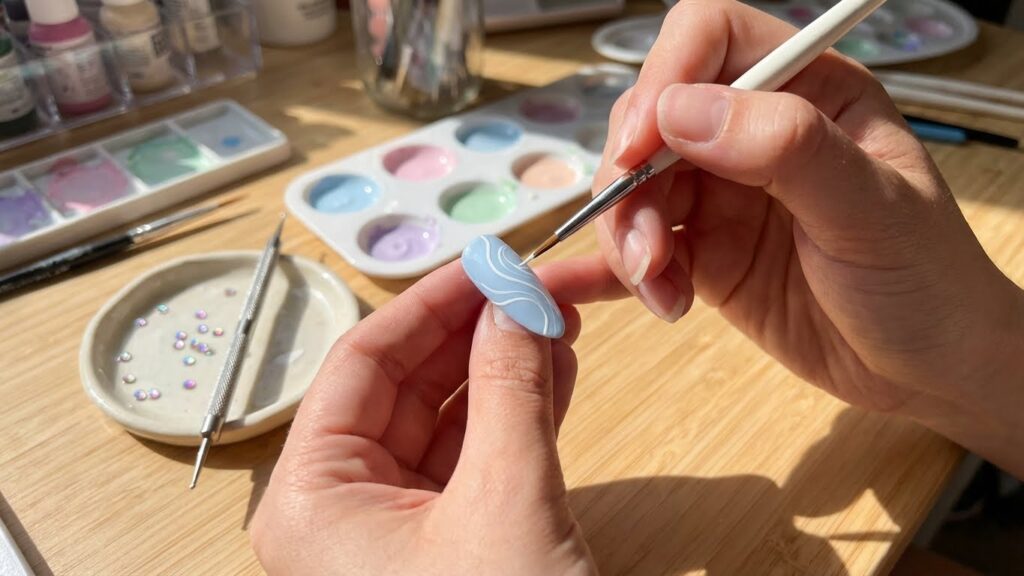
Start with a thin coat of base polish to seal the paper and give a smooth surface. Use a fast-dry or gel-like polish if you have it; let each coat dry fully before the next to avoid wrinkling.
Apply two thin color coats rather than one thick coat for even coverage. For clean edges, use a small brush dipped in remover to correct mistakes. Add glitter or chrome powders while the top coat is tacky so they stick.
Use small flat-backed gems, stickers, or washi tape for decorations. Attach gems with a tiny drop of nail glue and press for a few seconds. Finish with a glossy top coat to lock decorations and reduce lifting.
Creating Nail Art and Patterns
Plan simple designs like stripes, polka dots, or French tips first. Mark guidelines lightly with a thin marker or a strip of tape to keep lines straight.
Use dotting tools, toothpicks, or the tip of a bobby pin for small dots and details. Work from light to dark colors; lighter polish over dark can require two thin layers for opacity.
For marbling, place small drops of two colors on the paper and gently swirl with a toothpick. Allow patterns to dry on the paper before trimming to the nail shape to avoid smudging.
Adding Extra Layers for Strength
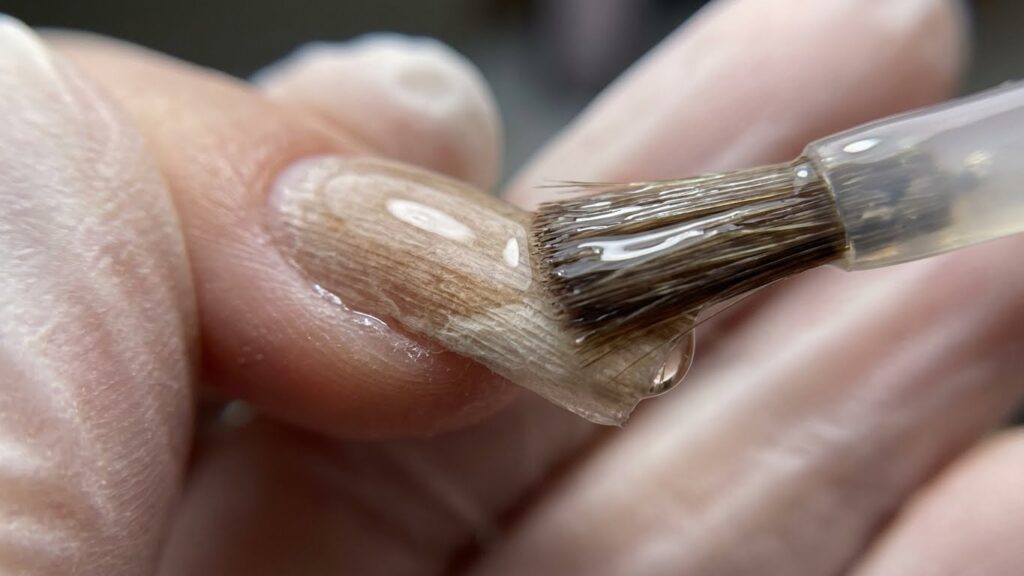
Reinforce the paper by layering clear top coat or thin glue evenly over the whole nail. Apply 2–3 thin layers, letting each dry fully; this adds rigidity without obvious bulk.
For more durability, glue a thin strip of clear tape or a layer of tissue between two paper pieces before shaping. Press edges down and seal with a top coat to prevent peeling.
If you need very strong nails, use a thin acrylic resin or builder gel over the paper following product instructions. Cure gels under a UV/LED lamp as directed and finish with a final glossy top coat.
Application and Removal Tips
Prepare clean, dry nails and gentle tools. Use thin layers, firm placement, and patience for strong, neat results. Remove slowly and protect your natural nails.
Best Application Techniques
Start by washing hands and pushing back cuticles. Lightly buff the nail surface so paper layers bond better. Cut paper to match your nail shape; test fit before gluing.
Use a small brush or a toothpick to apply thin lines of clear nail glue or a flour-and-water paste. Place the paper at the base, press down toward the tip, and smooth from center out to remove air bubbles. Add one or two more thin paper layers if you want extra strength, sealing each layer with a quick clear top coat.
Trim and shape with small scissors or a nail file. File in one direction to avoid shredding the paper. Finish with a top coat to waterproof and extend wear; allow each coat to dry fully before the next step.
How to Safely Remove Paper Fake Nails
Soak nails in warm, soapy water for 10–15 minutes to loosen glue or paste. Gently lift an edge with an orange stick; never pry hard. If the paper resists, soak longer.
Use a cotton pad with acetone-based remover only if your skin tolerates it. Press the pad on the nail for a minute, then wipe away softened glue and paper. After removal, wash hands and apply cuticle oil or a moisturizing cream to restore moisture and prevent peeling.
If you feel pain or see redness, stop and let the nail area rest for a few days before reapplying any fake nails.
Maintenance and Longevity
Keep your paper nails dry, handle them gently, and refresh the top coat every few days to extend wear. Small fixes and careful daily habits prevent peeling and make the nails look neat longer.
Daily Care Tips
Avoid soaking your hands for more than a few minutes. Use gloves for dishes or cleaning to stop water from softening the paper and glue.
Wipe your nails dry after washing. Pat them with a towel instead of rubbing hard to prevent edges from lifting.
Apply a clear top coat every 2–3 days. This seals edges and adds a waterproof layer that reduces wear.
File any rough edges gently with a fine nail file. Smooth edges stop snags on fabric and lower the chance of tearing.
Keep nails short if you do a lot of typing or manual work. Shorter paper nails catch less and stay attached longer.
Preventing Damage and Peeling
Press down the free edge each morning for 10 seconds to re-bond any tiny lifts. Use a microfiber cloth while pressing to avoid oils from your skin.
If an edge peels, lift only enough to apply a small drop of nail glue under the lift, then press and hold for 30 seconds. Trim the lifted area if glue won’t hold.
Avoid using your nails as tools for opening cans, scraping, or prying. These actions create stress points that tear the paper.
Keep cuticles pushed back and dry before application. Oils and moisture at the base cause early lifting and shorten wear time.
Alternatives to Paper Fake Nails
You can try press-on nails for a fast, durable option. They come in many shapes and sizes and attach with adhesive tabs or nail glue for a stronger hold than paper.
Acrylic and gel tips give the most salon-like finish. You need a bit of practice and tools, but these last longer and resist water better than paper.
Use tape, cotton, or foam for simple DIY tips when you want something quick. These materials are easy to shape and stick with double-sided tape or a safe adhesive.
Try plastic from disposable nail tips or broken manicure sets if you want a reusable base. Sand and file the edges to fit, then paint or decorate as you like.
If you prefer non-adhesive options, invest in reusable nail forms or clip-on styles. They snap on and off, so you avoid glue and keep your natural nails safer.
You can also explore no-glue hacks like folded paper methods, flour-and-water paste, or interlocking tabs. These reduce chemicals but usually don’t last through heavy use.
Compare options in a quick list:
- Press-on nails: easy, durable, salon look
- Acrylic/gel: long-lasting, requires tools
- Tape/cotton/foam: cheap, easy, short-term
- Reusable plastic/clip-on: no glue, reusable
- No-glue hacks: low-chemical, less durable
Pick what fits your time, budget, and how long you need the nails to last.
Safety and Aftercare
Keep your materials clean before you start. Wash your hands and dry them well to reduce bacteria under the paper nails.
If you use glue or nail tape, test a small skin area first. Stop if you feel itching, burning, or see a rash.
Avoid soaking your hands for long periods right after application. Paper layers and some adhesives weaken with water, so dry your hands gently after washing.
Use a clear top coat to seal edges and add strength. Reapply every few days to keep nails intact and water-resistant.
Trim and file paper nails carefully to avoid sharp edges. Smooth edges reduce catching on fabrics and lower the chance of peeling.
If a paper nail lifts or tears, remove it gently. Soak a cotton pad with warm water and press for a minute, then slide the nail off. Do not force it.
Watch your natural nails for changes like thinning or discoloration. If you notice problems, stop using paper nails and give your nails time to recover.
Store spare paper nails and supplies in a clean, dry place. Keep adhesives in a sealed container and out of reach of children.
Quick checklist
- Wash and dry hands first.
- Patch-test adhesives.
- Avoid long water exposure.
- Reapply top coat every few days.
- Remove lifted nails gently.
FAQs
What materials do you need to make paper nails? You only need paper (tissue, toilet paper, or cardstock), scissors, clear nail polish, and optional nail polish for color. Use thin paper for shaping and thicker paper or layers for strength.
How long will paper nails last? Expect 1–3 days with careful wear. They resist light water if sealed with several coats of clear polish, but avoid long soaking and strong chemicals.
Can you make paper nails without glue? Yes. You can fold and layer paper, then seal edges with clear polish or a flour-and-water paste as a mild adhesive. If you want stronger bonds, a small amount of nail glue or double-sided tape helps.
Are paper nails safe for natural nails? They are generally safe if you apply and remove them gently. Avoid pulling them off; soak in warm soapy water to loosen the layers. If your nails feel weak, give them a break and use a nail oil or moisturizer.
How do you customize designs? Paint over the sealed surface with regular nail polish, or add stickers and glitter before the final clear coat. For tips on safe polish use and nail care, check a trusted source like the American Academy of Dermatology: https://www.aad.org.
Where can you find step-by-step guides or inspiration? Look for video tutorials and DIY articles that show shapes and layering techniques. For safe DIY tips and basic nail health info, you can also visit Mayo Clinic’s skin and nail advice: https://www.mayoclinic.org.
Conclusion
You can make sturdy, stylish fake nails using paper and a few basic tools. The process is cheap and quick, and you control the shape, length, and design.
Start with thin paper, cut or fold to match your nail shape, and glue carefully. Seal with multiple clear coats to add strength and shine.
Expect these nails to last a few days to a week with gentle use. Avoid soaking hands and swap designs often to protect your natural nails.
If you want longer wear, try layering paper or use clear nail tips as a base. Practice will speed up your cutting and shaping, and small tweaks will improve fit and durability.
You can use nail polish, stickers, or markers for designs. Keep a small kit of glue, top coat, and tweezers handy for quick fixes.
Benefits at a glance:
- Low cost and low risk to natural nails
- Quick to make and easy to change
- Great for experiments, costumes, or short-term looks
Try different papers and sealants until you find a combination that fits your routine.