
You can get salon-quality fake nails at home by picking the right style, prepping your natural nails, and using the right glue or adhesive tabs. Pick nails that match your nail shape and size, clean and buff your natural nails, then press or glue each fake nail firmly for a secure, long-lasting fit.
You’ll learn simple steps for prep, application, and finishing touches so your manicure looks smooth and lasts longer. Follow a few safe removal and care tips to protect your real nails and keep them healthy between sets.
Key Takeaways
- Choose nails that fit your nail tips and lifestyle.
- Prep your nails and use the correct adhesive for better hold.
- Remove and care for nails gently to protect natural nails.
Choosing the Right Fake Nails
Pick nails that match your daily routine, nail shape, and how long you want them to last. Size, material, and style change comfort and durability, so choose with those priorities in mind.
Types of Fake Nails
There are four common types: press-ons, glue-on tips, acrylics, and gel extensions. Press-ons come pre-painted or plain and attach with tabs or glue; they work best for short-term wear and quick changes. Glue-on tips are unpainted plastic pieces you glue to your nail; they let you paint or shape them after application. Acrylics and gel extensions are applied at a salon or with a kit and bond to nail tips or forms; they last longer and feel more durable.
Think about how long you want them to last. Press-ons and glue-ons last days to two weeks with care. Acrylics and gels can last 2–6 weeks with fills. Also weigh removal: press-ons are easiest to remove, acrylics and gels require soaking or a salon visit.
Selecting the Proper Size
Choose the size that covers your natural nail without touching skin or cuticle. A too-small fake nail lifts at the sides; a too-large one will overlap skin and lift quickly.
Most sets include multiple sizes. Match each fake nail to your natural nail, then trim or file the sides slightly for a snug fit. If you must, file the underside of the fake nail edge to seat it flat against your nail bed. Test-fit every finger before applying adhesive to avoid mistakes.
Keep a rule: the fake nail should align with your natural nail edges and leave a tiny gap at the cuticle for glue placement. That gap helps prevent bubbling and lifting.
Material Considerations
Plastic (ABS) is lightweight and common in press-ons and glue-on tips. It bends less and can be filed into shapes, but it can feel stiff on longer lengths. Acrylic is powder-and-liquid; it builds thickness and strength, so it resists chipping. Gel is softer and glossier and can feel more natural, but it may require UV curing.
Choose material based on durability and comfort. If you type a lot or work with hands, pick acrylic or thick plastic. If you want a natural bend and shine, choose gel. Also check for hypoallergenic labels if you react to adhesives or monomers; thinner, breathable materials reduce moisture trapping beneath the nail.
Preparation Before Application
Get your nails clean, dry, and shaped. Gather the right tools and care for your cuticles so the fake nails stick and look natural.
Cleaning and Shaping Natural Nails
Remove old polish with acetone or non-acetone remover until no color or residue remains. Wash your hands with soap and warm water, then dry them completely to prevent moisture under the fake nails.
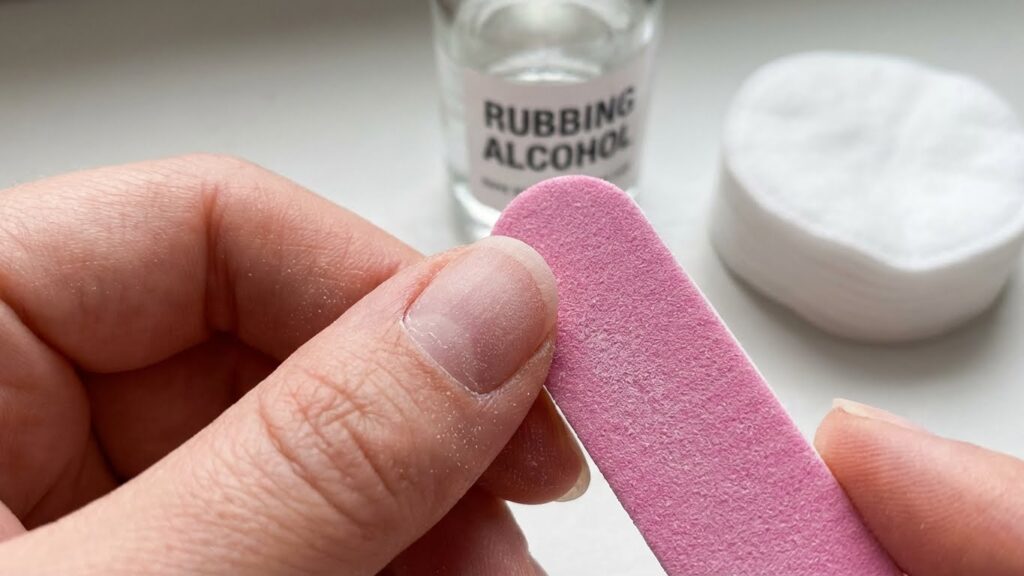
Use a nail clipper to trim nails short—about 1–2 mm past the fingertip is ideal for most press-ons. File the free edge into a straight or slightly rounded shape that matches the fake nail’s base. Lightly buff the nail surface with a fine grit buffer (180–240 grit) to remove shine; this helps glue or adhesive tabs bond better.
Avoid aggressive filing of the nail plate. Excess thinning weakens your nails. Finish by wiping each nail with rubbing alcohol on a cotton pad to remove oils and dust.
Cuticle Care
Soften cuticles by soaking your fingertips in warm water for 2–3 minutes or use a cuticle remover product for the time the label recommends. Pat dry thoroughly before doing any pushing or trimming.
Gently push cuticles back with a wooden orange stick or a cuticle pusher. Only trim hangnails or excess cuticle skin with small cuticle nippers—avoid cutting living tissue. Removing too much cuticle increases infection risk and makes glue lift sooner.
If your cuticles look dry, apply a small amount of cuticle oil and let it sink in, then wipe off the excess oil with alcohol before gluing. Oily cuticles prevent adhesives from sticking properly.
Gathering Required Tools
Lay out everything before you start: press-on nails or tips, nail glue or adhesive tabs, a nail file, buffer, nail clippers, cuticle pusher, rubbing alcohol, cotton pads, and cuticle nippers. Include a small bowl of warm water and a towel.
Check that glue is fresh and not thickened. If you plan to shape the fake nails after application, keep a fine grit file handy. For gel or acrylic preparations, have a primer or dehydrator recommended for that system.
Arrange tools within arm’s reach on a clean surface and work in good light. That prevents mistakes and speeds up the process.
Applying Fake Nails
This section shows the exact steps to glue, place, and set press-on or glue-on nails so they sit flat, stay put, and look natural. Follow each step in order and use light pressure and clean tools for best results.
Applying Nail Adhesive
Use nail glue or adhesive tabs based on how long you want the nails to last. If you want longer wear, pick a thin, fast-drying nail glue formulated for press-ons. For a less permanent option, use double-sided adhesive tabs rated for nails.
Apply a small drop of glue to the center of your natural nail or paint a thin bead along the underside edge of the fake nail. Avoid blobs that squeeze out; excess glue lifts edges and makes a mess. If you use tabs, press the tab onto your natural nail and peel off the liner.
Work one nail at a time so the glue does not skin over. Keep a cotton swab and acetone nearby to remove mistakes quickly. Use tweezers or the nail’s edges—don’t touch the glue with your fingers.
Aligning and Pressing Fake Nails
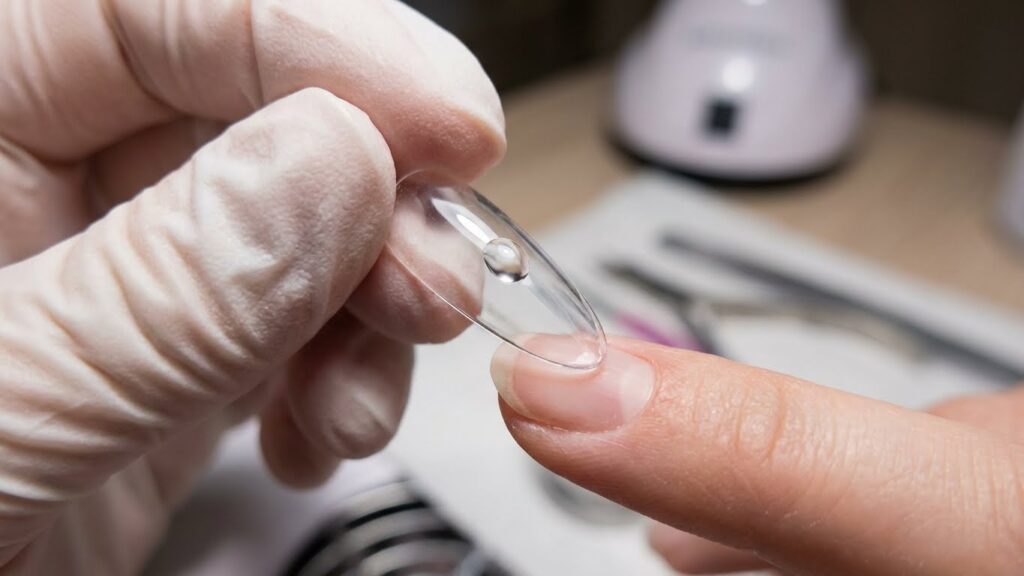
Start with the thumb on your non-dominant hand so you can steady the tool hand. Hold the fake nail at a 45° angle near the cuticle, not touching the skin. Align the fake nail with the natural sidewalls and cuticle line before you press.
Roll the fake nail forward onto your natural nail, keeping contact from cuticle to tip to avoid trapped air. Press with even pressure for 10–20 seconds. Use your fingertip to press down the center, then along both sides to seal edges.
If glue oozes, wipe it away immediately with a clean brush or cotton swab dipped in acetone. Check that the fake nail sits flush at the cuticle; if there’s a gap at the base, lift gently and reapply with a tiny bit more adhesive.
Securing and Setting
After pressing, hold steady for at least 30 seconds to ensure the bond sets. Keep your hand flat and avoid bending the nail while the glue cures, as movement can create weak spots. For glue, full curing can take a few minutes; wait before doing chores.
Light filing of the free edge and sidewalls smooths the join and reduces snagging. If you used gel adhesive, cure under an LED lamp per product instructions. Finally, apply cuticle oil around the nail base to hydrate the skin and help the bond last longer.
Finishing Touches
Take a moment to refine the fit and appearance. Trim and shape the tips, then smooth any rough edges so your nails look neat and last longer.
Trimming and Shaping
Use a nail clipper or tip cutter made for artificial nails to shorten any length that feels too long. Cut straight across first, then use small snips to fine-tune the curve. Work slowly to avoid cracking the fake nail.
Choose a file grit between 180–240 for most press-ons and acrylic tips. File in one direction with light pressure to prevent splitting. Check the nail against your natural nail bed frequently so the shape matches and the free edge sits flush.
If you want a specific shape (square, oval, almond), sketch the outline with the file before committing. Remove only a little at a time; it’s easier to take more off than to add length back.
Buffing and Smoothing Edges
Use a fine buffer or a 240–400 grit nail buffer to smooth the seam where the fake nail meets your natural nail. Buff in gentle strokes, not back-and-forth, to avoid thinning the artificial tip unevenly.
Run a soft emery board along the sidewalls to remove sharp edges that can catch on fabric. Pay special attention to the corners and under the free edge so you don’t snag or lift the adhesive.
Finish with a light buff across the nail surface if you plan to apply top coat or polish. Wipe the nail with alcohol or nail cleaner afterward to remove dust and oils so polish and glue adhere better.
Design and Decoration Options
Choose colors, finishes, and small decorations that match your outfit, event, and the nail shape. Think about durability and how often you want to change the look.
Polishing and Painting
Start with a base coat to protect your natural nail and help polish stick to the fake nail. Apply thin layers: one thin coat of color, wait 60–90 seconds, then a second thin coat for full coverage.
Use fast-dry or gel polish if you want longer wear. If you use gel polish, cure under an LED lamp according to the polish instructions. Finish with a top coat to add shine and seal edges; a matte top coat gives a flat finish instead.
Clean up edges with a small angled brush dipped in nail polish remover for sharp lines. If you prefer patterns like French tips, use striping tape or stickers to get even guides before painting.
Adding Nail Art
Small decorations can transform simple nails. Apply rhinestones, studs, or decals with nail glue or a dab of top coat to hold them in place. Press each decoration firmly and cure if using gel top coat.
For painted art, use thin brushes or dotting tools for precise lines and dots. Stamps and water decals are quick ways to add complex designs without freehand skill. Place decals after polish dries but before the final top coat.
Keep heavy or large decorations limited on longer nails to avoid breakage. Always seal art with at least one thick layer of top coat around and over the decoration to lock everything down.
Aftercare Tips
Keep your nails clean, dry, and protected. Check glue edges every few days and fix loose nails promptly to avoid lifting and dirt buildup.
Maintaining Longevity
Clean under and around nails daily with a soft brush and mild soap to remove dirt and oils that weaken adhesive. Pat nails dry; do not rub hard. Reapply a tiny drop of nail glue to any lifting edge as soon as you notice it to prevent water from getting under the nail.
Wear gloves for chores that use water or chemicals, like washing dishes or cleaning with bleach. Avoid using your nails as tools — open cans or scrape things with the pad of your finger instead. Use a light top coat every 5–7 days if your fake nails are painted; this reduces chipping and keeps them glossy.
Carry a small emergency kit: extra glue, a nail file, and a buffer. File only in one direction to keep tips smooth. Replace nails that crack or separate rather than forcing them to stay on.
Avoiding Damage to Natural Nails
Soak off fake nails properly if you plan to remove them. Use acetone soak-off or follow manufacturer instructions; do not pry or pull nails off. Pulling can strip layers of your natural nail and cause pain or infection.
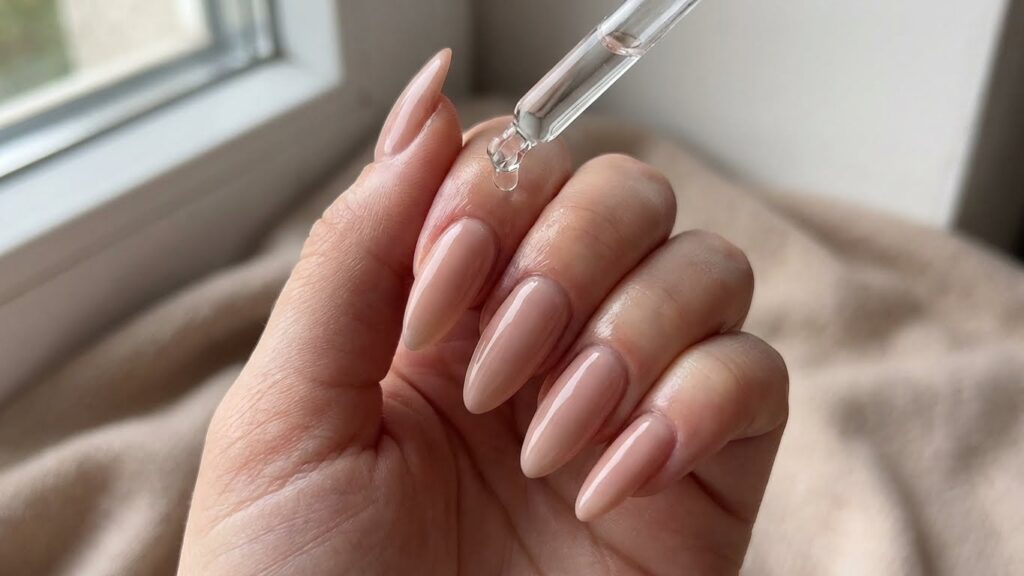
Before applying nails, push cuticles back gently and trim hangnails. After removal, massage cuticle oil and a rich hand cream into your nails and skin daily for at least a week to restore moisture. If you notice redness, swelling, or persistent pain, remove the nail and consult a clinician.
Give your natural nails a break of several days to weeks between full sets. During breaks, keep them short, filed, and well-moisturized to help them recover strength and prevent thinning or peeling.
Removing Fake Nails Safely
You will learn safe ways to loosen adhesive and how to restore your natural nails after removal. Follow steps that protect your nail bed and skin, use the right tools, and give nails time to recover.
Soaking Off Adhesive
Soak nails in pure acetone for 10–20 minutes to dissolve strong glue or acrylic. Use cotton balls soaked in acetone placed on each nail and wrap with aluminum foil to keep heat in; check every 5 minutes and gently test one nail with an orange stick.
If you prefer less harsh methods, try a warm bowl of soapy water with a few drops of olive oil for 10–15 minutes to soften press-ons and weaker glue. Never force or pry nails off; that causes peeling and breaks.
When a nail lifts, push off softened adhesive with a cuticle pusher or a soft orangewood stick. File away remaining glue lightly with a 240-grit file if needed. Wash hands and apply lotion after soaking to restore moisture.
Nail Restoration After Removal
Trim your nails short and file edges to prevent snags. Smooth the surface with a fine buffer to remove residue but avoid over-buffing, which weakens nails.
Apply cuticle oil twice daily for two weeks to rehydrate the nail matrix and surrounding skin. Use a strengthening base coat or a nail treatment with protein and calcium for 4–6 weeks if your nails feel thin.
Avoid acrylics or gels for at least a month if you experienced lifting or damage. Keep nails dry during heavy chores, wear gloves for cleaning, and eat a balanced diet with protein, biotin, and iron to support nail growth.
FAQs
How long will fake nails last on your natural nails? It depends on the type and how well you prep. Press-ons with glue can last 7–14 days; adhesive tabs often last 5–7 days. Activity level and nail prep change that time.
Can you reuse press-on nails? Yes, you can reuse many press-ons if you remove them gently and clean off glue. Store them flat in a box and keep the adhesive tabs or apply fresh glue when reusing.
Will fake nails damage your natural nails? They can if you skip prep or remove them roughly. Always file and clean your nail surface, and use cuticle oil after removal to rehydrate your nails. For safety tips, check guidance from the American Academy of Dermatology (https://www.aad.org).
Should you use glue or adhesive tabs? Glue gives a stronger hold and lasts longer. Tabs are easier to remove and gentler on nails. Choose glue for events and tabs for short-term wear or frequent changes.
How do you remove fake nails safely? Soak acrylic or glue-applied press-ons in acetone until they loosen, then gently lift. For tabs, peel slowly from the side. If your nails feel weak, give them a break and use a nail strengthener.
When should you see a professional? If you have pain, swelling, or persistent lifting, see a dermatologist or nail technician. They can check for infection and give safe removal or treatment options.
Conclusion
You can get salon-looking fake nails at home with steady prep and the right tools. Clean, shape, and degrease your natural nails first. That base step makes glue or adhesive tabs work much better.
Pick sizes that fit your nail beds and press each nail firmly for at least 10 seconds. Use a small amount of glue to avoid overflow, or choose adhesive tabs for easier removal.
Keep nails cared for after application. Avoid soaking hands in hot water right away, and trim around the cuticle if needed to prevent lifting. Carry a small bottle of glue or a few spare tabs for quick fixes.
If you want longer wear, file the underside lightly and avoid using nails as tools. Remove them gently with proper remover to protect your natural nails.
Tips at a glance:
- Clean and prep nails first
- Match sizes before gluing
- Press firmly and hold for 10 seconds
- Care for nails afterward
Follow these steps and your fake nails will look neat and last longer.