
Tired of stiff, lifting, or damaged fake nails? You can remove acrylics, gels, and glue-on tips safely at home with just a few common tools and some patience. Use acetone or a gentle soak method and take your time so you protect your natural nails.
This guide shows simple, step-by-step ways to remove different types of fake nails, plus safer alternatives and quick aftercare tips to help your nails recover. You’ll save time and money while avoiding common mistakes that cause peeling or pain.
Key Takeaways
- Gather basic supplies and prepare your nails before starting.
- Follow a slow, careful removal method to avoid damage.
- Use simple aftercare to help your natural nails heal.
Supplies Needed for Safe Removal
You will need a few specific tools, a good nail polish remover, and items to protect your natural nails and skin. Gather everything before you start to make removal safer and faster.
Essential Tools and Materials
Keep these items ready: cotton balls or pads, pure acetone, aluminum foil (cut into 3×3 inch squares), nail clippers, a coarse nail file, a wooden or metal cuticle pusher, and a small bowl if you soak.
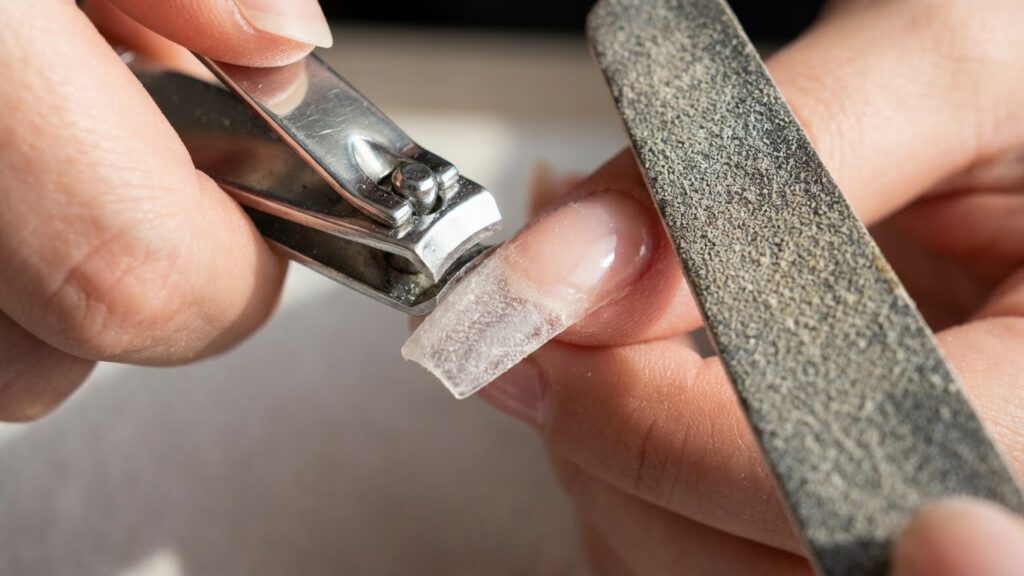
Use nail clippers to trim long tips down first. This reduces soaking time and stress on your nails.
A coarse file helps thin acrylic or gel surface layers so remover penetrates. Work gently—don’t file through to your natural nail.
Have moisturizer and cuticle oil on hand for aftercare. Keep a towel and cotton swabs nearby for cleanup.
Choosing the Right Nail Polish Remover
Pick 100% pure acetone for most acrylic and hard gel removals. It dissolves the acrylic faster than regular polish remover with lower acetone content. Use a product labeled “pure acetone” or buy acetone from a hardware or beauty supply store.
If you have sensitive skin, consider a non-acetone remover only for glue-on tips or light gel polish. Non-acetone takes much longer and often won’t work for hard acrylics.
Check for added fragrances and dyes. These do not help removal and can irritate skin. For soaking, pour acetone into a small glass or metal bowl—avoid plastic, which can melt or absorb acetone.
Protecting Your Natural Nails During Removal
Protect your skin and cuticles by applying petroleum jelly or a thick cream to the skin around each nail before soaking or wrapping. This creates a barrier against acetone.
Work on one hand at a time so the other stays protected and you can rest fingers between soaks.
Avoid prying or peeling the fake nail off. If a piece resists after soaking, re-soak the area rather than force it. After removal, buff gently and apply a rich hand cream and cuticle oil to rehydrate nails. Use a nail strengthener if your nails feel thin or weak.
Preparation Before Removal
Get the right tools, clean the nail surface, and check your natural nails for damage before you start. A tidy space and a clear plan make removal faster and safer.
Cleaning and Trimming Fake Nails
Start by washing your hands with warm water and soap for at least 20 seconds. This removes oils and dirt that can block acetone or make glue harder to break down.
Trim any very long tips with nail clippers or nail nippers. Shortening long press-ons or acrylic tips reduces leverage and lowers the chance of ripping the natural nail.
Gently file the top coat or glossy finish with a coarse nail file. Focus on removing shine so acetone soaks or glue softeners can penetrate. Don’t file down to your natural nail — stop when the surface looks dull.
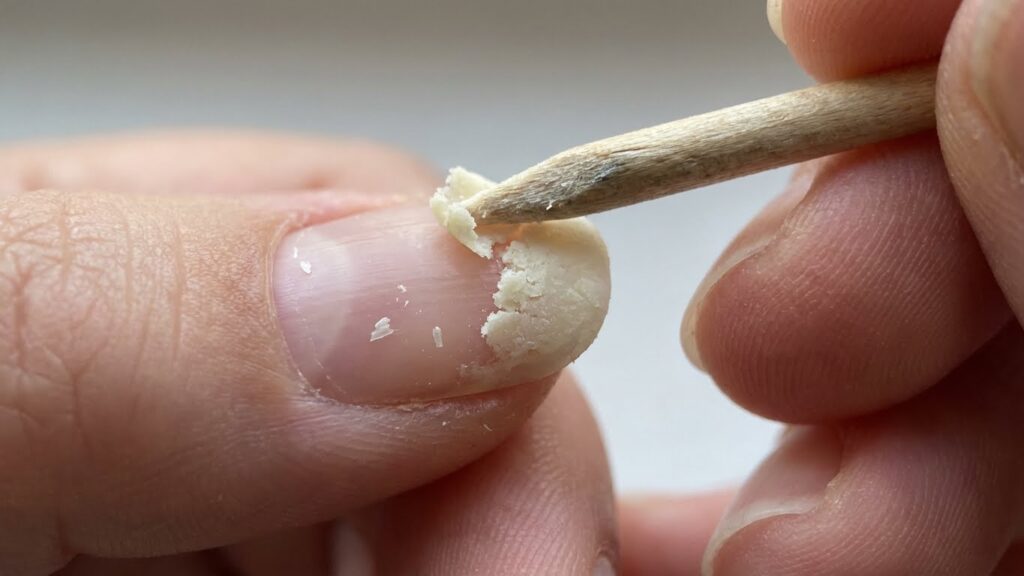
Use a cuticle pusher to lift edges of press-ons or glue-on tips slightly. Work slowly and only lift a little to see if the nail is already loose. If it resists, move to soaking methods instead of forcing it off.
Setting Up a Clean Work Area
Work at a flat table with good light. Lay down an old towel or disposable paper towel to catch filings, glue, and acetone drips.
Gather supplies before you begin: acetone or non-acetone remover, small bowl (for soaking), cotton balls, aluminum foil or nail clips, a coarse file, cuticle oil, and a bowl of warm soapy water. Keep a trash bag and hand cream within reach.
Open windows or run a fan if you use acetone to reduce strong fumes. Protect furniture and fabrics from acetone with a layer of cardboard or extra towels.
Have a timer or clock ready so you can track soak times. Keep your phone nearby only for timing or emergency calls — avoid distractions while working with tools and chemicals.
Assessing the Condition of Your Nails
Examine each nail for lifting, thinning, cracks, or white spots. If your natural nail looks very thin, painful, or infected (redness, swelling, pus), skip at-home removal and see a pro or a doctor.
Check for gaps between the fake nail and your cuticle. Large gaps can mean the nail will come off easily with a short soak. Fully adhered nails usually need longer acetone soaks or filing.
Note any areas of pain when you touch the nail. Pain suggests the bond is pulling the nail bed; removal should be gentler to avoid tearing the natural nail.
If you wore enhancements for a long time and the natural nail is brittle, plan to use shorter soak times and more oil afterward. Prepare a bottle of cuticle oil and a nail-strengthening treatment to use right after removal.
Step-By-Step Guide to Removing Fake Nails
Follow careful steps, use the right tools, and work patiently. Protect your skin and natural nails, and stop if you feel pain.
Soaking Off Acrylic Nails
File the top surface of each acrylic to break the seal. Use a coarse nail file and file gently until the shine is gone; this helps the solvent penetrate.
Soak cotton balls in 100% acetone and place one on each nail. Wrap aluminum foil around the finger to hold the cotton in place. Leave the wraps on for 15–30 minutes, checking one nail after 15 minutes.
When acrylic lifts, use a wooden or metal cuticle pusher to gently slide the softened acrylic off. Work slowly and stop if you meet resistance. Repeat soaking on stubborn spots rather than force removal.
After removal, wash your hands and rub cuticle oil into each nail and the surrounding skin. Trim and buff nails lightly, then apply a strengthening base or moisturizer.
Removing Gel Nails Safely
Start by trimming any free edge of the gel to shorten the nail. Lightly file the top coat to remove shine so acetone can work faster.
Soak a cotton ball with acetone and place it on the nail, then wrap in foil or use reusable gel removal clips. Leave for 10–20 minutes. Check one nail early to avoid overexposure.
Gels often lift and peel; use a cuticle pusher to nudge lifted gel off. If it resists, rewrap and soak again. Do not pry or force, as that can strip layers of your natural nail.
Finish by buffing gently and applying oil to rehydrate the nail plate. If nails look thin or soft, give them a break from enhancements for a few weeks.
Taking Off Press-On Nails
Start by soaking your nails in warm, soapy water for 10–15 minutes to loosen adhesive. Use a bowl with gentle dish soap and warm water; this often softens the glue enough to remove them.
If water alone doesn’t work, slide dental floss under the edge of the press-on. Move the floss back and forth while pulling the press-on upward to cut the adhesive bond. Be slow to avoid tearing the natural nail.
For stubborn glue, use a small amount of acetone on a cotton swab at the nail edge. Apply briefly and then lift; avoid soaking your whole finger if possible. Clean residual glue with an oil-based remover and finish with cuticle oil.
Alternative Methods for Nail Removal
You can use store-bought kits, a foil-and-acetone soak, or careful manual filing to remove fake nails. Each method balances speed, cost, and nail safety differently, so pick one that matches how much time and tools you have.
Using Nail Removal Kits
Nail removal kits usually include small acetone pads, a nail file, a buffer, and an orange stick. Follow the kit instructions: file the topcoat gently to break the seal, place the soaked pads on each nail, wrap with the provided foil or clips, and wait the recommended time (often 10–20 minutes). Check one nail first; if the fake nail lifts, you can gently push it off with the orange stick.
Use the kit’s buffer to smooth rough edges and finish with cuticle oil to rehydrate nails and skin. Kits are convenient and portable, and they reduce mess compared with loose acetone. Avoid forcing nails off; stop and re-soak if they resist to prevent tearing or thinning of your natural nail.
The Foil Method Explained
You need pure acetone, cotton balls, aluminum foil, a nail file, and a cuticle pusher. Start by filing the shiny top layer to help acetone penetrate. Soak a cotton ball in acetone and place it on the nail, then wrap the fingertip tightly with a small square of foil to hold the cotton in place.
Wait 10–25 minutes depending on the product and how thick the fake nails are. Remove one foil wrap and test the nail; the fake layer should soften and lift. Gently push it off with a cuticle pusher. Finish by washing hands and applying oil or hand cream. This method is effective for acrylics and gels but can dry your skin, so limit exposure and work in a ventilated area.
Manual Filing Techniques
Manual filing works when you want to avoid acetone or have only glue-on tips. Use a coarse file (180 grit) to gradually thin the fake nail, moving from the tip toward the cuticle. File in one direction with light to moderate pressure to avoid heat and splitting.
Once the fake layer is thin, switch to a finer file or buffer to remove residue and smooth the natural nail. Take breaks to check progress and avoid over-filing the nail plate. Clean under nails and apply a strengthening polish or oil afterward. Manual filing is slower but safe when done carefully; stop if you feel pain or see white, thinned spots on your natural nail.
Aftercare for Natural Nails
Treat your nails like skin: rehydrate the cuticles, rebuild strength, and watch for signs of infection or lifting. Use oils, gentle filing, and a short break from polish to let the nails recover.
Hydrating and Moisturizing Cuticles
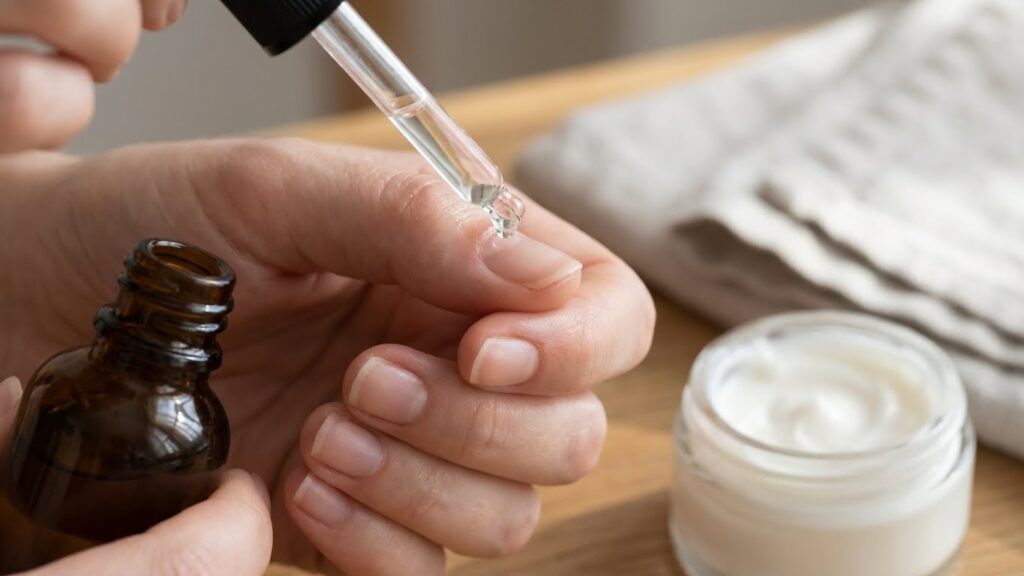
Apply cuticle oil or a lightweight natural oil (jojoba, almond, or olive) twice daily. Put a drop at the base of each nail and massage for 30–60 seconds to help oil penetrate and improve flexibility.
Do an overnight treatment once or twice a week. Slather a thicker cream or petroleum jelly, then wear cotton gloves to lock in moisture and speed repair.
Avoid cutting live cuticles; gently push them back with a soft cuticle pusher after a warm soak. This reduces tearing and keeps the nail bed healthy.
Restoring Nail Health and Strength
Trim nails to a short, even length to reduce breakage while they recover. File edges with a fine-grit board using one direction strokes to prevent splitting.
Use a protein- or calcium-enriched nail treatment 2–3 times weekly. Look for products with keratin, biotin, or calcium; apply as directed and discontinue if you get irritation.
Keep nails dry and clean. Wear gloves for dishes, cleaning, or gardening to prevent weakening from water and chemicals.
Avoiding Common Post-Removal Issues
Watch for pain, redness, swelling, or pus; these can signal infection and need a medical check. If you notice unusual lifting of the nail plate, see a clinician to rule out fungal or trauma-related problems.
Don’t rush back into acrylics or gels. Give your nails at least 2–4 weeks without enhancements and avoid aggressive buffing for a month to allow natural growth.
Skip strong acetone or harsh removers for touch-ups. Use gentle polish removers and avoid picking at rough spots, which can cause splits and long-term thinning.
Tips for Preventing Nail Damage
Follow gentle removal steps, keep nails trimmed and hydrated, and watch for signs like thinning, lifting, or pain so you can act fast.
Avoiding Forceful Removal
Never peel or pry off fake nails. Pulling lifts layers of your natural nail and removes the top plates, which causes thinning and splits. If a nail lifts, file the surface to break the seal, then soak in acetone or warm soapy water until the glue softens. Use a wooden cuticle stick to gently push the fake nail away once adhesive softens.
If you don’t have acetone, soak nails in warm soapy water for 20–30 minutes and repeat as needed. Work slowly and stop if you feel pain. Finish by filing any rough edges and moisturizing the nail and cuticle.
Regular Nail Maintenance
Trim and file your natural nails short before applying fakes to reduce lifting. Keep a medium-fine file on hand to smooth edges and prevent catching on fabrics. Every week, gently buff the nail surface to remove small snags and apply cuticle oil daily to maintain flexibility.
Schedule breaks between long-term sets. Give your nails a week or two without enhancements and use a strengthening base or biotin supplement if they feel weak. Replace damaged glue or lift promptly rather than waiting for a full removal.
Recognizing Signs of Nail Stress
Look for thinning, white spots (leukonychia), vertical ridges, or nails that split easily. These are early signs your nail plate lost moisture or was over-filed. Persistent lifting of the enhancement or pain under the nail can indicate infection or severe separation.
If you see redness, swelling, pus, or constant pain, stop using fake nails and get a medical check. For mild signs, increase hydration, cut nails short, and avoid acrylic or gel for several weeks while using a repair product.
When to Seek Professional Help
If your nails feel painful, hot, or swollen, stop home removal and see a nail tech or doctor. These signs can point to infection or damage that needs professional care.
Seek help if the fake nails are glued very tightly or the removal risks taking off layers of your natural nail. A technician can remove them safely with the right tools and training.
If you see dark spots, pus, or a strong smell, get medical attention. These symptoms can mean a fungal or bacterial infection that home methods won’t fix.
Choose a pro when you’re unsure what type of enhancement you have—acrylic, gel, dip, or press-on. Using the wrong method can cause splitting, thinning, or long-term damage.
If you have a health condition like diabetes, poor circulation, or weakened nails, let a professional handle removal. You need extra caution to avoid complications.
If you want a specific finish or reshaping after removal, a salon can offer safe filing, buffing, and nail care. They can also give immediate treatments to restore moisture and strength to your nails.
FAQs
What if your fake nails won’t lift? Try trimming and gently filing the top layer first. Then soak in acetone or use an acetone-soaked cotton ball under foil for 10–20 minutes to loosen glue or acrylic.
Is acetone safe for your skin and nails? Acetone works well but dries skin and cuticles. Use a moisturizer and cuticle oil after removal. If you have sensitive skin, wear gloves or try warm, soapy water and gentle filing instead.
Can you use dental floss to remove glued-on nails? Yes. Slide waxed dental floss under the edge and saw gently to lift the nail. Work slowly to avoid tearing your natural nail or cutting your skin.
How do you avoid damage to your real nails? Never force or pry off fake nails. File down length before soaking and be patient during the removal process. If nails are thin or painful, see a professional.
How long does removal take? Most at-home methods take 15–45 minutes depending on the type (acrylic, gel, or glue-on) and how much filing you do. Plan extra time if nails are long or thick.
When should you see a pro? Visit a salon or dermatologist if you feel sharp pain, have signs of infection, or if home methods fail. For trusted nail-care guidance, read tips from the American Academy of Dermatology (https://www.aad.org) or the FDA (https://www.fda.gov).
Conclusion
You can remove fake nails at home safely if you take your time and use the right method for the nail type. Match your approach to acrylic, gel, or glue-on nails and avoid forcing or prying them off.
Prepare with basic tools: nail clippers, a coarse file, acetone or non-acetone remover, foil or a small bowl, and a cuticle stick. Wear gloves and work in a well-ventilated area when using acetone.
Be gentle with your natural nails after removal. File any rough spots, push back cuticles lightly, and apply a moisturizing oil or cream to restore hydration.
Watch for signs that need professional care: persistent pain, redness, swelling, or severe nail damage. If you see these, stop and consult a licensed nail technician or a healthcare provider.
Quick checklist
- Trim and file fake nails before soaking.
- Use acetone for acrylics and builder gels; consider gentler options for press-ons.
- Soak until product softens, then gently lift with a cuticle stick.
- Rehydrate nails and skin after removal.
Follow these steps and you’ll reduce the risk of damage while keeping your natural nails healthy.