
You can remove glued-on fake nails at home without wrecking your natural nails if you weaken the glue and work slowly. Use acetone-soaked cotton and gentle soaking or try oil and warm soapy water for lighter glue, and never pry nails off quickly.
Take basic safety steps first: protect skin with a barrier like petroleum jelly, file the top layer of the fake nail to let removers penetrate, and use small tools gently to lift edges as the adhesive softens. With patience and the right materials, you’ll avoid pain and split nails.
Follow clear step-by-step methods and aftercare to restore your natural nails and prevent damage next time. If the nails resist or you feel pain, stop and get professional help.
Key Takeaways
- Prepare nails and protect skin before starting removal.
- Use acetone for strong glue or oil and warm water for milder glue.
- Stop and seek pro help if nails resist or you feel pain.
Preparing to Remove Glued-On Fake Nails
Know what type of fake nails and glue you have, gather acetone and simple tools, and protect the skin around each nail before you start.
Assessing Nail and Glue Type
Check the nail material first. Feel the fake nail: acrylics are hard and thick, gel tips are thinner and flexible, and press-ons are lightweight with a seam near the cuticle. Look at the glue bond. If you see a visible glue bead or very hard edges, that suggests strong cyanoacrylate glue. If the fake nails peel at the sides or lift slightly, the bond may be weaker and will come off easier.
Consider damage risks. If your natural nails are thin, split, or have redness, avoid forceful pulling. If you have medical nail issues or a skin reaction, stop and consult a professional. Write down what you observe so you can choose the right removal method.
Gathering Necessary Supplies
Collect pure acetone, cotton balls, aluminum foil sheets, a glass or ceramic bowl, a nail buffer, and an orangewood stick. Use 100% acetone for the fastest glue breakdown; alternatives like soaking in warm soapy water work only for weaker glue. Keep a small bottle of cuticle oil and petroleum jelly nearby to soothe and protect skin afterward.
Prepare tools for gentle lifting: a coarse nail file to thin the fake nail surface, a soft nail buffer for finishing, and a pair of cuticle nippers for tiny glue edges. Lay out a towel and a timer. Work at a well-ventilated table and wear old clothing—acetone can damage fabrics.
Protecting Surrounding Skin
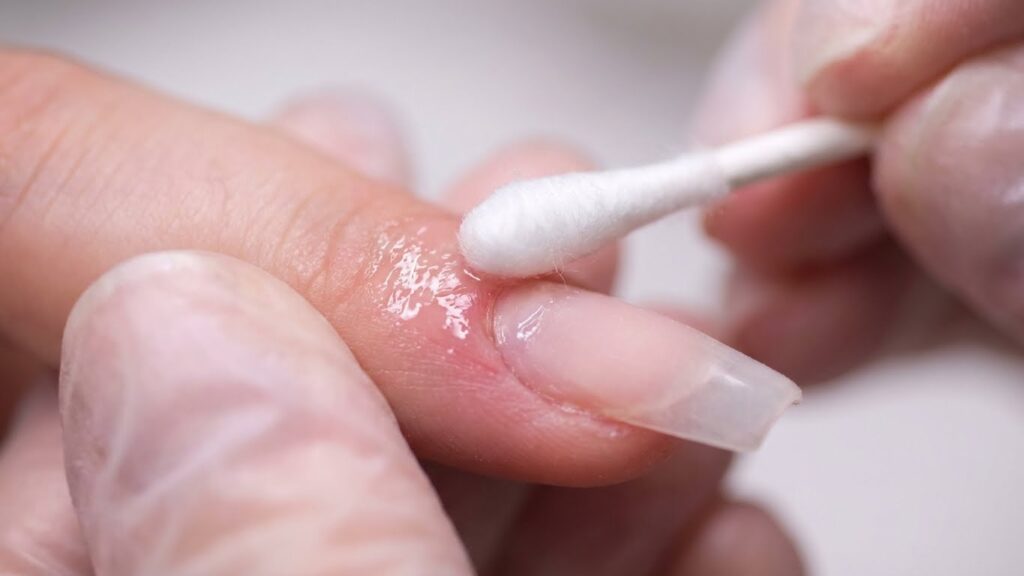
Apply a thin layer of petroleum jelly or thick lotion around each nail to create a barrier. This reduces acetone contact and helps prevent dryness or irritation. Dab the product carefully so it does not get under the fake nail edge.
When you use soaked cotton and foil, make sure the foil wraps only the fingertip and not the skin higher on the finger. Avoid prolonged acetone contact—limit each soak to the recommended 10–20 minutes and check frequently. Keep a small bowl of warm water and soap nearby to rinse off acetone quickly if your skin feels overly dry or stings.
Safe Methods for Removing Fake Nails Glued On
You can remove glued-on fake nails with acetone, warm soapy water plus oil, or careful filing. Each method aims to soften the glue and protect your natural nail while avoiding force.
Soaking in Acetone
Acetone dissolves most nail glues quickly. Work in a well-ventilated area and protect your skin with petroleum jelly around the nail folds. Use 100% pure acetone in a small glass or metal bowl. Soak cotton balls in acetone, place one on each nail, and wrap with aluminum foil for 10–20 minutes. Check one nail after 10 minutes; if the fake nail lifts easily, gently push it off with an orange stick. If it still resists, rewrap and soak another 5–10 minutes.
Avoid prolonged soaking if your skin becomes red or sore. After removal, wash hands, buff lightly, and apply cuticle oil or a rich hand cream to rehydrate nails and skin.
Using Warm Water and Oil
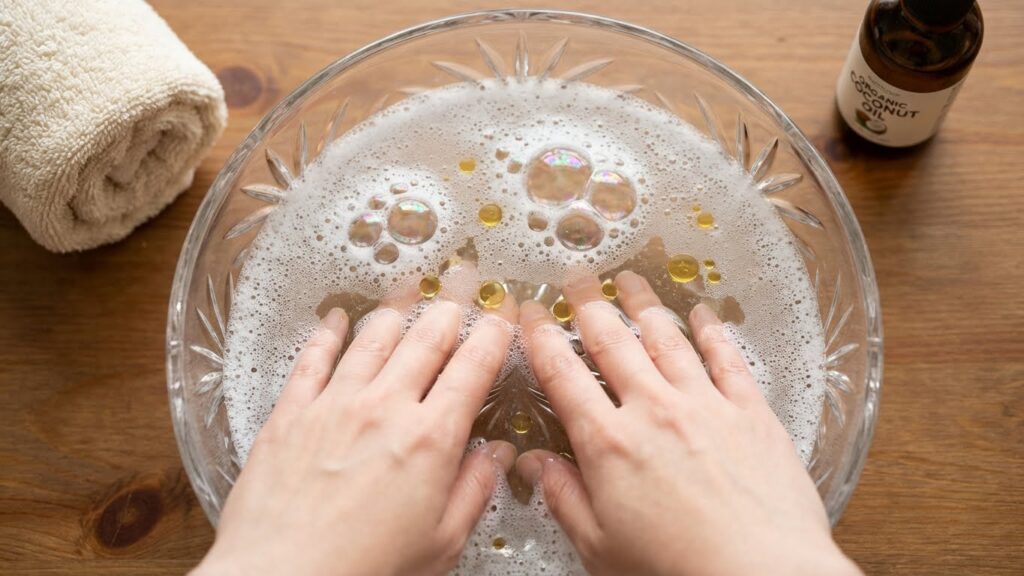
Warm water and oil is gentler and good if you prefer to avoid acetone. Heat a bowl of water to comfortably warm (not hot). Add 1–2 teaspoons of mild dish soap and 1 tablespoon of olive oil or coconut oil per cup of water. Soak your fingertips for 20–30 minutes to let the glue soften and swell.
After soaking, try to wiggle each fake nail edge. Use a wooden cuticle stick to lift gently at the side. Do not force a nail that sticks — soak again for 10–15 minutes. This method is slower but kinder to dry or sensitive skin.
Gently Filing the Surface
Filing works when the fake nail has a thick glued area or when you want to reduce glue bulk before other methods. Use a 180–240 grit nail file for the top surface only. File in one direction to thin the fake nail surface and the glue layer. Work slowly and stop frequently to check progress.
Once the fake nail is thin, switch to acetone or soaking to finish removal. Never file straight through to your natural nail. Finish by smoothing the natural nail with a fine buffer and applying oil to restore moisture.
Step-by-Step Process for Acetone Removal
You will need pure acetone, cotton balls, aluminum foil, a nail file, a cuticle pusher, and a small bowl or plate. Work at a table, protect the surface, and have hand cream ready for aftercare.
Applying Cotton Balls and Foil
Soak cotton balls in pure acetone until they are fully saturated but not dripping. Place one soaked cotton ball directly on each fake nail so it covers the entire nail surface.
Cut aluminum foil into squares large enough to wrap each fingertip. Press the foil tightly around the cotton ball and fingertip to hold the acetone against the nail and reduce evaporation. Repeat for all nails before you start the timer.
Keep your fingers warm by wrapping both hands in a towel; warmth speeds acetone action. Avoid using acetone on broken skin and work in a well-ventilated area to limit fumes.
Waiting and Checking Progress
Set a timer for about 15–20 minutes for acrylic or glued-on press-ons; gel or longer-wear adhesives may need 25–30 minutes. Check one nail first by removing the foil and cotton ball.
Look for softening, lifting, or gaps between the fake nail and your natural nail. If the nail resists, re-soak a fresh cotton ball and re-wrap for another 10 minutes. Do not force the nail off — more soak time is safer than prying.
Carefully Lifting the Fake Nails

After the nail looks softened, use a wooden cuticle stick or metal cuticle pusher at a low angle to gently nudge from the side and lift. Work slowly and stop if you feel strong resistance or pain.
If the fake nail lifts, push along the edge to remove it in small sections. For sticky spots, reapply acetone and wait a few minutes. File any remaining adhesive lightly, then wash hands and apply a moisturizing oil or cream to rehydrate nails and skin.
Non-Acetone Alternatives
You can remove glued-on fake nails without acetone using either a product made for nail glue or common household items. Both methods need time, gentle force, and care to avoid nail damage.
Utilizing Professional Nail Glue Remover
A professional nail glue remover is a safer, faster option than household tricks. Look for products labeled “nail glue remover” or “cyanoacrylate remover.” They often come as liquids or pads and contain solvents that dissolve the glue without strong acetone. Follow the product directions exactly: apply to the glued area, wait the recommended time (usually 5–15 minutes), then gently lift the fake nail with a cuticle pusher.
Wear gloves if the product warns about skin contact. Work in a well-ventilated area and avoid getting remover on your cuticles for long periods. If the nail still resists, repeat the soak rather than forcing it. Stop if you feel sharp pain or see raw skin.
Trying Household Solutions
If you prefer items at home, warm soapy water and rubbing alcohol are the safest starts. Soak your nails in warm, soapy water for 15–30 minutes to soften the glue. Use a soft nail file or buffer to gently thin the fake nail edge, then push up the sides with an orange stick or cuticle pusher.
Rubbing alcohol or 70–90% isopropyl alcohol can work faster. Soak a cotton ball in alcohol, place it on the nail, and wrap with foil for 10–20 minutes before trying to lift the nail. Olive oil or coconut oil can help lubricate and loosen edges; massage oil around the base and wait 10–20 minutes. Never force the nail off—work slowly to avoid peeling layers of your natural nail.
Aftercare for Natural Nails Post-Removal
Start by gently restoring moisture and strength, trim and shape to prevent snags, and check for signs of damage like peeling, discoloration, or infection. Use simple supplies and avoid harsh tools while your nails recover.
Moisturizing and Repairing Nails
Apply a rich moisturizer to your nails and cuticles at least twice daily. Use products with cuticle oil (jojoba or vitamin E) and a hand cream that lists glycerin or ceramides to lock in moisture. Massage oil into the nail plate and under the free edge for 30 seconds to boost absorption.
Use a strengthening treatment if nails feel thin or bendy. Pick a product with keratin, biotin, or calcium and follow the package directions—usually once daily for 2–4 weeks. Avoid scented lotions that contain alcohol; they can dry nails more.
Give your nails a break from polish and artificial nails for at least 2–4 weeks. During this time, keep them clean and moisturized and wear gloves for chores that use water or chemicals.
Trimming and Shaping Natural Nails
Trim nails to a comfortable length that avoids catching on fabric. Use a sharp nail clipper and cut straight across to reduce the risk of splitting.
File the edges with a fine-grit (180–240) nail file. File in one direction only to stop layering and peeling. Smooth any roughness with a quick buff using a soft buffer—no heavy buffing; that thins the nail.
If nails are uneven, file to match the shortest nail rather than pulling others longer. Wear gloves for gardening or dishwashing until nails regain strength to prevent breaks.
Addressing Potential Nail Damage
Look for signs of damage: white spots, vertical ridges, thinning, or yellowing. Small white spots or ridges often grow out and need only moisturizing and time.
If you see persistent discoloration, thickening, pain, or separation of the nail from the bed, contact a dermatologist or podiatrist. These can signal fungal infection or deeper injury that needs treatment.
For minor splits, use a paper tea bag or silk wrap with nail glue as a short-term fix until the nail grows out. Don’t pick or pry at the nail—this increases trauma and raises the risk of infection.
Tips to Prevent Damage During Removal
Use gentle methods and the right tools. Work slowly, protect your skin, and stop if you feel sharp pain or see signs of infection.
Avoiding Forceful Pulling
Never yank or pry a glued-on nail off. Pulling can strip layers of your natural nail and tear the nail bed, which slows healing and raises infection risk.
Soak first—use 100% acetone or warm soapy water for press-ons if acetone is not available. After 10–20 minutes, test the edge with a wooden cuticle stick and push gently. If the glue still holds, soak longer; repeat rather than force.
File the topcoat to break the seal before soaking. Use a coarse file lightly, then a finer file to smooth. Work under good light and use small, controlled motions. Keep your hands cushioned with petroleum jelly on skin around the nail to protect cuticles from acetone.
Recognizing Signs of Infected Nails
Watch for continuous throbbing pain, increasing redness, warmth, or yellow/green pus near the nail edge. These are common signs of infection and need prompt attention.
If the skin around your nail peels away or the nail bed bleeds after removal, clean with mild soap and water, apply an antiseptic, and cover with a sterile bandage. Seek medical care if symptoms worsen within 24–48 hours or if you have fever or spreading redness.
If you have diabetes or a weakened immune system, contact a healthcare provider before attempting removal. You may need professional removal to avoid complications.
When to Seek Professional Help
If you feel sharp pain, throbbing, or see signs of infection like redness, swelling, or pus, stop trying to remove the nails yourself and see a professional. These symptoms can mean the skin or nail bed is damaged, and a technician or medical provider can treat it safely.
If the glue or nail is not loosening after repeated safe home methods, book an appointment. Forcing the nail can peel layers from your natural nail. A pro can use proper solvents and tools to lift the false nail without extra damage.
If you have a health condition that affects healing — such as diabetes, poor circulation, or a weakened immune system — let a professional handle removal. Your risk of complications is higher, so a controlled, sterile environment is safer.
If you notice large chunks of your natural nail missing, severe lifting, or constant bleeding, seek medical care right away. A nail technician may stabilize the nail, while a doctor can assess for infection or deeper injury.
Consider professional help if you’re unsure which type of false nail you have (acrylic, gel, press-on). Technicians know safe techniques for each type and can prevent mistakes that cause long-term thinning or splitting.
FAQs
What if a glued-on nail won’t lift?
Don’t force it. Soak your nails in acetone or warm, soapy water to soften the glue. If you still can’t remove the nail, visit a salon to avoid damage.
Is acetone safe for your nails and skin?
Acetone removes glue fast but it dries skin and cuticles. Use a small bowl, limit soak time, and apply a moisturizer or cuticle oil afterward. For sensitive skin, try warm soapy water first.
How long does soaking take?
Plan for 10–30 minutes depending on glue type and nail thickness. Check every 5–10 minutes and gently test the edge; if it resists, keep soaking.
Can you file off glued nails at home?
You can thin the fake nail with a gentle file to reduce glue hold. Stop if you feel heat or pain, which means you’re close to your natural nail.
Will nail glue damage your natural nails?
It can if you peel or pry nails off. Proper soaking and gentle removal protect your nail bed. For more care tips, see guidance from the American Academy of Dermatology: https://www.aad.org.
How do you remove leftover glue?
Use a cotton swab with acetone or an oil-based remover and rub gently. Finish with soap and water, then moisturize. For health-related concerns, check Mayo Clinic’s nail care advice: https://www.mayoclinic.org.
Conclusion
You can remove glued-on fake nails safely if you follow steady steps and use patience. Take your time, avoid force, and pick a removal method that protects your natural nails.
Start with gentler options like soaking in warm soapy water or using oil if the glue is light. For stronger glue, use acetone-soaked cotton and wraps, but protect the surrounding skin with petroleum jelly and limit soak time.
Work slowly and check progress often. Gently lift edges with an orangewood stick or cuticle pusher when the glue softens. Stop if you feel pain or see damage, and seek professional help if needed.
After removal, care for your nails with a gentle file, cuticle oil, and a moisturizing hand lotion. Give your nails time to recover before applying new enhancements.
Quick checklist:
- Soften glue first (water, oil, or acetone)
- Use gentle tools and light pressure
- Protect skin and limit acetone exposure
- Follow with nail and skin hydration
You’ll get the best results by being patient and cautious. Follow these steps to keep your natural nails healthy and reduce the risk of damage.