
You can remove gel fake nails at home safely without wrecking your natural nails if you use the right tools, take your time, and follow proven steps. Soak in acetone with cotton and foil or use gentle filing and lifting to loosen the gel, then care for your nails after to restore strength.
You’ll learn simple preparation, safe removal methods, quick manual tricks for stubborn spots, and aftercare tips to keep nails healthy. Follow the steps and avoid common mistakes so you won’t need a salon visit unless a problem requires professional help.
Key Takeaways
- Prepare your workspace and gather gentle, effective tools before starting.
- Use slow, safe removal methods to avoid peeling or scraping your nails.
- Rehydrate and protect nails after removal to prevent long-term damage.
Preparation Steps Before Removal
Gather tools, protect your work area, and check your nail health before you start. Take a few minutes now to prepare; it makes the removal safer and faster.
Gather the Necessary Tools
Lay out everything you need within reach. You will want 100% acetone or an acetone nail soak, cotton balls or pads, aluminum foil strips (about 3 x 3 inches), a nail file (180 grit or higher), a wooden cuticle stick, cuticle oil, and a small bowl for warm water. If you prefer a non-acetone route, have a nylon nail remover kit or a gel polish remover system ready.
Check tools for cleanliness. Use fresh cotton and clean metal or wooden tools to avoid infection. Keep a timer or phone nearby to track soak time.
Have extras on hand. If a nail is stubborn or lifts, you may need more acetone, another foil strip, or a fresh file. A thick towel or paper towels will protect surfaces from spills.
Protect Your Workspace
Work on a flat, stable surface like a table or countertop. Cover it with a towel or disposable paper to catch acetone drips and nail dust.
Choose a well-ventilated area. Open a window or run a fan to reduce acetone fumes. Keep pets and children away until you finish.
Wear gloves if your skin reacts to acetone. If you don’t have gloves, apply a thin layer of petroleum jelly around the nail skin to limit contact. Keep a small bowl of warm soapy water nearby to rinse if you spill.
Assess the Condition of Your Nails
Look for lifting, cracks, or redness before starting. If nails are inflamed, pus-filled, or intensely painful, stop and see a healthcare professional rather than removing the enhancement yourself.
Note nail length and thickness. Very long or thick fake nails may require more soak time or a gentle file before acetone soaks to speed penetration.
Decide on removal method based on nail health. If your nails are thin or brittle, avoid aggressive scraping and opt for longer, gentler soaking. If nails feel strong, you can use standard soak-and-wrap with controlled filing to help the acetone work.
Safe Methods to Remove Gel Fake Nails
You will learn the main safe ways to remove gel nails: using acetone to dissolve the gel and using gentler, non-acetone options when acetone is not available or you prefer a milder approach.
Soaking Off with Acetone
Soak cotton pads in 100% acetone and place one on each nail. Wrap each fingertip in plastic wrap or use fingertip clips to hold the pad in place. Wait 10–20 minutes; check one nail first. If the gel lifts and looks flaky, use a wooden cuticle stick to gently push it off. Do not force or pry hard.
File the shiny top layer lightly before soaking to help acetone penetrate. Protect skin with petroleum jelly if you have sensitive skin. Finish with a soak in warm water, then apply cuticle oil and a nail-strengthening treatment.
Foil Wrap Method
Lightly buff the top coat to dull the shine so the remover works. Place an acetone-soaked cotton pad on the nail, then wrap the fingertip tightly with aluminum foil. Leave the foil wraps on for 10–20 minutes, depending on thickness. Unwrap one nail and gently remove softened gel with a push stick.
Use this method on each hand in batches to avoid long exposure of warm skin to acetone. Replace cotton and re-wrap if gel is still stubborn. After removal, wash hands well and moisturize to restore skin and nail hydration.
Acetone-Free Removal Techniques
Soak your nails in a warm bowl with a mix of hot water, olive oil, and a few drops of dish soap for 10–20 minutes. This softens glue-on tips and some builder gels. Use dental floss or a thin cuticle pusher to slide under the edge and lift slowly if the nail loosens.
For gel polish that won’t lift, visit a salon for mechanical filing or professional removal. Do not force or pick at nails; that can strip layers of your natural nail. Follow with nail oil and a gentle strengthening base to help nails recover.
Manual Techniques for Gel Nail Removal
You can remove gel with hand tools by gently thinning the topcoat and lifting edges. Work slowly, stop at any pain, and focus on one nail at a time to avoid damage.
Gentle Filing and Buffing
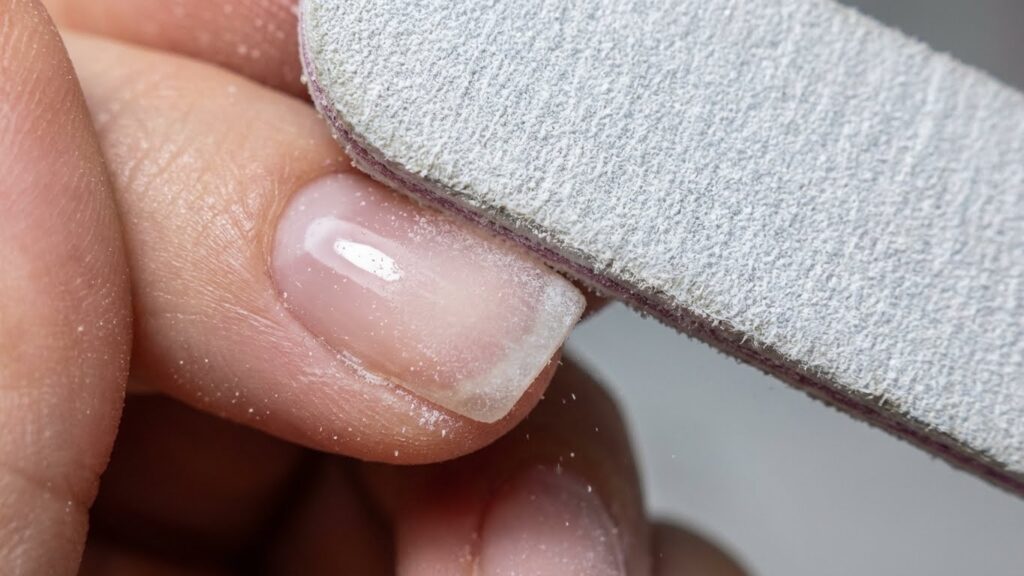
Start with a 180–240 grit file to reduce shine and thin the gel surface. Hold the file near the tip and use short, light strokes across the nail until the glossy top layer dulls. Do not file into your natural nail; stop when you feel softer resistance.
After filing, use a medium buffer to smooth the remaining gel. Buff lightly in one direction to lift edges where the gel can peel up. If you see thin white layers of your natural nail or feel any tenderness, stop and switch to an alternative removal method.
Sanitize tools before use and work in good light. Take breaks between nails so heat or friction does not build up on your nail bed.
Using an Orange Stick or Cuticle Pusher
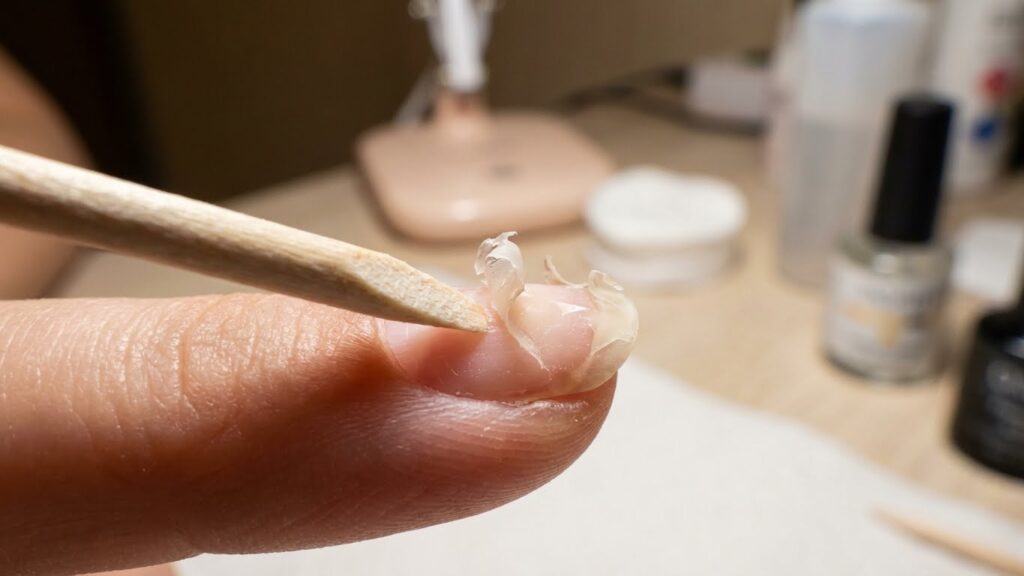
Soak nails briefly in warm, soapy water for 5–10 minutes to soften the gel edge. Dry your hands, then use an orange stick or metal cuticle pusher at a low angle to gently nudge the gel from the free edge toward the cuticle.
Apply light pressure and push in small sections; never pry or force a large sheet off. If the gel resists, stop and soak longer or return to gentle filing. Use upward, sweeping motions rather than scraping back and forth to reduce lifting of your natural nail layers.
Finish by trimming any loose gel and buffing the nail surface smooth. Apply cuticle oil and a nourishing hand cream to rehydrate the nail and surrounding skin.
Aftercare for Natural Nails
Restore moisture, rebuild strength, and protect new nail growth with targeted steps you can do at home. Focus on rehydrating your cuticles, using protein-rich treatments, and protecting nails during daily tasks.
Moisturizing and Hydration
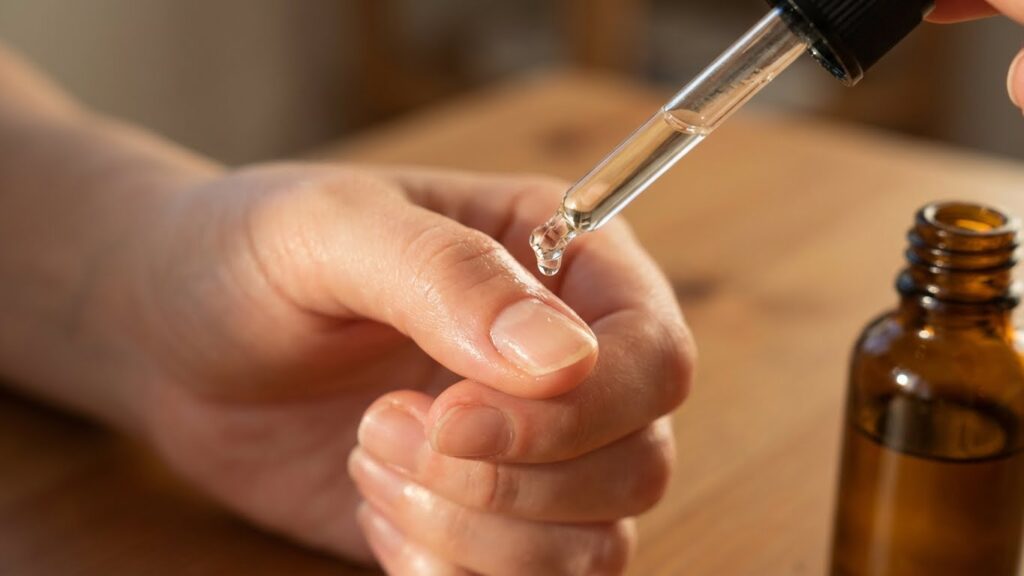
Apply a nourishing cuticle oil twice daily. Use an oil with jojoba, vitamin E, or sweet almond oil. Put one drop on each nail, massage into the cuticle for 30–60 seconds, and allow it to absorb.
Use a rich hand cream after washing hands and before bed. Look for creams with glycerin, ceramides, or shea butter to lock in moisture. Reapply after any activity that dries your hands, like dishwashing.
Soak nails once a week for 5–10 minutes in warm water mixed with a few drops of oil or a gentle hand soak. This softens cuticles and helps oils penetrate the nail plate. Pat hands dry and immediately seal in moisture with oil and cream.
Avoid long hot water exposure and harsh soaps while nails recover. Wear gloves for cleaning to prevent moisture loss and chemical damage.
Nail Strengthening Treatments
Use a protein-based strengthening treatment 2–3 times per week. Choose a product with keratin, collagen, or calcium and follow label directions. Apply a thin coat over clean nails and let it dry fully.
Alternate strengthening coats with breathable base coats if you plan to polish. Avoid heavy layering of multiple treatments; too many layers can peel and trap moisture. Remove product gently with non-acetone remover when instructed.
Trim and file nails to remove weak edges. Use a fine-grit file and file in one direction only to reduce splitting. Keep nails short until they regain flexibility and strength.
If nails remain thin, add a biotin supplement after checking with your healthcare provider. Biotin at common doses (e.g., 2,500–5,000 mcg/day) may support nail growth, but confirm safety for you before starting.
Things to Avoid During Removal
Stay patient and gentle. Avoid actions that force the gel off or expose your nails to extreme cold or heat. Use the right tools and move slowly to protect your nail beds and cuticles.
Damaging Habits
Do not peel or pick at the gel. Pulling the gel lifts layers of your natural nail, leaving thin, weak, and painful nails behind. Peeling increases risk of splits and long-term damage.
Avoid filing down to the natural nail quickly. Heavy, aggressive filing thins the nail plate and can cause heat and pain. File only the shiny top layer to help acetone penetrate, and stop when you reach a matte surface.
Skip soaking with cold water or holding ice. Cold tightens nail structure and slows gel removal, making you force the gel later. Keep your hands warm during acetone soaks to help lift the product.
Improper Tool Use
Do not use metal tools to pry or scrape. Metal pushers and knives can gouge the nail bed and cause bleeding or infection. Use a wooden orangewood stick or a soft plastic pusher and work gently.
Avoid substituting strong chemicals for acetone without guidance. Household solvents and undiluted cleaners can burn skin and irritate nails. Use 100% acetone or a safe acetone-free remover formulated for gels.
Don’t skip cuticle care. Tugging or cutting cuticles while the gel is wet or brittle causes tears and pain. Soften the area with oil or moisturizer first, then gently push back cuticles after removal.
When to Seek Professional Help
If your nails sting, bleed, or show deep gouges, stop home removal and see a pro. These signs mean the nail plate or skin may be injured and need expert care.
If the gel or fake nail won’t budge after soaking or gentle filing, a technician can remove it safely. You risk removing too much natural nail if you force it yourself.
Notice thick lifting, yellowing, or strange odors under the enhancement? These can signal an infection or fungal growth. A nail technician or dermatologist can diagnose and treat the problem properly.
If you have a health condition like diabetes, poor circulation, or a weakened immune system, avoid DIY removal. Your nails heal differently and complications can escalate quickly.
If you plan to switch to a different nail system or want a precise refill, let a pro handle it. They can prepare the nail surface without thinning or damaging your natural nails.
When in doubt, choose professional help. It prevents long-term damage and gives you peace of mind.
Tips for Preventing Nail Damage in the Future
Use a gentle removal method every time. Avoid peeling or forcefully lifting gel, since that strips layers of your natural nail and causes thinning.
Limit how often you wear gel nails. Give your nails a break of at least one to two weeks between sets so they can recover and rehydrate.
Keep nails short and file edges smoothly. Shorter nails break less and a fine grit file prevents splitting and jagged tears.
Moisturize daily. Apply cuticle oil and a hand cream to restore oils lost during soak-off and to strengthen the nail plate.
Choose a reputable salon or quality at-home products. Proper curing times, correct primer use, and good adhesives reduce lifting and infection risk.
Use a base coat under gel polish. A protective base helps prevent staining and reduces the amount of filing needed when removing the product.
Protect your nails during chores. Wear gloves for cleaning, washing dishes, and gardening to avoid water swelling and chemical exposure.
Avoid excessive filing and buffing. Remove only the gel surface when needed and leave healthy nail layers intact to prevent permanent thinning.
Consider milder systems. Look for soak-off, low-heat cures, or semi-cured strips that are easier to remove and less harsh on nails.
FAQs
What if the gel won’t come off?
Be patient and avoid prying or picking at the gel. Try soaking again in 100% acetone for 10–15 minutes, then gently push the softened gel with an orange stick. If it still resists, repeat the soak. For persistent layers, consider a salon visit to prevent nail damage.
Is acetone safe for your nails and skin?
Acetone removes gel efficiently but dries skin and nails. Use a small bowl or foil wraps to limit exposure and apply cuticle oil and hand cream after removal. If you have sensitive skin or a medical condition, check advice from a dermatologist like the American Academy of Dermatology (https://www.aad.org).
Can you remove gel without acetone?
Yes, you can file the top layer and use non-acetone polish remover or warm soapy water for thin layers. These methods take longer and need more effort. If you want step-by-step guidance, trusted sources such as professional nail sites offer safe alternatives.
How do you care for nails after removal?
Gently buff any rough spots and apply a strengthening base coat. Use cuticle oil daily and give nails a break from polish for a few weeks. If you notice pain, swelling, or persistent thinning, see a dermatologist or nail technician.
When should you see a professional?
Visit a pro if you feel pain, see lifting with infection, or can’t remove the gel without force. A salon can remove gel safely and assess any damage.
Conclusion
You can remove gel fake nails safely at home if you use the right supplies and go slowly. Pick a method that fits your tools and patience, like acetone soak for faster removal or gentle filing and soaking for less damage.
Protect your natural nails by filing the topcoat first and avoiding forceful prying. Keep tissues, cuticle oil, and a nail buffer nearby to smooth and nourish your nails after removal.
If you spot redness, swelling, or persistent pain, stop and seek professional help. A salon technician can remove stubborn gel without harming your nails.
Use this checklist to stay on track:
- File topcoat to break the seal
- Soak with acetone or use a safe alternative
- Gently remove softened gel with an orange stick
- Finish with a buffer and cuticle oil
Follow these steps and you will lower the risk of damage and promote healthy nail growth. Regular care after removal helps your nails recover faster and look their best.