
Nail Dehydrator Alternative at Home: What Actually Works?

Quick Answer
The best nail dehydrator alternative at home is usually high-strength isopropyl alcohol, ideally around 90% to 99%, applied sparingly with a lint-free wipe. Pure acetone can also remove oils and moisture, but it is more drying, so I treat it as a backup rather than an everyday solution. Whatever you use, follow the instructions for your gel, acrylic, or nail system and review the FDA’s nail-product safety guidance.
Quick Steps
- Step 1: Wash your hands, then let your nails dry completely before starting.
- Step 2: Shape the nails and gently remove loose surface dust.
- Step 3: Wipe each nail with high-strength isopropyl alcohol using a lint-free pad.
- Step 4: Let the alcohol evaporate fully without touching the nail surface.
- Step 5: Apply primer, base coat, or your nail system immediately afterward if its instructions require one.
One important rule
- Don’t improvise with oily products: Hand sanitizer, scented remover, witch hazel, and moisturizing cleansers can leave ingredients behind that work against adhesion.
If you’re halfway through a manicure and discover the dehydrator bottle is empty, you probably don’t need to abandon the whole set. A few simple nail-prep products can perform part of the same job when they’re used carefully.
The important part is knowing what a dehydrator really does. This guide explains which household alternatives make sense, which popular DIY tricks I would skip, and how to prep natural nails without turning them dry and brittle.
In This Guide
- What Does a Nail Dehydrator Actually Do?
- What Can I Use Instead of Nail Dehydrator at Home?
- How Do I Prep Nails Without a Dehydrator?
- Is Alcohol or Acetone Better for Nail Prep?
- Which DIY Nail Dehydrator Substitutes Should You Avoid?
- Do Home Alternatives Work With Gel, Acrylic, Dip, and Press-Ons?
- How Can You Prevent Lifting Without Over-Drying Your Nails?
- Frequently Asked Questions
- Final Takeaway
What Does a Nail Dehydrator Actually Do?
A nail dehydrator temporarily removes surface moisture and oils from the natural nail plate. That cleaner, drier surface can help gel, acrylic, dip, soft-gel tips, and some other nail products adhere more consistently.
Definition: A nail dehydrator is a fast-evaporating preparation liquid used on the natural nail before primer, base coat, or an enhancement system to temporarily reduce surface oil and moisture.
The effect isn’t permanent. Your nail plate naturally contains water, and moisture can gradually return after the prep liquid evaporates.
That’s why I prefer to dehydrate near the end of nail prep. Once the surface is clean and dry, I avoid touching it and move directly to the next product.
Dehydrator and primer are not the same thing
This distinction causes a lot of confusion. A dehydrator cleans and dries the nail surface, while a primer is designed to improve the bond between the nail and a particular enhancement system.
- Dehydrator: Removes or reduces surface oil and moisture.
- Primer: Helps create adhesion when the nail system calls for it.
- Base coat: Creates the foundation for gel color or another coating.
You shouldn’t automatically replace primer with alcohol or acetone. If your product instructions call for primer, use the compatible primer after your prep step.
As of 2026, I still consider the product manufacturer’s application instructions the safest starting point. Different gel, acrylic, dip, and extension systems can require different preparation sequences.
What Can I Use Instead of Nail Dehydrator at Home?
For a simple at-home substitute, high-strength isopropyl alcohol is my first choice. Pure acetone can work as a stronger fallback, while an oil-free professional nail cleanser may also be suitable if its label allows pre-application cleansing.
1. High-strength isopropyl alcohol
Isopropyl alcohol removes surface oil and evaporates quickly. A concentration around 90% to 99% contains less water than common 70% rubbing alcohol, making it more practical when your goal is a dry nail surface.
Apply a small amount to a lint-free wipe. Clean each nail, let it evaporate, and don’t touch the nail plate afterward.
2. Pure acetone
Pure acetone is an effective solvent and can remove oils quickly. It also evaporates fast, which is why some nail-prep routines use it when a dedicated dehydrator isn’t available.
However, acetone can be drying to the nail and surrounding skin. The American Academy of Dermatology’s gel-manicure guidance also notes the drying effects associated with acetone exposure.
Use only a small amount and keep it mainly on the nail plate. You don’t need to repeatedly soak the nail just to prepare it for a manicure.
3. An oil-free nail cleanser
Some professional nail cleansers are alcohol-based and designed for surface cleaning. These can be convenient if you already own one.
Check the label first. A cleanser formulated only for wiping cured gel isn’t automatically intended to replace a pre-application dehydrator.
4. Thorough cleaning and drying for simple polish
Regular nail polish is usually more forgiving than enhancement systems. For a basic manicure, thoroughly cleaned and fully dried nails may sometimes be enough without adding a separate dehydrator.
That doesn’t make soap and water a dehydrator. It simply means every manicure does not require the same adhesion routine.
How Do I Prep Nails Without a Dehydrator?
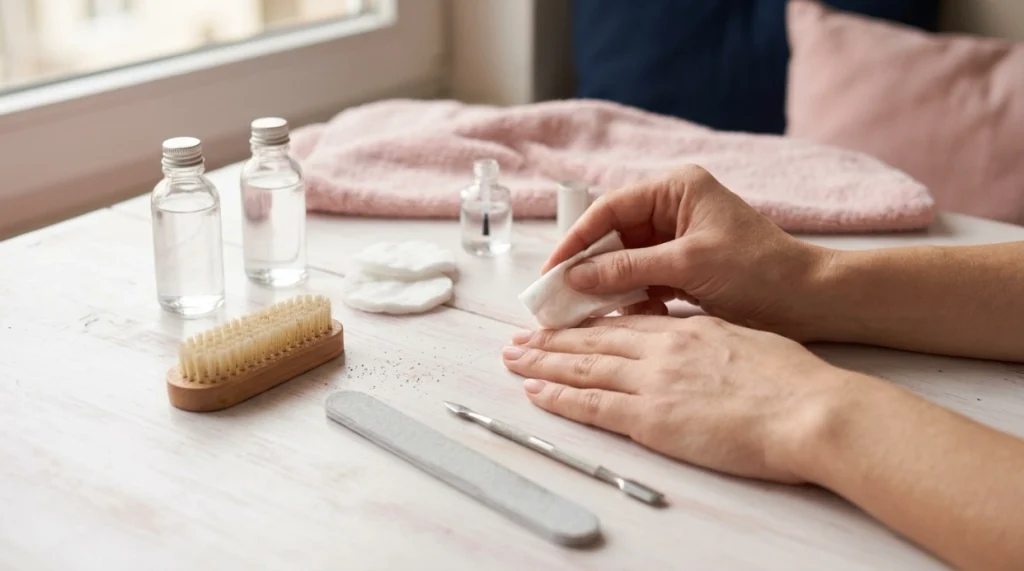
Good preparation matters more than pouring extra solvent onto the nail. Your goal is a clean, dry surface with no dust, lotion, cuticle oil, or skin touching the area where product needs to bond.
- Wash and dry your hands. Remove visible dirt and allow the nails to dry completely.
- Shape the free edge. File the nail into your preferred shape before applying prep liquids.
- Handle the cuticle area gently. Remove only loose material from the nail plate and avoid aggressive cutting.
- Remove filing dust. Use a clean nail brush or lint-free wipe.
- Degrease the nail. Wipe with high-strength isopropyl alcohol, or use a small amount of pure acetone when appropriate.
- Let it evaporate. Don’t blow on your nails because that can introduce moisture or contaminants.
- Don’t touch the surface. Finger contact can put skin oils straight back onto the prepared nail.
- Continue immediately. Apply the compatible primer, base, adhesive, or enhancement according to its directions.
One mistake I see in DIY routines is doing the alcohol wipe first, then spending ten minutes touching and refining the nails. By application time, the surface has already been handled again.
Keep the final cleansing step near the end. It’s simple, but it makes your routine much more consistent.
Also be gentle around the cuticle. The AAD’s manicure and pedicure guidance advises against aggressively cutting or pushing back cuticles because they help protect the area around the nail.
Is Alcohol or Acetone Better for Nail Prep?
For most home users looking for a temporary nail dehydrator alternative, I would start with high-strength isopropyl alcohol. Acetone is stronger and can be useful, but it is more likely to leave nails and surrounding skin feeling dry.
| Option | Oil Removal | Drying Effect | Best Use | Main Drawback |
|---|---|---|---|---|
| 90–99% isopropyl alcohol | Good | Moderate | Routine surface cleansing | Not identical to formulated dehydrator |
| 100% acetone | Strong | Strong | Occasional backup prep | Can be drying or irritating |
| Professional dehydrator | Designed for nail prep | Controlled | Frequent gel or enhancement use | Requires another product purchase |
Don’t assume that stronger always means better. If alcohol gives your nail system reliable retention, there is little reason to repeatedly strip the nail with a harsher solvent.
DermNet notes that strong nail-product solvents, including acetone and alcohol, can irritate and dry the nail plate or nearby skin when overused. You can read its overview of nail cosmetic reactions and solvents for more context.
Dermatology note: If your nails become painful, inflamed, unusually brittle, separated from the nail bed, or surrounded by a persistent rash, stop the cosmetic products and ask a dermatologist or healthcare professional for advice.
Which DIY Nail Dehydrator Substitutes Should You Avoid?
A useful substitute should evaporate cleanly and leave as little residue as possible. Many popular household liquids fail that test.
- Hand sanitizer: Many formulas contain glycerin, moisturizers, fragrance, or gel-forming ingredients that can leave residue.
- Witch hazel: Commercial formulas may contain water and other ingredients, so results can be inconsistent.
- White vinegar: It is mostly water and isn’t a direct replacement for a formulated nail dehydrator.
- Lemon juice: It introduces water and natural residues without giving you predictable nail-system compatibility.
- Hydrogen peroxide: It isn’t needed for routine adhesion prep and should not be treated as a dehydrator.
- Moisturizing polish remover: Added oils or conditioners can work against the clean surface you’re trying to create.
- Perfume or body spray: Fragrance mixtures contain ingredients that were never designed for nail adhesion.
I would also avoid mixing a homemade bottle of random solvents. A quick wipe with one appropriate product is easier to control and avoids unnecessary chemical exposure.
Keep flammable nail liquids away from flames, cigarettes, heaters, and other ignition sources. The FDA specifically recommends good ventilation and careful label-following when using nail products.
Do Home Alternatives Work With Gel, Acrylic, Dip, and Press-Ons?
They can help with surface cleansing, but the correct prep still depends on the system. A homemade substitute should never override the manufacturer’s instructions.
Gel polish and builder gel
Clean, dry nails are important for gel adhesion. If the brand calls for dehydrator and primer, alcohol may help with cleansing but does not automatically replace the recommended bonding products.
Pay close attention to curing and removal too. Gel problems aren’t always caused by dehydration.
Acrylic nails
Acrylic systems can be sensitive to prep technique. Oil or moisture may contribute to lifting, but excessive filing and harsh chemical use can also stress the natural nail.
The AAD explains that the preparation and removal involved with artificial nails can affect natural nail condition, so more aggressive prep isn’t automatically better.
Dip powder
Dip systems often have their own liquid sequence. Follow that system’s prep instructions rather than inserting several extra solvents because you think they will guarantee longer wear.
Soft-gel tips and Gel-X-style extensions
These systems depend on several factors, including correct tip sizing, nail preparation, adhesive coverage, and curing. A dehydrating wipe may help, but it cannot compensate for poor fit or incomplete curing.
Press-on nails
For press-ons, removing surface oil can make a noticeable difference. Alcohol is often the easiest option because it cleans quickly without requiring an elaborate prep routine.
Let the nail dry completely before applying glue or adhesive tabs. Avoid lotion and cuticle oil until after the press-ons are secure.
How Can You Prevent Lifting Without Over-Drying Your Nails?
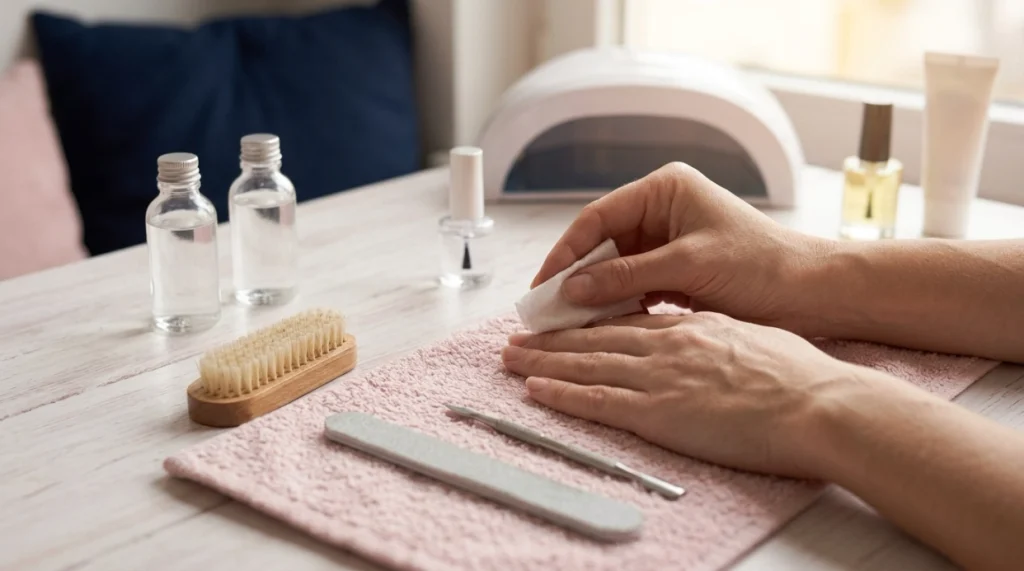
If your manicure lifts repeatedly, don’t keep adding stronger dehydrators. Adhesion problems often come from several small prep mistakes rather than one missing chemical.
- Remove invisible cuticle from the nail plate: Product placed over skin or cuticle material can lift early.
- Remove dust completely: Filing dust creates a barrier between the nail and product.
- Avoid lotion before application: Oils and creams can transfer onto the nail surface.
- Stop touching prepped nails: Even one fingertip can put oil back where you just cleaned.
- Use thin prep layers: More liquid does not automatically produce better adhesion.
- Cap products quickly: Alcohol, acetone, and other volatile nail liquids evaporate readily.
- Match your products: A compatible primer and base can matter more than adding another homemade step.
- Follow curing instructions: Incorrect lamp compatibility or curing time can create problems that look like poor prep.
My preferred routine is boring on purpose. I clean carefully, use as little prep liquid as necessary, keep my fingers off the surface, and move straight into the product system.
That approach is easier to repeat than constantly changing solvents. Consistency usually teaches you more about what’s causing lifting.
Protect dry nails between manicures
Dehydration is useful during application, but you don’t want permanently dehydrated nails. After the manicure or once enhancements are removed, return to normal moisturizing care.
Give irritated or brittle nails a break rather than repeatedly covering the problem. Persistent changes deserve professional evaluation instead of another layer of product.
Dermatology note: Stop using a nail product if you develop persistent burning, swelling, blistering, separation, drainage, or a spreading rash, and seek medical advice when appropriate.
Frequently Asked Questions
Can I use rubbing alcohol instead of nail dehydrator?
Yes, high-strength isopropyl alcohol can work as a temporary at-home alternative for removing surface oil. Around 90% to 99% is generally more practical for this purpose than lower concentrations because it contains less water, but it is still not identical to a professionally formulated dehydrator.
Can 70% alcohol dehydrate nails?
It can clean surface oils, but 70% isopropyl alcohol contains more water than stronger concentrations. If you already own it, let the nail dry completely, but I would choose a higher concentration when buying alcohol specifically for nail preparation.
Can I use pure acetone instead of nail dehydrator?
Pure acetone can remove oil and evaporate quickly, so it can function as an occasional prep alternative. Use it sparingly because repeated or excessive exposure may dry the nail plate and surrounding skin.
Can nail polish remover replace dehydrator?
Only if you know exactly what is in it. Many removers contain conditioners, fragrances, water, or oils, so a standard moisturizing nail-polish remover may leave residue and isn’t my first choice for adhesion prep.
Do I need nail dehydrator before gel polish?
Not every gel system uses the same preparation routine. Follow your gel brand’s instructions first; some systems recommend cleanser, dehydrator, and primer, while others use fewer steps.
What happens if I skip nail dehydrator?
You may notice no difference, or your product may lift sooner if surface oil and moisture interfere with adhesion. Good cleansing, proper cuticle preparation, correct application, and system compatibility all affect retention, so dehydrator is only one part of the process.
Final Takeaway
If you need a nail dehydrator alternative at home, start simple. High-strength isopropyl alcohol is my preferred temporary option for routine surface cleansing, while pure acetone is a stronger backup that should be used more sparingly.
Neither liquid magically replaces every professional prep product. Dehydrator, primer, base coat, adhesive, and curing each perform different jobs.
The best manicure prep is controlled rather than aggressive. Clean the nails, remove dust, degrease the surface, let it dry, avoid touching it, and follow your nail system’s directions.
If lifting keeps happening after your technique is consistent, a compatible professional dehydrator is usually a better next step than experimenting with stronger homemade mixtures. Your nails should look good without paying for it with unnecessary dryness, irritation, or damage.
