
Nail Dehydrator Not Drying? Causes, Fixes, and What to Check

Quick Answer
If your nail dehydrator is not drying, you may be applying too much, working on a damp or oily nail, using a contaminated or old bottle, or confusing dehydrator with primer or bonder. A standard dehydrator normally air-dries as its solvents evaporate, so follow the product label and the FDA’s nail-product safety guidance rather than putting it under a lamp unless your manufacturer specifically says to.
What to check first
- Use less product: One thin, controlled coat is usually enough to cover the natural nail.
- Let it air-dry: Most dehydrators rely on solvent evaporation rather than UV or LED curing.
- Check the label: Make sure the bottle is actually a dehydrator, not a primer, bonder, or combined prep product.
- Keep nails dry: Water, cuticle oil, lotion, and fingerprints can interfere with nail prep.
- Inspect the bottle: Replace product that has changed noticeably in texture, smell, appearance, or performance.
Quick verification
- Test a thin coat on one properly cleaned natural nail and watch whether the visible liquid flashes away before continuing.
If you’re staring at a nail that still looks wet after applying dehydrator, don’t immediately add more product. That often makes the problem harder to diagnose.
I start by checking three things: the bottle, the amount applied, and what was on the nail beforehand. Those clues usually explain whether the dehydrator is failing or simply behaving differently than expected.
In This Guide
- Why Is My Nail Dehydrator Not Drying?
- What Should Nail Dehydrator Look Like When Dry?
- What Causes Nail Dehydrator to Stay Wet?
- How Do You Fix Nail Dehydrator That Will Not Dry?
- Is It Dehydrator or Primer That Should Feel Tacky?
- Does Dehydrator Dry Differently With Gel, Acrylic, and Press-Ons?
- When Should You Replace a Nail Dehydrator?
- Can Nail Dehydrator Damage Your Nails or Skin?
- Frequently Asked Questions
Why Is My Nail Dehydrator Not Drying?
A nail dehydrator that remains visibly wet is usually dealing with an application, product, or nail-preparation issue. A conventional dehydrator is designed to remove surface oil and moisture and then evaporate rather than remain as a thick coating.
The word dry can also be misleading. Your nail does not need to look dramatically white or feel rough for the product to have evaporated.
- Visible liquid should disappear: The surface should not remain flooded with product.
- The nail may look matte: Many formulas leave less shine after evaporation.
- It should not form a thick layer: A true dehydrator normally does not behave like gel polish.
- No lamp may be needed: Standard solvent-based dehydrators generally air-dry.
If the nail still looks glossy, determine whether you’re seeing liquid or simply the natural surface of the nail. Some nail plates remain slightly reflective even after good preparation.
As of 2026, brands also use terms such as prep, dehydrator, bonder, and primer differently. That makes the bottle’s instructions more important than a universal drying-time rule.
What Should Nail Dehydrator Look Like When Dry?
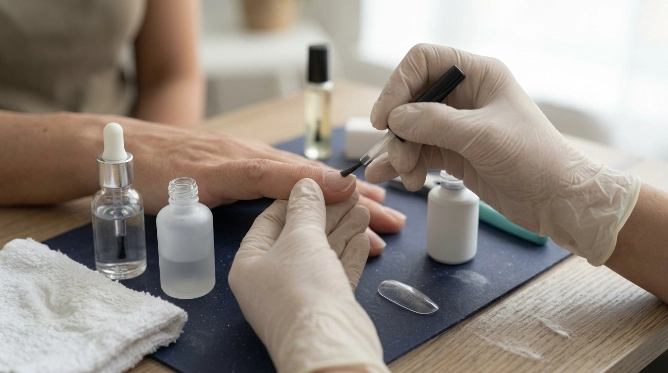
Once dry, dehydrator should leave the nail clean and free from obvious puddles or streaks of wet liquid. A lightly matte or chalkier appearance is common, but the exact finish varies.
Don’t touch the nail to test it. Touching can put skin oil straight back onto the surface you just prepared.
| What you see | What it may mean | What to do |
|---|---|---|
| Liquid disappears quickly | Normal solvent evaporation | Continue according to your nail system |
| Nail looks matte | Surface oil has likely been reduced | Avoid touching the nail |
| Wet puddles remain | Too much product or unusual formula | Use a thinner application and check instructions |
| Sticky layer remains | Product may be primer or bonder | Verify the product type |
| Greasy shine returns | Oil, lotion, or contamination may be present | Clean and repeat prep if the system allows |
The goal is not to make the natural nail extremely dry. You only need to create the surface condition required by your chosen nail system.
What Causes Nail Dehydrator to Stay Wet?
The most common causes are surprisingly simple. Before replacing the bottle, work through these possibilities one at a time.
1. You applied too much dehydrator
More dehydrator does not mean better adhesion. A heavily loaded brush can leave enough liquid that evaporation takes noticeably longer.
Wipe excess product from the brush and use a thin coat. Flooding the sidewalls or cuticle area also increases unnecessary skin exposure.
2. Your nails were still damp
Applying prep immediately after soaking or washing can leave extra moisture around the nail. The same problem can happen after a wet manicure routine.
- Dry hands completely.
- Keep the nail surface free from water.
- Remove visible dust using the method recommended by your system.
- Apply dehydrator near the end of nail prep.
3. Lotion or cuticle oil was applied first
Cuticle oil and hand cream are useful for aftercare, but they’re usually poor companions immediately before adhesion steps. They can leave a film that a small amount of dehydrator may struggle to remove evenly.
Save moisturizing products for the end unless your product manufacturer gives different instructions.
4. You touched the prepared nail
This one is easy to miss. Running a fingertip across a prepared nail can transfer fresh skin oil to the surface.
Hold fingers by the sides while working. Avoid checking dryness with another finger.
5. Your bottle is contaminated
A brush can pick up oil, dust, residue, or another product and carry it back into the bottle. Over time, contamination may change how consistently the product performs.
- Keep brushes away from cuticle oil and lotion.
- Don’t mix prep liquids intentionally.
- Close the bottle promptly after use.
- Replace questionable product instead of trying to modify it.
6. You’re using a primer or bonder
This is one of the biggest sources of confusion. Some primers and bonders are intentionally left slightly tacky because they perform a different job.
Read both the front and back labels. A product sold as a combined prep system may not behave like a simple fast-evaporating dehydrator.
7. The environment is affecting evaporation
Temperature, airflow, humidity, and how much product you apply can change evaporation speed. A cool, poorly ventilated room may feel different from a warm workstation with good air movement.
Don’t use direct heat or blow on the nails. Breath can introduce moisture, while unsafe heat around flammable solvents creates another problem.
Section Takeaway: If dehydrator stays wet, first reduce the amount, confirm the nail is clean and dry, and make sure the bottle is truly a dehydrator. Most troubleshooting starts there.
How Do You Fix Nail Dehydrator That Will Not Dry?
Start over on one test nail instead of experimenting on all ten. That makes it much easier to identify which step is causing the problem.
- Read the manufacturer’s directions. Confirm whether the product air-dries and whether it is labeled dehydrator, prep, primer, or bonder.
- Remove the previous product correctly. Follow the system’s directions instead of layering more dehydrator over a questionable surface.
- Prepare the nail gently. Shape and remove only the surface shine required by your system without aggressively thinning the nail.
- Remove dust. Keep the surface free from filing debris, oil, lotion, and other contamination.
- Make sure the nail is dry. Avoid applying dehydrator over water left from washing or soaking.
- Apply a thin coat. Don’t flood the nail folds or surrounding skin.
- Allow natural evaporation. Watch for the visible liquid to disappear without touching the nail.
- Continue promptly. Apply the next compatible prep or enhancement step according to the same system’s instructions.
If the thin test coat behaves normally, your earlier application was probably too heavy or the nail was contaminated. If it still remains oddly wet, inspect the product itself.
A UV or LED lamp is not a universal solution. Dehydrator and gel products perform different jobs, so curing an air-dry prep liquid won’t correct contaminated nails or an incompatible formula.
Section Takeaway: Test one clean nail with a thin application. If the product still behaves abnormally, stop changing your technique and investigate the bottle, label, storage, and compatibility.
Is It Dehydrator or Primer That Should Feel Tacky?
A dehydrator generally evaporates, while some primers and bonders can leave a different finish. That difference is important when deciding whether your product has truly failed to dry.
| Prep product | Main purpose | Typical behavior |
|---|---|---|
| Dehydrator | Reduces surface oil and moisture | Usually evaporates and leaves little or no visible coating |
| Primer | Promotes adhesion | Finish varies by formula and system |
| Bonder | Creates an adhesion layer | May remain tacky or require a specific next step |
Don’t assume two bottles are interchangeable because both say “prep.” The safest approach is to use products in the order specified by the manufacturer.
This matters even more when mixing brands. One system may expect a dehydrator followed by primer, while another may combine functions or skip a separate prep step.
Does Dehydrator Dry Differently With Gel, Acrylic, and Press-Ons?
The dehydrator itself may evaporate similarly, but what comes after it changes with the nail system. Compatibility matters more than trying to force every manicure into one prep routine.
Gel polish and builder gel
Gel systems often depend on carefully controlled nail prep and curing. Follow the gel manufacturer’s sequence for dehydrator, primer, base coat, and lamp use.
Acrylic nails
Acrylic systems may use dehydrator followed by a specific primer. Acid and acid-free primers can have different handling instructions, so don’t judge them by dehydrator behavior.
Gel extensions
Soft-gel tip systems can be sensitive to oil, dust, and incomplete preparation. The natural nail and the extension tip may also require different preparation steps.
Press-on nails
For press-ons, the goal is usually a clean, oil-free natural nail before adhesive application. Use the preparation method recommended by the glue or press-on manufacturer.
- Don’t mix steps automatically: A prep routine that works for acrylic may not match a press-on kit.
- Check adhesive instructions: Some products specify alcohol prep or another method.
- Avoid over-buffing: More abrasion is not automatically better adhesion.
- Keep products off skin: Good placement matters as much as good nail prep.
If artificial nails have already left your natural nails thin, brittle, sore, or damaged, review the American Academy of Dermatology’s artificial-nail guidance before adding another enhancement.
When Should You Replace a Nail Dehydrator?
Replace your dehydrator when its performance has changed noticeably and the problem continues after correct application. Don’t try to repair a cosmetic chemical product by mixing in alcohol, acetone, or another liquid.
Check for practical warning signs before your next manicure.
- Unexpected texture: The product is much thicker or behaves unlike it did when new.
- Visible contamination: You notice debris or residue in the bottle.
- Packaging failure: The bottle no longer closes securely or has leaked repeatedly.
- Changed performance: A thin coat no longer evaporates as expected.
- Storage problems: The bottle was repeatedly left open, exposed to excessive heat, or stored against its instructions.
- Manufacturer guidance: The printed shelf-life or after-opening guidance says it should be replaced.
Keeping the cap closed matters because many nail products contain volatile ingredients. CDC/NIOSH guidance for nail technicians also recommends controlling chemical exposure and keeping chemical containers properly closed.
If you work with nail chemicals often, review the CDC/NIOSH nail technician safety guidance for ventilation and exposure-control practices.
Can Nail Dehydrator Damage Your Nails or Skin?
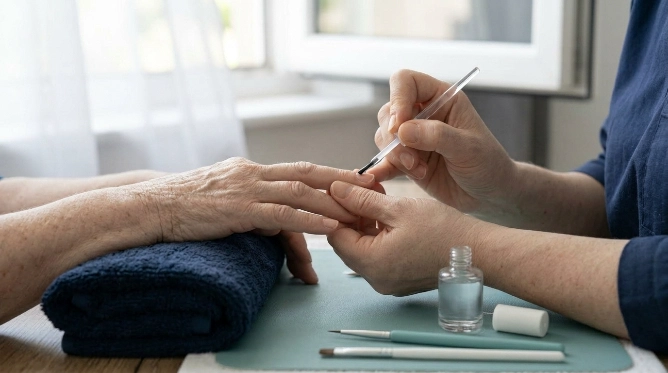
Nail prep products can dry or irritate skin when used incorrectly, especially when repeatedly flooded onto the cuticle or surrounding nail folds. Strong odor alone does not tell you whether exposure is safe.
Use only the amount you need, avoid unnecessary skin contact, close containers, and work with good ventilation. Follow all warning statements supplied by the manufacturer.
Avoid applying dehydrator to visibly broken, bleeding, infected, or severely irritated skin. Covering an unhealthy nail with enhancements can also make it harder to monitor changes.
The FDA advises consumers to use nail products according to labeled directions and warning statements. That simple rule is especially useful when product names sound similar but formulas behave differently.
Frequently Asked Questions
How long should nail dehydrator take to dry?
Many solvent-based nail dehydrators evaporate quickly, often within seconds rather than behaving like a polish layer. Exact timing varies, so use your manufacturer’s directions and judge whether the visible liquid has flashed away.
Why is my nail dehydrator still shiny?
A shiny nail does not always mean dehydrator is still wet. Check for actual moving liquid or puddling, because some natural nails retain a slight sheen even after surface oil has been reduced.
Do you cure nail dehydrator under a UV or LED lamp?
Standard nail dehydrators are generally designed to air-dry through evaporation. Don’t cure one under a lamp unless the manufacturer specifically instructs you to do so.
Can I apply primer while dehydrator is still wet?
Usually, you should allow the dehydrator to complete its intended evaporation before applying the next step. Applying another product over obvious wetness can interfere with controlled nail preparation.
Why does my dehydrator feel sticky?
A sticky finish can mean the bottle is a primer, bonder, combination product, or another prep formula rather than a simple dehydrator. Check the exact product name and instructions before trying to remove the tackiness.
Can I use more dehydrator if my nails are oily?
More liquid is not always better. Proper cleaning, avoiding lotion and fingerprints, using a thin application, and following your nail system usually matter more than repeatedly soaking the nail in dehydrator.
What if my manicure still lifts after the dehydrator dries?
Early lifting can come from several issues, including cuticle residue, oil contamination, incorrect primer use, product touching the skin, incompatible systems, poor tip fit, or application technique. Dehydrator alone cannot correct every adhesion problem.
Final Takeaway: What Should You Do Next?
If your nail dehydrator is not drying, don’t immediately blame your gel, acrylic, or glue. First verify that you’re using the correct product, then test a thinner application on one completely clean and dry nail.
Keep oil, lotion, water, and fingerprints away from the prepared surface. Allow the dehydrator to air-dry unless your manufacturer clearly instructs otherwise.
- Use a thin coat rather than flooding the nail.
- Check that the product is dehydrator, not primer or bonder.
- Follow one compatible nail system whenever possible.
- Replace a contaminated or strangely behaving bottle.
- Stop if you experience significant irritation or burning.
The biggest mistake is trying to fix uncertain prep by piling on more products. Clean, controlled application and the manufacturer’s directions give you a much better starting point for long-lasting nails.

