
Nail Dehydrator, Primer, and Bonder Order: What Goes First?

Quick Answer
For most nail systems, the correct order is nail prep first, then dehydrator, primer, bonder if your system calls for one, and finally your base gel, adhesive, acrylic, or enhancement product. However, primer and bonder can overlap in purpose, so you shouldn’t automatically layer both unless the manufacturer recommends it. The FDA’s nail care guidance also recommends following product labels and warnings closely.
Quick application order
- Prep the nail: Remove cuticle residue, shape the nail, lightly buff if your system requires it, and remove dust.
- Apply dehydrator: Use a thin coat to remove temporary surface moisture and oils.
- Apply primer: Use the correct acid or acid-free primer only when your nail system recommends it.
- Add bonder if required: Apply a thin adhesion-promoting layer after primer unless your brand specifies another order.
- Apply the enhancement: Continue with base gel, builder gel, Gel-X adhesive, acrylic, dip, or your chosen system.
Most important rule
- Check your brand: If your primer is already marketed as a bonding primer, adding another bonder may be unnecessary.
If you’ve ever lined up a dehydrator, primer, and bonder and wondered which bottle comes next, you’re not alone. The names sound similar, yet each product can play a different role in keeping gel, acrylic, extensions, or press-ons attached.
I use one simple rule when comparing nail-prep systems: move from cleaning and drying toward stronger adhesion. Once you understand that progression, the order becomes much easier to remember.
In This Guide
- What is the correct nail dehydrator, primer, and bonder order?
- What does each nail prep product actually do?
- Do you need dehydrator, primer, and bonder together?
- What order should you use for gel, acrylic, Gel-X, and press-ons?
- How do you apply dehydrator, primer, and bonder correctly?
- Is nail primer the same as bonder?
- What mistakes cause lifting after nail prep?
- How can you use nail prep products safely?
- Frequently asked questions
What Is the Correct Nail Dehydrator, Primer, and Bonder Order?
The usual sequence is natural-nail preparation → dehydrator → primer → bonder → enhancement product. That order moves from removing contamination to creating adhesion.
It isn’t universal, though. Some brands combine primer and bonder functions, while other systems tell you to use only one of them.
The standard prep sequence
- Push back and remove non-living cuticle: Product bonded to cuticle tissue can lift quickly.
- Shape and lightly refine the nail: Follow your enhancement system’s filing instructions.
- Remove dust: Use a clean, lint-free method.
- Apply dehydrator: Let it evaporate completely.
- Apply primer: Use a small amount and keep it off surrounding skin.
- Apply bonder: Only if the system requires a separate bonding product.
- Continue with your nail system: Apply base, adhesive, builder, acrylic, or another enhancement.
A dehydrator usually dries without a lamp. Many primers also air-dry, although some bonders or gel bonding products may require curing.
Always check the bottle. A product’s specific directions take priority over a generic prep sequence.
Definition: Nail prep is the process of preparing the natural nail so an enhancement can adhere predictably. It can include cuticle cleanup, surface preparation, dehydration, priming, and bonding.
The biggest mistake I see in complicated routines is assuming more prep products always mean stronger retention. Too many incompatible layers can be just as unhelpful as skipping a necessary one.
Section Takeaway: Start with physical nail prep, then dehydrate, prime, and bond only as your chosen system requires.
What Does Each Nail Prep Product Actually Do?
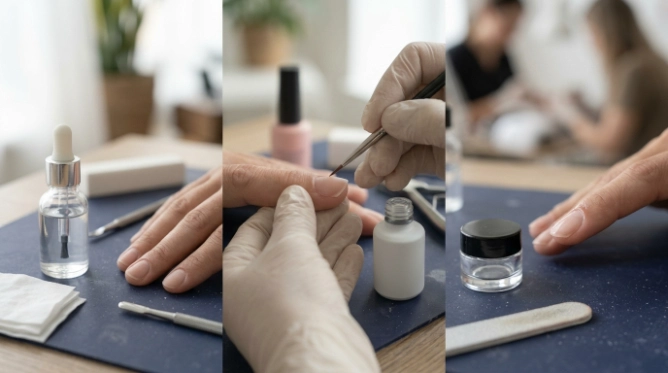
Dehydrator, primer, and bonder all support adhesion, but they don’t necessarily perform the same job. Understanding the difference helps you decide which bottles you truly need.
| Product | Main purpose | Typical position | Usually cured? |
|---|---|---|---|
| Dehydrator | Temporarily removes surface moisture and oils | First liquid prep step | Usually no |
| Primer | Prepares the surface for stronger adhesion | After dehydrator | Usually no, depending on formula |
| Bonder | Creates or improves the bond between nail and enhancement | After primer when separately required | Depends on product |
What does nail dehydrator do?
A nail dehydrator removes temporary surface oil and moisture before product application. It leaves the nail plate looking dry and ready for the next prep layer.
Think of dehydrator as surface preparation rather than glue. It doesn’t replace proper cuticle work, dust removal, or a bonding product when one is required.
What does nail primer do?
Primer changes how the enhancement interacts with the natural nail surface. Depending on its chemistry, it can create a stronger connection between the nail plate and the product placed over it.
Primers may be labeled acid, acid-based, acid-free, or non-acid. These aren’t interchangeable terms, so follow the exact instructions supplied by the manufacturer.
What does nail bonder do?
A bonder is an adhesion-promoting product placed between the prepared nail and an enhancement system. Some remain slightly tacky, while others behave more like a thin gel layer.
The term isn’t standardized across every brand. One company’s “bonder” may perform a job another company calls “primer,” “protein bond,” “bonding base,” or “prep bond.”
Do You Need Dehydrator, Primer, and Bonder Together?
No. You don’t automatically need all three products for every manicure or enhancement service.
The correct combination depends on the chemistry of your gel, acrylic, dip, extension, glue, or base system. Manufacturer compatibility matters more than the number of prep bottles you use.
When all three may be used
- Your nail system specifically lists dehydrator, primer, and bonder as separate steps.
- You are using a professional enhancement system designed around those products.
- The products come from a coordinated system with clear application instructions.
When you may need only dehydrator and primer
Many acrylic and gel systems use dehydration followed by primer, with no separate bonder. The enhancement is then applied directly according to the brand’s directions.
When primer and bonder overlap
Some products are marketed as adhesion primers or bonding primers. In that situation, adding another bonder may simply duplicate the same stage.
As of 2026, product naming still varies widely between nail brands. I check the directions before relying on the front-label name alone.
Section Takeaway: Use the prep system your enhancement requires rather than stacking every adhesion product you own.
What Order Should You Use for Gel, Acrylic, Gel-X, and Press-Ons?
The general pattern stays similar, but the final adhesion step changes depending on the nail service. Here’s a practical comparison.
| Nail system | Common prep order | Important note |
|---|---|---|
| Gel polish | Prep → dehydrator → primer/bond if required → base coat | Some gel systems don’t require primer on every client. |
| Builder gel | Prep → dehydrator → primer/bond → base or builder | Check whether the builder needs a separate base. |
| Acrylic | Prep → dehydrator → primer → acrylic | Use the primer type specified by the acrylic system. |
| Gel-X/soft gel tips | Prep → dehydrator → primer/bond → adhesive gel → tip | Follow the extension brand’s curing sequence. |
| Press-ons with glue | Prep → dehydrator if compatible → nail glue → press-on | Primer or bonder isn’t automatically needed. |
Should dehydrator go before Gel-X primer?
Yes, when the Gel-X system uses both. Dehydrator normally goes first because it prepares the natural nail before the adhesion-promoting primer or bonder.
Do you use bonder before acrylic?
Only if your acrylic system calls for that product. Many acrylic routines rely on dehydrator followed by acrylic primer without a separate bonder.
Do press-ons need primer?
Not necessarily. Traditional nail glue systems often work with clean, dry, properly prepared nails without an enhancement primer.
Adding a product that wasn’t designed to work under your glue can change adhesion rather than improve it.
How Do You Apply Dehydrator, Primer, and Bonder Correctly?
Thin, controlled application matters more than flooding the nail with prep liquid. These products are designed to work in small amounts.
Step 1: Prepare the natural nail
- Wash and dry your hands before starting.
- Push back the cuticle carefully.
- Remove non-living tissue from the nail plate.
- Shape the free edge.
- Lightly refine surface shine only if your nail system requires it.
- Remove all visible dust.
Step 2: Apply dehydrator
Brush a thin layer over the natural nail. Avoid flooding the sidewalls or cuticle area.
Most dehydrators evaporate quickly and don’t need curing. Wait until the surface has visibly dried before continuing.
Step 3: Apply primer
Use a minimal amount. Primer should stay on the nail plate rather than surrounding skin.
Let it dry according to the label. Don’t assume every primer should become completely matte or completely tacky.
Step 4: Apply bonder if required
Use the bonder only after the earlier prep products have completed their required drying time. Apply it in the thinness recommended by the brand.
If it’s a gel-based bonder, cure it only for the manufacturer’s specified time and lamp type.
Step 5: Continue with the enhancement
Move directly into your base coat, acrylic, builder gel, extension adhesive, or other system. Avoid touching the prepared nail with your fingers.
Skin oils can contaminate the surface again. If you accidentally touch the nail, follow your system’s instructions for re-prepping it.
Section Takeaway: Apply prep products thinly, keep them off the skin, let each layer finish its required drying or curing step, and avoid touching the prepared nail.
Is Nail Primer the Same as Bonder?
Sometimes they perform similar jobs, but you shouldn’t assume primer and bonder are identical. Their formulas and application methods can differ substantially.
A primer generally prepares the nail surface for adhesion. A bonder generally creates or strengthens the connection between the prepared nail and the enhancement.
Why the names get confusing
- Primer: May be acidic or acid-free and often air-dries.
- Bonding primer: May combine the roles of primer and bond promoter.
- Protein bond: A brand-specific style of adhesion promoter.
- Gel bonder: May function more like a thin adhesion gel and require curing.
- Bonding base: May replace a conventional base coat in certain systems.
That means the safest question isn’t simply, “Do I own a primer and a bonder?” Ask whether those two specific products were designed to work together.
Mixing systems isn’t always a problem, but compatibility becomes less predictable. When retention matters, I prefer following one manufacturer’s complete prep sequence whenever possible.
What Mistakes Cause Lifting After Nail Prep?
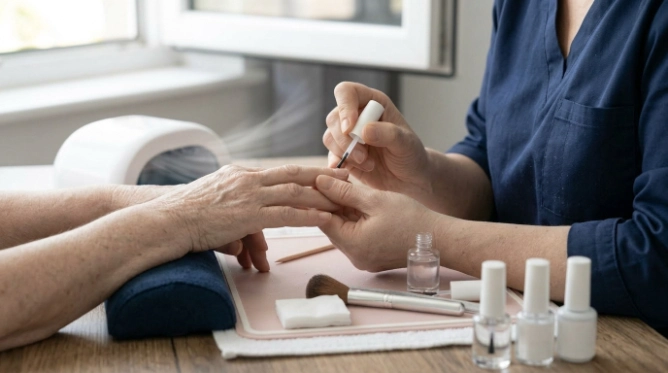
Lifting isn’t always caused by skipping primer. Physical preparation, product placement, curing, and contamination can all affect retention.
Common prep mistakes
- Leaving cuticle on the nail: Product attached to skin or cuticle tissue can separate quickly.
- Touching the prepared surface: Finger oils can contaminate the nail after dehydration.
- Using too much primer: More product doesn’t automatically create more adhesion.
- Flooding the skin: Prep or enhancement products should remain where the manufacturer intends them to be used.
- Skipping dust removal: Filing debris can interfere with a clean application.
- Mixing incompatible products: One brand’s bonder may not behave as expected under another brand’s base.
- Incorrect curing: Gel products need the proper lamp and cure time specified by the manufacturer.
- Over-filing the natural nail: Aggressive filing is unnecessary and can leave nails thin or uncomfortable.
What if nails still lift?
Check where the lifting starts. Cuticle-area lifting often points toward preparation or product touching skin, while free-edge problems may involve application technique or daily wear.
Don’t keep adding stronger prep products without identifying the cause. A systematic change is easier to evaluate than changing four steps at once.
Section Takeaway: Good retention comes from clean preparation, compatible products, thin application, correct curing, and careful product placement—not simply adding more primer.
How Can You Use Nail Prep Products Safely?
Read every product label before use, especially when working with primers and artificial-nail products. The FDA notes that some nail primers may contain methacrylic acid and that nail products should be used according to their warnings and directions.
The OSHA guidance on nail salon chemical hazards also emphasizes ventilation, limiting skin contact, and following manufacturers’ instructions.
Keep products away from skin
Don’t intentionally paint primer, bonder, gel, or acrylic products onto the surrounding skin. Clean application helps reduce unnecessary exposure.
The American Academy of Dermatology’s contact dermatitis guidance notes that nail polish and artificial nail products can be potential allergy triggers in some people.
Work with ventilation
Use nail products in a ventilated area and close bottles when you’re finished. This also limits unnecessary evaporation and fumes around your workspace.
Stop if you develop a reaction
Burning, persistent redness, swelling, itching, blistering, or a recurring rash deserves attention. Stop using the suspected product and seek medical advice when symptoms are significant or persistent.
The FDA’s broader cosmetic safety guidance also recommends reading labels, following warnings, and reporting problems associated with cosmetic products.
Health note: If you have damaged skin, an active nail infection, persistent nail separation, or a suspected allergy, get advice from a qualified healthcare professional before continuing cosmetic nail services.
Frequently Asked Questions
Does nail dehydrator go before or after primer?
Nail dehydrator normally goes before primer. The dehydrator removes temporary surface oil and moisture, then primer prepares the nail for stronger adhesion with the enhancement system.
Does bonder go before or after primer?
A separate bonder commonly goes after primer, but product systems vary. If the bonder’s instructions specify another sequence, follow the manufacturer’s directions instead of a generic order.
Can I use dehydrator without primer?
Yes, if your nail system doesn’t require primer. Dehydrator can help create a clean, dry surface, but it doesn’t perform every function of an adhesion primer.
Can I use primer without dehydrator?
Some systems allow it, but many routines use dehydrator first for more predictable surface preparation. Check your primer and enhancement instructions because requirements differ between formulas.
Can you use two primers or two bonders together?
It’s usually unnecessary unless the manufacturer specifically designed them as a sequence. Layering unrelated adhesion products may create compatibility issues rather than stronger retention.
Do I cure nail dehydrator or primer under a lamp?
Most traditional dehydrators and many primers air-dry rather than cure in a lamp. Some gel bonders and specialty primers are different, so always check the product label before curing.
What comes after nail bonder?
Your enhancement layer normally comes next. Depending on the system, that may be gel base coat, builder gel, Gel-X adhesive, acrylic product, or another manufacturer-specified layer.
Final takeaway: Remember the basic flow as prep → dehydrate → prime → bond → enhancement, but don’t treat it as an unbreakable rule. Your product system’s instructions should always decide whether primer, bonder, or both belong in the routine.
If you’re troubleshooting lifting, change one step at a time and keep the nail surface clean throughout the process. A simple, compatible prep routine is usually easier to repeat than a complicated stack of unnecessary products.
“`
SEO METADATA (for WordPress SEO plugin — do not paste into content):
Meta Title: Nail Dehydrator, Primer & Bonder Order Explained
Meta Description: Learn the correct nail dehydrator, primer, and bonder order for gel, acrylic, Gel-X, and press-ons, plus when you can safely skip a step.
URL Slug: nail-dehydrator-primer-bonder-order
Focus Keyword: nail dehydrator primer and bonder order
Secondary Keywords: nail prep order, dehydrator before primer, primer vs bonder, nail bonder order, gel nail prep
Internal links placed from sitemap (if applicable):
Internal links skipped — sitemap not fetchable.
Links to manually verify before publishing:
None identified — the external authority URLs used in the article were verified during research.
Safety-source verification: FDA guidance confirms the importance of following nail-product labels and discusses methacrylic acid in nail primers; OSHA guidance covers chemical exposure, ventilation, skin contact, and manufacturer instructions for nail products.

