
You want mocha nails that look elegant, and the right shape makes all the difference. I find almond and oval shapes elevate mocha tones best because they lengthen the finger and create a soft, refined canvas for warm brown shades. Almond and oval nails make mocha colors look most elegant by balancing warmth with a sleek, elongated silhouette.
I’m Ella Hart, and I’ll guide you through why those shapes work, how they compare to squares or coffins, and simple tips to pick the best shape for your hands. We’ll also cover quick styling and upkeep so your mocha manicure stays polished longer.
Key Takeaways
- Choose almond or oval to enhance mocha’s elegant look.
- Match shape to your finger length for the best effect.
- Keep shape and finish neat for a polished, lasting manicure.
Understanding Mocha Nails
I focus on the shades, why people love them, and how trends shape the look. The next parts explain what mocha nails are, the key color tones, and the styles driving popularity.
Definition and Popularity of Mocha Nails
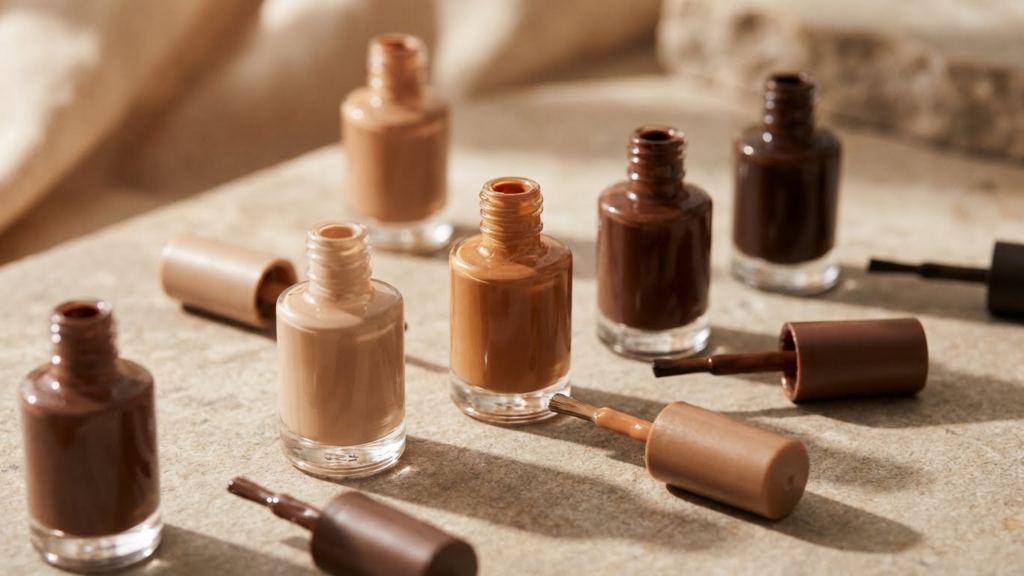
I define mocha nails as manicures that use warm brown tones inspired by coffee and cream. These shades range from deep chocolate to soft beige and create a polished, neutral look that suits many outfits.
People choose mocha because it reads as elegant and wearable. It hides chips well, pairs with gold jewelry, and works for both office and casual settings. The color flatters many skin tones: lighter mocha shades suit fair skin, mid-tone warms work for medium skin, and richer browns pop on deeper skin.
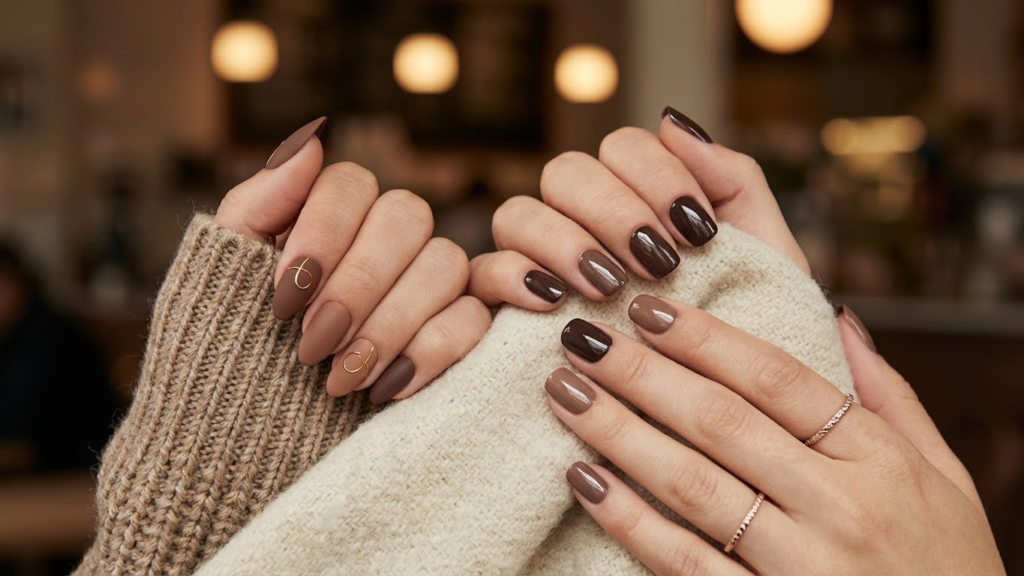
I often see mocha used as a base for simple accents like thin gold lines or a neutral French tip. Salons and influencers prefer it because it feels timeless yet modern, making it a safe but stylish choice.
Color Variations and Undertones
Mocha covers a range of browns with different undertones: yellow-warm, pink-warm, and cool taupe. Yellow-warm mocha has a golden glow and pairs well with warm jewelry. Pink-warm mocha reads softer and can brighten fair complexions. Cool taupe has gray hints and looks more muted and sophisticated.
When choosing a mocha shade, I check skin undertone first. Warm undertones match golden or caramel mochas. Neutral skin can wear most tones. Cool undertones look best with taupe or mocha with slight gray or mauve. Finish affects the final look too: glossy makes colors richer, while matte softens intensity.
I recommend testing a small swatch near the hand or wrist. Lighting changes perception, so view the color in both natural and indoor light before committing.
Trends Influencing Mocha Nail Designs
I track trends that keep mocha nails fresh. Minimalist looks—single-color, short almond, or square nails—remain popular for a clean, elegant vibe. Mixed finishes like glossy base with matte tips or a single metallic accent nail add modern interest without overwhelming the neutral base.
Seasonal shifts also matter. Deeper mochas appear in fall and winter, while lighter, creamier mochas show up in spring. Nail art trends such as thin gold striping, tiny negative-space shapes, and soft geometric swirls complement mocha tones well.
I notice shape trends affecting perception: almond and squoval shapes make mocha appear refined, while long coffin shapes create a bolder, fashion-forward look. Designers often suggest subtle accents rather than heavy patterns to preserve the mocha’s understated elegance.
Nail Shapes That Enhance Elegance

I focus on shapes that make mocha shades look refined, elongate the fingers, and fit both short and long nail lengths. Each shape below highlights different mocha tones and finish choices so you can pick what matches your style and daily needs.
Classic Almond Shape
I find almond nails soften the richness of mocha colors. The tapered sides and rounded tip create a slender silhouette that keeps darker mocha shades from appearing too heavy. This shape works well with glossy or satin finishes and pairs nicely with subtle accents like a thin gold stripe or a matte topcoat.
Almond is especially flattering on medium to long nail beds. It reduces bulk at the tip, which helps warmer mocha tones read as elegant rather than stark. If you want a low-maintenance option, ask your nail tech for a slightly shorter almond—still chic, easier to wear daily.
Sophisticated Oval Shape
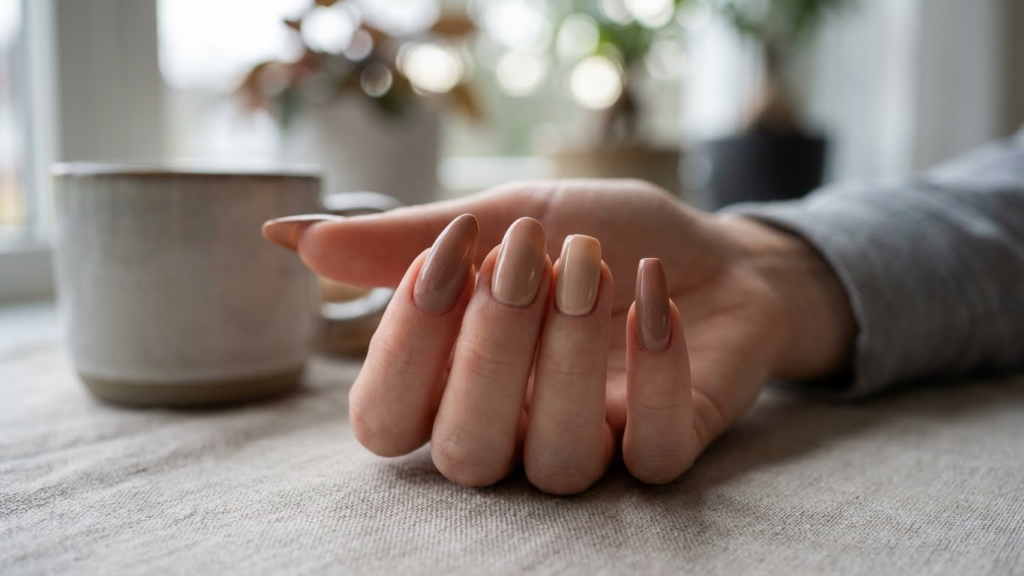
Oval nails offer a classic, clean look that highlights mocha hues without drawing too much attention. The gentle curve follows the natural nail edge, which makes mocha creams and latte shades look polished and professional.
I recommend oval nails for those with shorter nail beds who still want a refined finish. They avoid sharp corners that can chip and suit both neutral mocha and deeper chocolate tones. For extra durability, a thin gel overlay keeps the oval shape intact and the finish smooth.
Timeless Coffin Shape
Coffin (or ballerina) nails add drama while keeping mocha palettes fashionable. The squared-off tip gives a modern edge that lets bold mocha-reds or mocha mousse stand out. This shape pairs well with negative space designs or metallic accents for a fashion-forward look.
I suggest coffin nails for longer nails and for anyone who likes statement manicures. They can make fingers look longer but need more care to prevent breakage. Consider reinforced acrylic or builder gel if you prefer a strong structure with glossy mocha finishes.
Modern Squoval Shape
Squoval blends square and oval for a practical, stylish option that suits most hands. I use squoval when clients want the neatness of a square tip but the soft edges of an oval. This balance allows mocha neutrals to read as tidy and elegant, perfect for work or events.
Squoval fits short and medium lengths well and reduces snagging compared to sharp squares. It complements both matte and shiny mocha polishes, and works great with understated nail art like a single accent nail or tiny geometric details. For care tips and shape guides, I often reference resources like the American Academy of Dermatology for nail health.
Comparing Nail Shapes for Mocha Nails
I focus on how nail shape changes the way mocha tones look and how they suit your hands and events. I compare common shapes and point out which work best with warm, creamy mocha shades.
Flattering Effects on Hand Appearance
I find almond and oval shapes slim the fingers most. The tapered sides and rounded tips draw the eye lengthwise, which makes fingers look longer and more elegant when paired with mocha tones.
Square and squoval nails give a more balanced, sturdy look. They suit shorter fingers and create a neat contrast with mocha’s soft warmth. If you want a modern, professional vibe, these shapes keep the manicure grounded.
Coffin and stiletto shapes add drama and length. They emphasize bold mocha shades and glossy finishes. I don’t recommend extreme points for very short nails, because they can look disproportionate.
How Shape Impacts the Mocha Color Aesthetic
Almond and oval let mocha read as smoother and softer. The gentle curves reduce harsh edges, so brown-beige tones look creamy and refined on these nails.
Square cuts can make mocha feel more graphic and contemporary. The flat tips show off layered designs, color blocking, or metallic accents without losing mocha’s warmth.
Long coffin or stiletto nails deepen mocha’s drama. The extended surface lets gradients, matte-to-gloss transitions, and detailed art pop. On shorter lengths, mocha tends to read as neutral; on long elongation it reads as fashion-forward.
Suitability for Different Occasions
For work or interviews, I choose almond, oval, or short squoval. These shapes keep mocha subtle and polished. They pair well with gold jewelry and neutral outfits.
For casual, everyday wear, squoval and soft square are practical. They resist chipping and make simple mocha shades look chic without fuss.
For events or nights out, coffin and stiletto suit bold mocha looks and detailed nail art. Almond also works for formal events because it balances elegance with trendiness.
Selecting the Right Nail Shape for Your Hands
I focus on three practical factors that change how mocha shades look on you: finger length, nail bed width, and your personal style. Choosing the right shape can make mocha tones appear more polished, balanced, and flattering.
Choosing Based on Finger Length
I look at finger length first because it affects balance. For short fingers, I choose rounded or soft-square shapes to create the illusion of length without drawing attention to width. These shapes keep the hand looking proportional and let mocha colors read as elegant rather than heavy.
For long fingers, I often pick almond or oval shapes. Those narrow the tip and emphasize the hand’s natural length, which pairs well with deep mocha tones for a refined look. If you prefer drama, tapered stiletto can stretch the silhouette, but I avoid extreme tips if you want everyday wearability.
If one finger is noticeably shorter or longer, I reshape the others slightly to match. Small adjustments keep the manicure cohesive and make the mocha shade look intentional.
Matching to Nail Bed Width
I measure nail bed width to decide between narrow or wider profiles. For narrow nail beds, I favor almond or oval because they add softness without making tips look too thin. Mocha shades on these shapes read warm and sophisticated.
For wider nail beds, I prefer square or squoval shapes. These give a structured platform that prevents mocha polish from looking too bulky. A slightly rounded corner (squoval) softens the look and keeps it modern.
When the nail bed has a strong curve at the base, I consider a rounded shape to follow the natural line. That harmony between shape and bed makes mocha tones appear smooth and cohesive.
Adapting to Personal Style
I match shape to lifestyle and fashion choices next. If you wear lots of tailored or minimalist clothes, I pick almond or oval for a classic finish that complements neutrals. Those shapes make mocha colors feel timeless.
If you like bold accessories or edgy outfits, I suggest coffin or stiletto to add contrast. The sharp shape gives mocha polish a fashion-forward edge. For low-maintenance needs, I recommend short rounded or squoval shapes that keep mocha nails elegant and practical.
I also factor in how often you use your hands. If you type or work with your hands a lot, I avoid long, fragile shapes even if they look stylish. Practical shapes keep the manicure looking good longer.
Elegant Nail Art Pairings with Mocha Nails
I focus on small, refined details that enhance mocha shades without stealing the show. The ideas below show how simple accents, metallics, and negative space lift mocha nails into a polished, elegant look.
Minimalist Embellishments
I keep embellishments subtle so the mocha tone stays central. Tiny gold studs or single crystal accents at the cuticle add a luxe touch without clutter. Try one micro-stud per nail or place accents on an accent nail only to keep the look wearable for work or events.
For texture, I use a thin matte topcoat over glossy mocha for contrast. A single thin white or beige stripe on one side of the nail creates a modern, minimalist line design that reads clean and intentional. These small moves let the brown tones remain warm and understated.
Accentuating with Metallics
I pair mocha with warm metallics like gold, bronze, or copper to enhance the color’s richness. Thin metallic French tips or metallic foil flakes near the base of the nail catch light and feel elegant without being loud. Use foil sparingly—one nail with foil per hand looks balanced.
When painting metallic accents, I prefer a fine brush for narrow lines and a peel-off base under foil for easy removal. For inspiration on techniques and safe product choices, I consult resources like the American Academy of Dermatology for nail safety and reputable nail brands’ tutorials.
Combining Negative Space Designs
I use negative space to make mocha nails feel modern and airy. Leave crescent moons or diagonal gaps of bare nail near the cuticle, then frame them with a thin mocha border. The contrast between skin and polish gives the manicure a refined, graphic look.
I balance negative space by reserving it for one or two nails per hand. If you like geometry, try tiny triangular gaps at the tip paired with solid mocha on the rest. For step-by-step design ideas, I sometimes reference professional nail artist galleries and oil-free topcoat guides to maintain clean lines and longevity.
Maintenance Tips for Elegant Mocha Nails
I focus on simple, daily steps that keep your nail shape crisp and your mocha color rich. Small habits and the right tools stop chips, lifts, and uneven edges.
Protecting the Nail Shape
I file nails gently every 5–7 days to keep the chosen shape—almond, coffin, or square—clean and even. I use a fine-grit file (180–240) and always file in one direction to prevent splitting.
When I shape longer styles like almond or coffin, I check the sidewalls and tip for thin spots and file those areas lightly to avoid breaks.
I wear gloves for heavy chores like washing dishes or gardening. Water and detergents weaken both natural nails and enhancements, so I treat gloves as essential protection.
If I have gel or acrylic, I book fills every 2–3 weeks to maintain the structure and avoid uneven stress that causes lifting or breakage.
Keep a small repair kit in your bag: a buffer, a tiny bottle of clear top coat, and a nail glue. I use glue only for quick fixes and visit my technician for serious damage.
Preserving Color Vibrance
I apply a thin layer of clear top coat every 3–4 days to keep mocha polish glossy and reduce wear at the tips. This simple step prevents dullness and soft chipping.
For gel manicures, I remove skin oils with an alcohol wipe before applying top coat at home to improve adhesion and shine.
I avoid soaking nails in hot water for long periods because heat can lift polish and fade pigments. Short baths and cool rinses extend the life of the color.
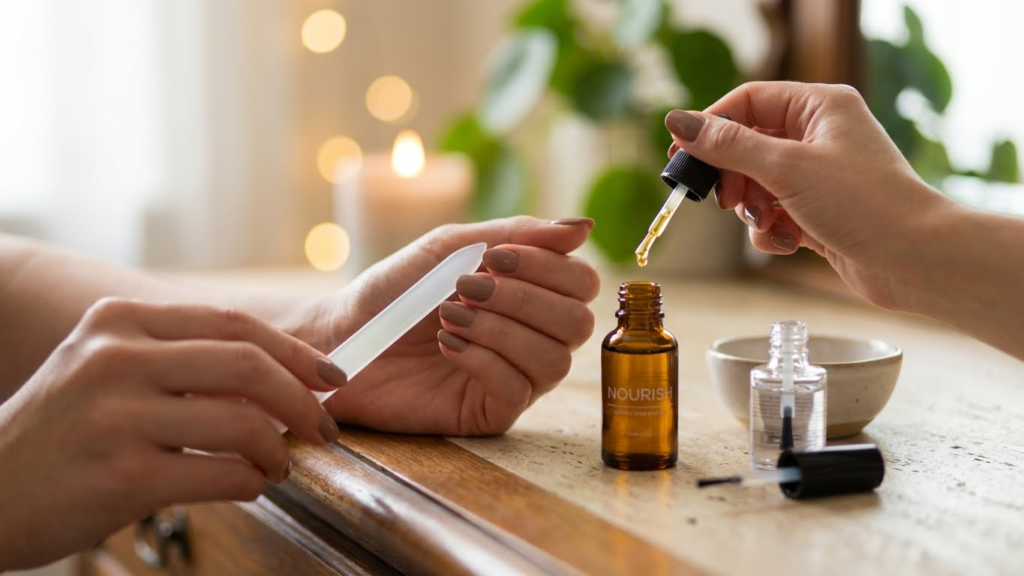
I choose oil treatments twice a week for cuticles and nail beds. A light dab of cuticle oil (jojoba or vitamin E) seals moisture and protects the mocha tone from looking dry or chalky.
When removing polish, I use non-acetone remover for regular lacquer and follow salon-safe removal for gels or acrylics. Quick, gentle removal prevents surface damage that makes colors look uneven.
Professional vs. At-Home Mocha Nail Application
I compare salon and DIY options so you can pick what fits your time, budget, and skill. Professional salons give precise shaping like almond or oval that flatters mocha tones, and they use durable base and top coats for long wear.
At-home application saves money and lets me change colors often. I can achieve clean mocha finishes with a steady hand, a good brush, and simple tools like a buffer and cuticle pusher.
I list pros and cons to help decide quickly.
- Professional
- Pros: precise shaping, longer-lasting gels, expert cuticle care
- Cons: higher cost, appointments required
- At-Home
- Pros: flexible schedule, lower cost, easy touch-ups
- Cons: harder to shape evenly, polish may chip sooner
I recommend salon visits when I want complex techniques like gel overlays, ombré, or sculpted shapes. I prefer DIY for quick touch-ups, simple solid mocha, or when I want to practice a new shape at home.
I follow a short kit checklist for at-home success: clean nails, base coat, two mocha coats, quick-dry top coat, and nail oil. For salon trips, I ask for my preferred shape and mention I want a neutral, elegant mocha finish so the tech can match my vision.
Expert Advice on Mocha Nail Trends
I often recommend almond and squoval shapes for mocha nails because they lend a polished, timeless look. Both shapes narrow the finger visually without feeling sharp, which suits mocha’s warm, soft tones.
I like a medium length—about 2–4 mm past the fingertip—for an elegant balance. Shorter nails read more casual, while very long nails can make the color feel heavy.
Matte and glossy finishes each have a role. Matte gives a velvety, modern vibe that matches Pantone’s Mocha Mousse trend. Glossy enhances depth and pairs well with minimalist gold accents.
I advise keeping nail art simple. A single accent nail, thin negative-space lines, or a subtle ombré keeps the manicure refined. Avoid overly busy designs that compete with mocha’s understated charm.
When matching skin tone, I suggest testing two nearby shades. Cooler skin tones can handle deeper mocha brown, while warmer tones look great with creamier, caramel-infused mocha.
My care tips: always prep the nail with a base coat and finish with a top coat suited to your chosen finish. Hydrate cuticles and file in one direction to reduce splitting, which helps the shape and color last longer.
Quick styling ideas:
- Almond + matte mocha = chic, modern
- Squoval + glossy mocha = classic, wearable
- Short squoval + caramel mocha = neat, everyday-friendly
Conclusion
Mocha nails look their most elegant when the shape supports the color’s natural warmth and softness. Almond and oval shapes consistently stand out because they elongate the fingers, soften edges, and let mocha shades appear creamy and refined rather than heavy. While squoval and coffin shapes can also work beautifully depending on your style and occasion, choosing a shape that matches your finger length, nail bed, and lifestyle is key. Keep the silhouette clean, the finish neat, and the design minimal, and your mocha manicure will always read polished, modern, and effortlessly elegant.
(FAQs)
1. Are almond or oval nails better for short fingers?
Both work well, but oval nails are usually the safest choice for short fingers. The rounded edges subtly elongate the hand without needing extra length, while almond shapes are best if you can grow your nails at least slightly past the fingertip.
2. Do mocha nails look better matte or glossy?
Both finishes look elegant. Glossy mocha appears richer and more classic, while matte mocha feels modern and velvety. If you want a timeless look, go glossy; for a trend-forward style, choose matte.
3. Can square nails still look elegant with mocha polish?
Yes. Short square or squoval nails look very clean and professional with mocha shades. Softening the corners (squoval) helps keep the look refined rather than harsh.
4. What nail length is best for elegant mocha nails?
A medium length—about 2–4 mm past the fingertip—is ideal. This length balances practicality with elegance and prevents mocha colors from looking too heavy or overly casual.
5. How do I keep mocha nails looking polished longer?
Maintain the shape with gentle filing every week, reapply top coat every few days, and use cuticle oil regularly. Wearing gloves for chores and avoiding long hot-water soaks will also help preserve both shape and color.