
Why Use Nail Dehydrator for Nails? A Complete Prep Guide

Quick Answer
You use a nail dehydrator to temporarily remove surface moisture and oily residue before applying gel, acrylic, builder gel, tips, or other products that need strong adhesion. A properly prepared nail plate gives the next layer a cleaner surface to grip, which can help reduce premature lifting when the rest of the manicure is applied correctly. For more detail on how dehydration affects adhesion, see this nail dehydration explanation.
Why nail dehydrator is useful
- Removes moisture: It briefly dries the upper surface of the natural nail plate.
- Reduces surface oil: Many formulas also help clear oily residue that can interfere with adhesion.
- Supports adhesion: Gel, acrylic, glue, and base products can contact the prepared nail more evenly.
- Helps prevent lifting: Better preparation can reduce one common cause of product separating at the edges.
- Works quickly: Most dehydrators air-dry within seconds and do not need a nail lamp.
Best practice
- Apply a thin amount after normal nail prep and before primer or the next step required by your nail system.
I used to think clean-looking nails were automatically ready for gel or extensions. The problem is that moisture and oil can remain even when the nail plate looks perfectly clean.
That is where a nail dehydrator earns its place. In this 2026 guide, I’ll explain why we use it, when it matters, when you can skip it, and how it differs from primer and cleanser.
In This Guide
- What is a nail dehydrator, and why do we use it?
- What are the benefits of using nail dehydrator?
- When should you use nail dehydrator?
- How do you apply nail dehydrator correctly?
- Nail dehydrator vs primer vs cleanser: what is the difference?
- Do all types of manicures need dehydrator?
- What mistakes should you avoid when using dehydrator?
- Frequently asked questions
- Final takeaway
What is a nail dehydrator, and why do we use it?
A nail dehydrator is a nail-preparation liquid that temporarily reduces moisture and oily residue on the natural nail plate. It is normally used shortly before applying an adhesion-dependent nail product.
The natural nail may look dry while still carrying tiny amounts of moisture, skin oil, dust, lotion, or residue. Those contaminants can sit between the nail and the product you want to attach.
Why does moisture matter for nail adhesion?
Gel, acrylic, builder products, extension adhesives, and similar systems need good contact with the natural nail. Anything separating those two surfaces can make consistent adhesion harder.
A dehydrator creates a short preparation window by leaving the nail surface cleaner and temporarily drier. The effect is not permanent.
- Before dehydration: the nail may contain invisible surface moisture or oily residue.
- After dehydration: the surface often looks more matte and feels dry.
- Next step: primer, base coat, acrylic, or adhesive is applied according to the product system.
I think of dehydrator as surface preparation rather than nail treatment. Its purpose is to improve the condition of the nail surface for whatever comes next.
What are the benefits of using nail dehydrator?
The main reason to use nail dehydrator is more reliable adhesion. It does not guarantee a long-lasting manicure, but it removes one obstacle that can contribute to early lifting.
It helps reduce surface oil
Natural oil can migrate from the surrounding skin onto your nail plate. Hand cream, cuticle oil, hair products, and skincare can also leave residue.
Removing that residue gives your base product a more consistent surface. This can be especially useful if your manicures tend to lift around the cuticle or sidewalls.
It temporarily reduces surface moisture
Water can remain in or on the upper nail surface after washing your hands. Humid conditions may also make careful nail preparation more important.
A fast-evaporating dehydrator temporarily reduces that moisture. You can then continue with the next product without a long delay.
It can improve consistency
A manicure depends on more than dehydrator alone. Nail preparation, product compatibility, correct curing, proper application thickness, and avoiding skin contact all matter.
Dehydrator gives you one repeatable prep step. That makes it easier to troubleshoot adhesion problems because you know the surface was properly prepared first.
- Cleaner contact: less unwanted material remains between the nail and product.
- Better prep routine: you follow the same preparation order on every nail.
- Less guesswork: you are not relying only on whether the nail looks clean.
- Fast application: the product normally evaporates without lamp curing.
When should you use nail dehydrator?
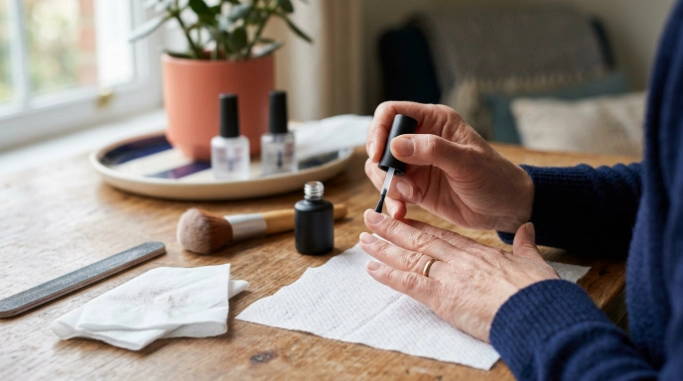
Use nail dehydrator after the basic nail-preparation work is finished and shortly before applying primer or the next adhesion product. Always follow the instructions for the specific system you use.
I avoid applying dehydrator too early. The nail can pick up moisture or oil again if I wait too long before continuing.
Typical nail prep order
- Remove old product correctly.
- Shape the natural nail as needed.
- Gently manage non-living cuticle from the nail plate.
- Buff or prepare the surface only as your nail system directs.
- Remove filing dust and residue.
- Apply a thin coat of nail dehydrator.
- Let it evaporate fully.
- Apply primer if your system requires one.
- Continue with base coat, gel, acrylic, adhesive, or another specified product.
Avoid touching the prepared nail with your fingertips afterward. Skin contact can transfer oil back onto the surface you just cleaned.
How do you apply nail dehydrator correctly?
You normally need only a thin, controlled application. More liquid does not automatically mean better preparation.
Read the bottle first because formulas and instructions vary. Some products are marketed as dehydrators, pH prep, nail prep, or bond-preparation liquids.
Simple application method
- Finish your prep: complete shaping, surface preparation, and dust removal first.
- Remove excess liquid: wipe one side of the brush against the bottle neck if needed.
- Coat the nail lightly: cover the natural nail without flooding the surrounding skin.
- Allow evaporation: wait until the surface is dry before continuing.
- Move directly to the next step: use primer or base product according to the system directions.
Do not repeatedly soak the nail because one thin application is usually enough unless the manufacturer says otherwise. Overusing prep liquids can expose the nail and surrounding skin to unnecessary solvent.
If the nail still looks oily after preparation, check the earlier steps instead of automatically adding multiple dehydrator coats. Lotion, incomplete dust removal, or touching the nail may be the real problem.
Nail dehydrator vs primer vs cleanser: what is the difference?
A dehydrator, primer, and cleanser are not automatically interchangeable. They may appear together in a nail-prep routine, but each can have a different job.
The labels can also vary between brands. Your safest approach is to follow the complete instructions for the gel, acrylic, adhesive, or enhancement system you are using.
| Product | Main purpose | Typical timing | Leaves a bonding layer? |
|---|---|---|---|
| Cleanser | Removes dust, oil, or residue depending on the formula | During preparation or final cleansing | Usually no |
| Dehydrator | Temporarily reduces surface moisture and oily residue | Immediately before primer or application product | No; it normally evaporates |
| Primer | Promotes adhesion between compatible nail surfaces and products | After dehydrator when the system calls for it | Often yes, depending on formula |
Does dehydrator go before primer?
In systems that use both products, dehydrator normally goes first. You want to prepare the nail surface before adding the adhesion-promoting primer.
Primer itself also varies. Some formulations contain methacrylic acid, while other systems use acid-free bonding products, so the FDA nail-care product guidance is worth reviewing if you use professional-style prep products.
Do all types of manicures need dehydrator?
No single preparation routine is correct for every product. Whether you need nail dehydrator depends on the manicure system, your natural nails, and the manufacturer’s instructions.
Gel polish
Many gel routines benefit from a clean, dry natural nail, especially when lifting is a recurring issue. Some brands include a dehydrator in their required prep sequence, while others specify their own cleanser or bonding system.
Acrylic and builder products
These systems rely heavily on adhesion, so careful preparation is important. Dehydrator is commonly placed before primer when both products are part of the manufacturer’s system.
Soft-gel tips and press-on nails
Dehydrator can help when oil or moisture interferes with adhesive contact. The glue or gel adhesive instructions should still decide the final prep routine.
Regular nail polish
Regular polish often needs only a clean, dry nail and compatible base coat. A separate dehydrator can be optional rather than essential.
If your nails become brittle, peel, or develop persistent changes, focus on nail health rather than repeatedly adding stronger prep. The American Academy of Dermatology’s manicure and nail-care guidance offers practical advice for keeping natural nails healthy.
What mistakes should you avoid when using dehydrator?
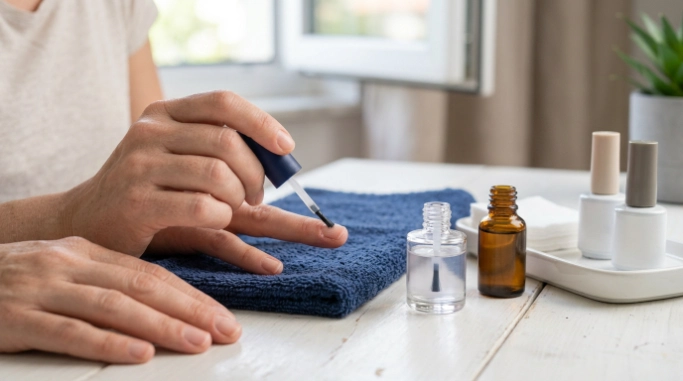
Most dehydrator problems come from treating it as a cure for every adhesion issue. Good nail prep is a system, not a single bottle.
Using too much
A heavy coat usually gives you no extra benefit. Use the amount the manufacturer recommends and keep the product on the nail plate.
Touching the nail after prep
This is one of the easiest mistakes to make. Touching the nail can transfer skin oil back onto the surface before the base product is applied.
Confusing dehydrator with primer
One product normally prepares the surface while the other promotes adhesion. Do not substitute them unless the manufacturer specifically describes the product as a combined formula.
Ignoring the complete product system
Mixing random dehydrators, primers, bases, adhesives, and lamps may produce unpredictable results. Follow the instructions for the main nail system first.
Getting prep liquid on the skin
Avoid flooding the cuticle, sidewalls, or broken skin. Read all warnings, keep bottles tightly closed, and stop using a product if you develop burning, swelling, or another concerning reaction.
Safety note: Nail products can contain solvents and methacrylate-related ingredients, so use good ventilation and follow label precautions. Professional nail workers can also review OSHA’s nail salon safety guidance for information about chemical exposure.
- Keep products away from flames: many nail liquids contain volatile solvents.
- Avoid broken skin: do not intentionally apply dehydrator to cuts or irritated areas.
- Use ventilation: especially when several nail products are used together.
- Follow the label: application and safety directions vary by formulation.
- Seek professional advice: persistent nail pain, swelling, discoloration, or skin reactions deserve proper evaluation.
Frequently Asked Questions
Why use nail dehydrator before gel polish?
Nail dehydrator temporarily removes surface moisture and oily residue that may interfere with gel adhesion. It gives the base layer a cleaner surface to contact, although correct curing, thin application, compatible products, and complete nail preparation still determine overall wear.
Can I use nail dehydrator without primer?
Sometimes, but it depends on the nail system. Dehydrator and primer have different jobs, so skipping primer is appropriate only when the manufacturer does not require it or when your specific product is designed to work without a separate primer.
Can rubbing alcohol replace nail dehydrator?
Alcohol can remove some surface oil and residue, but it is not automatically identical to a purpose-made dehydrator. Formulas vary, so follow the instructions for your nail system instead of assuming every alcohol solution is an exact substitute.
Does nail dehydrator damage natural nails?
Dehydration is intended to be temporary when the product is used correctly. Problems are more likely when prep liquids are overused, repeatedly placed on skin, combined incorrectly, or used despite irritation, so always follow the product label.
How long should nail dehydrator dry?
Many formulas evaporate within seconds, but there is no universal drying time for every product. Wait until the nail appears dry and then follow the manufacturer’s next step rather than using an arbitrary timer.
Should nail dehydrator look shiny or matte?
A properly dehydrated nail often appears dry or matte once the solvent evaporates. However, appearance can vary with the formula and natural nail, so use the manufacturer’s directions rather than relying only on shine as your test.
Can I use dehydrator on press-on nails?
You can use a compatible dehydrator on the natural nail before many press-on applications to reduce oil and moisture. Apply it before glue or adhesive tabs only when the press-on or adhesive instructions allow that preparation step.
Final takeaway: is nail dehydrator worth using?
If your nail system depends on strong adhesion, nail dehydrator is a small prep step that can make your routine more consistent. Its job is simple: temporarily create a cleaner, drier natural nail surface before the next product goes on.
It works best as part of correct preparation, not as a shortcut for poor application. Use a thin coat, avoid skin contact, follow your chosen system, and move to the next step once the dehydrator has evaporated.
If you regularly struggle with lifting, review the entire process from cuticle preparation to curing rather than adding more dehydrator. Better technique usually comes from finding the weak step instead of using more product.

