
Easy Nail Art for Teens: Cute, Simple Designs You Can Do at Home

If you want nail art that looks fun without turning into a full project, you’re in the right place. The best beginner designs are the ones that work on short nails, use a few tools, and still look neat when you’re done.
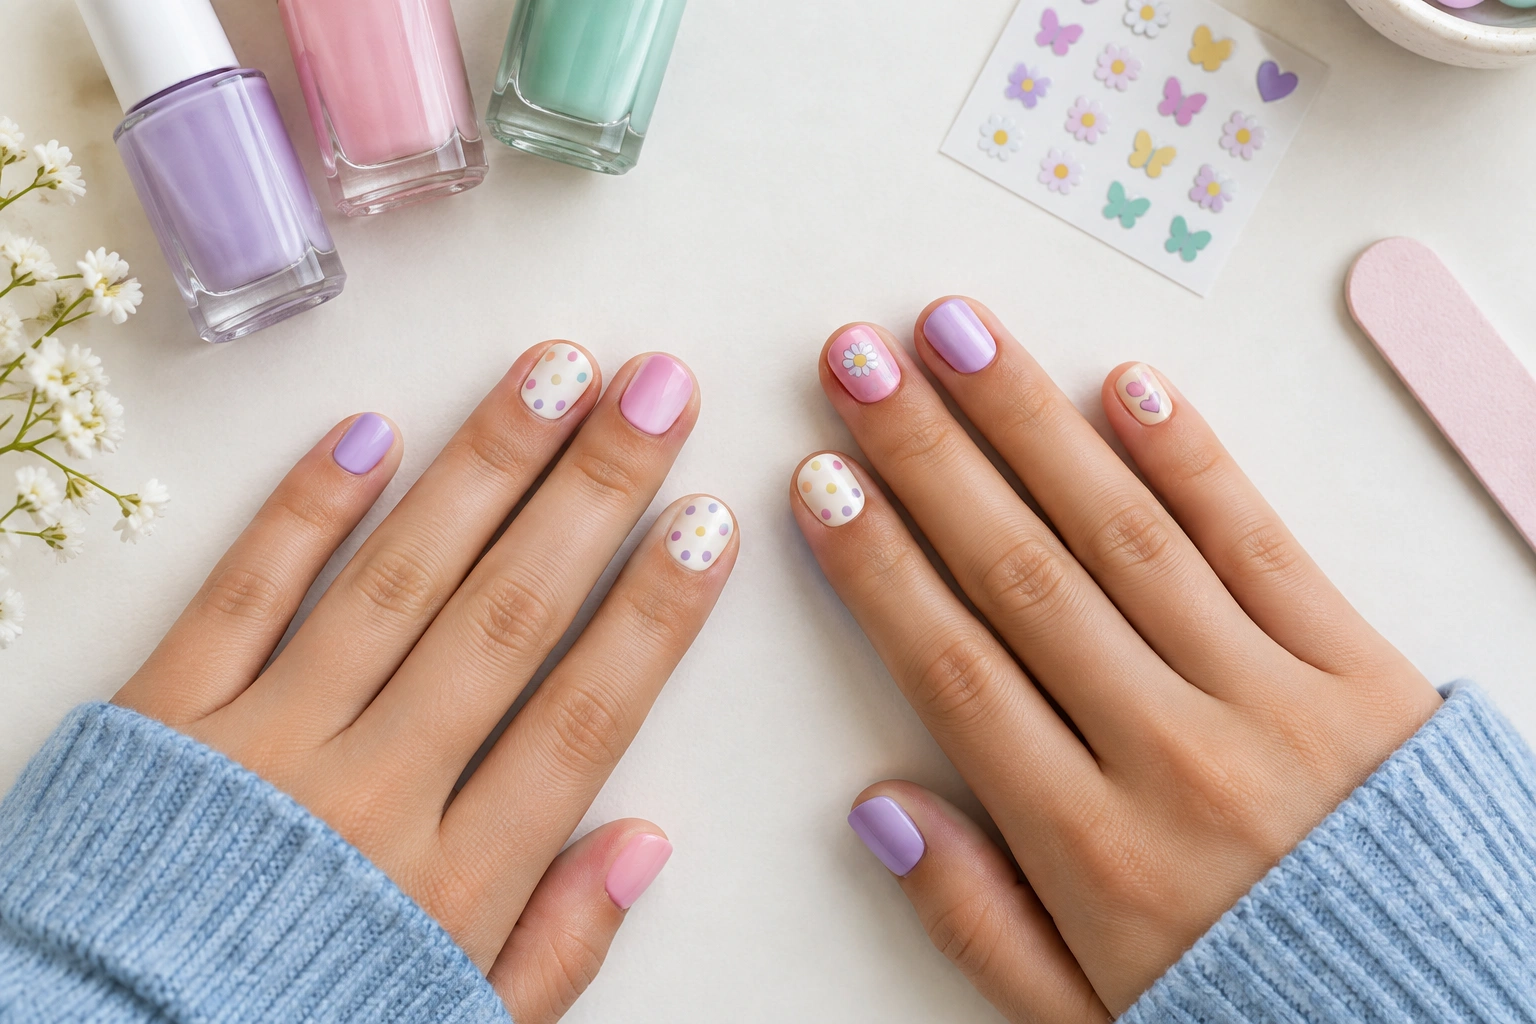
A good teen manicure should be easy to wear at school, quick to clean up, and simple enough to repeat later. That usually means dots, stickers, stripes, tiny shapes, or a soft French tip rather than anything intricate. The goal is not perfection. The goal is a design you can actually finish and feel good wearing.
If you want a few safe, cute ideas fast, here are the easiest wins:
- Polka dots on a nude, pink, or clear base
- One accent nail with a sticker or decal
- Two-tone diagonal stripes
- Tiny hearts, stars, or flowers
- Pastel French tips on short nails
- A glitter accent nail
- Press-ons for the fastest finished look
If you want a broader set of teen-friendly ideas, you can also compare these with the examples in this guide to simple nail designs for teens or keep this article open while you try your first set.
What You Need Before You Start
You do not need a full nail kit to make cute nail art. For most of these designs, the basics are enough:
Truly necessary for most polish-based designs
– Nail polish in 1–3 colors
– Base coat
– Top coat
Helpful but optional
– A toothpick, bobby pin tip, or dotting tool
– Small striping tape or regular tape
– Nail stickers or decals
– Cotton swabs or a small brush for cleanup
If you already own a clear polish, a pale pink, and one accent color, that can cover a lot of looks. Teens often get the best results by keeping the palette simple. Two colors plus a neutral base usually looks more polished than trying to use every shade in the box.
For the lowest-cost version, you can often use what most teens already have at home: clear polish, one colored polish, a bobby pin for dots, and regular tape for stripes. That is enough to test the basics before buying extra tools.
Press-ons are another low-effort option if you want a finished look without painting each nail. They can be useful when you want either a weekend look or a slightly longer wear time, depending on the method you choose. See a product-specific guide from BTArtbox Nails here.
Quick Comparison: Which Easy Design Fits You Best?
| Design | Skill level | Time needed | Tools required | Works well on short nails? | Best for |
|---|---|---|---|---|---|
| Polka dots | Very easy | 10–20 min | Toothpick or dotting tool, polish | Yes | First-time DIY |
| Accent nail sticker | Very easy | 5–15 min | Sticker/decal, top coat | Yes | Fastest clean look |
| Two-tone diagonal stripes | Easy | 15–25 min | Tape, 2 polishes | Yes | Neat, modern style |
| Tiny hearts/stars/flowers | Easy to moderate | 15–30 min | Toothpick or fine brush | Yes | Cute detail without overload |
| Pastel French tips | Easy | 20–30 min | Tape or steady hand, polish | Yes | School-friendly polish |
| Glitter accent nail | Very easy | 10–20 min | Glitter polish or loose glitter polish | Yes | Low-effort sparkle |
| Press-ons | Very easy | 10–20 min | Press-ons, adhesive tabs or glue | Usually yes | Fastest full manicure |
The simplest choice is the one you can finish cleanly. If you are nervous about mess, pick stickers or press-ons first. If you want to practice hand control, dots and stripes are better than detailed art because they teach consistency without demanding perfect lines.
1. Polka Dots on Short Nails
Polka dots are one of the easiest nail art designs for beginners because they hide tiny imperfections. They also work especially well on short or natural nails, where there is less space for complicated art.
How to do it
- Paint nails with a base color and let them dry.
- Dip the tip of a toothpick or dotting tool into a second color.
- Place dots in a loose pattern across each nail.
- Seal with top coat after the dots dry.
A neat trick is to keep the dots uneven on purpose. Small and medium dots mixed together look more playful than perfectly identical ones. For a school-friendly version, use a sheer pink, beige, or pale lavender base with white or soft pastel dots.
Why it works
Polka dots need very little precision. If one dot lands a little off-center, the design still looks intentional. That makes this a strong first manicure for teens who want something cute without worrying about straight lines.
2. Accent Nail with a Sticker or Decal
If you want the easiest possible nail art, use a sticker on one nail and keep the others plain. This is the fastest way to get a finished look with almost no skill.
How to do it
- Paint all nails in a solid color.
- Let them dry fully.
- Place one sticker or decal on the ring finger or thumb.
- Press it down gently and seal with top coat.
Sticker vs. hand-painted design
- Stickers are faster and cleaner, especially for beginners.
- Hand-painted designs give you more control over color and placement, but they take longer and usually need more cleanup.
If you like a polished look for school, choose a tiny star, heart, bow, or flower decal instead of a large graphic. One accent nail is enough to make the manicure feel styled without looking busy.
3. Simple Two-Tone Diagonal Stripes
Diagonal stripes give a modern look without requiring advanced nail art skills. They also make short nails look neat because the line cuts across the nail in a clean direction.
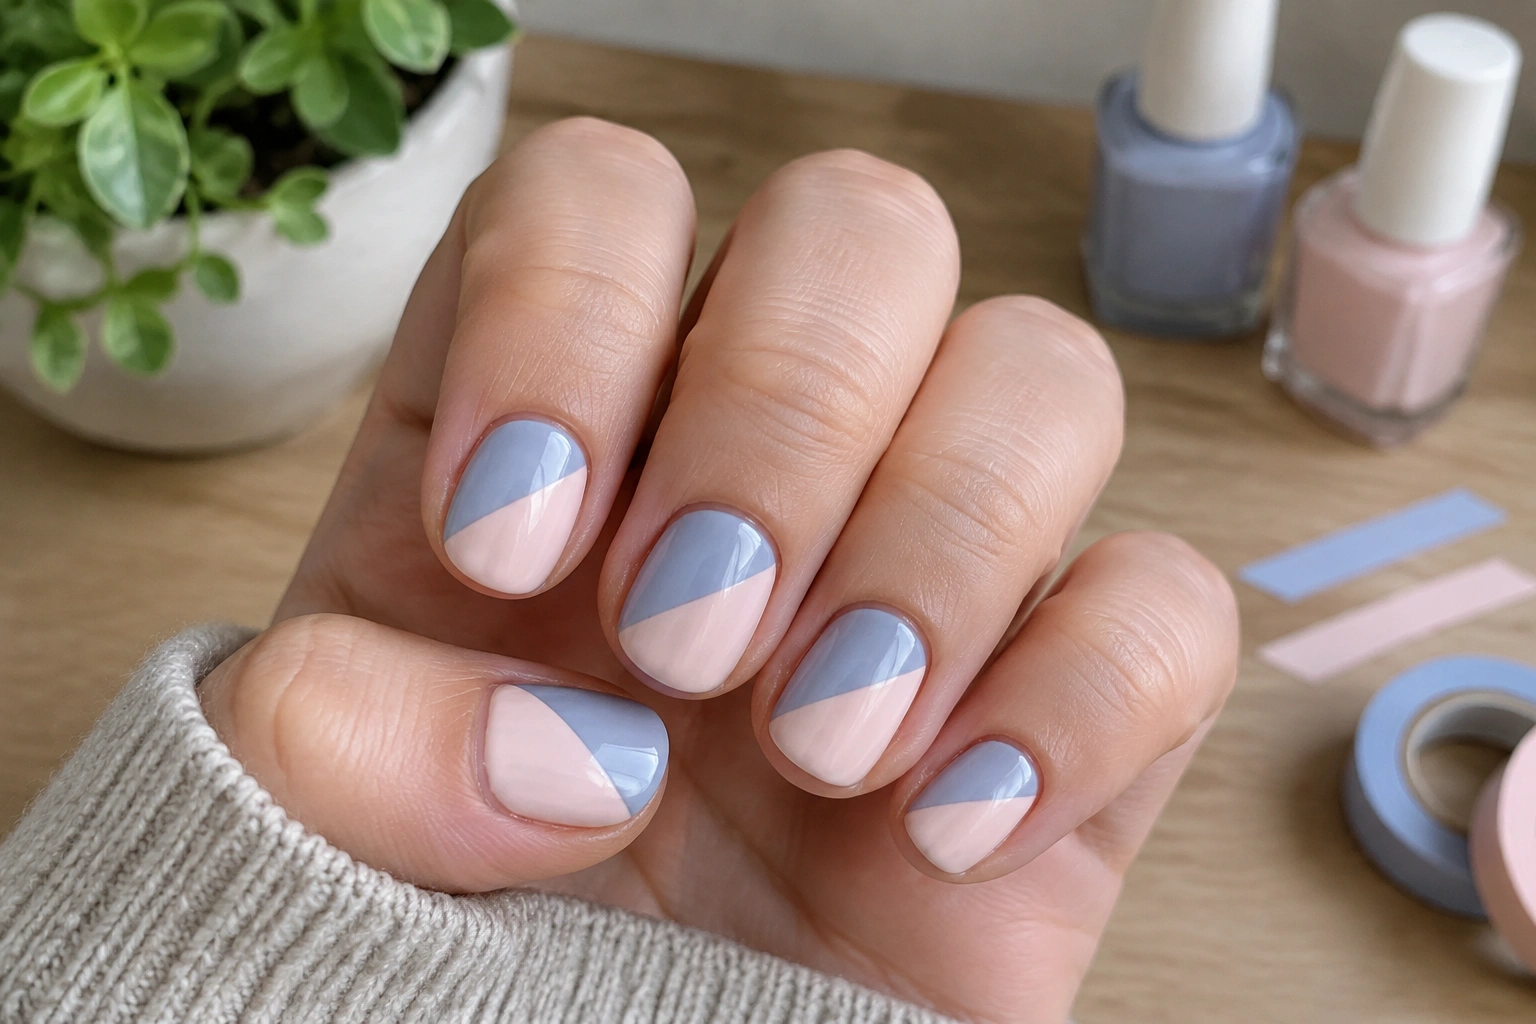
How to do it
- Paint nails with your base color and let dry.
- Place striping tape or a small piece of regular tape diagonally across each nail.
- Paint the exposed section with a second color.
- Remove the tape before the polish fully sets.
- Finish with top coat.
A good beginner choice is white and blush, navy and silver, or lilac and cream. Keep the contrast clear so the stripes show up even on short nails.
Beginner tip
If tape feels too fiddly, do the design on just two accent nails and leave the rest plain. That gives you the same effect with less chance of smudging.
4. Tiny Hearts, Stars, or Flowers
Tiny shapes are popular because they feel personal without needing a lot of detail. The easiest version is usually one small shape per nail, not a full pattern across every finger.
A teen-friendly example is the soft doodle style with tiny hearts, squiggles, or playful shapes in contrasting colors. That kind of look feels light and creative rather than overly formal. You can see a similar playful direction in a teen summer nail idea from Your Teen Mag, which describes cream doodle almond nails with random squiggles and tiny hearts made with contrasting polish colors. The same idea adapts well to shorter nails when you keep the shapes small and simple.
How to do it
- Paint a light base color.
- Use a toothpick or fine brush to make one tiny heart, star, or flower.
- Repeat on a few nails only.
- Add top coat once dry.
Best use case
This design works well when you want a cute look that still feels age-appropriate for school. It is also a good step up from dots because you practice making small, deliberate shapes.
5. Pastel French Tips for Short Nails
French tips do not have to be crisp white and formal. For teens, pastel tips can look softer and more current while still staying clean and wearable.
How to do it
- Paint nails with a sheer pink, nude, or clear base.
- Use tape or a steady hand to paint the tip in a pastel shade.
- Keep the tip thin on short nails.
- Seal the look with top coat.
Try baby blue, mint, lilac, or peach if you want something fresh but not loud. On short nails, a thin tip looks better than a thick one because it keeps the nail from looking crowded.
Why this is beginner-friendly
The tip covers only a small section, so mistakes are less obvious than with a full-nail design. If one edge is slightly uneven, the manicure still reads as neat from a normal distance.
6. Glitter Accent Nail
If you want sparkle without a lot of painting, make one nail the glitter nail and keep the others plain. This gives you a little shine without requiring any detailed art.
How to do it
- Paint all nails in a solid color.
- Apply glitter polish to one accent nail.
- Let it dry fully.
- Add top coat for a smoother finish.
Silver glitter works with almost any color, but rose gold, lavender shimmer, and fine multicolor glitter are also easy to wear. One accent nail is usually enough. Doing glitter on every nail can make the manicure feel heavier and may take longer to remove later.
Best for
This is ideal for school dances, weekend plans, or any time you want a little extra without committing to a complicated design.
7. Press-Ons for a Fast Finished Look
Press-ons are the quickest route to a polished manicure when you do not want to paint or wait through drying time. They also come in many teen-friendly styles, from soft pink to playful prints.

When press-ons make sense
- You want a clean look for one event
- You do not have time for polish to dry
- You want a more consistent shape on every nail
- You like trying different lengths or finishes
Quick note on wear time
Wear time depends on the specific product and how it is applied, so follow the package instructions rather than assuming one method lasts the same for everyone.
Trade-off to know
Press-ons are faster than hand-painted nail art, but they are less customizable once applied. If you want total creative control, polish wins. If you want speed and consistency, press-ons are hard to beat.
Step-by-Step Mini Tutorial: Easy Polka Dots from Start to Finish
If you want one design to try first, this is the simplest full beginner routine.
Supplies: base coat, one light polish color, one darker polish color, toothpick or dotting tool, top coat, cotton swab
- Start with clean nails and apply a thin base coat.
- Paint one or two thin coats of your light polish color.
- Wait until the polish is dry to the touch.
- Dip the tip of a toothpick into the darker polish.
- Place a few dots on each nail, spacing them out so they do not crowd the surface.
- If one dot is too large, use the clean end of the toothpick to lightly adjust it before it dries.
- Let the dots dry fully.
- Finish with a thin top coat.
That is enough to create a beginner design that looks finished without needing any special tools.
How to Make Nail Art Look Neat Without Professional Skills
A clean manicure usually comes down to a few small habits:
- Use thin layers instead of thick ones
- Let each layer dry before adding the next
- Keep a cotton swab nearby for cleanup
- Work on one hand at a time if you are new
- Finish with top coat to smooth the look
If polish gets on the skin, do not panic. Let it dry a little, then use a cotton swab or small brush dipped in remover to clean around the nail edge. To sharpen the sides of the nail, lightly trace the edge with remover on a fine brush or swab so the line looks crisp without disturbing the design. The biggest beginner mistake is rushing the drying time. Smudges usually happen because the design was touched too soon, not because the idea was too hard.
A base coat also helps create a cleaner surface for polish. If your nails stain easily, it is worth using even for simple designs.
Quick cleanup tip
- Polish on skin: Wait a moment, then wipe it away with a remover-dampened cotton swab.
- Uneven edges: Use a small brush with remover to straighten the outline and make the nail shape look sharper.
Best Colors and Patterns for School-Friendly Teen Nail Art
For school, the safest style choices are usually soft neutrals, pale pinks, clear polish, muted lavender, dusty blue, and gentle shimmer. These shades read as neat and intentional without drawing too much attention.
Patterns that work especially well include:
– Tiny dots
– Thin stripes
– One small sticker
– A single glitter accent nail
– Soft French tips
If your school prefers understated looks, choose one design element only. For example, a nude manicure with one tiny heart on each ring finger feels much quieter than combining stripes, glitter, and stickers all at once.
Common Mistakes to Avoid
The most common beginner errors are easy to fix once you know them:
- Using too much polish: Thick coats take longer to dry and smudge more easily.
- Skipping base or top coat: The manicure may look less finished and wear unevenly.
- Trying a design that is too detailed: Small hands and short nails usually look better with simpler art.
- Not waiting between steps: Drying time matters more than fancy tools.
- Painting every nail differently: Too many ideas at once can make the manicure look messy instead of creative.
If your first attempt is imperfect, keep going. A slightly uneven dot or stripe still teaches you something useful for the next try.
How to Choose the Right Design for Your Nail Length and Skill Level
Use this quick rule:
- Very short nails: Choose dots, stickers, glitter accents, or tiny shapes.
- Medium short nails: Try diagonal stripes or pastel French tips.
- Lowest patience level: Pick stickers or press-ons.
- Want to practice painting skills: Choose dots first, then stripes.
- Need a one-day look: Use adhesive tabs or stickers.
- Want something longer-lasting: Consider press-ons with glue, following the product instructions carefully.
If you are deciding between polish, stickers, and press-ons, think about how much control you want. Polish gives you the most room to customize. Stickers are easiest. Press-ons are fastest when you want a finished look right away.
These designs work best on natural nails and very short nails: polka dots, stickers, glitter accents, and tiny shapes, because they do not need much surface space.
When to See a Nail Technician or Dermatologist
If your nails are persistently painful, swollen, very discolored, or showing signs of infection, get professional advice rather than trying to cover the issue with polish or press-ons. Nail art should sit on healthy nails, not hide a problem that needs attention.
A nail technician can also help if you want a special look for an event and you are not confident doing it yourself. That is especially useful when you want a cleaner finish than you can get at home.
FAQ
Can these nail art ideas work on natural nails?
Yes. Most of these designs are made for natural nails and look especially good on short natural nails.
What is the easiest nail art for a total beginner?
A sticker on one nail, simple polka dots, or a glitter accent nail are usually the easiest starting points.
Do I need special tools to start?
No. You can begin with polish, a base coat, a top coat, and a toothpick or bobby pin for dots.
What should I do if I mess up the polish on my skin?
Let it dry slightly, then clean the edge with a cotton swab or small brush dipped in remover.
Final Takeaway
The easiest nail art for teens is usually the kind that uses one idea well: dots, a sticker, a stripe, a tiny shape, a soft tip, or one glitter nail. If you keep the tools simple and the design small, you can get a cute result without a lot of stress. That is the kind of manicure that actually gets worn, not just admired in a photo.

