
How to Apply Nail Polish at Home: A Beginner-Friendly Guide for a Neat, Long-Lasting Manicure

A clean at-home manicure is less about talent and more about sequence. If you prep the nail plate properly, use thin coats, and give each layer enough time to set, you can get a finish that looks far more polished than most first attempts.
This guide walks you through the full process of how to apply nail polish at home with practical, beginner-friendly steps. I’m Ella Hart, and in the salon I teach new clients the same principle over and over: neat polish comes from control, not speed. The good news is that control is easy to learn once you understand what each step is doing.
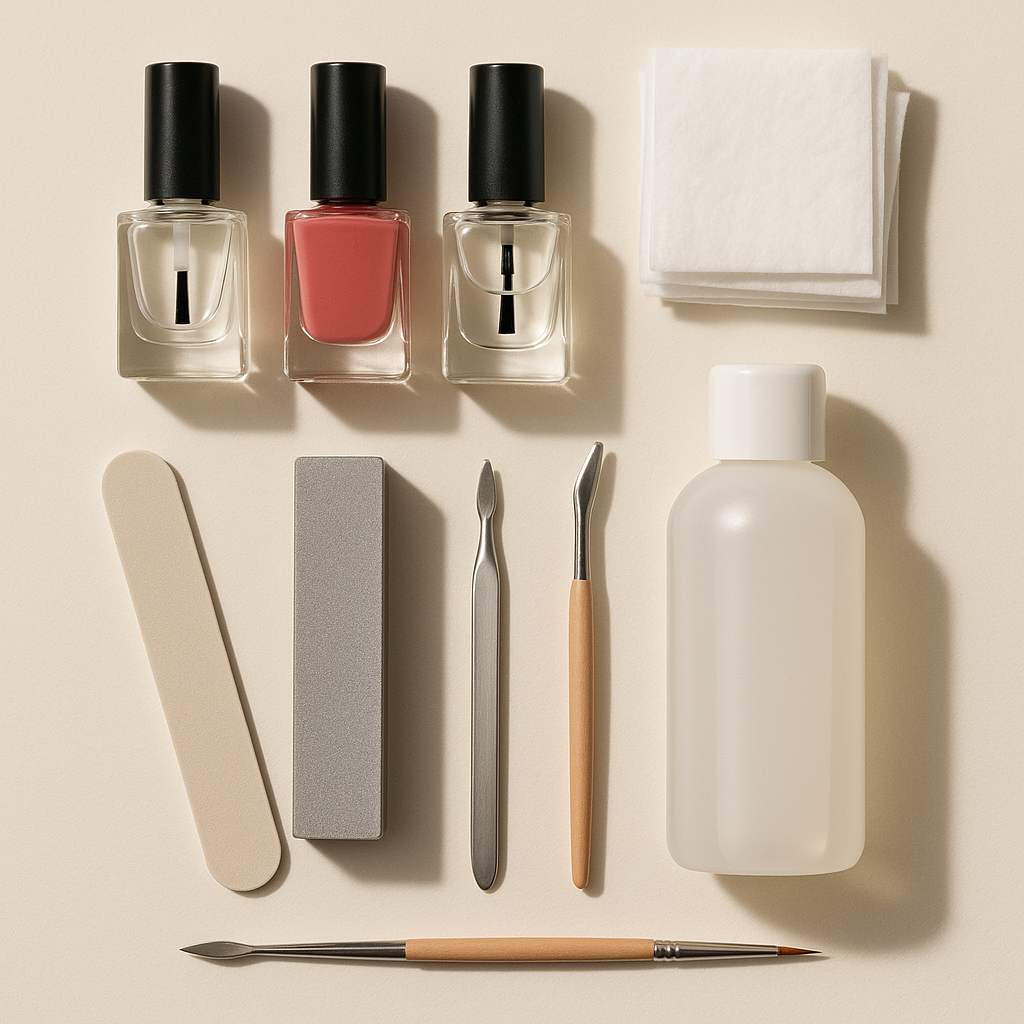
What You Need Before You Start
Gather everything before you open the bottle. Once polish is on the brush, you want to move efficiently.
Here’s a simple starter kit:
- Nail polish remover
- Lint-free wipes or pads
- Nail file
- Buffer, used lightly
- Cuticle pusher
- Base coat
- Nail color
- Top coat
- Cleanup brush, cotton swab, or corrector pen
- Hand towel or a stable surface to rest on
If your polish is old and thick, it may apply unevenly. A nail polish thinner can help restore the formula, but use only a product made for polish, not remover or acetone. If the bottle has turned stringy or gloopy, that’s usually a sign it needs thinning or replacing.
For a simple reference on application order, see our guide to how to apply nail polish correctly.
Prep Your Nails for Better Adhesion
Prep affects everything that follows. Polish sticks and levels better on a clean, dry surface than on one coated with oil, lotion, or dust.
Clean the nail surface first
Use remover on a lint-free wipe to clear away leftover polish and surface oils. This step matters even if your nails look clean. Skin oils can make polish slide or lift sooner, especially near the tips.
Let your nails dry fully before moving on. If the nail plate is still damp from remover or hand washing, the base coat may not sit evenly.
Shape before you paint
File the free edge into a shape that suits your natural nail. Short nails usually look neat with a soft square or rounded edge. Longer nails can handle more shaping, but the goal is consistency, not perfection.
File in one direction if you can. Aggressive back-and-forth filing can leave the edge rough, which may show through polish.
Buff lightly, not aggressively
A gentle buff can smooth ridges and help polish lie flatter. The key word is light. You are not trying to thin the nail, only remove surface texture.
If your nails are already fragile or peeling, skip heavy buffing. Too much abrasion can make the surface less comfortable to work on and may leave the nail too thin for a polished finish.
Push back cuticles gently
Use a cuticle pusher to ease the cuticle back just enough to expose the nail plate. Don’t scrape or cut living skin. A neat manicure comes from creating a clean border, not from forcing the skin back.
The more tidy the cuticle area is before painting, the less cleanup you’ll need later.
Choose the Right Base Coat, Color, and Top Coat
This is where beginners often try to save time and end up losing it later.
Base coat vs. no base coat
A base coat gives the color something smoother to grip and can help create a more even surface. It also adds a barrier between the nail and the pigment in the polish, which is useful if you wear deeper shades often.
Skipping base coat can work in a pinch, but the finish is usually less forgiving. If your nails have ridges or you want a more controlled application, use it.
Color formula matters
Some polishes are naturally easier for beginners because they level well and don’t drag as much. If you’re choosing between two shades, a cream formula is often simpler to apply than a sheer or very metallic finish, because it tends to show fewer patchy spots.
Sheer colors can look elegant, but they often need extra precision because uneven strokes show more easily. Opaque colors cover faster, but they can look thick if you overload the brush.
Top coat: regular vs. quick-dry
A regular top coat gives you a classic finish and extra shine. A quick-dry top coat is useful when you need the manicure to set faster and you’re more likely to bump your nails soon after painting.
In general, quick-dry formulas are more convenient, while regular top coats may feel a little more forgiving if you’re still adjusting your application speed. If you want to leave the house soon after painting, quick-dry is the smarter choice.
For more drying-specific guidance, you may also find our article on how to dry nail polish fast at home helpful.
How to Apply Nail Polish Step by Step
The goal is a thin, even layer that reaches close to the skin without touching it.
1. Apply a thin base coat
Brush on a thin layer of base coat and let it air dry until it is no longer tacky to the touch. That tack-free stage matters because color polish glides better over a set base than over a wet one.
2. Load the brush properly
Wipe excess polish from one side of the brush before you touch the nail. For beginners, less polish is safer: you want a small, controlled amount on the brush, not a big bead that can run into the cuticle.
A brush that is overloaded tends to pool near the cuticle and sidewalls. That’s one of the fastest ways to create a messy manicure.
3. Place the first stroke down the center
Set the brush slightly above the cuticle area, then glide it toward the free edge in one smooth stroke. Leave a tiny gap near the skin so the polish does not touch the cuticle.
Keep the brush centered and moving as you pull it down. Don’t stop and press hard near the base. Anchoring the brush lightly and starting just above the cuticle helps you control the polish instead of flooding the skin.
4. Fill in each side
Use one stroke on each side of the nail, moving from the base toward the tip. Keep the brush moving in a controlled path rather than pressing it down hard.
For many beginners, the three-stroke method is easier to manage than trying to paint the whole nail in one pass. It gives you a cleaner shape and reduces the chance of streaks.
5. Cap the free edge
Run the brush lightly across the tip of the nail. This helps seal the edge where chips often begin.
If your nails are very short, some professionals recommend adjusting the angle slightly so you can still reach the edge without touching the skin. The point is to seal the tip without forcing polish onto the fingertip.
6. Let the first coat set
Wait until the first coat is mostly dry before applying the second. If you rush, the brush can drag the first layer and leave lines or bald spots.
The exact time depends on the formula, but the practical test is simple: if the surface still feels soft or marks easily, it needs more time.
How Many Coats to Apply and When to Let Each Layer Dry
Most beginner manicures look best with two thin coats of color.
One thick coat may seem faster, but it usually creates more problems: streaks, slower drying, and more dents. Thin layers dry more quickly and are less likely to smudge because there is less product sitting on the nail at once.
Use this simple timing guide for natural nails:
- Between base coat and color: wait until the base coat is no longer tacky, usually a few minutes.
- Between color coats: wait about 2 to 5 minutes, or until the first coat looks set and doesn’t drag when touched lightly.
- After the final color coat: wait about 10 to 15 minutes before doing anything that might mark the surface.
- After top coat: let the manicure sit for at least 15 to 20 minutes before light activity, and longer if the formula is not quick-dry.
Surface-dry is not the same as fully set. A nail can feel dry on top and still dent underneath, especially during the first hour.
Two thin coats usually beat one thick coat for home application.
How to Clean Up Mistakes and Sharpen the Edges
Cleanup is part of the manicure, not a sign you failed.
Use a cleanup brush for the neatest finish
A small cleanup brush dipped in remover gives the most control. Wipe off the excess first, then trace around the cuticle line and sidewalls to sharpen the edge.
This is usually the best option if you want a salon-like outline and are comfortable working slowly. It offers the most precision, especially for shaping the curve around the cuticle.

Use a cotton swab for quick fixes
A cotton swab is convenient and easy to find, but it can leave fuzzy fibers and may deposit too much remover if it’s soaked. It works best for small slips, not detailed edge work.
If you use one, keep it only lightly damp. A dripping swab can smear wet polish instead of lifting it.
Use a corrector pen for the easiest beginner cleanup
Corrector pens are often the easiest option for beginners because they feel simple and targeted. They’re useful when you just need to erase a tiny mark near the skin or fix a small spot on the side of the nail.
The trade-off is precision versus coverage: a corrector pen is handy and tidy for small mistakes, but it is not as flexible as a cleanup brush for larger edge work. For fine detailing, the brush usually gives better control; for very small touch-ups, the pen is faster.
Fix a cuticle flood before it dries
If polish touches the skin, clean it up right away. Once it starts setting, the edge becomes harder to sharpen without disturbing the nail.
A steady hand helps here. Resting your painting hand on a stable surface can make cleanup less necessary in the first place.
Common Mistakes That Ruin a Home Manicure
A few habits cause most of the frustration beginners feel.
Painting too thickly
Thick coats look tempting because they seem faster, but they create drag marks and stay soft longer. If your polish looks bulky on the brush, remove some before applying it.
Starting too close to the cuticle
If the brush touches the skin, polish can flood the area and make the nail look wider or uneven. Leave a tiny margin near the cuticle and let the color sit close, not on, the skin.
Rushing between coats
If the first layer is still soft, the second coat can pull it around. That leads to streaks and uneven color. Give each layer time to settle before adding the next.
Forgetting the free edge
Skipping the tip makes chips more likely. Even a light cap on the edge can help the manicure wear more evenly on natural nails.
Touching the nails too soon
Fresh polish can feel dry on top while still being soft underneath. That’s when dents happen. Treat the manicure gently for a while after finishing.
How to Make Nail Polish Dry Faster and Last Longer
There’s a difference between “dry to the touch” and “fully set.” Many smudges happen in that in-between stage.
Speed up drying without making the finish messy
If time matters, use a quick-dry top coat. It usually helps the surface set faster than waiting for air drying alone.
Air drying is simpler, but it asks more patience. Quick-dry products are better when you need to move on with your day and want less risk of bumping the polish.
Protect fresh polish during the first hour
Avoid hot water, heavy handwashing, and pressure on the nails right after painting. Even if the surface feels dry, the polish can still dent.
For the first hour, be careful with zippers, bags, hair tools, and anything that presses on the tips. If you need to wash your hands, use cool or lukewarm water and keep it brief.
Maintain the manicure on natural nails
Wear gloves for cleaning, and reapply top coat after a few days if the tips start looking dull. That small refresh can help the manicure look neater for longer.
Re-capping the free edge with top coat is especially helpful on natural nails, since the tips usually wear first.
Keep polish in usable condition
If your polish gets thick, a few drops of nail polish thinner can improve the way it applies. Don’t use remover inside the bottle; it can change the formula in ways that don’t help application.
For more on faster-setting options, see our guide to how to dry nail polish fast at home 2.
Practical Examples for Beginners
A simple work-ready manicure on short nails
If you want a clean, office-friendly look, choose a cream shade in a neutral or soft pink tone. Use base coat, two thin coats of color, and a regular or quick-dry top coat depending on how soon you need to leave.
Fixing a small flood at the cuticle
If polish slips into the skin line, wait a moment for it to stop moving, then use a cleanup brush with a tiny amount of remover to trace the edge. Don’t keep brushing over the same spot repeatedly; that usually spreads the mess.
Choosing between sheer and opaque polish
If you’re brand new, opaque cream polish is usually easier to control because it covers in fewer strokes. Sheer polish can be pretty, but it often shows brush marks more clearly, so it demands a steadier hand.
FAQs
How long should I wait between coats?
Wait until the first coat is mostly set and no longer drags easily. If the brush pulls the color around, give it more time.
Can I use just one coat of polish?
Sometimes, if the polish is very opaque. But two thin coats usually give a more even and durable-looking result.
What’s the easiest way to avoid getting polish on my skin?
Leave a tiny gap near the cuticle, load the brush lightly, and move in controlled strokes from the base toward the free edge.
Is a base coat really necessary?
If you want smoother application and a cleaner surface, yes. It also gives the color something more even to grip.
What should I use to clean up mistakes?
A cleanup brush gives the most precision, while a cotton swab is useful for quick fixes and a corrector pen is often the easiest option for tiny touch-ups.
How do I keep my manicure from chipping so fast?
Cap the free edge, use a top coat, and avoid pressure on the nails while they’re still setting. On natural nails, protecting the tips during daily tasks makes a noticeable difference.
What if my polish is too thick?
If the polish is old, a polish thinner may help. If the formula is badly degraded, replacing it is often the easier fix.
Should I buff every time?
Not necessarily. Light buffing can smooth the nail, but over-buffing can leave the surface too thin. Use it sparingly.
How do I know when polish is dry?
Dry on the surface does not always mean fully set. If the nail still dents when you press lightly or feels soft, it needs more time.
Is quick-dry top coat better than regular top coat?
Quick-dry is better when speed matters. Regular top coat can be a fine choice if you have time to let the manicure settle naturally.

