
How to Fix Patchy Nail Polish: A Practical Guide to Smooth, Even Coverage

Patchy polish is one of those manicure problems that looks small at first and then keeps bothering you every time you glance at your hands. The good news is that many patchy manicures can be rescued without starting from scratch, but not all of them can. The trick is figuring out whether you’re dealing with a coverage problem, a drying problem, or a formula problem.
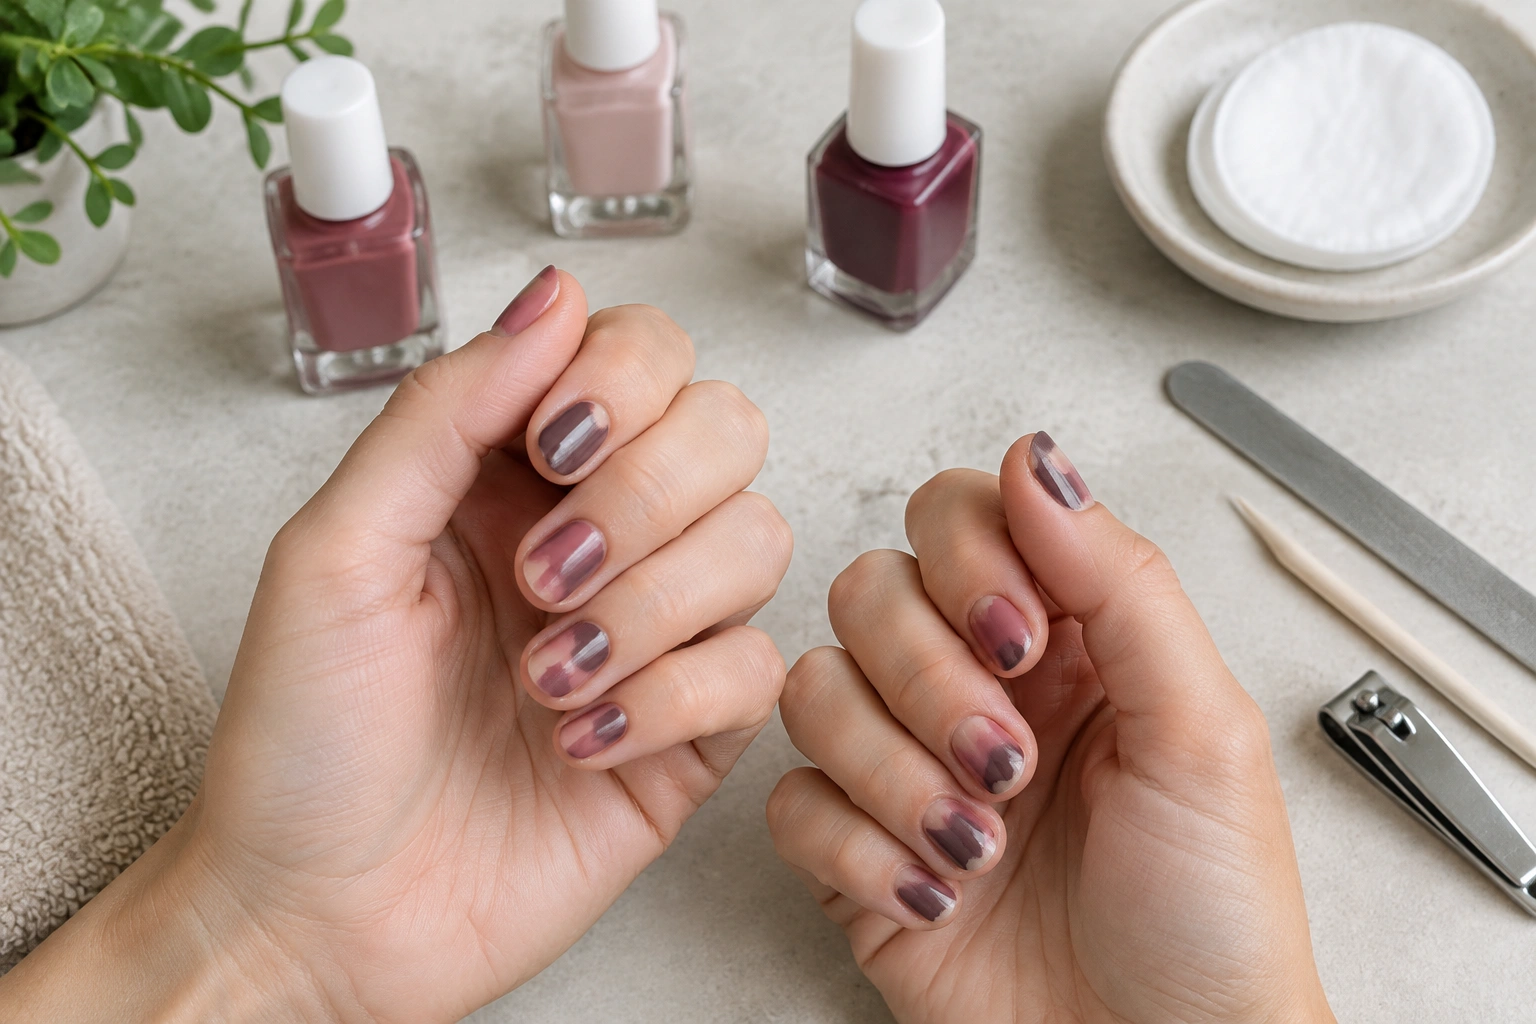
Instead of guessing, use this quick decision tree:
- If the polish is only lightly patchy and still smooth overall: wait briefly, then add one thin coat.
- If the polish is dry, dragging, lumpy, or showing obvious brush tracks: remove it and restart.
- If you already have two or three thin coats and it still looks see-through: the formula may be too sheer for the result you want, so more layering may not help much.
Patchy usually means one of three things: the color is too sheer for the look you want, the coat is too thick or too thin, or the polish is being dragged around before it has a chance to settle. Once you know which one is happening, the fix gets simpler.

Why Nail Polish Looks Patchy or Streaky
Patchiness is often a coverage issue, not a “you did everything wrong” issue. Some formulas are simply more translucent than others. Sheer nudes, whites, and many pale pinks tend to show the nail underneath more easily, so they may need extra care or an extra coat to look even.
The nail surface matters too. If the nail has ridges, oil, leftover lotion, or dust, the polish may not grip evenly. A clean, lightly prepped nail usually gives the color a better chance to sit flat. That’s why many nail-care guides recommend washing hands first and removing residue with a lint-free pad and nail prep solution or remover before painting. Dazzle Dry gives that advice in its chip-prevention guide, along with using a base coat that covers the full nail surface: proper nail prep and base coat application.
Brush handling is another common culprit. If you press too hard, the brush can leave thin tracks. If you barely load the brush, you may get bald spots and drag marks. And if you keep brushing over the same area while the polish is already setting, you can pull the layer underneath and make the finish look worse instead of better.
Formula quality also matters. A polish that has thickened in the bottle, or one that is naturally low in pigment opacity, can look streaky no matter how careful you are. That’s why some colors are harder to make opaque than others. White, pale beige, and some sheer pinks are especially notorious.
Can You Fix Patchy Nail Polish Without Starting Over?
Yes, sometimes. Here’s the decision rule I use:
- If the patchiness is light and the polish still looks smooth overall, add one thin coat.
- If the polish is dragging, lumpy, or showing obvious brush tracks, remove it and restart.
- If you already have two or three thin coats and it still looks see-through, the formula may be too sheer for the result you want.
That last point matters. More coats are not always the answer. A very sheer polish can stay patchy even when applied well, because the pigment simply isn’t dense enough to fully cover the nail in the number of coats you’re willing to wear.
Think of it like painting a wall with watered-down paint. You can keep adding layers, but if the paint is too translucent, the wall still shows through.
How to Fix Patchy Nail Polish Step by Step
If the manicure is already on your nails, use the least disruptive fix first.
1. Let the current coat settle
If the polish is still wet or tacky, stop touching it. Brushing over it now usually makes streaks worse. Give it a little more time than you think it needs. Quick-dry formulas are convenient, but they also leave less room to smooth things out before the surface sets. If you want a deeper look at that trade-off, see whether quick-dry nail polish really dries faster.
2. Check what kind of patchiness you’re seeing
Look at the nail in bright light.
- Faint see-through spots with an otherwise smooth surface usually mean you can try another thin coat.
- Side-to-side striping, drag marks, or repeated bald spots usually point to brush loading, pressure, or a formula that’s setting too fast.
- Uneven coverage that gets worse as you add coats often means the formula is not rescuing well and may need to come off.
If the polish is already dry to the touch, a fresh thin coat is usually safer than trying to “blend” the old one around.
3. Load the brush with a controlled amount of polish
You want enough polish on the brush to cover the nail in a few strokes, but not so much that it floods the cuticle or pools at the tip. If the brush looks heavily coated and dripping, wipe off the excess before you start. If the brush looks nearly dry, reload it. A brush that’s too dry tends to skip and leave gaps.
4. Start slightly away from the cuticle
Begin the first stroke a hairline distance from the cuticle, not right on top of it. Then gently nudge the polish back toward the cuticle without touching skin. This helps you avoid flooding the base of the nail while still covering the full plate.
5. Use long, light strokes in one direction
For a rescue coat, keep the motion simple: one stroke down the center, then one on each side, all in the same direction. Don’t scrub back and forth. If the polish starts to drag, stop and let it settle instead of trying to force it smooth. A light “floating” motion can help some streaky formulas level out, but it works best when the coat is thin and the polish is still workable. Treat it as a practical technique, not a guarantee.
6. Match the fix to the formula
Different formulas need different rescue moves:
- Fast-drying polish: work in smaller sections and stop sooner. If the surface is already setting before you finish, another coat may only make the drag marks worse. In that case, removing and restarting can be the cleaner option.
- Sheer polish: if it’s meant to be translucent, patchiness may simply be part of the formula. One more thin coat can help, but if you’re still seeing through to the nail after two or three coats, the shade may never look fully opaque.
- Glitter or shimmer polish: these formulas often look patchy because the particles settle unevenly. Roll the bottle gently, then load the brush with enough product to distribute the shimmer evenly. Glitter polishes often need a couple of careful coats, but once they start looking clumpy or bumpy, more layers can make them harder to smooth.
- Thickened polish: if the polish feels sticky, stringy, or hard to spread, it may not level well enough to rescue cleanly. A thinner coat can help if the formula is only slightly thickened, but if it’s gloopy or separated badly, restarting with a better-mixed or fresher bottle is often the more practical fix.
7. Apply one thin correcting coat, then stop and assess
If the polish is still a good candidate for rescue, add one thin coat and give it a moment to settle before deciding on more. Use three strokes total if you can: center, then each side. If the second coat improves the coverage but doesn’t fully finish it, let that layer settle before adding anything else.
8. Finish with top coat only after the color is even
A top coat can improve shine and smooth minor texture, but it won’t fully hide severe patchiness. Think of it as the finishing layer, not the rescue layer. If the color still looks uneven before top coat, the color coat usually needs another pass or a restart.
When to Remove the Polish and Restart
Sometimes the smartest move is to stop layering.
Remove and redo the manicure if you see any of these:
- thick, bumpy buildup
- obvious dragging where the brush pulled the color
- patchiness that gets worse with each coat
- a surface that looks rough instead of smooth
- a formula that stays streaky even after careful application
Restarting takes more time, but it saves you from ending up with a thick, crowded manicure that chips faster and looks less polished. If the polish is old, gloopy, or separated badly in the bottle, a fresh bottle may be the better fix than more application tricks.
How to Apply Nail Polish Evenly Next Time
If you want smoother coverage on the next manicure, focus on the first coat. That’s where most patchiness begins.
Keep coats thin
Thin coats usually level better than thick ones. Thick coats seem like a shortcut, but they often trap streaks, dry unevenly, and make the surface look bulky. Two or three thin coats usually look better than one heavy coat.
Don’t overwork the brush
Once polish starts to set, repeated brushing can create texture and bald spots. Make your strokes, then leave the layer alone long enough to settle.
Use a clean, prepped nail
Wash your hands first, remove oils or residue, and skip lotion right before painting. That advice is common in nail-care prep because oils interfere with adhesion. A clean nail gives the polish a better surface to grip. If you want a broader safety-and-prep reference, the NIH’s general skin and nail care resources are a useful starting point for understanding why gentle prep matters.
Match the number of coats to the formula
A sheer polish may need extra coats to look even. An opaque cream may cover in fewer coats but still streak if applied too heavily. If you’re using a pale shade and expecting full coverage in one pass, you’re setting yourself up for frustration.
Keep your strokes consistent
Use the same direction and pressure on each nail. If one nail gets three light strokes and the next gets ten scrubbing motions, the finish will look different even if the bottle is the same.
Choosing the Right Base Coat, Top Coat, and Polish Formula
The products you choose can either help or work against you.
Base coat
A base coat helps the color grip the nail and can improve the look of uneven nails. If your nail surface has ridges, a ridge-filling base coat may help reduce the appearance of texture underneath. That doesn’t mean it fixes every patchy manicure, but it can make the surface look more even before color goes on.
A standard base coat is usually the better default for smooth nails and most everyday manicures. A ridge-filling base coat makes more sense when the nail surface itself is visibly uneven.
Top coat
A top coat smooths and seals. It can make a manicure look more finished, but it cannot fully cover a weak color layer. If the polish is still visibly patchy, adding top coat alone is usually not enough.
Sheer vs opaque polish
Sheer polish gives a soft look and can be beautiful, but it’s less forgiving. Opaque polish is easier when you want even, solid color. If you love pale shades, accept that they may need more coats or a different base underneath.
Glitter, shimmer, and fast-drying formulas
These formulas can look great, but they behave differently from classic cream polish.
- Glitter and shimmer polishes often need more careful mixing and a more even brush load so the particles distribute well.
- Very sheer formulas may never look fully solid, even with careful application.
- Fast-drying formulas are convenient, but they give you less time to correct streaks before the surface sets.
If you often patch up polish successfully, cream formulas are usually the most forgiving. If you’re trying to rescue a formula that is naturally sheer or quick-setting, you may need to decide sooner whether to continue or restart.
Self-leveling formulas
Some formulas spread more smoothly on their own after you lay them down. Those are easier to rescue because they can soften brush marks before the surface dries. If a polish fights you every time, the formula may be the problem, not your technique.
Troubleshooting by Symptom
| Symptom | Likely cause | Best fix |
|---|---|---|
| Faint see-through spots | Polish is too sheer or coat is too thin | Add one thin coat |
| Brush lines | Too much pressure or overworking | Float the brush lightly |
| Bald patches near edges | Not enough product on the brush | Reload and apply evenly |
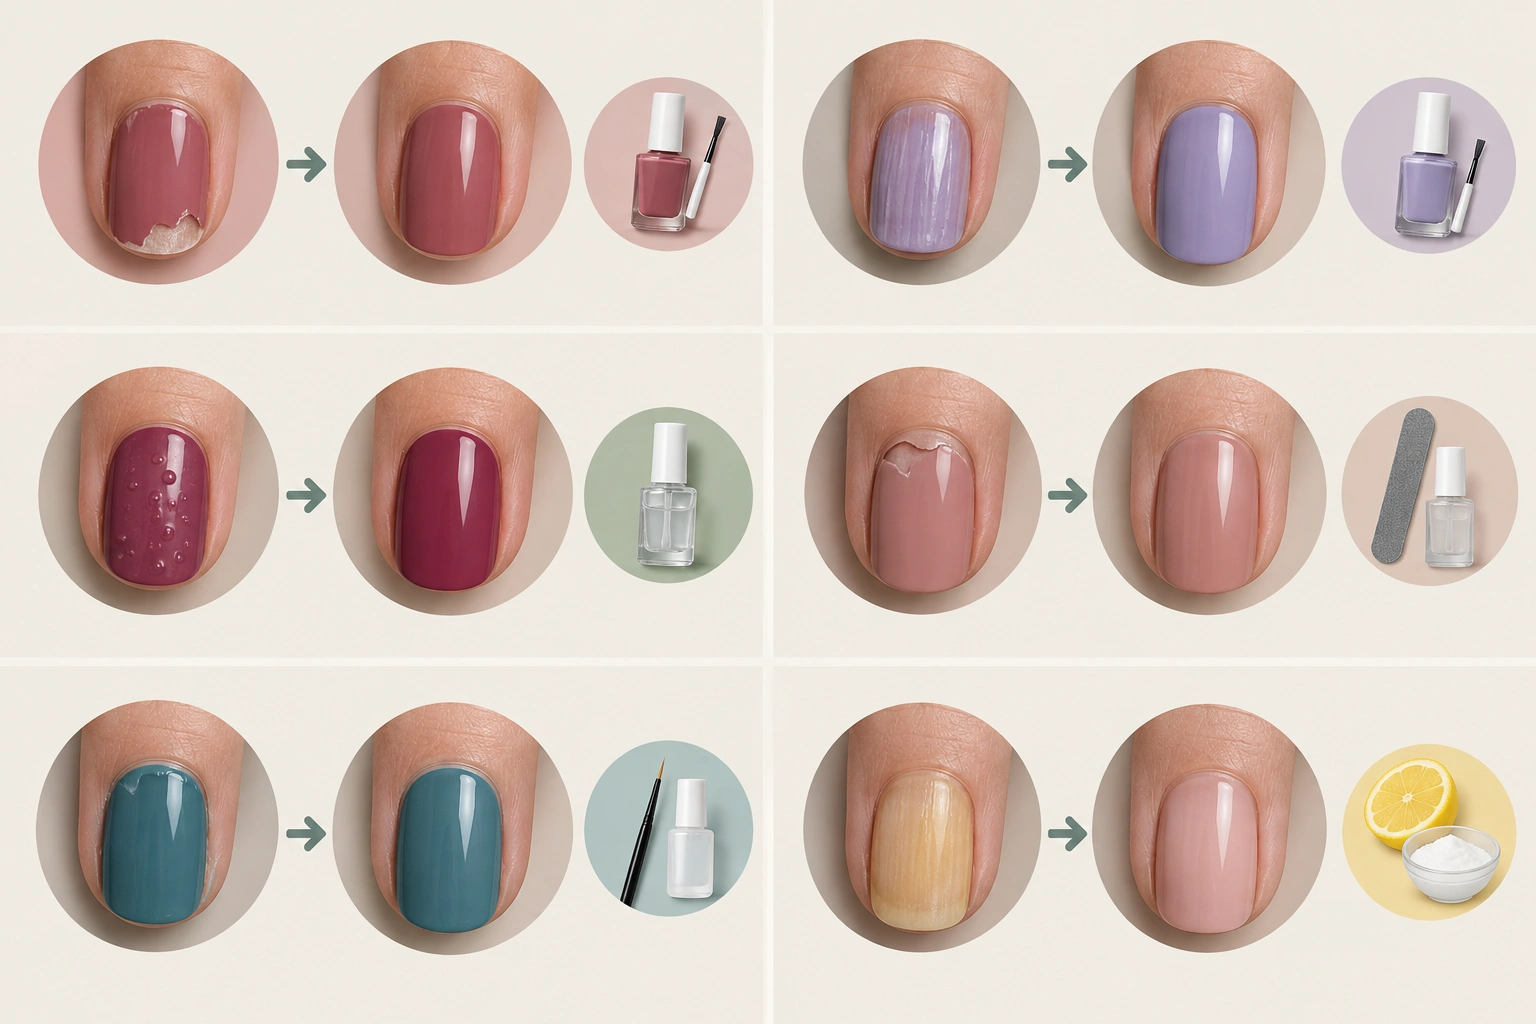
| Bubbles | Coat too thick, polish shaken too hard, or layers applied too fast | Remove and redo with thinner coats |
| Peeling at the tips | Poor prep, weak adhesion, or oily residue | Clean nails well and use base coat |
| Lumpy finish | Too many layers, polish dried between strokes, or a formula that has thickened | Restart with thinner coats |
If you’re seeing bubbling, peeling, or a lumpy finish along with patchiness, the issue is often more than one thing at once. Coverage, drying time, coat thickness, and nail prep can all be involved. Nail surface prep matters enough that some manufacturers build detailed instructions around it, including cleaning the nail and using base coat correctly, as Dazzle Dry notes in its application guidance: how prep affects polish wear.
How to Prevent Patchy Nail Polish in Future Manicures
The easiest prevention habit is simple: use thinner coats and give them time to settle.
A few practical habits make a real difference:
- clean nails before painting
- push back cuticles so polish can reach the full nail plate
- use a base coat on bare nails
- choose an opaque formula when you want full coverage
- avoid shaking the bottle aggressively enough to create bubbles
- stop after the polish looks even, not after it looks “extra painted”
On bottle shaking: a gentle roll between your hands is usually safer than wild shaking, because hard shaking can introduce air bubbles. That said, some streaky formulas do seem to improve when the pigment is re-mixed more thoroughly, so the goal is even dispersion, not foam. If the bottle has sat for a while, some extra mixing may help; just don’t whip air into it.
For application, a few concrete cues help:
– leave just enough polish on the brush to cover the nail without dripping
– start slightly away from the cuticle
– use long strokes rather than repeated back-and-forth scrubbing
– reload the brush when it starts to look dry instead of forcing it to stretch
If you often struggle with drying issues, it may also help to understand whether your polish type is meant to air-dry normally or needs a different routine. These related guides can help: whether regular nail polish air-dries under a UV lamp and whether cold air helps nail polish dry.
When to Replace the Polish or Get Professional Help
Replace the bottle if it has thickened, separated badly, or keeps applying unevenly even when your technique is good. Old polish can become harder to level and more likely to streak.
See a nail technician or dermatologist if you notice nail changes that go beyond polish performance, such as persistent lifting, discoloration that doesn’t wipe off, pain, or nail surface changes that keep interfering with application. A technician can help you assess whether the issue is the product, the prep, or the nail surface itself. A dermatologist is the right choice if the nail looks unhealthy rather than simply hard to paint.
FAQ
Can I fix patchy nail polish with a top coat?
Only if the patchiness is very mild. Top coat can smooth shine and texture, but it won’t fully hide an uneven color layer.
How many coats should I use?
Usually two thin coats is the starting point, but sheer shades may need a third. If the polish still looks patchy after that, the formula may be too translucent for the result you want.
Why does my polish look worse after the second coat?
The second coat may be too thick, or the first coat may not have set enough before the next layer went on. That can cause dragging and visible streaks.
Is the problem my technique or the polish?
If the same problem happens across multiple nails and multiple tries, the formula may be the issue. If it only happens when you rush or press hard, technique is more likely the cause.
Can a ridge-filling base coat help patchy polish?
Yes, if the patchiness is partly caused by nail texture showing through. It won’t fix a very sheer formula, but it can help reduce the appearance of ridges before color goes on.
Should I shake the bottle before using it?
Mix it well, but avoid violent shaking. You want the pigment blended, not full of bubbles.
What if I keep getting streaks with pale polish?
That’s common. Pale and sheer shades often need thinner, more controlled coats and sometimes a more opaque base or different formula.
Patchy polish can be annoying, but it’s usually fixable once you identify the real cause. If the manicure is only a little uneven, one careful coat may be enough. If the formula is fighting you, a restart is often faster than trying to rescue a layer that won’t level.
