
How to Paint Nails Properly: A Beginner-Friendly At-Home Guide

Painting your nails neatly at home is a skill you can learn with a little structure and patience. The goal is not perfection on the first try. The goal is a smooth, even manicure that looks clean, lasts reasonably well, and feels easy to repeat.
If you have ever ended up with polish on your skin, streaky color, or a dented manicure five minutes after you finished, this guide is for you. I’ll walk you through the simple routine I teach beginners: prep, base coat, color, top coat, cleanup, and safe removal.
What You Need Before You Start
Gathering the right basics makes the whole process easier. You do not need a big kit. A few simple tools are enough:
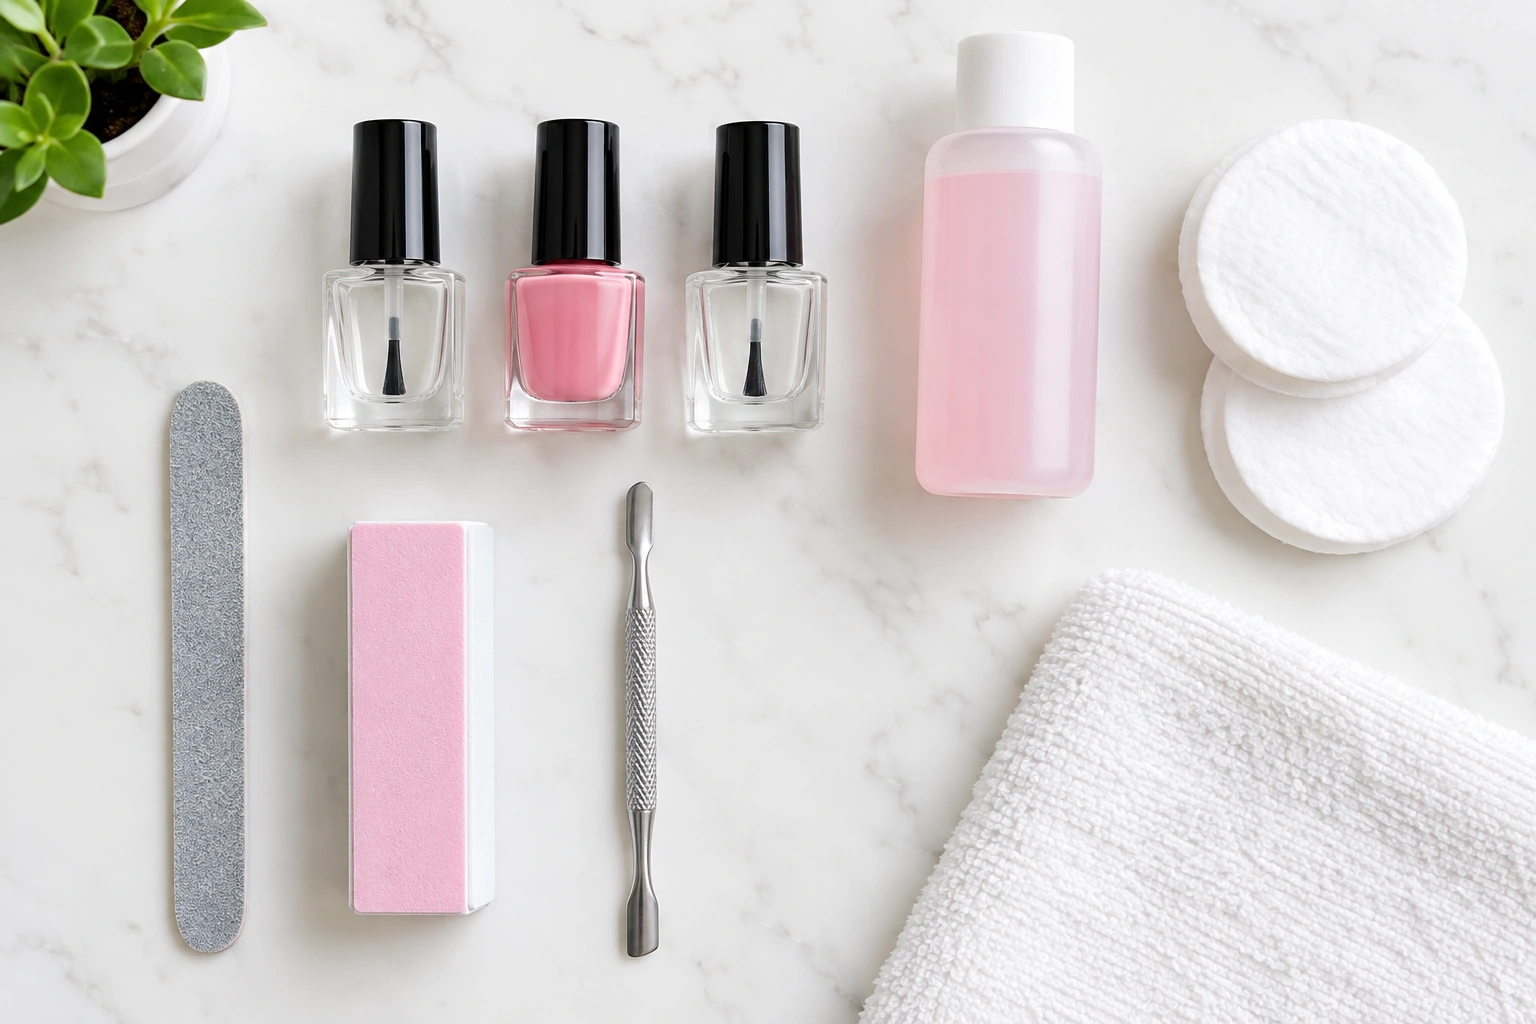
- Nail polish remover
- Cotton pads or lint-free wipes
- Nail file
- Buffer
- Cuticle pusher
- Base coat
- Nail polish color
- Top coat
- Small cleanup brush or angled brush
- Cuticle oil
If you are choosing polish, look for a beginner-friendly formula that is smooth, not syrupy, and not ultra-fast setting. A thin-to-medium formula is usually easier to control than one that feels very thick or sticky. A wider, flat brush is often easier for beginners because it covers the nail in fewer strokes, while a very skinny brush can feel harder to manage. If the bottle mentions “self-leveling,” that can also be helpful because the polish tends to settle more evenly.
Here is a simple comparison to help you choose the basics:
| Item | What it does | Why beginners may want it |
|---|---|---|
| Base coat | Helps polish grip the nail and can reduce staining | Gives a smoother starting surface |
| Top coat | Adds shine and helps protect the color | Helps the manicure last longer |
| Regular polish | Usually gives more time to correct your strokes | Good if you are still learning brush control |
| Quick-dry polish | Sets faster than many regular formulas | Helpful if you struggle with smudging |
| Acetone remover | Removes polish quickly | Useful for dark colors or stubborn polish |
| Non-acetone remover | Slower, often gentler feeling | Better if you prefer a softer remover |
For removal, acetone works faster, while non-acetone is a slower, gentler-feeling option for many people.
Prep Your Nails for a Smooth Finish
A neat manicure starts before the polish bottle opens. Clean nails hold polish better than oily ones, and a little prep helps the color go on more evenly.
Here is the simple prep routine:
- Remove old polish completely.
- Wash and dry your hands.
- Shape the free edge with a nail file.
- Lightly buff the surface if it feels rough.
- Gently push back the cuticles.
Keep the pressure light when you push back cuticles. You are just clearing the nail plate a bit, not forcing the skin back. If your nails are very dry or stained, you may also want to read how to prevent nail polish from staining nails before you paint.
A clean, slightly smooth nail surface helps polish sit better. You do not need to over-buff. If the nail looks shiny and healthy, stop there.
Understand the Correct Order: Base Coat, Color, Top Coat
The basic order is simple:
- Base coat
- Nail polish color
- Top coat
Each layer has a job.
Base coat gives the color something to grip and can help protect the nail from staining.
Color polish gives you the shade you want.
Top coat seals the manicure, adds shine, and helps reduce chipping.
Think of it like building a thin stack. If one layer is too thick, the whole manicure becomes harder to control. Thin layers dry more evenly and are easier to correct.
How to Load the Brush and Avoid Flooding the Cuticles
A lot of beginner mess comes from loading too much polish on the brush. You want enough polish to cover the nail, not so much that it runs into the skin.
A simple rule: wipe one side of the brush lightly against the bottle neck, then use the other side for the first stroke. The brush should look coated, not dripping. If you can see a bead forming at the tip, that is usually too much.
When you place the brush on the nail, start about a millimeter away from the cuticle. Hold the brush at a shallow angle, almost flat to the nail, so the polish glides instead of pushing forward in a blob. For short nails, use an even lighter touch and smaller brush loads because there is less space before the skin. For curved cuticles, let the brush follow the curve gently rather than trying to press straight into the edges.
If your brush is overloaded, the polish will spread too fast and touch the skin. That usually leads to cleanup work and a less neat finish.
Step-by-Step: How to Paint Each Nail Neatly
This is the part most beginners want to get right. Use a calm, steady pace.
1. Apply base coat
Paint a thin layer of base coat over the whole nail. Keep it even and light. Let it settle before moving on.
2. Place the color near the center
Set the brush near the middle of the nail, slightly above the cuticle line. Gently push the polish toward the cuticle without touching the skin, then pull the brush down toward the tip.
3. Use three strokes
A simple pattern works well:
– One stroke down the center
– One stroke on each side
This helps cover the nail evenly without overworking the polish.
4. Paint the side walls carefully
For short nails, the side walls are easy to flood if you use too much polish. Keep the brush flatter and lighter near the edges. If your nails are very short, use smaller brush loads and fewer strokes.
5. Finish the tip
Bring the last bit of polish to the free edge so the tip is covered. That helps the manicure wear a little better.
If you miss a small area, fix it with the next coat instead of trying to pack on extra polish right away.
How Many Coats to Apply and When to Stop
Most beginner manicures look best with two thin coats of color. Some sheer shades need three thin coats to look even. Opaque colors may only need two.
The key is thin coats, not thick ones. Thick coats can streak, bubble, and stay soft longer. Thin coats are easier to control and usually look smoother.
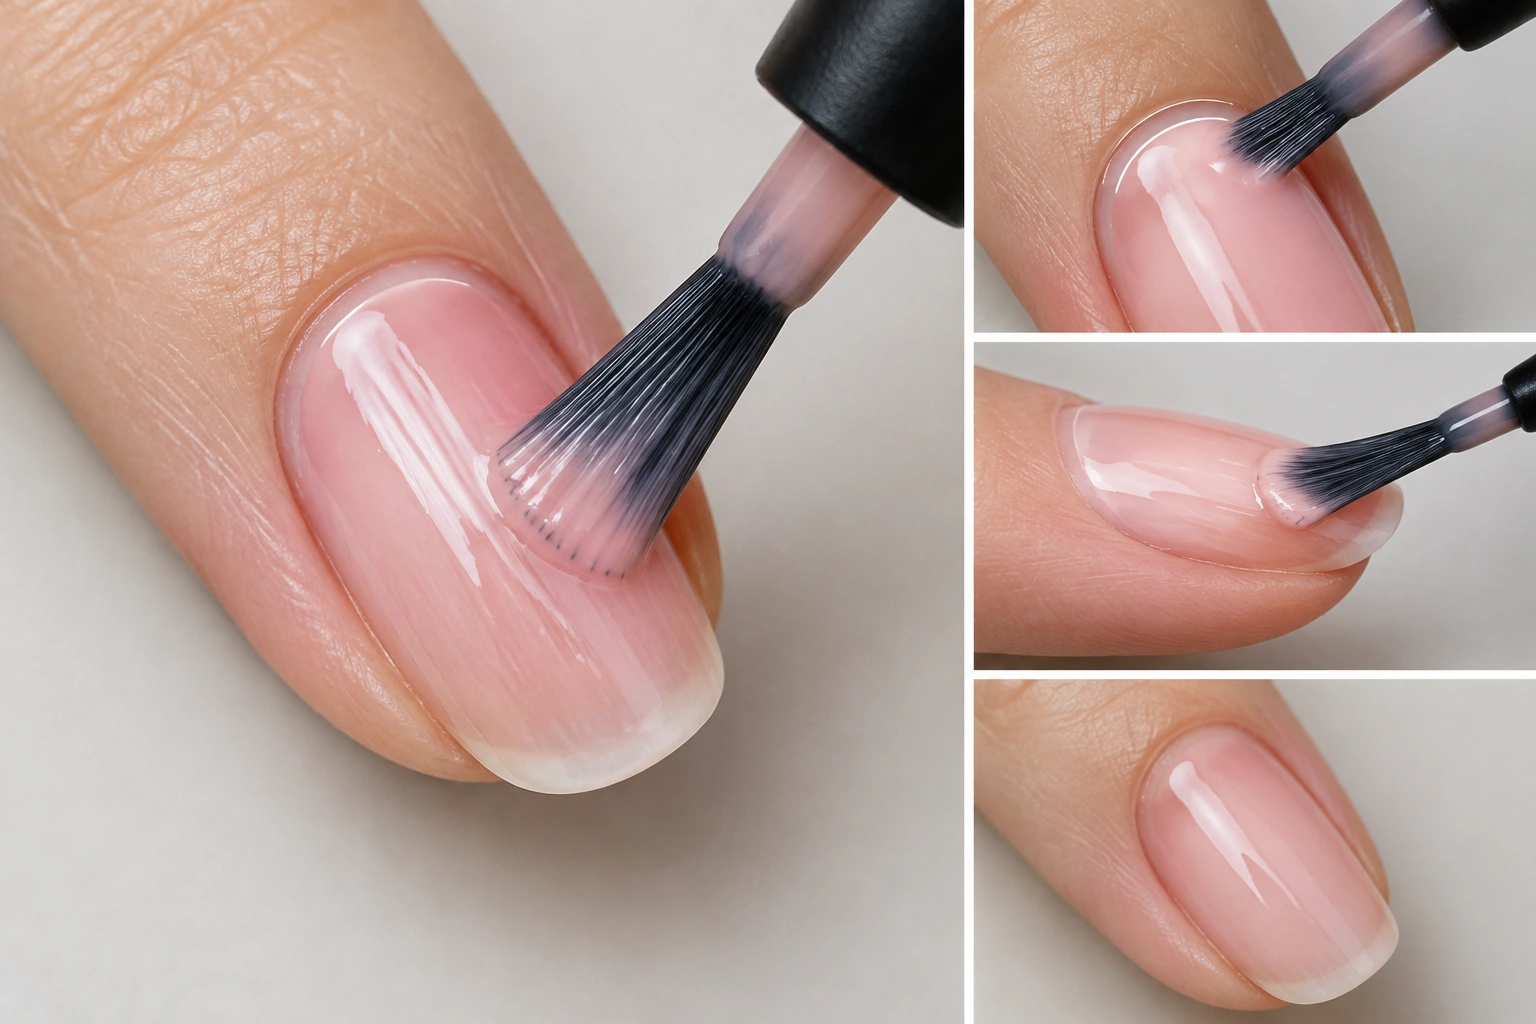
A good stopping point is when the color looks even and the nail edge is fully covered. If the polish still looks patchy after two coats, add a third thin coat rather than one heavy layer.
How to Seal the Free Edge for Better Wear
Sealing the free edge means running a small amount of polish along the very tip of the nail. You can do this with color and again with top coat.
This step matters because nail tips take the most wear from typing, washing, and daily use. A sealed edge can help reduce early chipping.
Keep the movement light. You are not painting the underside of the nail. You are just brushing the tip so the color wraps over the edge a little.
Drying Time: How Long to Wait and How to Avoid Smudges
Drying is where many good manicures get ruined. Even if the surface feels dry, the layers underneath may still be soft.
A practical rule of thumb is to wait about 2 to 5 minutes between thin coats of base coat, color, and top coat. If your polish goes on a little thicker, wait longer. If it is a quick-dry formula, you may be able to move a bit sooner, but it is still smart to give each layer a few minutes to settle.
A simple test: the coat is dry enough to continue when it looks evenly glossy rather than wet and does not shift if you lightly tap the edge of a nail with another fingertip. If it dents, strings, or feels tacky, wait a little longer.
To avoid smudges:
- Keep coats thin
- Don’t test the nails too soon
- Avoid heavy hand use right after painting
- Use quick-dry products if drying time is a big concern
- Give the final top coat extra patience before doing chores or putting on tight shoes
Quick-dry polish can be helpful, but it is not magic. Careful application still matters more than the label.
How to Clean Up Mistakes Without Starting Over
Small mistakes happen. The good news is that you usually do not need to restart the whole manicure.
For polish on the skin, use a small cleanup brush or angled brush dipped lightly in remover. Wipe away the extra polish around the nail edge, then stop. Do not soak the brush so much that remover runs onto the nail and softens the color.
For uneven edges, wait until the coat has settled a bit, then correct the line with a tiny amount of polish or cleanup work. If you try to fix everything while the polish is still very wet, you may drag the color and make the problem bigger.
A steady cleanup brush is especially helpful around the cuticle area, where beginners often get the most polish on the skin.
How to Make Your Manicure Last Longer
A beginner manicure usually lasts longer when you keep the routine simple and consistent.
These habits help most:
- Use a base coat
- Apply thin coats
- Seal the free edge
- Finish with a top coat
- Let the manicure dry before normal tasks
- Apply cuticle oil after the polish has set
Cuticle oil is best used after the manicure is dry enough to handle. It helps the skin around the nail look healthier and less dry, which makes the manicure look cleaner overall.
If staining is a problem for you, you may also want to read why nails turn yellow after nail polish and how to remove nail polish stains from nails.
How to Remove Nail Polish Safely
When it is time to remove polish, be gentle. Scraping or peeling polish off can weaken the nail surface.
Use this simple method:
- Soak a cotton pad or wipe with remover.
- Hold it on the nail for a moment.
- Wipe the polish away.
- Repeat if needed.
- Wash and dry your hands afterward.
Acetone remover works faster, especially on darker or more stubborn polish. Non-acetone remover usually takes longer but may feel gentler for some people. If your nails are already dry or fragile, the slower option may be more comfortable.
After removal, wash your hands and apply a little cuticle oil or hand cream. That helps restore a more comfortable feel after remover use.
Common Beginner Mistakes to Avoid
A few mistakes show up again and again when people learn how to paint nails properly:
Using thick coats
This is the fastest way to get streaks and dents. Thin coats are easier to manage.
Loading too much polish on the brush
A dripping brush is hard to control and often floods the cuticle area.
Painting too close to the skin
Leave a small gap near the cuticle so the polish does not run into it.
Skipping base coat or top coat every time
You can skip them if you are in a rush, but the manicure usually wears better with both.
Rushing the next coat
If the layer underneath is still soft, the brush can drag it and leave lines.
Peeling polish off
This can pull at the nail surface. Remove polish with remover instead.
When to See a Nail Technician or Dermatologist
Most at-home polish problems are just technique issues. But if your nails are painful, very discolored, lifting, or the skin around them is irritated, it is better to stop and get professional advice.
If you have tried a few at-home manicures and still struggle with flooding the cuticles, uneven coverage, or clean shaping, a nail technician can be a good next step for technique help. A salon visit can be especially useful if you want to see proper brush control in action or if your nails are difficult for you to reach neatly at home.
A dermatologist is the right choice if you think there may be a skin or nail health issue rather than just a polish problem.
FAQ: Beginner Nail Painting Questions
How many coats of nail polish should I use?
Usually two thin coats is a good starting point. Some sheer colors may need a third thin coat.
Do I really need a base coat and top coat?
If you want better wear and a cleaner finish, yes, they help. Base coat supports adhesion and top coat helps protect the color.
How do I stop polish from flooding my cuticles?
Use less polish on the brush, leave a tiny gap near the skin, and keep the brush strokes light.
How long should I wait between coats?
Wait about 2 to 5 minutes between thin coats, or until the layer looks settled and no longer shifts when lightly tapped.
What if I make a mistake?
Use a cleanup brush with a little remover to tidy the skin around the nail. Small fixes are usually easier than starting over.
Is quick-dry polish better for beginners?
It can be helpful if you want less waiting, but it also means you need to work carefully and move with purpose.
Learning how to paint nails properly gets easier every time you do it. Keep the coats thin, stay patient with drying, and focus on control rather than speed. That simple approach gives beginners the cleanest results.

