
How to Remove Nail Polish Safely at Home: A Beginner-Friendly Guide

Removing polish should be simple, not stressful. If you know what kind of polish is on your nails and use the right remover, the job is usually quick and gentle. The biggest mistake beginners make is treating every polish the same. Regular polish, glitter polish, gel polish, and polish on acrylics do not all come off the same way.
If you want the short version: use a remover that matches the polish type, press the cotton on the nail for a moment instead of scrubbing right away, and never peel off polish that resists. For gel, follow a different removal method or go to a professional. For regular polish, a basic wipe-off method works well.
What You Need Before You Start
Gather your supplies first so you do not end up rubbing the nail too hard because you are trying to improvise.
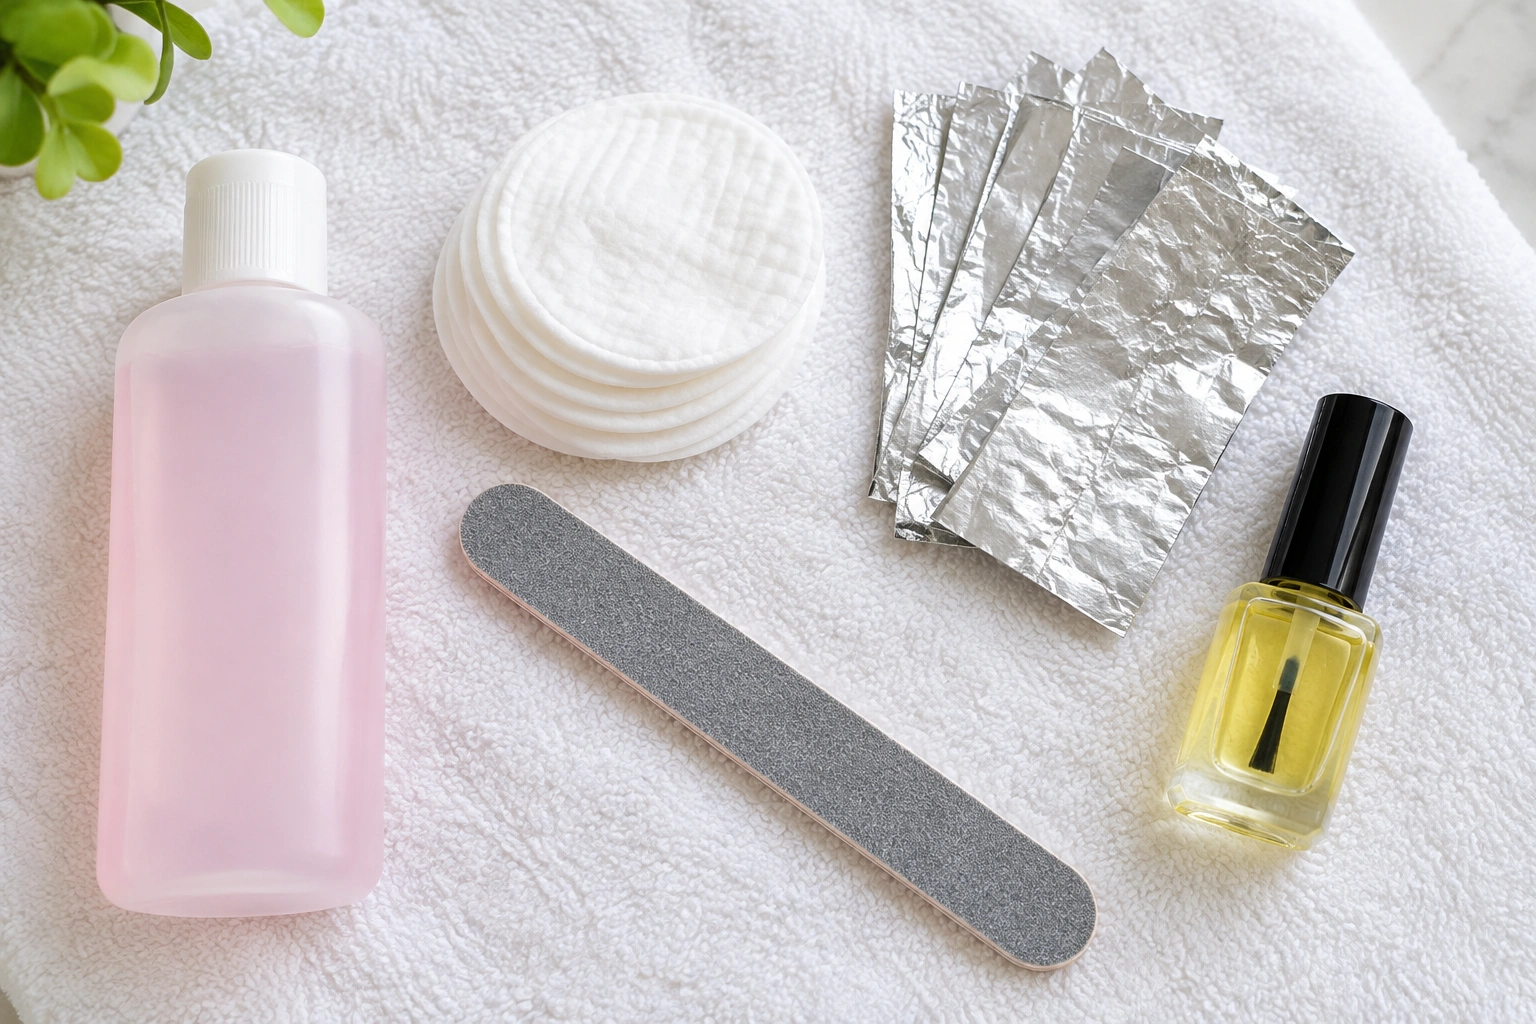
A simple removal kit usually includes:
- Nail polish remover
- Cotton pads or cotton balls
- A small piece of foil, if you need the soak-off method
- A nail file, if you are dealing with glitter or gel
- Cuticle oil or hand cream for aftercare
- A towel or paper towel to protect your surface
If you are removing polish near a sink or table, lay down a towel first. Remover can dry out surfaces and leave marks.
Quick note on ventilation
Nail polish remover has a strong smell, especially acetone. Use it in a room with some airflow. The FDA’s consumer guidance on cosmetics is a helpful place to check general product safety basics, especially if your skin is sensitive or easily irritated.
Choose the Right Remover for Your Polish Type
This is the part that saves the most time.
Acetone vs. non-acetone remover
Acetone remover works faster and is usually better for stubborn polish, glitter polish, and gel removal. The trade-off is that it can feel more drying on skin and nails.
Non-acetone remover is gentler for regular polish and is often a better starting point if your nails and cuticles are dry or sensitive. The downside is that it may take longer and struggle with glitter or darker shades.
Simple decision rule
- Regular polish on natural nails: non-acetone is often fine
- Dark polish or glitter polish: acetone is usually easier
- Gel polish: usually needs acetone-based soak-off removal or a salon method
- Acrylics or extensions: check the product instructions first, because some removers can weaken or affect enhancements
If you are not sure whether your manicure is regular polish or gel, look at the finish and feel. Gel usually looks thicker and wears longer. If it has been cured under a lamp, treat it as gel unless you know otherwise.
For general nail care and polish basics, essie’s nail care resources can also be a useful reference point when you are learning the difference between polish types.
How to Remove Regular Nail Polish Step by Step
For a standard manicure on natural nails, the basic wipe-off method is usually enough.
1. Soak the cotton
Pour a small amount of remover onto a cotton pad or cotton ball. It should be damp enough to cover the nail, not dripping everywhere.
2. Press, then wipe
Place the cotton on the nail and hold it there for about 5 to 10 seconds so the remover can break down the polish. Then wipe from the base of the nail toward the tip. Use gentle pressure instead of scrubbing back and forth.
3. Repeat if needed
If color is still left behind, use a fresh piece of cotton and repeat the process. Two passes is usually reasonable for regular polish. If you still need more than that, switch to a fresh pad with a little more remover and give it another brief hold rather than rubbing harder.
4. Clean the edges
Use a clean corner of the pad or a cotton swab to remove polish near the cuticles and sidewalls.
5. Wash and dry
When the polish is gone, wash your hands with mild soap and water. This removes leftover remover and helps your nails feel less dry.
If a faint stain remains after the polish is gone, wash and dry the nail first, then gently buff the surface very lightly if needed. If the discoloration still does not budge, leave it alone and let it grow out rather than scrubbing the nail plate.
How to Remove Stubborn, Dark, or Glitter Nail Polish
Dark shades and glitter usually need more patience. They are not “harder” because you are doing anything wrong; they simply cling to the nail more.
For dark polish
Use the same press-and-wipe method, but expect to repeat it once or twice. If some color remains, do not start scrubbing harder. A second pass is safer than rough rubbing.
If dark polish is layered on heavily, the foil method can help, but it is usually most useful when the polish is stubborn enough that a regular wipe is not enough.
For glitter polish
Glitter often needs the foil method because a quick wipe rarely lifts everything cleanly. For most glitter polish, let the remover sit on the nail for about 5 to 10 minutes before checking it. If the glitter is especially dense or layered, you may need closer to 10 minutes.
Foil soak-off method for stubborn polish
- Cut cotton pads into nail-sized pieces.
- Saturate each piece with remover.
- Place one on each nail.
- Wrap the fingertip with a small piece of foil to hold it in place.
- Let the remover sit long enough to loosen the polish.
- Remove the foil and cotton, then gently wipe away the softened polish.
If the glitter still clings, repeat the wrap rather than scraping. Glitter removal is one of the places where patience protects the nail plate.

A useful rule
If polish is not moving after a normal wipe, do not increase pressure first. Increase contact time or switch to the foil method.
How to Remove Gel Polish Safely
Gel polish is different from regular polish. It is designed to last longer, so it does not simply wipe off with regular remover.
If your polish is gel, do not peel it. Peeling can pull layers from the nail plate and leave nails thin or rough.
Safer at-home soak-off method
- Lightly buff the top coat. Use a fine nail file to remove the shine from the surface. A very light buff is enough; do not file into the natural nail.
- Soak cotton in acetone. Saturate a cotton pad or cotton ball with acetone-based remover.
- Place and wrap. Put the cotton on the nail and wrap each fingertip with foil to hold it in place.
- Wait for the soak-off. Let the acetone sit for about 10 to 15 minutes, then check one nail.
- Gently lift softened gel. Use a wooden stick or cuticle pusher to nudge off only the gel that has already loosened. If it resists, rewrap and soak a little longer.
- Stop if it is not coming off cleanly. If the gel is still firmly attached after another short soak, or if the nail feels sore, stop and seek a professional rather than forcing it.
When to stop and get help
If the gel is very thick, lifting unevenly, or attached to extensions, a salon visit is often the safer choice. The CDC’s general hand hygiene guidance is not about polish removal specifically, but it is a good reminder to wash hands after using products that can irritate skin.
Can You Use Household Products Instead of Nail Polish Remover?
If remover is unavailable, people sometimes try rubbing alcohol, hand sanitizer, perfume, or hairspray. These may loosen a little polish in a pinch, but they are not reliable substitutes.
What to expect
- They often work slowly
- They may dry the skin more than proper remover
- They usually struggle with glitter, dark polish, and gel
- They can leave the nail sticky or irritated
A temporary household substitute is better than picking at the polish, but it is not a true replacement. If you can, follow up with proper remover as soon as possible.
How to Remove Polish from Acrylic Nails or Extensions
Artificial nails need extra caution. Some removers can affect the enhancement itself, not just the polish on top.
What to do first
Check the instructions for the product on your nails. If you are wearing acrylics or extensions, do not assume the same method used for natural nails is safe.
Best general approach
- Use the gentlest method that removes the top polish layer
- Avoid aggressive soaking unless the product is designed for it
- Do not pry under the polish with a metal tool
- Stop if the enhancement starts to feel soft, loose, or damaged
Acetone is often used for polish removal, but on acrylics, extensions, and very dry or irritated skin it can be harsh. If you do not know exactly what enhancement you are wearing, the safer default is to avoid long acetone soaks and check the manufacturer’s guidance or ask a nail technician before proceeding.
If you are unsure, a nail technician can remove the polish without weakening the enhancement.
Aftercare: How to Rehydrate and Protect Nails After Removal
Removal is only half the job. After polish comes off, nails and cuticles often feel a little dry.
Simple aftercare steps
- Wash your hands to remove leftover remover.
- Pat them dry.
- Apply cuticle oil around the nail base.
- Use hand cream to soften the skin.
- Give your nails a short break if they feel brittle or tender.
If the nail surface looks dull after removing polish, a very light buff can smooth it, but do not overdo it. Too much buffing can thin the nail plate.
If your nails feel stripped, rough, or sore, pause before applying a new manicure. It is better to wait until they feel comfortable again than to repaint immediately and trap dryness underneath.
For readers who also struggle with leftover discoloration, if a light stain remains after removal, wash the nail, dry it well, and leave it alone unless it can be gently lifted with a very light buff. If it still stays, it usually needs time to grow out.
Common Mistakes to Avoid
These are the habits that cause the most trouble for beginners.
Peeling off polish
This is the biggest one, especially with gel. If polish lifts in sheets, it can take part of the nail with it.
Scraping too hard
A metal tool or aggressive scraping can scratch the nail surface. If polish is stuck, soften it more instead of forcing it off.
Using the wrong remover
Regular remover may be fine for standard polish but not enough for glitter or gel. Matching the remover to the polish saves time and reduces damage.
Leaving remover on skin too long
A little contact is normal. Prolonged soaking can dry out the skin and cuticles.
Buffing too much
Buffing should be minimal. If you are removing shine from the entire nail plate, you are probably doing too much.
When to See a Nail Technician or Dermatologist
Some situations are better handled by a professional.
See a nail technician if:
- You are not sure whether the polish is gel, acrylic, or regular polish
- The polish will not come off after a few gentle attempts
- The enhancement feels loose or damaged
- You want polish removed safely from extensions
See a dermatologist if:
- Your skin becomes painful, very red, or swollen
- You notice a rash or strong irritation after using remover
- Your nails are repeatedly peeling, splitting, or changing in a way that does not improve
If you are mainly trying to avoid bubbles or uneven results when you repaint later, our guide on how to prevent nail polish bubbles may help with your next manicure.
Quick Comparison: Which Removal Method Should You Use?
| Polish or nail type | Best remover or method | Speed | Dryness risk | Notes |
|---|---|---|---|---|
| Regular polish on natural nails | Non-acetone or acetone wipe-off | Fast | Low to moderate | Easiest beginner method |
| Dark polish | Acetone wipe-off or repeat wipe | Fast | Moderate | May need a second pass |
| Glitter polish | Acetone + foil soak-off method | Moderate | Moderate | Usually needs more patience |
| Gel polish | Acetone soak-off or salon removal | Slower | Moderate to high | Do not peel |
| Acrylics or extensions | Follow product instructions | Varies | Varies | Avoid guessing |
| Dry or sensitive skin | Non-acetone for regular polish | Moderate | Lower | May need extra patience |
A Simple Beginner Rule to Remember
If it is regular polish, a cotton pad and remover usually do the job. If it is gel, treat it differently. If it is glitter or dark polish, expect to soak or repeat the process. And if the polish resists, soften it more instead of scraping harder.
That one rule prevents most of the damage beginners run into.

