
Is Nail File and Buffer the Same? Key Differences Explained

If you are putting together an at-home manicure kit, it is easy to look at a nail file and a nail buffer and assume they do basically the same job. After all, both have textured surfaces, both touch the nail, and some manicure blocks even include filing and buffing sides in one tool.
So, is nail file and buffer the same? No. A nail file is mainly designed to shorten, shape, and smooth the free edge of your nail. A nail buffer is generally finer and is used on the surface of the nail to reduce minor roughness or create a smoother, shinier finish.
Knowing the difference matters because using a coarse file where you should use a buffer—or buffing too aggressively—can leave natural nails thinner, weaker, or more sensitive.
Below, we will compare nail files and buffers, explain when to use each one, cover safe technique, and help you decide which tool belongs in your manicure routine.
Quick Answer
No, a nail file and nail buffer are not the same. A nail file shapes and shortens the nail edge, while a nail buffer uses a finer abrasive surface to gently smooth or polish the top of the nail plate. Some multi-sided tools combine both functions, but each surface has a different purpose.
What Is a Nail File?
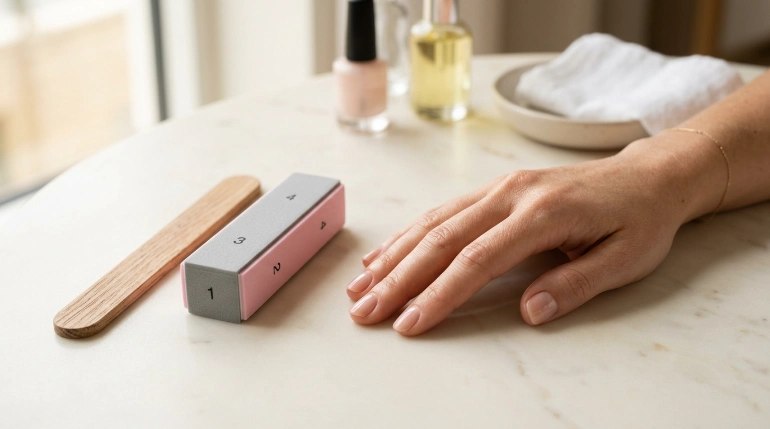
A nail file is an abrasive manicure tool primarily used on the free edge—the part of your fingernail that extends beyond the fingertip.
You can use one to:
- Shorten nails gradually
- Create round, square, oval, almond, or squoval shapes
- Smooth sharp corners
- Remove small snags
- Refine an uneven edge after clipping
According to the American Academy of Dermatology’s nail-trimming guidance, rough or uneven edges can be smoothed with a nail file or emery board, and the organization recommends filing in the same direction.
Nail files come in several materials, including emery, glass, ceramic, metal, and foam-backed abrasives. If you are unsure which material fits your nail type, NailPrime’s guide to the best materials for nail files explains the main differences between common options.
What Is a Nail Buffer?
A nail buffer is a finer abrasive tool designed mainly for the surface of the nail plate, rather than for removing a significant amount of length.
Buffers may come as:
- Foam blocks
- Padded rectangular boards
- Multi-sided manicure blocks
- Fine polishing pads
- File-and-buffer combination tools
Depending on the product, different sides may be labeled something like smooth, buff, or shine.
Buffing removes a very small amount of material from the nail surface. Done gently and occasionally, it can make minor surface roughness look smoother.
However, buffing is not something you need to do aggressively or constantly. Removing too much from the top of the nail can make the nail plate thinner.
That is especially important if your nails are already soft, peeling, flexible, damaged, or tender.
Nail File vs. Nail Buffer: What’s the Difference?
Here is the simplest comparison.
| Feature | Nail File | Nail Buffer |
|---|---|---|
| Main purpose | Shape and shorten nails | Smooth or polish nail surface |
| Main area used | Free edge of nail | Top surface of nail plate |
| Abrasiveness | Usually more abrasive | Usually finer |
| Removes length | Yes | Very little or none |
| Changes nail shape | Yes | Not significantly |
| Can add shine | Usually no | Some buffers can |
| Best for | Shaping, shortening, smoothing snags | Minor surface smoothing and finishing |
| Main risk | Over-filing the edge | Thinning the nail plate |
| Frequency | As needed | Sparingly, as needed |
The biggest difference is where and why you use the tool.
Think of a file as the shaping tool and a buffer as the finishing tool.
Why Do Nail Files and Buffers Look So Similar?
The confusion is understandable because manicure manufacturers often combine several abrasive surfaces into one product.
For example, a four-sided manicure block might contain:
- A coarse side for shaping
- A medium side for refining
- A fine side for smoothing
- A very fine side for polishing
That does not mean every side performs the same job.
The amount of material removed depends on the surface texture, commonly described by its grit. In general, a rougher surface removes material faster, while a finer surface removes less and produces a smoother finish.
Manufacturers do not always label combination tools in exactly the same way, so follow the instructions on your specific buffer or file rather than relying only on its color or appearance.
Should You File or Buff Nails First?
If you plan to do both during a manicure, shape first and buff second.
A simple routine looks like this:
- Trim excessive length if necessary.
- File the free edge into your preferred shape.
- Check both hands for symmetry.
- Smooth obvious snags.
- Buff the nail surface only if there is a reason to do so.
- Brush away nail dust.
- Moisturize your hands and surrounding nail skin.
You do not have to buff simply because you filed your nails.
If your nail plates already look smooth and healthy, you can stop after shaping.
How to Use a Nail File Safely
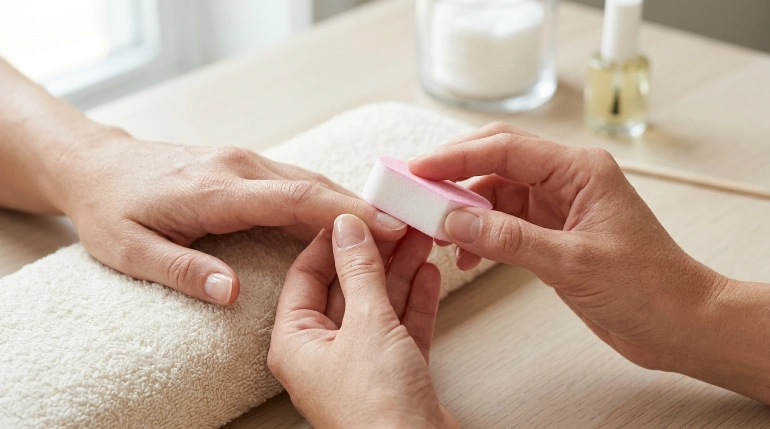
A nail file is simple, but technique matters.
Step 1: Choose an Appropriate File
Natural nails generally benefit from a gentler filing surface than thick acrylic enhancements.
Glass and ceramic files are popular reusable options. NailPrime’s guide to ceramic nail files explains how ceramic surfaces can provide controlled shaping when used with light pressure.
You can also compare reusable options in our guide to crystal glass nail files.
Step 2: Work on the Free Edge
Position the file against the edge rather than grinding across the top of the nail.
Use controlled movements and avoid pressing hard.
Step 3: Remove Length Gradually
Check your shape every few strokes.
It is easier to file off a little more than to correct a corner that has suddenly become too short.
Step 4: Smooth Snags
Once you have the desired length, lightly refine rough spots that might catch on clothing or hair.
The American Academy of Dermatology’s healthy nail tips specifically recommend keeping nails shaped and free of snags.
Step 5: Stop if It Hurts
Normal filing should not cause:
- Sharp pain
- Burning
- Bleeding
- Significant tenderness
If it does, stop.
How to Use a Nail Buffer Safely
Buffing deserves a lighter touch because you are working directly on the visible nail plate.
Step 1: Look at Your Nails First
Do not automatically buff every nail.
Skip buffing if your nails are:
- Very thin
- Peeling in layers
- Tender
- Cracked
- Recently damaged by enhancements
- Painful
- Showing unusual discoloration
Step 2: Use the Correct Side
If you have a multi-step buffer, identify the side intended for smoothing rather than shaping.
Never assume the roughest surface belongs on the nail plate.
Step 3: Use Very Light Pressure
Move the buffer gently over the area that needs smoothing.
You are not trying to sand away every natural line or texture.
Step 4: Make Only a Few Passes
Check the nail frequently.
Once it feels smoother, stop.
More buffing does not necessarily produce a healthier-looking nail.
Step 5: Moisturize
After removing nail dust, apply hand cream or a moisturizing product around the nails and cuticles.
The goal is a neat finish—not an aggressively polished, paper-thin nail plate.
Expert Tip: If you can feel the nail becoming warm, unusually flexible, tender, or thinner while buffing, stop. Those are signs you may be removing more surface material than necessary.
Can You Use a Nail File Instead of a Buffer?
Generally, you should not use an ordinary shaping file to aggressively buff the top of your natural nail.
A file meant to remove length can be significantly rougher than a buffer.
Using it over the entire nail plate may cause:
- Excessive thinning
- Surface scratches
- Peeling
- Weakness
- Increased sensitivity
The American Academy of Dermatology notes that roughening natural nails for artificial-nail application thins them and can make them weaker. The practical takeaway for DIY manicures is to avoid unnecessarily removing material from the top surface of healthy nails.
The exception is a multi-function file specifically designed with a fine buffing surface. In that case, use only the side the manufacturer identifies for buffing.
Can a Nail Buffer Replace a Nail File?
Not very well.
A fine buffer may soften a tiny rough spot, but it is inefficient for shortening or reshaping nails.
If you want to change a square nail into an oval shape, for example, a proper file gives you much better control.
Trying to remove lots of length with a very fine buffer also creates unnecessary work and wears out the buffer quickly.
For most DIY manicure kits, it makes sense to have both:
- One suitable nail file for shaping
- One gentle buffer for occasional surface finishing
Which Tool Should You Use?
Choose based on what you are actually trying to fix.
Use a Nail File When:
- One nail is longer than the others
- You want to change your nail shape
- A corner feels sharp
- The edge is snagging
- You need to refine nails after trimming
Use a Buffer When:
- The nail surface has minor roughness
- You want a smoother finish before certain manicure applications
- You are using a multi-step shine buffer
- A manufacturer specifically instructs you to lightly buff before using a product
Use Neither When:
- The nail is painful
- Skin around it is red or swollen
- There is pus or drainage
- A crack extends into the attached nail
- The nail is separating
- You have an unexplained dark streak
- The nail has suddenly become thick, distorted, or discolored
Those problems should not simply be filed or buffed away.
What About Natural Nails vs. Gel and Acrylic Nails?
Natural nails require especially careful treatment because once you thin the natural nail plate, you cannot immediately restore the removed layers.
Natural Nails
Use a gentle file for shaping and keep surface buffing minimal.
Thin, peeling, or brittle nails deserve an especially light touch.
Gel Nails
Some gel systems include surface preparation or removal steps that involve filing or buffing.
Follow the directions for the actual product rather than improvising with a coarse file.
Acrylic and Hard Enhancements
Artificial enhancements are thicker and may require stronger files for reshaping.
However, the tool that works efficiently on acrylic may be far too aggressive once you reach the natural nail underneath.
The American Academy of Dermatology’s guidance on reducing artificial-nail damage warns that filing the natural nail surface to roughen it can make natural nails thinner and weaker.
If you cannot clearly tell where the enhancement ends and your natural nail begins, professional removal may be safer than continued DIY filing.
Tool Material, Durability, and Cost
You do not need an expensive manicure tool simply because it has premium packaging.
Basic emery boards and foam buffers are generally inexpensive and convenient, but their abrasive surfaces wear with use.
Reusable materials such as glass and ceramic usually cost more upfront, but they can last much longer when properly cared for.
Your best choice depends on:
- How often you do your nails
- Whether you want a reusable tool
- Your nail thickness
- How much shaping you normally do
- Whether you wear enhancements
- How easy the tool is to clean
- Whether your nails are sensitive or fragile
The most expensive option is not automatically the gentlest option. Technique and abrasiveness matter just as much as material.
Nail File and Buffer Hygiene
Both files and buffers collect nail dust and debris.
For home manicures, keeping your tools personal is a simple hygiene habit.
Avoid sharing a file or buffer when:
- Someone has an infected-looking nail
- There is broken or bleeding skin
- The tool cannot be properly cleaned
- You do not know how it was previously used
Reusable glass or ceramic files may be easier to clean than porous disposable boards, but always follow the manufacturer’s cleaning directions.
Buffers and disposable emery boards should be replaced when they become heavily worn, dirty, damaged, or difficult to clean.
If manicure products are being used alongside your tools, the FDA’s nail care product safety information notes that some nail products can cause irritation, infection, or allergic reactions and advises consumers to follow product warnings and directions.
Nail Sensitivity and Over-Buffing
If your nails are naturally thin, you may not need routine buffing at all.
Be cautious if you notice:
- Increased flexibility
- Tenderness when pressing the nail
- Peeling layers
- A burning sensation during buffing
- Nails that feel unusually thin
- Increased breakage after manicures
These signs can mean your nail routine is too aggressive.
Stop buffing and give the nail time to grow out rather than repeatedly trying to smooth the problem.
Common Mistakes to Avoid
Even simple manicure tools can cause trouble when used incorrectly.
- Using a shaping file over the entire nail surface. A coarse file can remove too much of the nail plate.
- Buffing every time you do your nails. Buff only when it serves a real purpose.
- Trying to erase deep ridges. Deep or new nail changes may have an underlying cause.
- Pressing harder to work faster. Light, controlled pressure gives you more control.
- Using the same tool for every nail type. Thick acrylic and thin natural nails may need very different abrasiveness.
- Using dirty or damaged tools. Replace worn disposable tools and clean reusable ones appropriately.
- Ignoring tenderness. Nail care should not be painful.
- Filing or buffing an infected-looking nail. Cosmetic tools do not treat infection.
- Trying to remove all visible texture. Natural nails do not need to look perfectly glass-smooth to be healthy.
When to See a Nail Technician or Dermatologist
A nail technician can help with cosmetic concerns such as:
- Shaping difficult enhancements
- Correcting acrylic length
- Maintaining gel or hard-gel manicures
- Professionally removing enhancements
- Choosing appropriate manicure tools
A dermatologist or other qualified healthcare professional is more appropriate when you have a possible nail or skin condition.
Consider medical evaluation if you notice:
- Persistent redness or swelling
- Pus or drainage
- Significant pain
- A nail lifting away from the nail bed
- Unexplained changes in color
- A new or changing dark streak
- Sudden thickening or distortion
- Repeated cracking without an obvious cause
- Changes that do not improve as the nail grows
The American Academy of Dermatology recommends having concerning changes such as nail lifting and other unexplained nail abnormalities evaluated rather than simply covering or filing them away.
A nail technician can improve a manicure. They should not be expected to diagnose a possible infection or nail disease.
FAQs
Is nail file and buffer the same tool?
No. A nail file is mainly used to shorten and shape the free edge, while a buffer uses a finer surface to smooth or polish the nail plate. Some manicure tools combine both functions on different sides.
Can I use a nail buffer instead of a file?
A buffer can smooth very minor roughness, but it is not efficient for changing nail length or shape. Use a proper nail file when you need to shorten or reshape your nails.
Can I use a nail file to buff my nails?
Avoid using a coarse shaping file across the top of natural nails. It can remove too much material. Only use a file on the nail surface if it includes a clearly labeled, fine buffing side intended for that purpose.
Do I file or buff first?
File first. Shape and refine the nail edge before doing any optional surface buffing. You may find that you do not need to buff at all.
How often should I buff my nails?
There is no reason to buff on a fixed schedule. Buff lightly only when needed, and skip it if your nails are thin, peeling, damaged, or sensitive.
Does a nail buffer remove nail ridges?
A buffer may make very minor surface texture look smoother, but you should not aggressively buff deep or newly developed ridges away. Significant or unexplained nail changes may deserve professional evaluation.
Is a glass nail file the same as a nail buffer?
No. A glass file is still primarily a shaping tool, even though its surface can feel smoother than a traditional emery board. Some specialty glass tools are marketed for polishing, so check the manufacturer’s intended use.
Conclusion
So, is nail file and buffer the same? No. They may look similar, but they have different jobs in your manicure routine.
A nail file shapes and shortens the free edge of the nail. A nail buffer uses a finer surface to smooth or polish the nail plate.
For most at-home manicures, shape first with an appropriate file and treat buffing as an optional finishing step—not something you need to do aggressively every time.
Choose tools based on your nail strength, keep them clean, use light pressure, and stop if your nails become thin or tender.
Most importantly, do not try to file or buff away pain, swelling, infection, discoloration, or unexplained nail changes. When a problem looks like more than a cosmetic issue, give your nails the care they deserve and get qualified professional advice.

