
How to Apply Nail Polish Without Bubbles: A Smooth, Salon-Style Guide for Home Manicures

Bubbles usually show up when polish is forced to do too much at once: too much air in the bottle, too much product on the nail, or not enough time for each layer to settle. The fix is less about speed and more about control. If you want a smooth finish, think in terms of thin layers, calm handling, and a nail surface that is truly clean and dry.
[IMAGE_1]
Why Nail Polish Bubbles Happen
Bubbles can form at several points in the manicure, and the cause changes the fix.
If the bottle was shaken hard, air can get mixed into the polish before it ever touches the nail. That trapped air may show up as tiny bubbles in the brush load or on the finished coat. Rolling the bottle between your palms is usually gentler because it blends the polish without whipping in as much air.
Shaking can trap air in the polish, while rolling blends it more gently. That difference matters most when you are trying to avoid tiny bubbles before the brush even hits the nail.
Thick coats are another common problem. A heavy layer dries unevenly: the top can start setting while the layer underneath is still soft. That mismatch can leave pockets, ripples, or bubbles as the polish levels out.
Moisture and oils also matter. If the nail surface still has lotion, cuticle oil, or water on it, the polish may not spread evenly. Uneven flow can make the finish look pitted or bubbly, especially under a top coat.
Older polish is worth checking too. As polish thickens with age, it becomes harder to spread in a smooth, even film. If it drags on the nail or leaves stringy trails, bubbles are more likely because you have to overwork it to get coverage. If that happens, a nail polish thinner is the safer fix; remover can change the formula too aggressively. If the bottle is very old and still won’t smooth out after thinning, it may be time to replace it.
For a deeper step-by-step on the basics, you can also read how to apply nail polish correctly and how many coats of nail polish should you apply.
What You Need Before You Start
A bubble-free manicure begins before the brush touches the nail.
Have these ready:
- base coat
- nail polish
- top coat
- lint-free wipe
- isopropyl alcohol
- nail polish thinner, if the polish has thickened
- cuticle oil, for after the manicure only
- a nail file and buffer if your nail edges need smoothing
Start by shaping the nails, then remove dust and oils, and only after that wipe each nail lightly with isopropyl alcohol. Let the nails air-dry fully before you apply base coat. If you file after cleaning, you will put dust back on the nail and undo the prep.
The main goal here is a clean, even surface. A lint-free wipe with isopropyl alcohol helps remove leftover oil and dust. Base coat gives the color something smoother to cling to. Top coat seals the finish, but only works well if the layers underneath have had enough time to settle.

If your bottle looks old or gloopy, check it before you begin. A polish that barely flows off the brush is harder to apply in thin coats, which is exactly when bubbles become more likely.
Prep Your Nails for a Smooth Surface
Good prep prevents a lot of bubbling because the polish can spread evenly instead of fighting against residue.
1. Shape the nails first
File the free edge so it is even. Jagged edges can catch the brush and encourage extra strokes, and extra strokes often mean more disturbance in the wet polish.
2. Remove dust and oils
After filing, wipe each nail with a lint-free pad lightly dampened with isopropyl alcohol. Let the nails air-dry fully. If you apply polish while the nail still feels damp, you may trap moisture under the coating.
3. Skip lotion right before painting
Hand cream is useful, but not immediately before a manicure. If you want to moisturize, do it earlier, then clean the nails again before polish. Leftover cream on the nail plate can interfere with smooth adhesion.
4. Keep cuticle oil for the end
Cuticle oil is excellent after the manicure, not before. If it touches the nail surface too early, polish can slide around instead of laying flat.
[IMAGE_2]
Check the Polish and Your Room Conditions
Before you open the bottle, do a quick reality check.
Decide whether the polish is usable as-is
Hold the bottle up to the light. If the polish looks separated, stringy, or unusually thick, test the brush on the bottle neck. If it drags heavily, you may need a few drops of nail polish thinner. If it still won’t move smoothly after thinning, replace it.
That trade-off matters: a bottle that is only slightly thickened can often be restored, but a polish that has become gummy may force you to apply heavier coats just to get coverage. Heavier coats are one of the fastest ways to create bubbles.
Check the room
A very hot room can make polish feel too fluid and harder to control. A very cold room can make it feel sluggish and less self-leveling. Humidity can also slow drying, which gives surface disturbances more time to show up.
You do not need a laboratory. Just avoid painting in a steamy bathroom, next to a heater, or in a room where the air feels damp and still. A comfortable, normal indoor space is usually the better choice.
For a practical overview of top-coat bubbling and drying conditions, LONDONTOWN’s guidance on why top coat bubbles aligns with the same basic principle: thin layers and enough drying time help reduce trapped moisture and uneven setting.
How to Apply Nail Polish in Thin, Even Coats
This is the part that matters most. Thin coats are easier to control, dry more evenly, and are less likely to trap air.
1. Roll the bottle gently
Hold the bottle between your palms and roll it back and forth. This mixes the polish without the aggressive air-whipping effect of hard shaking.
2. Load the brush lightly
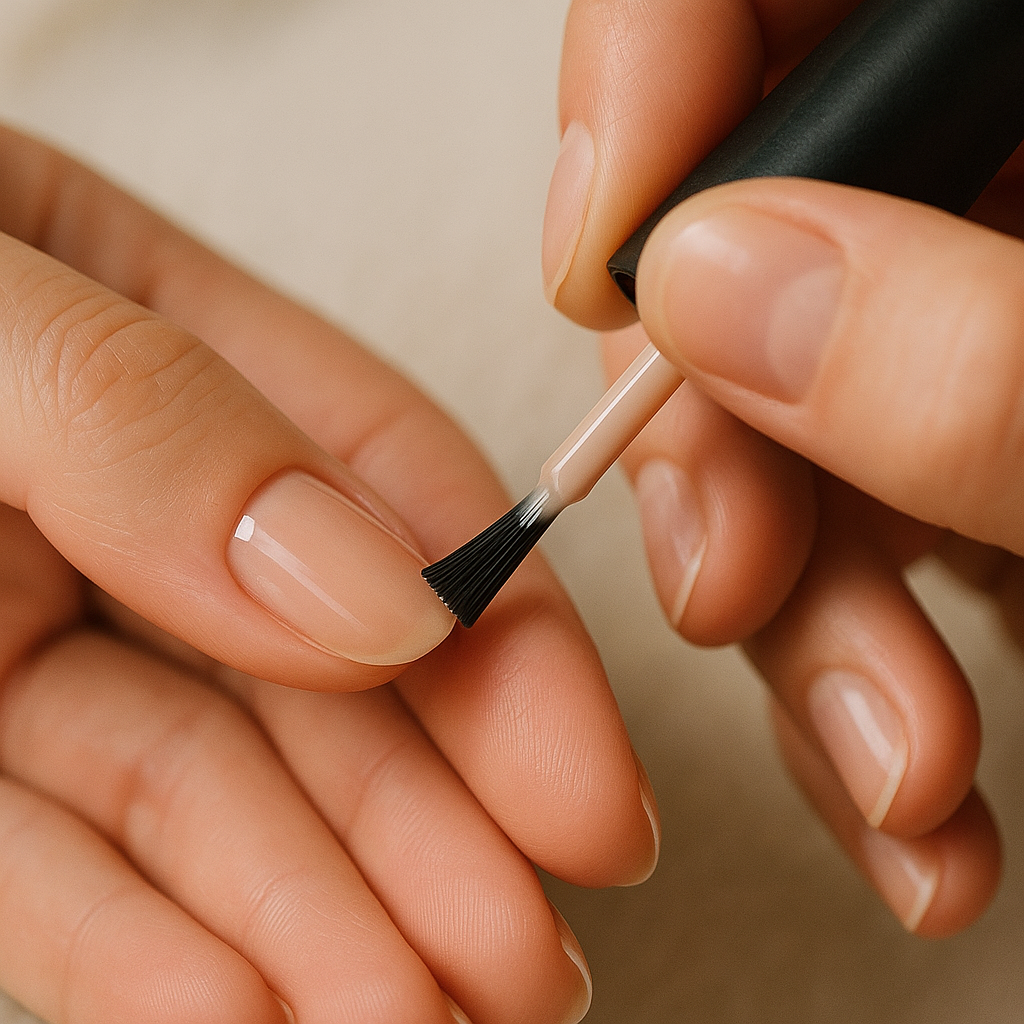
Pull the brush out slowly and wipe only the excess that would drip. You want enough polish to cover the nail in a few strokes, not so much that it pools around the cuticle.
3. Place the polish, then float it down
Set the brush near the base of the nail, leaving a small margin from the cuticle. Then guide the polish toward the free edge with light pressure. Use smooth strokes and let the brush do the work. Pressing hard or repeatedly brushing over the same area can disturb the layer you just laid down.
4. Use as few passes as possible
The goal is even coverage, not perfecting the nail with endless strokes. If you keep going back over semi-wet polish, you can drag air into it or create ridges that later look like bubbles.
5. Seal the tip lightly
Run a small amount of polish across the free edge to help the manicure wear more evenly. Keep it light. A thick wrap on the tip can create a bulky edge that dries at a different rate than the rest of the nail.
6. Repeat on the other hand with the same restraint
Beginners often do one hand carefully and then rush the second. Keep the same thin-layer approach on both hands.
If you want a companion guide for avoiding streaks while keeping the coat thin, see how to apply nail polish without streaks.
How Long to Wait Between Coats
There is no single universal minute count that works for every polish and every room. For beginners, a good starting point is to wait about 2 to 5 minutes between thin coats, and longer if the coat is thicker or the room is humid. If the polish still looks wet, slides when touched very lightly at the edge, or dents easily, give it more time.
A practical rule:
- thin coat in a normal room: often around 2 to 5 minutes
- slightly thicker coat: wait longer, sometimes 5 to 10 minutes or more
- humid room, cool room, or slow-drying polish: wait longer than usual
- fast-dry polish: still wait until the surface looks set, not just shiny
The safer rule is this: wait until the coat looks set, not just surface-shiny. Rushing the second coat can trap solvent underneath, and that trapped layer may show up later as bubbles or a soft, uneven finish.
The same logic applies to top coat. A quick-dry top coat can help a manicure set faster, but if the color layer is still too soft, the top coat can disturb it and create texture instead of smoothing it.
Should You Use a Base Coat and Top Coat?
Yes, usually. Just use them for the right job.
Base coat
A base coat helps create a more even surface between your natural nail and the color. It can also improve glide, which means you may need fewer brush strokes to get a smooth layer. Fewer strokes usually means less opportunity to introduce bubbles.
Top coat
A top coat protects the color and can improve shine. It also helps smooth over minor texture if the color layers underneath were applied well.
The trade-off is timing. A top coat over a soft layer can trap movement underneath, especially if applied too soon or too heavily. If your color coat is still tacky and you flood it with top coat, you may see tiny distortions or bubbles as both layers settle.
Quick-dry vs regular top coat
A quick-dry top coat saves time, which is useful if you tend to smudge your manicure. But it is less forgiving if the color layer is too thick. A regular top coat gives you a little more working time, which can be helpful for beginners who need to place the brush carefully.
If you often get bubbles only after top coat, the issue may be the layer beneath it rather than the top coat itself.
Common Mistakes That Cause Bubbles
These are the errors I see most often in beginners:
- shaking the bottle hard before use
- painting thick coats to “save time”
- brushing over the same spot repeatedly
- applying the next coat before the previous one has settled
- painting over nails that still have oil, lotion, or moisture
- using old polish without checking whether it needs thinner
- rushing the top coat because the manicure “looks almost dry”
A useful self-check: if you are trying to fix coverage by adding more pressure or more product, stop and reset. Most bubble problems come from overcorrecting.
What to Do If Bubbles Already Formed
The fix depends on when you notice them.
If bubbles appear in the wet polish
If the coat is still wet, you can sometimes smooth it lightly with one careful pass of the brush. Do not keep stirring the surface. If the bubbles keep reappearing, the layer is probably too thick or the polish is too airy, and it is better to remove that coat and redo it thinly.
If bubbles appear after the top coat
This usually means the layers underneath were not dry enough, or the top coat was applied too heavily. In that case, adding more product usually makes it worse. If the bubbles are small and isolated, you may be able to file lightly after full drying and add another thin top coat. If the finish is patchy, start over.
If the polish has fully set with bubbles
Once the manicure is dry, the cleanest solution is often removal and reapplication. Trying to bury large bubbles under more polish usually creates a thicker, less even result.
For removal without harsh scraping, you may also find how to remove nail polish without remover useful.
Practical Examples of Bubble-Free Application
A beginner shakes the bottle hard, paints one thick coat, and sees tiny bubbles as it dries. The fix is not a different top coat; it is gentler mixing and two thin coats instead of one heavy one.
Someone paints in a humid bathroom after a shower and notices the top coat looks slightly pitted. The problem is likely the environment plus slow drying. Moving to a drier room and waiting longer between coats would help more than adding extra product.
Another person has an older polish that drags on the brush. They add a few drops of nail polish thinner, roll the bottle, and the polish spreads more evenly. That is a good use case for thinning. If the formula is still clumpy after that, replacement is the better call.
Quick Checklist for a Bubble-Free Manicure
Before you paint, check these boxes:
- nails are clean, dry, and free of lotion
- bottle was rolled, not shaken hard
- polish flows smoothly and is not gummy
- coats will be thin
- room is comfortable, not steamy or overly hot
- each coat will get enough time to settle before the next one
- top coat will go on only after the color layer is ready
If you want a broader foundation, how to apply nail polish is a helpful companion guide.
FAQs About Applying Nail Polish Without Bubbles
Should I shake or roll nail polish before using it?
Roll it gently between your palms. Shaking can mix in air, which may show up as bubbles in the polish.
How many coats should I apply?
Usually two thin coats are better than one thick coat. Thin layers dry more evenly and are easier to control.
How do I know if I waited long enough between coats?
The previous coat should look set and no longer feel soft or slippery. If it dents easily, give it more time.
Does thick polish cause bubbles?
It can. Thick polish is harder to spread evenly and often dries less uniformly than a thinner layer.
Can a base coat or top coat prevent bubbles?
They can help the manicure apply and finish more smoothly, but they will not fix a heavy or rushed application. The way you apply the layers still matters most.
What if bubbles only appear after top coat?
That usually points to the color layer underneath being too soft, too thick, or not dry enough. Let the underlying coat set longer next time.
Should I redo the manicure if bubbles appear?
If the bubbles are small and the polish is still wet, you may be able to smooth it. If the manicure is already set and the finish looks uneven, redoing it is usually the cleaner result.
Can old polish still be used?
Sometimes, if it only needs a little nail polish thinner. If it is very gummy, stringy, or impossible to spread smoothly, replace it.
Does room temperature matter?
Yes, in a practical sense. Very hot, very cold, or humid conditions can make polish harder to apply and dry evenly.
Is a quick-dry top coat a good idea?
It can be, especially if you tend to smudge your manicure. Just make sure the color layer underneath is thin and ready, or the quick-dry top coat may lock in problems instead of smoothing them out.
When to See a Nail Technician
If your polish keeps bubbling even when you use thin coats, clean prep, and enough drying time, a nail technician can help you spot whether the problem is the product, the application method, or the condition of the nail surface. That is especially useful if you are trying to troubleshoot several manicures in a row and nothing seems to change.

