
How to Apply Nail Polish Without Getting It on Skin: A Clean, Beginner-Friendly Guide

If your polish always seems to wander onto your cuticles or sidewalls, the fix is usually not “more steady hands.” It’s better prep, less polish on the brush, and a cleaner stroke path.
I’m Ella Hart, and when I teach beginners, I focus on one goal: make the nail plate easier to paint, then give the brush fewer chances to flood the skin. That means you do not need salon-level speed. You need control.
What You Need Before You Start
Gather everything first so you are not hunting for a cotton swab while your polish starts to set.
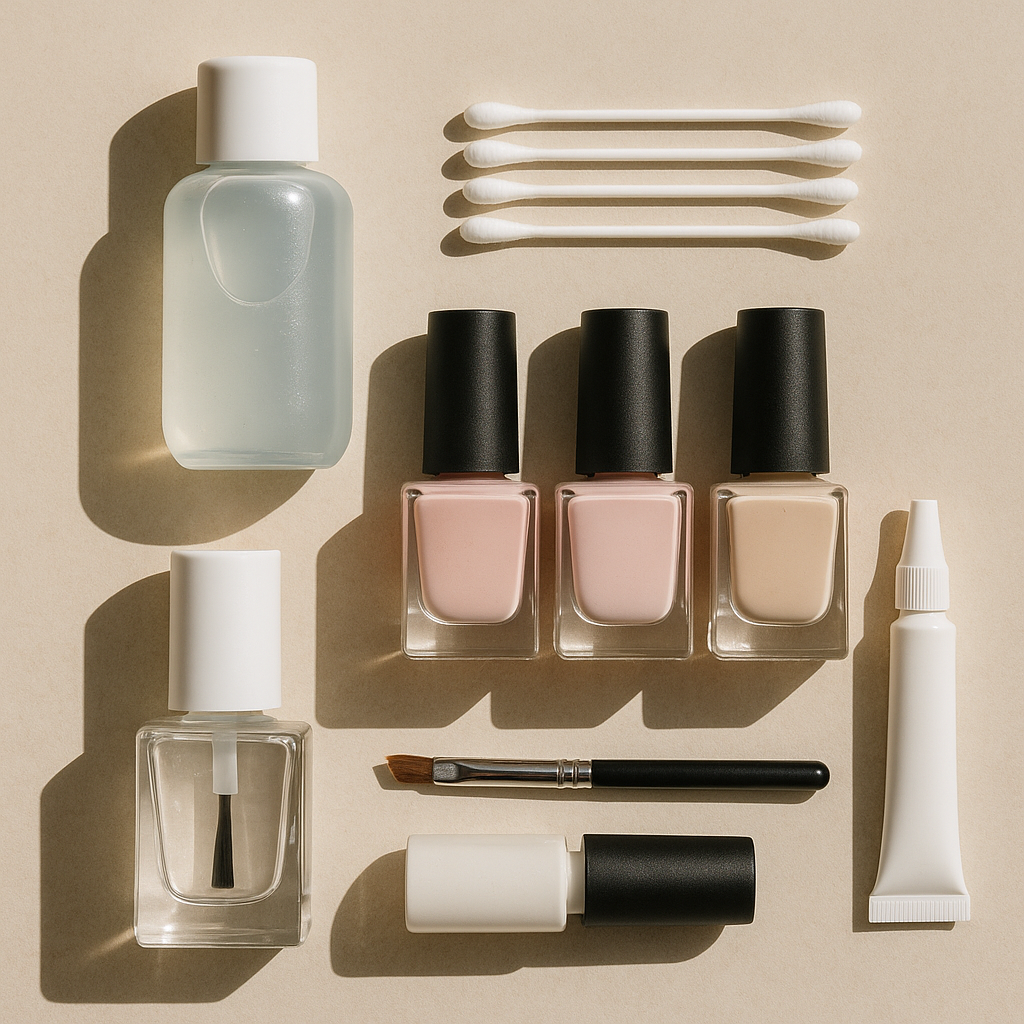
You’ll want:
- Nail polish
- Base coat
- Top coat
- Nail polish remover
- Cotton swabs or a small cleanup brush
- A paper towel or lint-free pad
- Optional barrier product such as petroleum jelly or liquid latex
- Optional fast-drying polish or a fast-drying top coat, if you want easier cleanup and less smudging
If you want a reference for the basic polish sequence, OPI’s polish application guide is a useful starting point. For a more beginner-oriented walkthrough, Manucurist’s nail polish application tips also follow the same control-first approach: thin coats, careful brush loading, and a centered stroke.
Prep Your Nails for a Cleaner Application
Clean prep matters because polish behaves better on a smooth, dry surface than on oils or skin buildup.
- Remove old polish fully.
- Wash and dry your hands.
- Gently push back the cuticles if needed.
- Wipe each nail with remover or a nail cleanser to remove surface oils.
Keep the prep gentle. You are not trying to scrape skin away; you just want the nail edge to look tidy so you have a clear border to paint against.
If your nails are very short, prep becomes even more useful because there is less free edge to work with. A clean cuticle line gives you a visual guide so you can stop just before the skin.
Choose Your Mess-Prevention Method
There are two broad ways to stay neat: block the skin before you paint, or clean the skin right after.
Here’s a quick comparison:
| Method | Best for | Precision | Ease for beginners | Cost | Trade-off |
|---|---|---|---|---|---|
| Petroleum jelly | Casual at-home manicures | Medium | Easy | Low | Can feel greasy and may interfere if it gets on the nail |
| Liquid latex | Cleaner barrier around the nail | High | Moderate | Moderate | Requires a separate product and a little setup |
| Cleanup brush | Fixing small mistakes precisely | High | Moderate | Low to moderate | Needs a steady hand and remover |
| Cotton swab | Simple cleanup | Medium to low | Very easy | Low | Can be too wet and smear polish |
A thin barrier can help if you are still learning brush control. wikiHow suggests petroleum jelly around each nail as a barrier, and that is a practical low-cost option when you want a little forgiveness. A liquid latex barrier is cleaner to remove, but it adds a step and may not be ideal if you want the simplest possible routine.
My practical rule: use a barrier if your main problem is repeated polish-on-skin mistakes; use a cleanup tool if the problem is occasional small slips. Many beginners do best with both.
How to Load the Brush Without Overloading It
Too much polish on the brush is one of the fastest ways to flood the cuticle.
The safest habit is to wipe excess polish off on the bottle neck before you touch the nail. Manucurist recommends removing extra polish from the brush on the edge of the bottle before applying, and that small step makes a real difference because the brush should carry enough product to glide, not drip.
A good beginner rule is this: the brush should look coated, not loaded. If polish is pooling near the ferrule or forming a bead that wants to slide, there is too much on the brush. You want a thin, even amount that can be spread in a few controlled strokes.
Think of it this way: cleaner strokes are the goal.
Step-by-Step: Apply Nail Polish Neatly
The simplest neat-application pattern is center first, then sides. That keeps the brush traveling where your eye can track it best.
1. Set the brush just above the cuticle
Place the brush close to the cuticle, but do not press into the skin. Leave a hairline gap at the cuticle. That small gap is what keeps the polish from flooding the cuticle area.
2. Pull one stroke down the center
Glide the brush from near the base toward the tip in one smooth motion. OPI recommends applying polish down the center first to avoid flooding the cuticle, then working down the sides.
3. Fill each side with one controlled stroke
After the center, use one stroke on each side to cover the remaining nail. Ella+mila also recommends a three-stroke approach: one in the center and one on each side. For beginners, that structure is easier to control than repeated back-and-forth brushing.
4. Keep the brush slightly angled
A slight angle can help the bristles follow the nail shape. If you hold the brush too flat, it can push polish toward the skin. If you hold it too upright, you may streak the color.
5. Stop before the sidewalls
Do not chase every last millimeter right up to the skin. A tiny border looks cleaner than a flooded sidewall, and it is easier to refine with cleanup tools than to remove polish from the skin after it has set.
6. Apply a second thin coat only after the first coat is mostly dry
Wait until the first coat is mostly dry, or no longer wet to the touch, before adding the next coat. Lights Lacquer’s guidance on neat application includes letting the nails dry between coats and avoiding direct contact with the skin. Thin coats are easier to control than one thick coat, and they reduce the chance of polish sliding into the cuticle area.
7. Finish carefully with the top coat
Top coat can drag color if the layer underneath is still too wet, so use the same light pressure and avoid overworking the brush.
If you want a deeper walkthrough of the basic sequence, you can also read how to apply nail polish correctly and how many coats of nail polish you should apply.
How to Paint Your Non-Dominant Hand Neatly
This is where most people lose control, so simplify the job.
Brace the painting hand against a table and keep the working hand relaxed. Move slower than you think you need to. The goal is not speed; it is a predictable stroke.
A few practical adjustments help:
- Rest your elbows on the table for stability
- Turn the hand slightly so you can see the cuticle line
- Use less polish on the brush than you would on your dominant hand
- Paint your four fingers first, then the thumb, so you are not twisting into awkward angles
- Use a barely damp cleanup brush for tiny mistakes instead of trying to repaint the edge
- Paint in shorter motions if a full-length stroke feels shaky
If your non-dominant hand is especially unsteady, choose thinner coats over trying to “fix” coverage with a heavy first pass. Heavy polish is harder to control, especially when your hand is already less steady.
How to Fix Polish on the Skin Before It Dries
Clean wet mistakes immediately. Waiting usually makes the cleanup wider and messier.
For a cleanup brush:
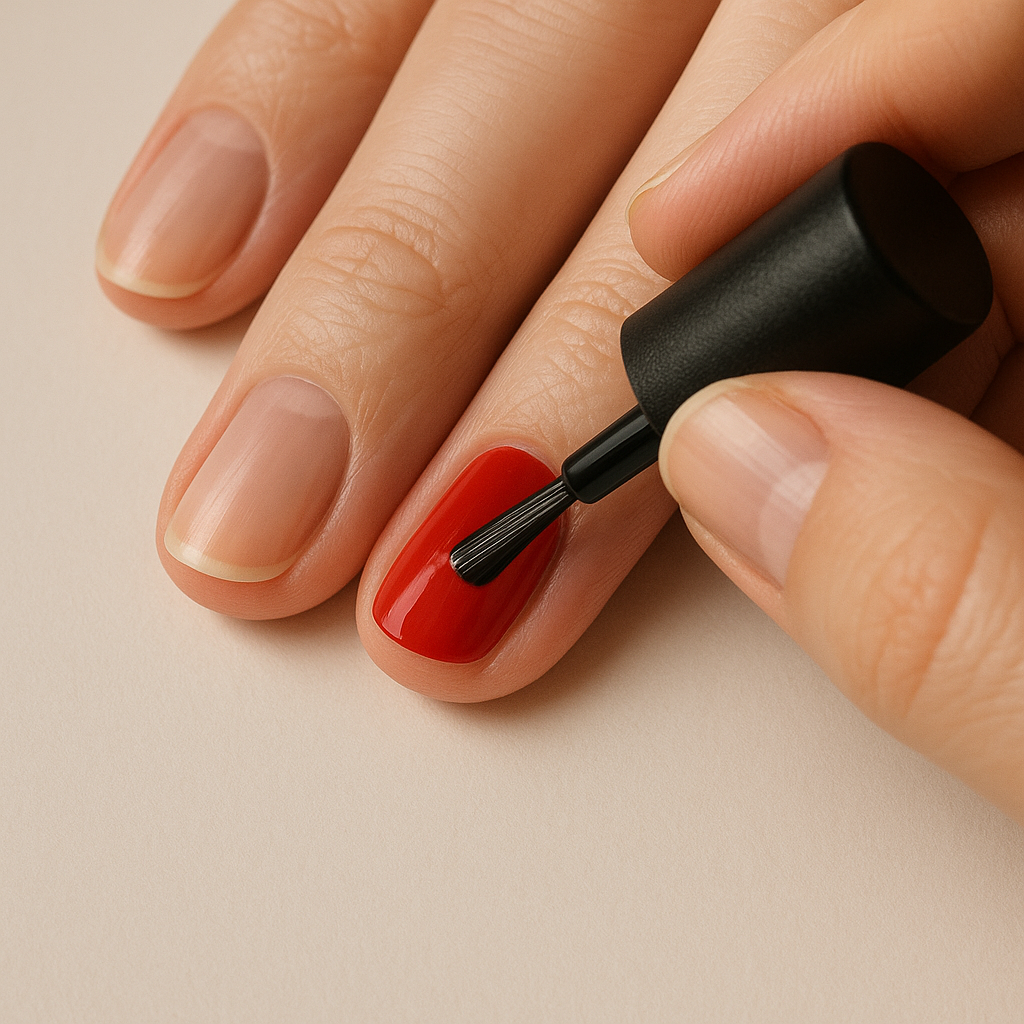
- Dip just the tip in nail polish remover.
- Wipe off the excess so the brush is barely damp, not dripping.
- Trace along the skin edge to lift away the stray polish.
- Wipe the brush on a pad and repeat as needed.
For a cotton swab, use less remover than you think. A soaked swab can spread polish around instead of removing it. Roll the swab lightly along the edge of the nail rather than scrubbing.
Here’s the trade-off: a cleanup brush gives you more control around the cuticle line, while a cotton swab is easier to grab if you are working with what you already have. If the mistake is tiny, a brush is usually cleaner. If the mistake is broad and still wet, a swab may be enough to get you back on track.
If you want to avoid remover during the manicure, a barrier method can help before you paint. If you want to correct mistakes after the fact, a cleanup tool is the better choice.
Common Mistakes That Cause Polish to Get on Skin
Most messy manicures come from a few repeat habits.
Thick coats
Thick coats pool near the cuticle and sidewalls. They also take longer to settle, which gives polish more time to creep.
Too much polish on the brush
This is the classic flood problem. If the brush is overloaded, the first stroke deposits too much color at once.
Brushing back and forth
Repeated passes push polish around instead of placing it neatly. One controlled stroke is usually cleaner than three corrective strokes.
Painting too close to the skin
Trying to “hug” the cuticle often leads to touching it. A tiny gap is safer and still looks neat.
Waiting too long to clean up
Once polish starts to set, cleanup can tug at the edge and make the line look rough. Fix wet mistakes right away.
Rushing the second hand
The non-dominant hand is where control usually slips. Slow down there on purpose.
Troubleshooting: If Your Polish Keeps Flooding the Cuticles
If this keeps happening, the issue is usually one of three things: too much polish, too much pressure, or too little spacing.
If the cuticle floods every time:
- Use less polish on the brush
- Start with the center stroke
- Leave a slightly wider gap at the base
- Keep the brush pressure light
- Switch to thinner coats
If the polish keeps reaching the sidewalls, your brush may be too full or your hand may be angled too flat against the nail. Reposition the hand so you can see the edges clearly before you touch the nail again.
If cleanup keeps smearing instead of fixing, your remover tool is probably too wet. Dampen it, then wipe the excess before touching the nail edge.
For more help with finish quality once the polish is on, how to apply nail polish without streaks pairs well with this guide.
Practical Examples of a Clean At-Home Manicure
A beginner with short nails might use petroleum jelly around the skin, then paint with a three-stroke pattern. The barrier gives a little backup while the brush technique improves.
Someone painting their non-dominant hand may do better with a cleanup brush nearby and a slower pace rather than trying to paint perfectly on the first pass. That keeps the manicure from turning into a rescue job.
If your nails are very short, you may need to be even more careful with the base area. OPI’s guidance to work down the center first is especially useful here because it helps you avoid flooding a small nail bed.
And if you are doing a quick at-home manicure before an event, the best strategy is usually thin coats, careful cleanup, and a careful top coat rather than trying to build full opacity in one heavy layer.
When to See a Nail Technician
If you have tried the same basic technique several times and still cannot keep polish off the skin, a nail technician can help you check whether the issue is brush size, hand positioning, or product choice. That is especially useful if your hands shake, your nails are very small, or your polish formula seems unusually runny.
A technician can also show you the stroke pattern in person, which is often faster than trying to correct the habit alone.
FAQs
How close should nail polish go to the cuticle?
Close, but not touching. Leave a tiny gap so the polish does not flood the skin. That gap usually looks cleaner than trying to press polish right up to the cuticle line.
Should I use a barrier or a cleanup brush?
Use a barrier if your problem happens before the polish touches the nail. Use a cleanup brush if you usually need to fix small mistakes after application. Many beginners like both.
Is petroleum jelly or liquid latex better?
Petroleum jelly is simpler and cheaper, but it can feel greasy and may interfere if it gets on the nail plate. Liquid latex is cleaner as a barrier, but it requires an extra product and a little more setup.
How much polish should I put on the brush?
Enough to cover the nail in a few smooth strokes, not enough to bead or drip. If the brush looks heavily loaded, wipe some polish off on the bottle neck first.
Should I clean mistakes immediately or wait?
Clean them immediately. Wet polish is easier to remove cleanly. Once it starts drying, cleanup can drag the edge and make the line look less neat.
What if I keep getting polish on my dominant hand?
Slow down, brace your elbows, and use less polish on the brush. The dominant hand is usually steadier, so if it still gets messy, the issue is often overload rather than hand control.
For a related finishing step, see how to dry nail polish without smudging so your neat application stays neat after you finish.

