
Does UV Light Dry Regular Nail Polish? A Beginner’s Guide to the Right Drying Method

If you’re using regular nail polish, the short answer is this: a UV or LED lamp is not an effective or necessary way to dry it the way it dries gel polish. Regular polish usually sets by air-drying as its solvents evaporate, while gel polish is made to cure under a lamp.
That matters because a nail can feel “set” on top long before it is fully dry underneath. If you put regular polish under a UV or LED lamp and assume it is ready, you may still end up with dents, smudges, or sheet marks later.
As a licensed nail technician, I like to keep this simple: use the drying method that matches the polish type. If your bottle says regular, classic, or air-dry polish, plan on air-drying and use quick-dry helpers if you want to speed things up. If it says gel or lamp-cured, then a compatible lamp is part of the process.
Quick Answer: Does UV Light Dry Regular Nail Polish?
No, not in the same way it dries gel polish.
Regular nail polish is designed to dry on its own. A UV lamp does not turn it into a gel manicure, and it usually won’t give you the fully hardened finish people expect from lamp-cured products. The practical takeaway is simple: if you’re wearing regular polish, let it air-dry and use drying aids made for regular formulas.

If you want a deeper breakdown of drying times, you may also find how long regular nail polish takes to dry helpful.
Drying vs. Curing: The Simple Difference
Beginners often use “dry” and “cure” as if they mean the same thing, but they do not.
Drying usually refers to a polish losing its solvents and becoming firm enough to touch without smearing. That happens as the product sits in open air.
Curing is different. Gel polish is made with ingredients that harden when exposed to the right light. In other words, the lamp is part of the formula’s setting process.
A simple way to think about it:
- Regular polish = air-dry
- Gel polish = lamp-cure
That difference is the reason a UV lamp is not a universal shortcut for every manicure. If you use the wrong method, the polish may look fine for a moment but still stay soft underneath.
Why UV or LED Lamps Don’t Work the Same on Regular Polish
A nail lamp is designed for formulas that react to light. Regular polish is not built that way.
So what happens if you put regular polish under a lamp? It may only change how the surface feels for a moment, but it does not properly dry the polish through the layers.
That false sense of dryness is the real problem. You may touch your nails, press them into fabric, or pick up a bag too soon, then discover the manicure dents easily.
This is why I tell beginners not to treat a lamp like a universal “drying machine.” If your polish is not labeled for lamp curing, the safer and more reliable choice is to air-dry it.
For a broader explanation of polish timing, see how long nail polish takes to dry completely.
Regular Nail Polish vs. Gel Polish: What Changes the Drying Method
Here’s a quick comparison that helps clear up the confusion.
| Feature | Regular Nail Polish | Gel Polish | Hybrid / “Gel-like” Polish |
|---|---|---|---|
| Drying method | Air-dries | Cures under UV or LED lamp | Depends on the formula |
| Lamp needed? | No | Yes | Sometimes |
| Smudge risk right after application | Higher | Lower after curing | Varies |
| Removal | Usually remover-based | Often requires gel-specific removal steps | Varies by brand |
| Best for beginners who want simple application | Yes | Only if you want lamp curing | Read the label carefully |
The most useful rule is this: follow the label on the bottle, not the look of the polish. Some products look glossy and salon-like but still dry like standard polish. Others are true gel formulas and need a lamp.
If you’re comparing product types, it can help to look for specific wording. For example:
- Regular polish labels: “nail polish,” “classic polish,” “air-dry,” or “fast-dry”
- Gel labels: “gel polish,” “soak-off gel,” “UV/LED cure,” or “cures under lamp”
- Hybrid clues: phrases like “gel effect,” “gel-like shine,” or “hybrid formula” can be marketing terms, so check whether the directions actually say to cure under a lamp
If the instructions say to cure under UV or LED light, that is the clearest sign it is not standard air-dry polish.
If you’re comparing product types, it can help to think about your routine. Regular polish is easier to remove and simpler to use. Gel polish is more specialized and only makes sense if you want lamp curing and are willing to follow the full gel process.
What Happens If You Put Regular Polish Under a UV Lamp?
Usually, nothing useful enough to rely on.
If you already put regular polish under a lamp, stop relying on the lamp and let the manicure air-dry fully. Avoid pressure, rubbing, or heavy use until the polish has hardened on its own.
The bigger issue is that you may think your nails are ready when they are not. That can lead to:
- dents from clothing or bedding
- streaks from touching the surface too early
- chips from stacking layers before the first coat has settled
A lamp can also tempt you to skip normal drying habits, which is where many smudges happen. If you’re using regular polish, the safer move is to let it air-dry and use a quick-dry top coat if needed.
For readers who want a faster set time without switching to gel, quick-dry nail polish methods are worth a look.
How Long Regular Nail Polish Usually Takes to Dry
Regular polish often feels dry on the surface before it is fully dry underneath.
A practical beginner estimate is:
- Touch-dry: often about 5 to 15 minutes for a thin coat
- Safer to handle lightly: often around 20 to 30 minutes
- Fully dry / hardened enough for normal use: often 1 to 2 hours, sometimes longer with thicker coats
That distinction matters. A nail may be light-touch dry in a few minutes, but still be soft enough to dent if you press on it or use your hands normally. Thicker coats take longer. Darker or more heavily pigmented shades can also feel slower to set because people often apply them too generously.
A practical beginner rule:
- Thin coats dry faster
- Thick coats stay vulnerable longer
- Top layers may feel dry before the lower layers do
If you want a manicure that behaves better sooner, focus on thin, even coats instead of trying to “fix” drying time with a lamp.
The Fastest Safe Ways to Dry Regular Nail Polish at Home
If you want regular polish to set faster, use methods that actually help the formula dry.
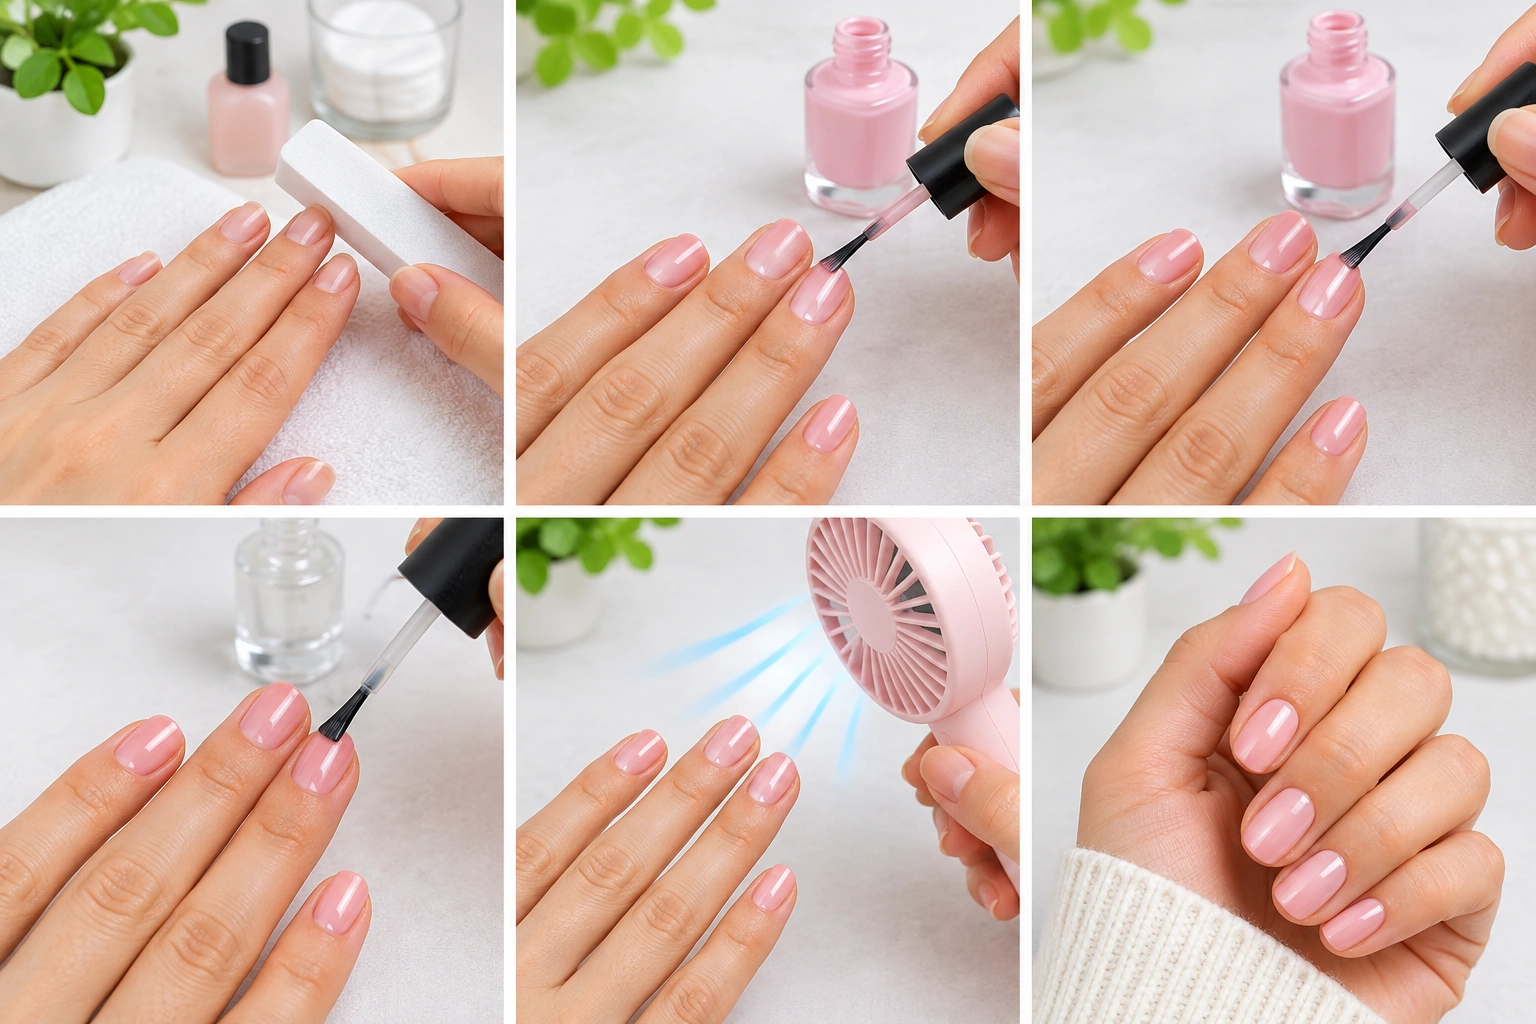
1. Apply thinner coats
This is the simplest improvement and usually the most effective. Two or three thin coats dry more reliably than one heavy coat. Each layer has less product to lose, so it sets faster and is less likely to wrinkle.
2. Give each coat a little breathing room
Wait until the previous layer is mostly settled before adding the next one. You do not need to wait forever, but rushing coat after coat can trap wet polish underneath.
3. Use a quick-dry top coat
A quick-dry top coat can help regular polish set sooner and reduce smudging risk. It is one of the best choices if you want regular polish but less waiting time.
4. Add gentle airflow
A fan or open room air can help regular polish dry more comfortably than still, humid air. Keep it gentle. Strong air can sometimes disturb the surface if the polish is still very wet.
5. Avoid water, heat, and heavy hand use right away
Even if your nails feel dry, treat them carefully for a while. Don’t wash dishes, take a hot shower, grab tight clothing, press into pillows, or dig through a bag immediately after painting.
A useful rule of thumb: if the manicure still leaves a mark when you lightly press it, it needs more time.
How to Tell Whether Your Polish Is Regular, Gel, or Hybrid
If you’re unsure what you bought, check the label first. The bottle usually tells you a lot.
Look for these clues:
- Regular polish: says “nail polish,” “color,” or “classic”
- Gel polish: says “gel,” “soak-off gel,” or “cures under LED/UV”
- Hybrid or gel-like polish: may mention both polish and gel features, but still needs label checking
Also look at the instructions. If the brand tells you to cure under a lamp, that is a strong sign it is not standard air-dry polish.
When in doubt, do not guess. Using the wrong drying method can leave you with a manicure that seems finished but behaves like it is still wet.
For more basics on drying behavior, how long nail polish takes to dry is a useful companion guide.
Simple Decision Guide: Use Air-Drying, a Lamp, or a Quick-Dry Product
Here is the easiest way to choose:
Use air-drying if:
- your polish is regular nail polish
- the bottle does not mention curing
- you want the simplest, most beginner-friendly method
Use a lamp if:
- the polish is clearly labeled gel
- the brand says it cures under UV or LED light
- you are following the full gel system, including removal instructions
Use a quick-dry product if:
- you are wearing regular polish but want it to set faster
- you want less smudging risk without switching to gel
- you prefer a simple at-home manicure routine
That decision tree keeps things practical: match the drying method to the formula, not the other way around.
Common Mistakes That Make Regular Polish Smudge
A lot of beginner frustration comes from a few avoidable habits.
Applying polish too thickly
This is the biggest one. Thick coats take longer to dry and are easier to dent. If the bottle looks streaky, it is usually better to add another thin coat than to pile on one heavy layer.
Assuming the top is the whole nail
A polish can feel dry on the surface while the lower layers are still soft. That is why a manicure can seem fine for a few minutes and then get ruined by a blanket, zipper, or hair tie.
Using a lamp as a shortcut
If your polish is not made for lamp curing, the lamp can create false confidence. You may think you are safe to continue with your day when the manicure still needs normal drying time.
Touching nails too soon
Even careful touch-testing can leave tiny marks. If you need to check, do it very lightly and only after giving the polish a reasonable amount of time.
When to See a Nail Technician or Dermatologist
See a nail technician if you are unsure whether a product is regular, gel, or hybrid, or if your manicure keeps smudging no matter what drying method you use. A technician can help you read the label, pick the right base and top coat, and match the polish to your routine.
See a dermatologist if you notice ongoing nail irritation, discoloration, or a reaction after using polish or lamp-cured products. That is less about drying and more about making sure your nails and skin are okay.
The Bottom Line
UV light does not dry regular nail polish the way it cures gel polish, and it is not a reliable or necessary drying method for standard air-dry formulas. If you are using regular polish, the best approach is still air-drying plus smarter habits like thin coats, a quick-dry top coat, and a little patience. Once you know which formula you have, choosing the right drying method becomes much easier.

