
Easy Nail Art for Teens: 5 Safe, Beginner-Friendly Designs for School and Weekends

If you’re a teen scrolling through nail art ideas, or a parent trying to figure out which options won’t wreck young nails, the good news is you don’t need a professional setup. The designs in this guide use regular polish, short natural nails, and tools you probably already have in a bathroom drawer or craft box. You’ll finish with five beginner-friendly looks, a simple supply list, and a plan for making them last without damaging the nails underneath.
Start Here: What Safe, Beginner-Friendly Nail Art Looks Like for Teens
A simple rule for families is this: for beginner teen nail art, stick with regular nail polish on natural nails. Skip gel, dip powder, acrylic, and UV lamps for now. Many young nails can be softer and more flexible than adult nails, and those systems usually need stronger removers or more aggressive prep. Regular polish, a gentle base coat, and an acetone-free remover let you experiment with less risk and fewer supplies.
Press-ons are sometimes used as a temporary middle ground if you want a length or shape change, but they aren’t automatically damage-free. Strong adhesive glues can be rough on young or flexible nails, especially if removed by prying or peeling. If you try them, choose adhesive tabs for short wear, remove them gently, and avoid applying glue to the nail plate. For this guide, the focus stays on regular polish art because it’s the easiest place to learn technique and fix mistakes.
Minimal Starter Supplies and Household Swaps
You don’t need a 30-piece kit. Start small. Here’s what actually matters:
- A base coat
- A top coat
- Two or three regular polishes you like
- Acetone-free remover
- Cotton pads or a small cleanup brush
- A nail file
That’s enough for every design in this guide. For tools, you can borrow from around the house before buying anything specialized. A bobby pin or toothpick makes a fine dotting tool. A pencil eraser gives you a larger dot. Painter’s tape or nail striping tape creates crisp lines. A small wedge makeup sponge works for gradient looks, and petroleum jelly or tape protects the skin around the nail.
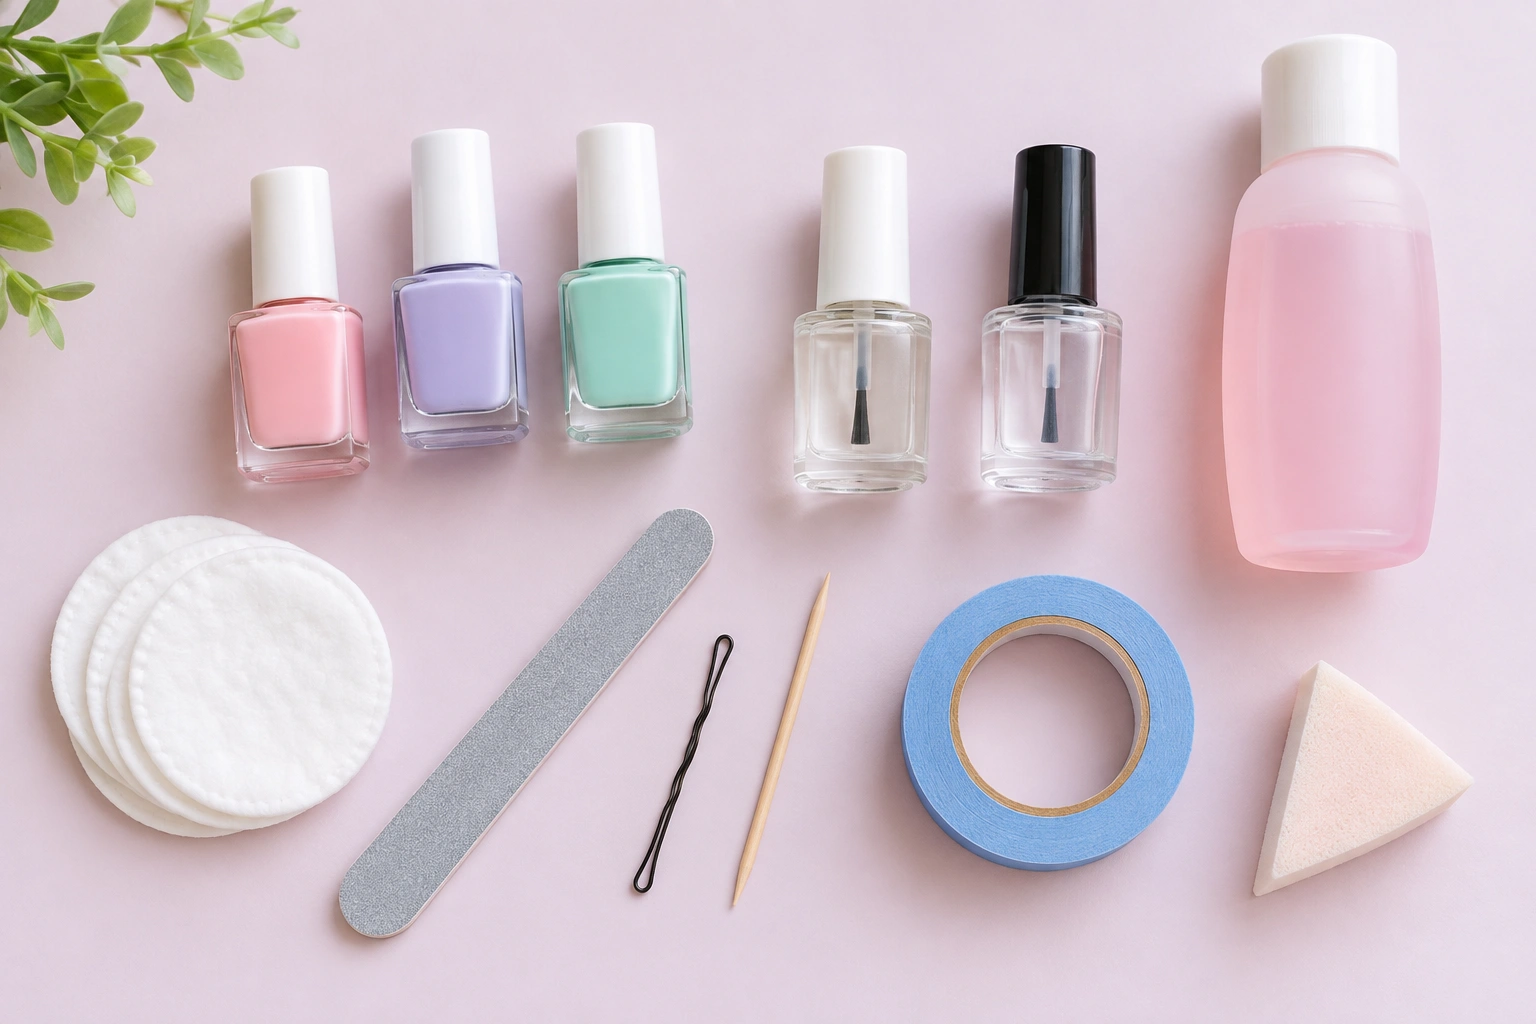
When it comes to buying a beginner kit versus individual items, individual bottles usually win for two reasons: you control the formula, and you avoid paying for tools you don’t need. Some kits include gel polishes or tiny brushes that sit unused. If a kit is tempting, check the contents and make sure it’s regular polish and simple tools you’ll actually use.
Choosing Teen-Safe Polish and Remover: What Labels Like 5-Free and Acetone-Free Actually Mean
Polish labels can feel like code. Here’s the quick translation: “5-free,” “7-free,” and “10-free” usually mean the formula is made without a certain number of solvents or ingredients like formaldehyde, toluene, and DBP. Fewer harsh solvents can be a plus, but the number alone doesn’t make a polish automatically non-toxic or safe for everyone. It also doesn’t tell you how the polish will wear. Teens and parents can read the label, choose a brand that’s open about its ingredients, and test a small area if there’s any history of sensitive skin.
Water-based or peel-off polishes can be especially good for younger tweens because they tend to come off more gently. The trade-off is that they may chip sooner, so they work well for weekend play rather than a whole school week.
For remover, think about the mess and the time. Acetone works fast, especially on glitter or stickers, but it’s harsher on nails and skin. Acetone-free remover is gentler but slower, so you might need to hold a soaked cotton pad on the nail for a minute before wiping. For most teen nail art, start with acetone-free and keep acetone only for occasional stubborn glitter.
One thing that surprises parents: the U.S. Food and Drug Administration doesn’t pre-approve most cosmetic products before they go on sale, though color additives are regulated separately. That’s why label reading and following the manufacturer’s instructions matter as much as the marketing claims.
Nail Prep and Base Coat First: The Longwear Foundation
Prep is the step most beginners skip because it’s boring. It’s also the step that makes the biggest difference in how long your design lasts and whether your natural nails stain. Here’s a sequence that works well for beginners:
- Wash your hands and wipe each nail with a little remover on a cotton pad. That removes oil and lotion that would keep polish from sticking.
- File gently in one direction only, shaping to your natural nail. Avoid filing back and forth aggressively, especially on thinner teen nails.
- Don’t cut your cuticles. They protect the nail from bacteria and fungus. If they’re puffy, gently push them back with a soft towel or a cuticle pusher after a shower, but skip the nippers.
- Apply a thin base coat and let it dry completely. Base coat stops dark colors from staining the nail and gives polish something to hold onto.
If you’re curious about whether a dedicated prep kit adds enough benefit to be worth it, this review of the Beetles Nail Prep Kit walks through what’s actually inside and who it’s for. Most beginners don’t need one on day one, but a basic kit can be a nice upgrade once you’re painting regularly.
5 Easy Nail Art Designs at a Glance: Skill Level, Time, and School-Safe Status
Before you pick a design, think about two things: how much time you actually have, and whether it needs to pass a school dress code. The table below sorts the five designs in this guide so you can scan and choose.
| Design | Skill Level | Approx. Time | Tools | School-Safe? |
|---|---|---|---|---|
| Dot Daisies or Dotticure Accent Nails | Easiest | 15 min | Bobby pin or toothpick, 2–3 polishes | Yes, with softer colors |
| Tape Stripes and Color Blocks | Easy | 20 min | Painter’s tape or striping tape, 2 polishes | Yes, subtle combos |
| Sticker or Decal Accent Nails | Fastest | 10 min | Nail stickers or decals, top coat | Yes, pick simple designs |
| Sponge Gradient or Ombre Tips | Medium | 30 min | Makeup sponge, 2–3 polishes, tape or petroleum jelly | Weekend-only if bold |
| Simple Painted French Tips | Medium | 25 min | Tape or nail art pen, 1–2 polishes | Yes, classic neutrals |
Quick comparison for beginners: hand-painted designs like dots, stripes, and French tips build brush and tool control and are easy to fix with regular polish; stickers and decals are the fastest option and need no drawing skill, but can lift at the edges if not sealed well; press-ons offer temporary length or shape, but strong adhesives can be rough on young nails, so adhesive tabs and gentle removal are safer than strong glue. For a first project, hand-painted dots or sticker accent nails are usually the gentlest starting points.
If this is your first time, choose the dot or sticker designs first. Save the gradient for a weekend afternoon when you can go slowly.
Design 1: Dot Daisies or Dotticure Accent Nails (15 Minutes, Easiest)
Dots are forgiving because you can correct them without wiping off the whole nail. If a dot lands in the wrong spot, you can often turn it into a bigger flower or wipe just that dot with a dampened tool.
Steps:
- Paint one or two thin coats of your base color and let them dry completely.
- Dip the rounded end of a bobby pin or the tip of a toothpick into polish. Tap it gently on the nail to make a small dot.
- For a daisy, place five small dots in a circle with one color, then add a contrasting dot in the middle.
- Leave the design on just one or two accent nails to keep it quick and school-friendly.
- Let the dots dry until they’re no longer tacky, then seal with a thin top coat, dragging it lightly so you don’t smear the dots.
If you smudge a dot, don’t panic. Re-dip your tool in polish and make it into a slightly larger flower center or a tiny heart. Mistakes become features when you build on them.
Design 2: Tape Stripes and Color Blocks (20 Minutes, Easy)
Tape gives you straight lines without needing a steady hand. Painter’s tape is gentle on the nail and easy to trim with small scissors.
Steps:
- Paint your base color and let it dry completely. This matters: if the base is even slightly tacky, the tape will lift it when you pull it away.
- Cut thin strips of tape and press them onto the nail in the pattern you want — diagonal stripes, a half-and-half color block, or a chevron.
- Paint the exposed area with a second color. Keep the coat thin.
- While the second color is still slightly wet, carefully peel the tape away. Removing it before that layer dries helps keep the edges crisp rather than jagged.
- Let the design set for a few minutes, then seal with top coat.
Two-color stripes on a single accent nail usually stay tasteful enough for school. Three neon colors? Save that for a weekend sleepover.
Design 3: Sticker or Decal Accent Nails (10 Minutes, Fastest)
Some mornings don’t allow time for dried layers and cleanup. Nail stickers, decals, and simple press-on accents handle those days well.
Steps:
- Apply a base color if you want one, or leave nails bare.
- Choose a nail sticker or decal that fits your nail. On short nails, smaller decals tend to sit better than oversized ones.
- Press the decal onto the nail with the flat end of a toothpick or your fingertip, smoothing from the center outward to avoid air bubbles.
- Seal the edges with a thin top coat. This is the step that keeps the sticker from peeling later.
- If a decal wrinkles, try sliding it gently with a damp fingertip or remove it before top coat and start over with a fresh one.
The beauty of stickers is that they’re fast, and if a design doesn’t fit your nail, you haven’t spent twenty minutes on it. Keep a small pack in your bag for last-minute school mornings.
Design 4: Sponge Gradient or Ombre Tips (30 Minutes, Medium)
Gradients look impressive, but the technique is really just dabbing. The key is protecting the skin around the nail, because sponging gets messy.
Steps:
- Paint a light base color and let it dry.
- Before sponging, put a thin layer of petroleum jelly on the skin around your nail, or place small pieces of tape on the skin. This catches excess polish.
- Paint two or three colors in stripes directly onto a makeup sponge — light at the top, medium in the middle, darker at the tip.
- Dab the sponge onto the nail a few times with a light bouncing motion. Re-ink the sponge as the colors fade.
- Build the color in thin layers, letting each pass dry slightly. Thick, wet sponging causes streaks and pooling.
- Remove the tape or wipe away the petroleum jelly with a cotton swab dipped in remover.
- Seal with top coat using a light hand so the gradient doesn’t smear.
This is a weekend design for most teens, both for the time and because bold gradients sometimes read as too much for a classroom. Sheer, pastel gradients can pass school dress codes if you keep them soft.
Design 5: Simple Painted French Tips with Tape or a Nail Art Pen (25 Minutes, Medium)
French tips on short nails can look clunky if they’re thick bands. The goal is a thin line at the free edge. Tape gives you a guide; a nail art pen gives you control.
Steps:
- Apply a sheer pink or neutral base and let it dry.
- Option A: Place a curved piece of tape just below the free edge so only the tip shows. Paint the tip with white or another soft color. Remove the tape while the tip polish is still slightly wet.
- Option B: Use a nail art pen or thin polish brush to draw a thin line across the tip, following your natural smile line.
- Clean up any wobbles with a small brush dipped in acetone-free remover.
- Seal with top coat.
If you want a twist, paint just the tips of two accent nails in a pastel color, or use tape to create a diagonal tip rather than a classic curve. This design works surprisingly well on short nails because the line is thin and doesn’t overwhelm the nail bed.
Once you feel confident with these designs, try translating a favorite look into a simpler at-home version: pick one accent nail, limit yourself to two or three colors, and use tape or a bobby pin for fine details. That makes detailed nail art easier to practice on short natural nails without extra tools.
Drying, Sealing, and Making It Last Through the Week
The biggest enemy of teen nail art is impatience. Thick coats feel faster but take far longer to dry and smudge more easily. Thin coats, with a two- to five-minute wait between layers, will save you more time than they cost.
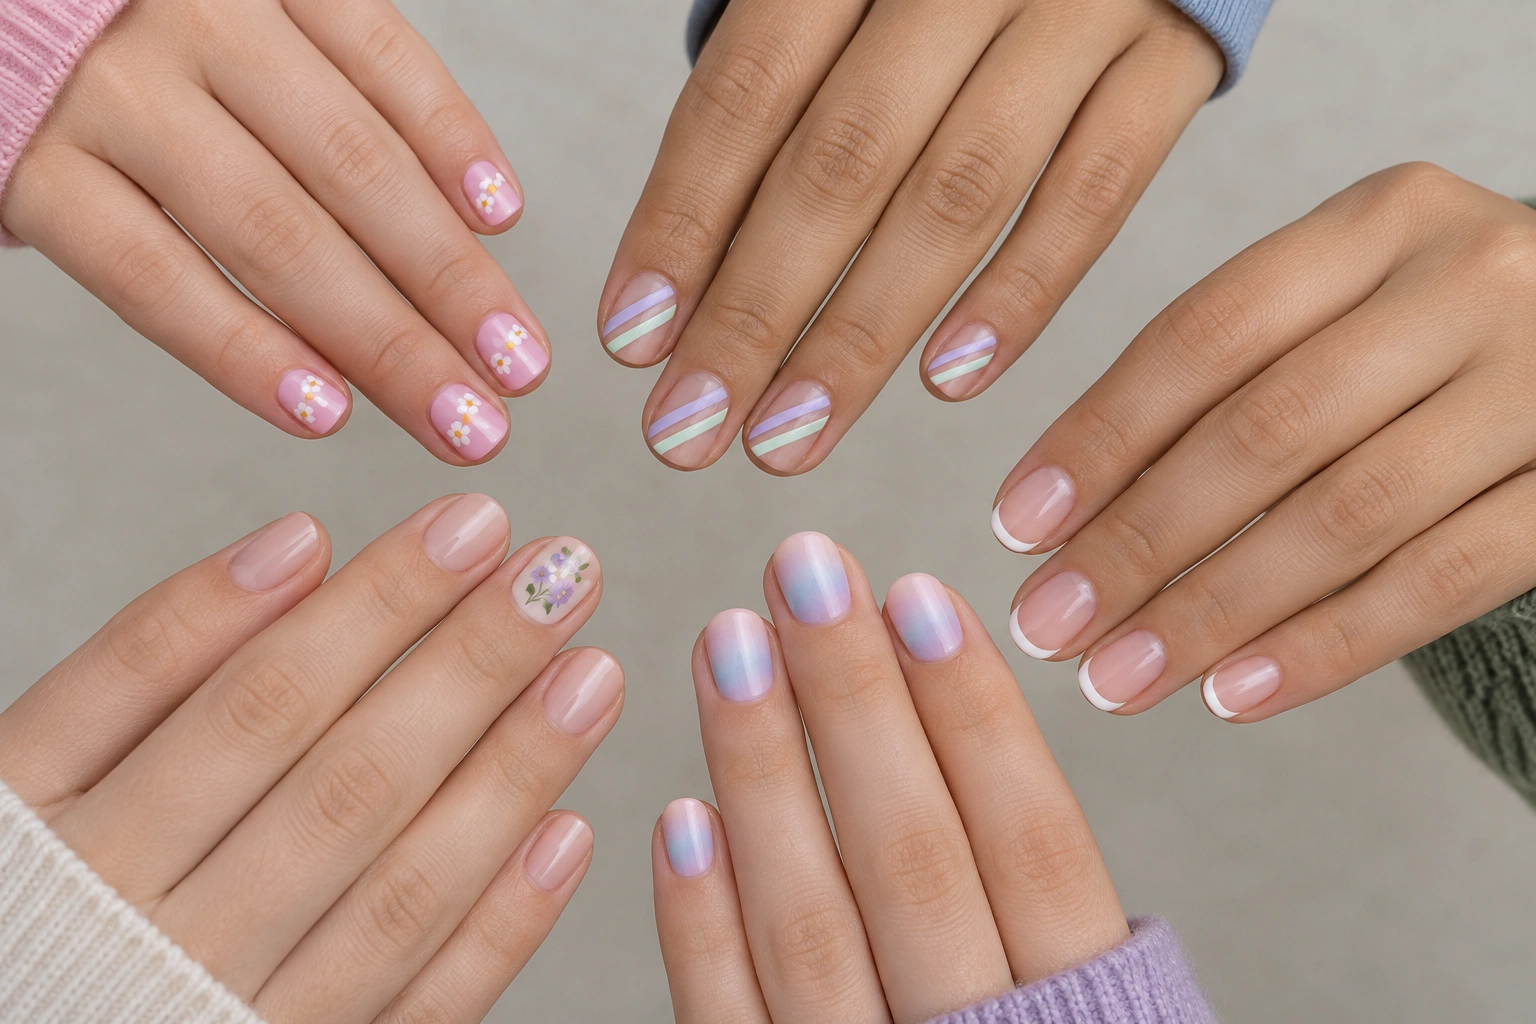
Once the design is finished, run top coat across the free edge of the nail. That edge seal is where chips usually start. Quick-dry drops or spray can speed the process, but apply them lightly; too thick a quick-dry top coat can shrink or streak a design.
For longer wear on natural short nails, reapply a thin top coat every two to three days. This doesn’t just add shine — it reinforces the edges that get bumped by backpacks, phones, and sports.
Fixing Smudges, Streaks, and Small Mistakes Without Starting Over
Smudges happen. Here’s how to handle the most common ones:
- Smudged dot: Dip your dotting tool in polish again and turn it into a slightly larger dot or a tiny flower. Don’t try to dab remover on a still-wet nail; you’ll smear more.
- Uneven tape line: After removing the tape, use a small brush dipped in acetone-free remover to tidy just the edge. If the line is still too uneven, a thin stripe of a third color can cover the wobble.
- Stray polish on skin: Let it dry, then wipe with a cotton swab and remover. Doing it while wet spreads the color.
- Streaky gradient: The usual cause is too much polish on the sponge or dabbing too hard. Build your next layer thinner and bounce the sponge more gently.
If a whole nail looks off, wiping it clean before top coat is easier than fixing it after. But most small flaws disappear under a layer of top coat and arm’s length.
Gentle Removal and Aftercare for Teen Nails
Every manicure ends at some point, and how you remove it matters more than how you applied it. Peeling polish off with your fingers tears the top layer of the nail and can leave white patches that take weeks to grow out.
Here’s a removal method that balances effectiveness with gentleness:
- Soak a cotton pad with acetone-free remover.
- Press it onto the nail and hold for about a minute.
- Wipe softly in one direction. For glitter or stickers, hold the pad on for a couple of minutes before wiping.
- Repeat as needed rather than scrubbing aggressively.
Peel-off base coat is another option, especially for glitter-heavy weekend looks. The trade-off: designs lift sooner, sometimes within a day or two, so it’s not your best pick for a full school week.
After removal, wash your hands and massage a little hand cream or cuticle oil into the nails and surrounding skin. If nails look thin or flaky after a few weeks of manicures, take a break for a week or two and let them recover. Constantly painting over stressed nails doesn’t give the nail plate time to rehydrate.
For broader guidance on nail health and what’s normal as nails grow, the American Academy of Dermatology offers practical, parent-friendly resources. Most teen nail issues are cosmetic and temporary, but persistent changes deserve a closer look.
When to See a Pediatrician or Dermatologist
Temporary staining, light ridges, or a small chip are normal. Persistent green or brown discoloration, nails lifting away from the nail bed, ongoing pain, or skin that’s red, swollen, or oozing are not. Those can signal an infection or other condition that shouldn’t be coated over with polish. A pediatrician or dermatologist can assess the issue safely.
School-Friendly vs Weekend-Only: Choosing Designs That Won’t Get Flagged
The easiest school-safe rule? Choose softer colors and limit art to one or two accent nails. Sheer pinks, nudes, light blues, lavender, and baby yellow almost always fit under a typical dress code. Skip chrome, extreme glitter, 3D charms, and very long press-ons if your school has an explicit nail policy.
Think of it as a visual test: if a design draws attention from across the room, it’s probably weekend wear. Dots, thin stripes, small decals, and classic French tips pass easily. A bold neon gradient or glitter-drenched look can wait for Friday night.
For more specific school-friendly ideas — including lengths, colors, and shapes that stay neat all week — this guide to simple nails for school breaks it down. The short version: when in doubt, go slightly more sheer and keep the design on an accent nail rather than all ten.
Common Mistakes to Skip for Longer-Lasting, Healthier Nails
Here’s the quick checklist of common beginner mistakes:
- Applying thick coats to save time. Thick layers trap wet polish under a dry surface and smudge hours later.
- Skipping base coat. You set yourself up for stained nails and chips at the edges.
- Pressing tape or stickers onto wet polish. Always let the layer underneath dry fully first.
- Peeling off polish or scraping glitter with a metal tool. That’s how you weaken the nail plate.
- Jumping to gel, dip, or acrylic before learning regular polish. Those systems come with steeper learning curves and harsher removal.
- Over-filing or filing back and forth hard. On thinner teen nails, gentle one-direction filing prevents splitting.
If you make one change, let it be this: slow down between layers. Most smudges and impatient mistakes come from rushing the dry time.
Frequently Asked Questions About Easy Nail Art for Teens
Can I do these designs without a UV lamp or special tools?
Yes. Every design in this guide uses regular polish and either household items like bobby pins, tape, and a makeup sponge, or low-cost supplies like nail stickers and a top coat. No UV or LED lamp is involved.
What polish is safe for a 12-year-old?
Look for polishes labeled for kids or described as water-based, peel-off, or formulated without common harsh solvents. Labels like 5-free or 7-free can help, but they aren’t a guarantee, so check the ingredient list and do a small patch test if skin is sensitive.
How do I make nail art last longer on short nails?
Start with clean, dry nails and a base coat, use thin layers, seal the free edge with top coat, and reapply top coat every two to three days. Short nails tend to chip less than long ones, but the free edge still needs protecting.
How do I fix a smudge without redoing the whole nail?
For a smudged dot or small design, turn it into a bigger shape — a larger dot, a flower, or a tiny heart. For stray polish on skin, wait for it to dry and then wipe with a cotton swab and acetone-free remover.
Can I wear press-on nails if I’m a teen?
Press-ons can be a short-term option, but for younger tweens, strong adhesive glues can be rough on still-growing nails. If you go the press-on route, choose adhesive tabs for temporary wear and remove them gently rather than prying or peeling. For most beginners, stickers and decals on natural nails are the safer starting point.

