
Nails Feel Dry After Nail Dehydrator? Causes, What’s Normal, and What to Do

Quick Answer
If your nails feel dry after nail dehydrator, a temporary dry, matte, or slightly chalky appearance is usually expected because the product removes surface oil and moisture before gel, acrylic, or other enhancements are applied. However, persistent burning, redness, pain, peeling, or cracking deserves more attention, and you should follow the product directions and the FDA’s nail product safety guidance.
What to check
- Temporary matte look: Normal nail dehydrators intentionally leave the natural nail looking dry before product application.
- No burning: Dryness should not feel like a chemical burn or produce increasing pain.
- Skin stays comfortable: Red, cracked, swollen, or irritated skin around the nail suggests more than simple dehydration.
- One thin application: More dehydrator does not automatically create better adhesion and can increase unnecessary solvent exposure.
- Moisturize later: Avoid oils immediately before gel or acrylic, but moisturize nails and cuticles after the service when appropriate.
Stop and reassess if
- You develop burning, swelling, a rash, significant pain, worsening splitting, or another unusual reaction.
Nails feel dry after nail dehydrator for a simple reason: dryness is part of what the product is designed to create. A dehydrator temporarily removes surface moisture and oils so nail products can grip the natural nail plate more effectively.
I still treat “dry” and “damaged” as two different things. In this guide, I’ll show you how to tell the difference, what to do next, and how to prep nails without unnecessarily stressing them.
In This Guide
- Is It Normal for Nails to Feel Dry After Nail Dehydrator?
- Why Does Nail Dehydrator Make Nails Feel So Dry?
- How Can You Tell Normal Dryness From Nail Damage?
- What Should You Do When Your Nails Feel Dry?
- How Can You Use Nail Dehydrator Without Over-Drying?
- Nail Dehydrator vs Primer, Alcohol, and Acetone
- When Should You Stop Using Nail Dehydrator?
- A Gentler Nail-Prep Routine for Dry Nails
- Frequently Asked Questions
Is It Normal for Nails to Feel Dry After Nail Dehydrator?
Yes. A temporarily dry, matte, or less shiny nail surface is normally consistent with what nail dehydrator is meant to do.
A nail dehydrator is a nail-prep liquid designed to remove surface moisture and oil from the natural nail plate. This creates a cleaner surface for compatible gel, acrylic, dip, press-on, or other nail systems.
What normal dehydration looks like
The nail may lose its natural shine shortly after application. Some formulas can also make it appear slightly pale or chalky until the next product is applied.
- Matte surface: The nail no longer looks oily or glossy.
- Fast evaporation: The liquid disappears instead of remaining wet like polish.
- No significant pain: The nail may feel dry, but it should not feel intensely painful.
- No worsening redness: Surrounding skin should not become increasingly inflamed.
The effect is temporary. Your natural nail contains water, and normal moisture eventually returns toward the surface.
Dry does not automatically mean damaged
This distinction matters. A temporarily dry-looking nail after preparation is different from a nail that becomes thin, flaky, sore, cracked, or persistently brittle.
When I evaluate a nail-prep routine, I look at the whole process rather than blaming one product immediately. Aggressive buffing, frequent removal, repeated acetone exposure, and picking enhancements can all contribute to dryness.
Why Does Nail Dehydrator Make Nails Feel So Dry?
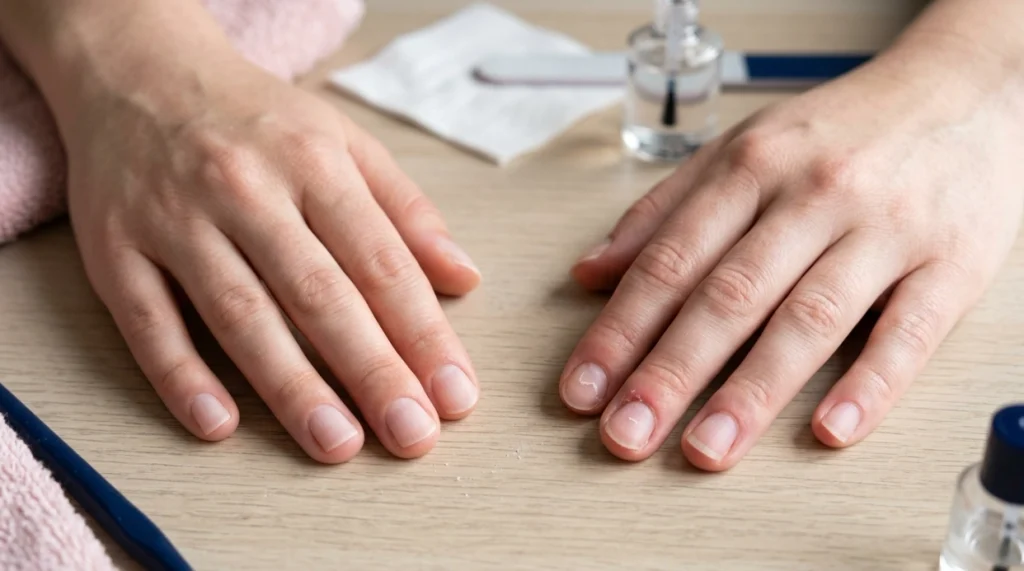
Nail dehydrators often use fast-evaporating solvents to remove substances that interfere with adhesion. Depending on the formula, ingredients may include isopropyl alcohol, acetone, ethyl acetate, or related solvents.
Those ingredients can remove oils from surfaces quickly. That is useful during nail preparation, but repeated or excessive exposure may leave nails and nearby skin feeling noticeably dry.
It removes surface oils
Natural oils can interfere with how some nail coatings adhere. Dehydrator reduces that oily film immediately before the next preparation step.
This is why touching the nail with your fingertips afterward can be counterproductive. Your fingers can transfer oil back onto the freshly prepared surface.
It removes surface moisture
Moisture can also affect adhesion. A dehydrator temporarily creates a drier working surface rather than permanently removing water from the entire nail.
Solvents can dry surrounding skin too
The surrounding skin and cuticle area do not need the same preparation as the nail plate. Getting solvent-heavy products repeatedly onto that skin can make dryness and irritation more likely.
Workplace guidance from OSHA on nail salon chemical exposure also emphasizes ventilation and reducing unnecessary exposure to nail-product chemicals.
How Can You Tell Normal Dryness From Nail Damage?
Normal dehydration is usually temporary and mainly changes the nail’s surface appearance. Damage or irritation tends to produce persistent symptoms, structural changes, or discomfort.
| What You Notice | More Consistent With Normal Prep | Reason to Pause |
|---|---|---|
| Appearance | Matte or temporarily chalky | Deep peeling, cracking, or worsening discoloration |
| Sensation | Dry but comfortable | Burning, throbbing, or increasing pain |
| Skin | Little or no change | Redness, rash, swelling, or cracked skin |
| Duration | Temporary surface dryness | Persistent brittleness between services |
Pay attention to your baseline nail condition
A naturally strong nail and an already peeling nail may respond differently to the same manicure routine. If your nails were dry before using dehydrator, repeated prep can make the problem more obvious.
Artificial nail services can involve filing, adhesives, solvents, and removal procedures. The American Academy of Dermatology notes that artificial nails and repeated manicure processes can leave natural nails brittle, thin, or parched.
Health note: Persistent pain, swelling, rash, nail lifting, drainage, or unusual color changes should be assessed by a healthcare professional or board-certified dermatologist.
What Should You Do When Your Nails Feel Dry?
Your next step depends on whether you are still applying a manicure. If the dehydrator has simply created a dry surface and you have no irritation, follow your nail system’s instructions for the next step.
If you are applying gel, acrylic, or extensions
Do not immediately cover the prepared nail with cuticle oil or hand cream. Oils can defeat the purpose of preparing the nail for adhesion.
- Allow the dehydrator to evaporate completely.
- Avoid touching the prepared nail surface.
- Apply primer if your specific system requires one.
- Continue with the base, gel, acrylic, adhesive, or enhancement exactly as directed.
If the manicure is finished
Once the service is complete, you can focus on the skin surrounding the nail. Cuticle oil or a suitable hand moisturizer can help relieve dryness without interfering with a finished coating.
The American Academy of Dermatology’s gel manicure guidance recommends rehydrating nails and cuticles between manicures to help minimize brittleness and chipping.
If it burns or hurts
Do not keep layering nail products over an uncomfortable nail. Stop using the product and follow its label instructions for accidental skin exposure or adverse reactions.
If significant irritation persists or worsens, seek professional medical advice. Dryness alone and an active chemical reaction are not the same thing.
How Can You Use Nail Dehydrator Without Over-Drying?
Use the smallest effective amount and keep the product mainly on the natural nail plate. More coats are not automatically better.
Use a thin, controlled coat
I prefer treating dehydrator as a preparation step, not a treatment that needs to soak into the nail. A light, even application is usually easier to control than repeatedly flooding the surface.
- Prep first: Finish shaping, gentle buffing, and dust removal before dehydrating.
- Use sparingly: Apply only the amount instructed by the manufacturer.
- Avoid skin: Keep the brush away from sidewalls and surrounding skin when possible.
- Let it evaporate: Do not cure a standard air-drying dehydrator unless its instructions specifically say otherwise.
- Do not touch: Avoid transferring finger oils back onto the prepared nail.
- Ventilate: Use solvent-containing nail products in a well-ventilated space.
Avoid stacking drying steps without a reason
If your routine includes alcohol cleansing, acetone, dehydrator, repeated filing, and another solvent step, ask whether every step is required by your system. The combined routine can matter more than the dehydrator alone.
As of 2026, I still recommend following the instructions for the exact gel, acrylic, dip, or extension system you use. Different brands are formulated around different preparation steps.
Nail Dehydrator vs Primer, Alcohol, and Acetone
These products can appear in the same manicure routine, but they do not all perform the same job. Understanding the difference helps prevent unnecessary repetition.
| Product | Main Purpose | What Happens After Application |
|---|---|---|
| Nail dehydrator | Temporarily reduces surface moisture and oil | Usually evaporates quickly |
| Nail primer | Supports adhesion for compatible enhancement systems | Used after dehydrator when required |
| Isopropyl alcohol | Cleans oils, dust, and residue in many prep routines | Evaporates from the surface |
| Acetone | Common solvent used for removal and degreasing | Evaporates quickly and can feel drying |
A dehydrator is also not a moisturizer or nail-strengthening treatment. Its job is preparation for adhesion.
Acetone exposure can irritate skin and contribute to nail dryness or brittleness. Poison Control’s acetone guidance also recommends careful application, ventilation, and following product warnings.
When Should You Stop Using Nail Dehydrator?
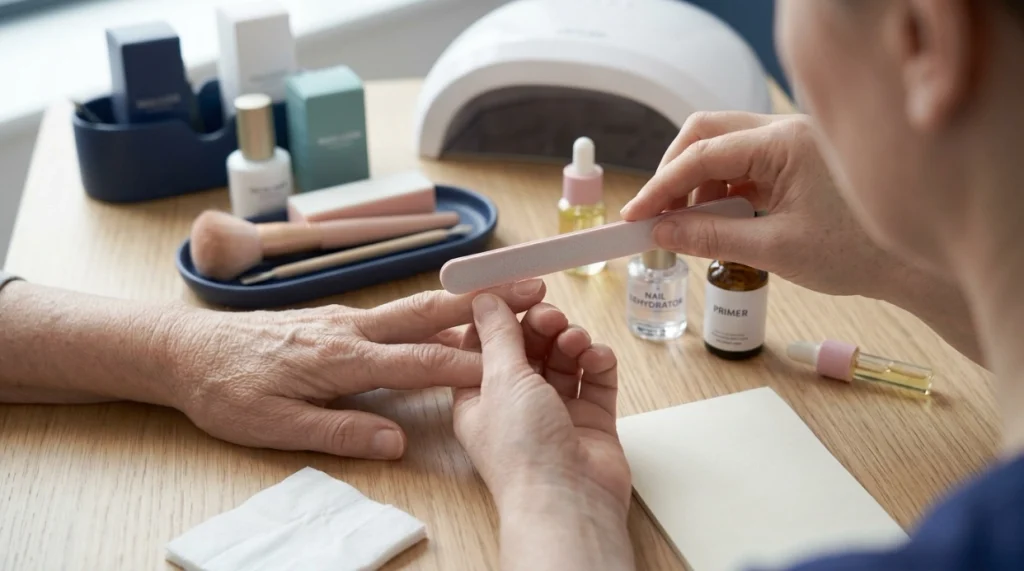
Stop and reassess when symptoms go beyond temporary surface dryness. A manicure is not worth pushing through pain or an obvious reaction.
- Burning: Especially when it continues after the product has evaporated.
- Redness or swelling: These may indicate skin irritation or another reaction.
- Rash or itching: Stop using the suspected product until the cause is understood.
- Persistent peeling: Repeated splitting between manicures suggests your nail-care routine needs adjustment.
- Painful thinning: Take a break from aggressive filing and enhancement services.
- Unusual discoloration: Do not simply cover an unexplained nail change with another enhancement.
FDA guidance advises consumers to read nail-product labels carefully, follow warnings, use good ventilation, and report adverse cosmetic reactions when appropriate.
Health note: If symptoms are severe, spreading, infected-looking, or do not improve after stopping the product, contact a qualified healthcare professional.
A Gentler Nail-Prep Routine for Dry Nails
If your nails already feel brittle, simplify your preparation instead of adding more aggressive steps. The goal is a clean surface without unnecessarily thinning or stripping the nail.
- Inspect your nails. Do not apply enhancements over painful, infected-looking, or severely damaged nails.
- Shape gently. File the free edge without aggressively sawing back and forth.
- Manage cuticles carefully. Avoid cutting living skin or scraping hard into the nail plate.
- Buff only as required. Remove surface shine gently instead of thinning the natural nail.
- Remove dust. Use the cleaning method recommended for your nail system.
- Apply dehydrator sparingly. Keep it on the nail plate and allow it to air-dry.
- Use primer only when required. Follow the instructions for the exact product system.
- Finish the manicure correctly. Cure or set each layer according to manufacturer directions.
- Moisturize afterward. Once it will not interfere with adhesion, care for surrounding skin and cuticles regularly.
Between manicure cycles, give visibly stressed nails some recovery time. Regular moisturizing can also help maintain flexibility in dry nails and surrounding skin.
I find the easiest rule is also the most useful: prep enough for adhesion, but do not chase an ultra-dry appearance by repeatedly stripping the nail. Healthy-looking nails should remain the priority.
Frequently Asked Questions
Why do my nails turn white after nail dehydrator?
A temporary pale, matte, or chalky look can occur when surface oils and moisture are removed. If whitening comes with pain, deep peeling, burning, or worsening damage, stop using the product and reassess your routine.
Can nail dehydrator damage natural nails?
Correct, occasional use as directed is different from repeated solvent exposure or aggressive prep. Overuse, skin contact, frequent acetone exposure, excessive buffing, and improper removal can combine to leave nails dry, thin, or brittle.
Should I put cuticle oil on after nail dehydrator?
Not before applying gel, acrylic, glue, or another product that needs strong adhesion. Oil can contaminate the prepared surface, so save cuticle oil for after the manicure is completed or for periods between enhancement services.
How long should I let nail dehydrator dry?
Let it evaporate completely before continuing. Many formulas flash off quickly, but exact timing varies, so the instructions on your specific product should take priority over a universal number.
Does nail dehydrator need a UV or LED lamp?
Most traditional nail dehydrators are designed to air-dry rather than cure under a lamp. Always check your bottle because preparation systems differ, and the manufacturer’s directions should control how the product is used.
Can I skip nail dehydrator if my nails are already dry?
Possibly, depending on the nail system and manufacturer instructions. Some enhancement systems recommend dehydrator as part of standard prep, while others may use a cleanser or other preparation method instead.
Should nail dehydrator sting?
Significant stinging or burning is not something I would ignore. Avoid applying dehydrator to broken or irritated skin, discontinue use if you develop a reaction, and seek medical advice for severe or persistent symptoms.
Final Takeaway
If your nails feel dry after nail dehydrator but are comfortable, intact, and only temporarily matte, the product is likely doing its intended preparation job. The bigger concern is dryness accompanied by burning, redness, cracking, pain, or persistent brittleness.
Use dehydrator sparingly, keep it away from surrounding skin, avoid unnecessary solvent layers, and follow the instructions for your complete nail system. Once your manicure is finished, regular nail and cuticle moisturizing can help keep your routine balanced.
