
Quick Answer
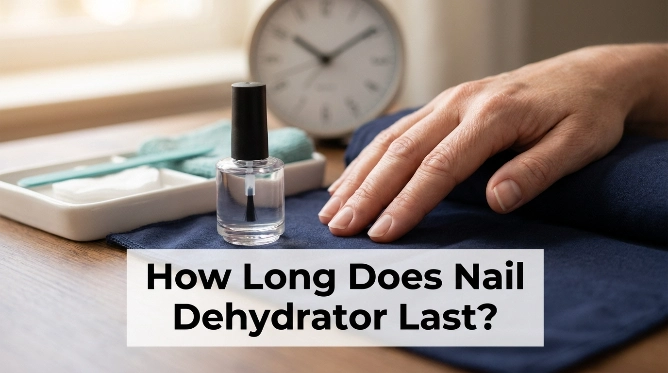
How long should you wait after nail dehydrator? Wait until the product has completely air-dried before applying primer, bonder, base coat, or your next nail-prep product. That may take only a few seconds with some formulas or around 30–90 seconds with others, so follow your product label first. Professional systems such as OPI’s acrylic application guidance also instruct users to let the prep product dry before moving to the bonding step.
The safest timing rule
- Apply it thinly: One light coat usually evaporates faster and more evenly than a soaked application.
- Let it air-dry: Standard liquid nail dehydrators normally do not need a UV or LED lamp.
- Watch the surface: Continue when the liquid has disappeared and the natural nail looks clean and dry.
- Check your label: Manufacturer directions override any general timing recommendation.
- Work promptly: Once dry, avoid touching the nail and continue with the next prep step.
If you’ve ever wondered whether nail dehydrator needs 10 seconds, one minute, or much longer, you’re not alone. The confusing part is that different formulas evaporate at noticeably different speeds.
I use the appearance of the nail as my main cue rather than relying only on a stopwatch. In this guide, I’ll show you what “dry” should look like, what comes next, and which timing mistakes can lead to lifting.
In This Guide
- How long should you wait after nail dehydrator?
- How can you tell when nail dehydrator is dry?
- What comes after nail dehydrator?
- Do you cure nail dehydrator under a UV or LED lamp?
- Does the wait time change for gel, acrylic, Gel-X, or press-ons?
- What mistakes cause lifting after dehydrator?
- What if nail dehydrator stays wet, turns white, or stings?
- Frequently asked questions
- Final takeaway
How Long Should You Wait After Nail Dehydrator?
Wait until the dehydrator has fully evaporated before continuing. For many products, that happens within seconds to about one minute, while some manufacturers specify closer to 60–90 seconds.
There isn’t one universal waiting time because nail dehydrators use different solvent blends and applicators. The amount you apply, room temperature, airflow, and product formula can all affect evaporation.
Definition: A nail dehydrator is a nail-prep liquid designed to temporarily remove surface moisture and oils from the natural nail plate before primer, bonder, gel, acrylic, or other enhancement products are applied.
Manufacturer instructions show just how much timing can vary. That is why I treat the bottle directions as the final authority.
| Example product guidance | Dehydrator timing | What it shows |
|---|---|---|
| Born Pretty Nail Prep Dehydrator | About 3 seconds | Some fast-solvent formulas evaporate almost immediately. |
| Sol Dips Prep Dehydrator | 30–60 seconds | A short air-dry period is common in many prep systems. |
| Nailster PH Bond/Dehydrator | 60–90 seconds | Some formulas specifically require a longer evaporation period. |
A good default when instructions are available is simple: follow them exactly. When they don’t provide seconds, wait until no liquid remains visible before moving forward.
Don’t deliberately leave the nails sitting for several minutes unless the manufacturer says to. Long delays give you more time to accidentally touch the nail or contaminate the prepared surface.
Section Takeaway: Wait for complete evaporation, not an arbitrary universal timer. Product-specific directions always come first.
How Can You Tell When Nail Dehydrator Is Dry?
A properly dried nail dehydrator should no longer look wet or pooled on the nail. The natural nail often looks slightly matte, chalky, or temporarily less shiny.
You usually don’t need to touch the nail to check it. Touching defeats part of the prep process because oils from your fingertip can transfer back onto the nail.
Look for these signs before continuing
- No visible liquid: You shouldn’t see wet streaks or beads moving across the nail.
- Matte appearance: The nail may temporarily look duller than it did before dehydration.
- No pooling: Product should not remain around the cuticle or sidewalls.
- Even evaporation: Every part of the natural nail should look consistently dry.
I usually work from the little finger toward the thumb. By the time I finish the last nail, the first few are often ready for the next step.
That workflow is easier than timing each nail separately. It also keeps the prep process moving without unnecessary waiting.
Should the nail look white?
A slight temporary pale or chalky appearance can happen as oils and moisture are removed. That doesn’t mean you need another coat automatically.
If the nail becomes heavily frosted, uncomfortable, or excessively dry, stop adding more product. Repeated applications aren’t always better.
What Comes After Nail Dehydrator?
The next step depends on the nail system you’re using. Many enhancement systems use dehydrator first, primer or bonder second, and the main nail product after that.
A common gel or acrylic prep order looks like this:
- Prepare the natural nail. Shape, manage non-living cuticle tissue, and remove filing dust.
- Clean the nail. Make sure no lotion, oil, or loose debris remains.
- Apply nail dehydrator. Use a controlled, thin application on the natural nail plate.
- Let it air-dry completely. Do not touch the prepared surface.
- Apply primer or bonder if your system requires one. Follow its separate drying instructions.
- Apply base coat, acrylic, builder gel, adhesive, or other system product. Cure only products that are specifically designed for lamp curing.
Dehydrator and primer aren’t the same thing. Dehydrator focuses on surface moisture and oils, while a primer or bonding product is designed to improve the connection between the nail and the enhancement system.
OPI, for example, describes its Bond Aid pH Balancing Agent as a preparation step for improving adhesion. Its professional acrylic instructions tell users to let that preparation dry before applying the bonding agent.
Should you wait between dehydrator and primer?
Yes, but only until the dehydrator has evaporated. Once it looks dry, you can normally move directly to the primer.
Don’t put primer over visibly wet dehydrator unless your product manufacturer specifically instructs you to do so. Mixing wet prep layers can change how the products behave.
Do You Cure Nail Dehydrator Under a UV or LED Lamp?
Most traditional liquid nail dehydrators are air-dry products and don’t need lamp curing. Their solvents evaporate naturally from the nail surface.
This is different from gel base coats, builder gels, and gel colors. Those products contain ingredients designed to polymerize under the correct lamp.
- Nail dehydrator: Usually air-dried.
- Many nail primers: Usually air-dried, although the finish may remain slightly tacky.
- Gel base coat: Usually requires the lamp specified by the manufacturer.
- Gel polish: Requires the appropriate curing cycle.
- Traditional acrylic: Polymerizes without a UV/LED gel lamp.
Always check the bottle because combination products can follow different rules. A product labeled “prep,” “bond,” or “primer” shouldn’t automatically be treated like another brand’s version.
As of 2026, professional gel systems still emphasize following system-specific preparation and cure instructions. Using extra lamp time isn’t a substitute for reading the label.
Does the Wait Time Change for Gel, Acrylic, Gel-X, or Press-Ons?
The dehydrator itself still needs to dry before the next step, regardless of the manicure type. What changes is what you apply afterward.
| Nail system | After dehydrator dries | Main point |
|---|---|---|
| Gel polish | Primer/bond if required, then gel base | Cure the gel base, not the standard dehydrator. |
| Acrylic | Primer/bond, then acrylic application | Avoid flooding the surrounding skin with prep liquids. |
| Builder gel | Bonding step or compatible base | Stay within one manufacturer’s recommended system when possible. |
| Gel-X/soft gel tips | Primer/bond and tip-extension products | Natural-nail prep and tip prep are separate steps. |
| Press-on nails | Compatible glue or adhesive system | The nail should be dry before adhesive is applied. |
One mistake I see in home routines is treating every clear prep liquid as interchangeable. Dehydrator, primer, bonder, base coat, and nail glue each serve different purposes.
When I’m combining products from different brands, I check compatibility before application. Staying within one complete system makes the instructions easier to follow.
What Mistakes Cause Lifting After Dehydrator?
Waiting the right amount of time won’t fix poor preparation elsewhere. Lifting often starts because oils, cuticle tissue, excess product, or skin contact interfere with adhesion.
Common mistakes to avoid
- Touching the nail afterward: Fingertips can transfer natural oils back to the dehydrated nail.
- Applying too much dehydrator: Heavy coats take longer to evaporate and may run onto surrounding skin.
- Skipping nail cleanup: Dehydrator won’t remove attached cuticle tissue or filing debris.
- Using lotion first: Hand cream and cuticle oil can work against an adhesion-focused prep routine.
- Flooding the sidewalls: Gel, acrylic, or adhesive touching skin can contribute to lifting and unwanted exposure.
- Mixing incompatible systems: A primer designed for one system may not behave the same under another.
- Ignoring the free edge: Proper product application at the tip matters for chip and lift resistance.
More dehydrator isn’t always the answer when lifting happens. Sometimes the real problem is preparation, application thickness, curing, or product compatibility.
I prefer changing one part of the routine at a time when troubleshooting. That makes it much easier to see which step was causing the problem.
What If Nail Dehydrator Stays Wet, Turns White, or Stings?
A dehydrator that stays visibly wet for a long time may have been applied too heavily. Stop adding layers and check the manufacturer’s directions before proceeding.
If the product reaches the skin, remove it according to the product instructions. Nail-prep liquids should generally be kept on the natural nail rather than the surrounding skin.
What if it looks chalky or white?
A temporary matte or pale appearance can happen after dehydration because the nail surface has lost temporary oils and moisture. The appearance alone doesn’t mean the nail has been damaged.
However, aggressive filing plus repeated solvent application can make the nail feel excessively dry. Keep prep controlled rather than repeatedly scrubbing or soaking the nail.
What if it burns or causes redness?
Stop using the product if you develop burning, persistent redness, itching, swelling, or another reaction. The U.S. Food and Drug Administration’s nail-product guidance recommends following product warnings and notes that nail products can cause irritation or allergic reactions in some users.
The American Academy of Dermatology’s manicure safety guidance also advises taking reactions to artificial-nail products seriously. Don’t keep applying a product to irritated or damaged skin just to finish a manicure.
Health note: Persistent pain, swelling, blistering, rash, nail separation, or suspected infection should be evaluated by a qualified healthcare professional or dermatologist.
Frequently Asked Questions
How long should nail dehydrator dry before primer?
Wait until the dehydrator has completely evaporated. Depending on the formula, that may be only a few seconds or around 30–90 seconds, so your product’s instructions should determine the exact timing.
Can I apply primer immediately after nail dehydrator?
Yes, once the dehydrator is fully air-dry. You don’t need to add an extra waiting period unless your product manufacturer specifically tells you to.
Do I wipe nail dehydrator off?
Usually no. Brush-on nail dehydrators are generally designed to evaporate from the nail rather than be wiped away, but always check your specific product label.
Can I use two coats of nail dehydrator?
Some systems may permit another light pass for oily nails, but two coats aren’t automatically better. Start with the amount recommended by the manufacturer and avoid unnecessary repeated solvent exposure.
Should nail dehydrator feel sticky?
A typical dehydrator usually evaporates and leaves the nail dry rather than sticky. A tacky feeling is more commonly associated with certain primers or bonding products, so confirm which bottle you’re using.
What happens if I apply primer before the dehydrator dries?
You may interfere with the intended preparation sequence because both liquids are present at once. Waiting for full evaporation creates a more predictable surface for the next product.
Can I wait too long after using nail dehydrator?
The nail doesn’t suddenly become unusable after a minute or two, but unnecessary delays increase the chance of contamination. Once it is dry, avoid touching the nail and continue with your manicure.
Final Takeaway: How Long Should You Wait?
Wait only until your nail dehydrator is completely air-dry. Depending on the product, that can mean a few seconds, 30–60 seconds, or occasionally around 60–90 seconds.
Don’t assume every dehydrator uses the same timing. The bottle directions and the visible disappearance of the liquid are better guides than a universal stopwatch rule.
- Apply a thin, controlled coat.
- Keep it off the surrounding skin.
- Let it evaporate naturally unless the label says otherwise.
- Don’t touch the nail once it is dehydrated.
- Move directly to the compatible primer, bonder, base, or enhancement step.
That simple sequence gives you a clean starting surface without overcomplicating nail prep. When retention problems continue, look at the whole preparation and application routine rather than increasing dehydrator alone.